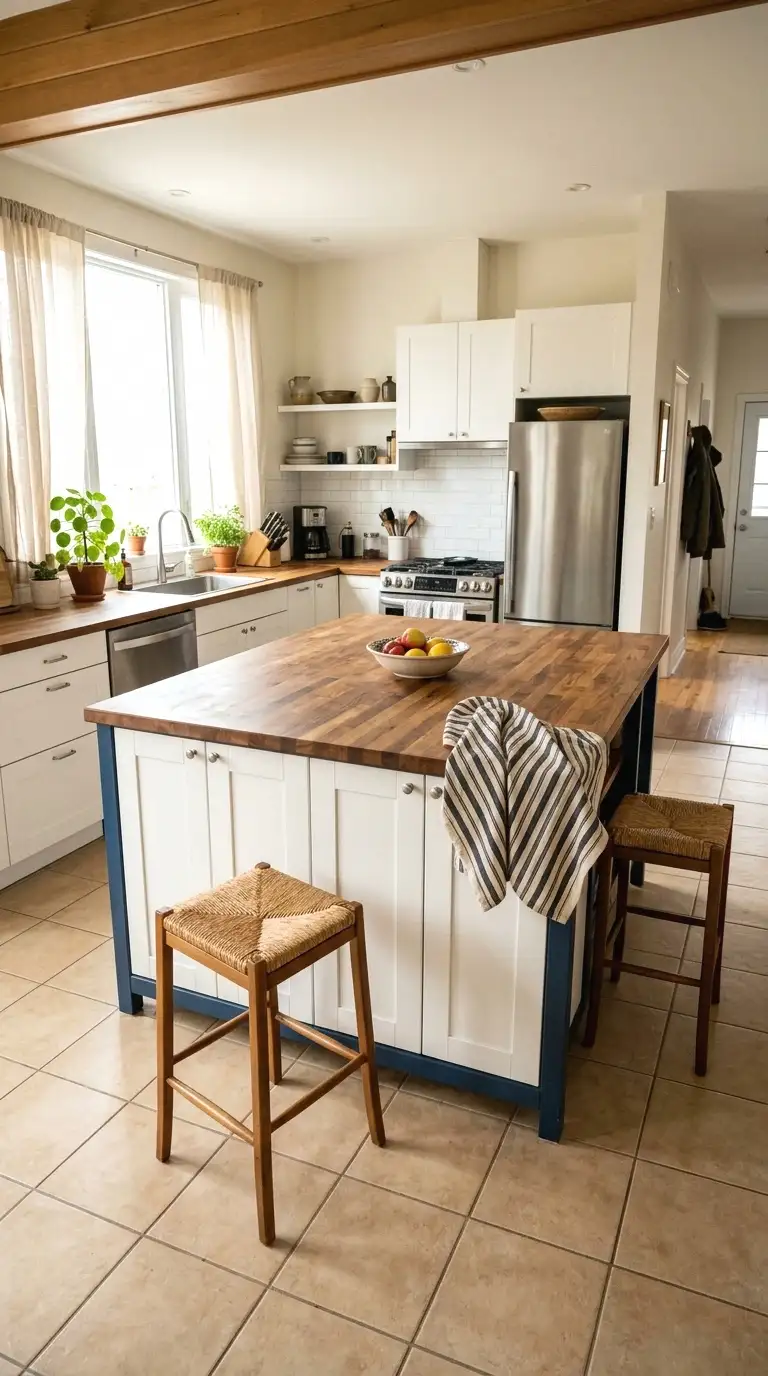
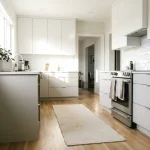
Kitchen Island With Cabinets on Both Sides and Seating: 20 Ideas That Actually Work
You want more storage, more prep space, and a place where people can actually sit in your kitchen. But every time you look up “kitchen island with cabinets on both sides and seating,” you get staged showrooms that cost $20,000 and require a contractor, a designer, and probably a second mortgage. That’s not your life.
This list covers 20 real ideas, researched across homeowner forums, renovation communities, and budget build threads. Each idea was picked because it solved a specific problem: not enough storage, awkward seating angles, dead space on one side, or cabinets that looked good but held nothing useful. Budget range runs from around $200 up to $2,500 for a full DIY build.
This is for people who want a working kitchen island, not a catalog photo. If you’re looking for a full custom built-in with quartz countertops and integrated appliances, this isn’t that. But if your budget is real and your kitchen needs function first, you’ll find something here.
By the end, you’ll know exactly what kind of island works for your space and how to make the seating and cabinet combo feel intentional.
And if you’re thinking through storage on other parts of your home at the same time, there are some cabinet layout options worth planning around that apply across rooms.
What to Know Before You Start a Kitchen Island With Cabinets and Seating
- Most kitchens need at least 42 inches of clearance on all sides of the island for comfortable movement.
- Standard counter height is 36 inches. Bar-height seating at 42 inches needs different stools than counter stools.
- Budget reality: a solid DIY base cabinet island with seating overhang runs $400 to $900 in materials.
- Deep base cabinets (24 inches) on both sides leave almost no room for a seating overhang. Plan for one shallower side.
- Most people forget to plan for electrical. An outlet on the island face saves a lot of frustration later.
- Screw base cabinets to each other before anchoring to the floor. Skipping this step causes gaps over time.
- Hardwood countertops need annual oiling to stay sealed around the sink or prep areas.
- Freestanding islands are easier to reconfigure than built-ins, especially if you rent.
1. Back-to-Back Base Cabinets With a Seating Overhang on One Side

The most popular approach in DIY home communities is this: buy two rows of stock base cabinets, install them back to back, and extend the countertop 12 to 15 inches past one side to create a seating ledge. It sounds basic, but it works incredibly well, and most people who’ve done it say it’s the single best upgrade they’ve made to their kitchen.
You can buy stock 24-inch base cabinets from any home improvement store for $80 to $200 each depending on finish. Pair four of them back to back, add a countertop, and you’ve got storage on both sides with seating for two to three people. The seating side cabinets are usually shallower (around 12 inches) to keep the overhang reasonable. Total build for a 6-foot island often runs $600 to $1,000.
2. IKEA SEKTION Cabinets Built Into a Custom Frame
So here’s one I keep recommending to people who want that built-in look without the built-in price. IKEA SEKTION base cabinets are designed to be modular, which means you can arrange them in a U-shape, line them back to back, or build them out with custom trim to look fully custom. A lot of people add a wood frame around the outside and paint it a contrasting color.
The frames and doors for a full island build using SEKTION typically run $300 to $700 depending on size and finish options. Add a butcher block countertop from IKEA itself (around $100 to $200) and you’re under $1,000 for a real, functional island. The seating overhang just needs a countertop that extends 12 inches past the cabinet edge, which you can cut yourself or have the store do.
More Ideas:


3. Repurposed Kitchen Cabinets From a Demo or Habitat ReStore

This one is so underrated. Habitat for Humanity ReStores sell donated and salvaged kitchen cabinets, often from kitchen remodels, for a fraction of retail. I’ve seen full sets of solid wood base cabinets go for $50 to $150 total. You pick them up, strip or repaint them, and build your island from scratch.
The catch is that cabinet sizes won’t always match perfectly. But for a back-to-back island, you just need two similar-depth sets that can face outward on each side. A little wood filler and paint makes mismatched cabinets look intentional. This route takes more time than buying new, but the material cost for the whole island can drop to $200 to $400.
4. Shaker-Style Cabinets With Open Shelving on the Seating Side

Here’s what most people don’t realize about cabinets on both sides: the seating side doesn’t have to be closed cabinets. Open shelves on the seating side look less bulky, make the island feel lighter in smaller kitchens, and give you a spot for cookbooks, bowls, or wine glasses that you actually want to show off.
When I tried this in my own space, I used three open shelf sections on the seating side and full closed cabinets on the cooking side. The combo gave me hidden storage where I needed it (pots, pans, dry goods) and display storage on the side facing the living area. Open shelf units run about $40 to $80 each from most big-box stores and fit right into a standard base cabinet build.
If you want to see how open shelving gets balanced with closed storage in a tight space, there are some modular shelving ideas that actually hold up well under daily use.
5. Two-Tone Cabinet Colors for Visual Depth

The seating side and the working side of your island don’t have to match. Painting the seating-facing cabinets a different color than the working side is a design move that makes the island look intentional rather than like two rows of cabinets pushed together. It also helps define the “dining” side from the “kitchen” side visually.
Common combinations that work: navy on the seating side, white on the kitchen side. Forest green facing out, cream facing in. If you’re building from stock cabinets, you can buy them unfinished and paint each side differently before assembly. Paint costs almost nothing, and this move alone can change how the whole kitchen feels.
For more help choosing shades that work together without clashing, there’s a good breakdown of two-tone color combos that feel intentional rather than accidental.
6. Waterfall Countertop Extending Into a Seated Knee Space

A waterfall countertop means the countertop material wraps down the end panel of the island and touches the floor. It looks really nice but the more functional version for seating is this: instead of wrapping all the way down, you cut back the lower cabinet on the seating side to create a knee space about 24 to 30 inches wide.
This gives seated people somewhere to actually put their legs. Without a knee space, people perch at the edge and the seating never feels comfortable. You’re basically removing one base cabinet from the seating side and replacing it with open space, which also doubles as a spot to tuck a step stool or a small bin. Cabinet-free knee space costs nothing extra, it just takes planning.
More Ideas:
7. Built-In Wine Rack on the Seating Side Cabinet
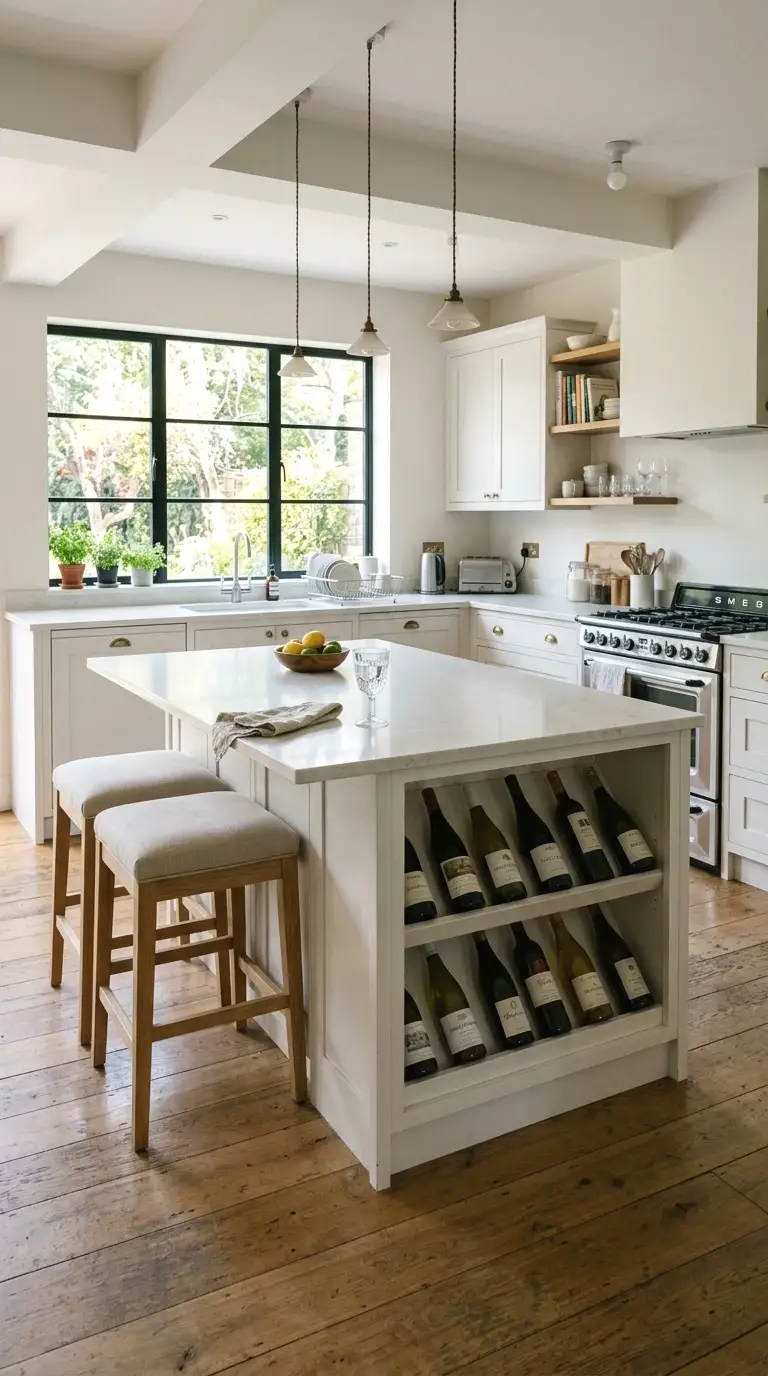
The seating-facing side of your island is real estate that most people waste on another row of standard cabinet boxes. A built-in wine rack section is a much better use of that space, especially if the seating side faces a dining or living area. You can buy a pre-made wine rack insert that fits inside a standard base cabinet opening for around $30 to $60.
Install it in one of the seating-side cabinet openings with a door removed, and it looks like it was always part of the design. You can stack it between two closed cabinets or give it its own framed panel. It holds 8 to 12 bottles and turns dead storage into something you’ll actually use every day.
8. Toe Kick Drawers for Hidden Storage Underneath

Here’s what nobody tells you when you build a base cabinet island: that toe kick space at the very bottom, the 3 to 4 inch recessed area under the cabinets, is actually usable. Toe kick drawers slide out flat and hold flat items like baking sheets, cutting boards, placemats, or foil rolls. They’re invisible when closed.
You can buy pre-made toe kick drawer kits online for $40 to $80 per drawer set. They install in the existing toe kick space without modifying the cabinets above. It’s probably the most underused storage trick in any kitchen, and it works especially well on an island where you have four sides of toe kick space to work with.
9. Appliance Garages Built Into the Working Side Cabinets

An appliance garage is a small cabinet with a roll-up or lift-up door that hides countertop appliances. Think coffee maker, toaster, blender. You can build one into the working side of your island by using a cabinet with an open top section and adding a tambour door (the roll-up kind) or a simple lift-up panel.
The reason this works so well on an island is that the working side faces your kitchen, so it’s naturally where your appliances should live. Pull-up door hardware kits cost around $25 to $40 per cabinet. Add this to a standard base cabinet with an upper shelf and you’ve got a hidden appliance station that clears your main countertops completely.
10. Contrast Hardware to Tie Both Cabinet Sides Together

When you have cabinets on both sides of an island, the hardware is what makes it feel like one piece instead of two separate things pushed together. Matching hardware across all cabinet faces, whether both sides use the same pull style and finish, creates visual continuity even if the cabinet colors or door styles differ.
Matte black pulls are still the most versatile right now and run about $2 to $5 per pull. Brass is coming back strongly in 2025 and 2026 kitchens. The rule I’d follow: pick one metal finish and use it on every single door and drawer in the entire island. Mixing finishes works on some things. On a dual-sided island with a lot of hardware, it reads as messy.
More Ideas:
11. Narrow Pull-Out Pantry on the End Panel

The end panels of your island, the short sides, are usually just flat decorative panels that do nothing. One of those ends can become a pull-out pantry if you replace the end panel with a vertical pull-out unit. These are tall, narrow cabinets that slide out from the end and hold spices, oils, canned goods, or snacks in a footprint of about 6 to 9 inches.
I was skeptical about this one but after adding a pull-out end pantry, I stopped buying duplicate spice jars because I couldn’t find the ones I already had. Pull-out pantry inserts run $80 to $150 depending on height and number of shelves. They install into a standard cabinet end with pull-out drawer hardware and a face panel to match your island.
12. Floating Countertop Extension for a Longer Seating Run

If your island cabinets don’t leave enough overhang for comfortable seating (you need at least 12 inches for a stool, 15 is better), you can add a floating extension to one end. It’s a cantilevered countertop section that extends past the cabinet edge, supported by steel brackets underneath.
Heavy-duty countertop support brackets run about $15 to $30 each, and you’d use two or three depending on the extension length. The countertop material can match the main surface or contrast it, a butcher block extension on a stone-look laminate island looks really nice. This move can add 18 to 24 inches of seating space without touching the cabinet layout.
If you’re still deciding on your countertop material, it helps to look at countertop and backsplash pairings that work before you lock anything in.
13. Drawer-Only Lower Cabinets for Daily-Use Items

Most base cabinet builds default to a door with one shelf inside. But a bank of drawers on the working side of your island is actually more functional for most kitchens. Drawers give you full visibility and access to everything inside, where a deep base cabinet with one shelf means half your stuff disappears into the back.
A 4-drawer base cabinet costs about the same as a door cabinet at most retailers. Drawers work best for utensils, dish towels, foil and wrap, spice packets, or anything you grab and put back multiple times a day. If you do door cabinets on the seating side and drawers on the working side, you get the best of both storage types on one island.
This kind of functional-first thinking is exactly what makes drawer-only base cabinet builds for real kitchens worth the extra planning time upfront.
14. Painted Shiplap Skirt as a Cabinet Alternative

Not everyone needs full base cabinets on both sides, and that’s fine. A shiplap skirt is a way to enclose the bottom of a freestanding island without building cabinets. You frame the base with horizontal shiplap boards, leave the inside open, and add a couple of large baskets inside for storage.
This approach costs $50 to $150 in materials and works especially well in farmhouse or transitional kitchens. The baskets inside can hold anything you’d put in a lower cabinet, and they pull out easily. It doesn’t give you as much organized storage as real cabinets, but for renters or people who aren’t ready to commit to a built-in, it’s a real option.
More Ideas:
15. Butcher Block Top With a Built-In Prep Sink

Adding a prep sink to your island countertop is a move that changes how you cook. You wash produce, drain pasta, and prep ingredients right at the island without walking back and forth to the main sink. It requires a plumber and an electrician if you want a disposal, but the sink itself is often a simple undermount job.
Small prep sinks run $80 to $200. Plumbing labor is the bigger cost, often $200 to $400 depending on how close your island is to existing water lines. If you’re already building the island from scratch, this is the time to rough in the plumbing before the floor goes back. It’s much harder to add later.
16. Seating on One Long Side With Storage on the Short Ends

Most kitchen islands position the seating on one of the long sides, but placing it there with storage carved into both short end panels gives you a more social setup. People can sit along the full length of the island and face the kitchen, which works well for entertaining. The short ends become vertical storage columns instead of dead decorative space.
Tall end cabinet columns, around 84 inches for floor-to-ceiling, can hold cleaning supplies, paper goods, or small appliances. If ceiling height allows, you can extend the end cabinets all the way up for serious storage. This configuration is common in open-plan homes where the kitchen island also functions as a room divider.
If your island doubles as a divider, it’s worth looking at open-plan kitchen layouts that handle traffic well before finalizing where everything sits.
17. Rolling Island Base With Lockable Wheels

If you’re renting or you’re just not sure where you want your island permanently, a rolling base is the move. You can build the cabinet structure exactly as you would a fixed island, but mount the whole thing on heavy-duty locking casters. When you want it fixed, lock all four wheels. When you need to move it, unlock and roll.
Locking swivel casters rated for 300 pounds or more run about $8 to $15 each. You’ll need four. The island needs to be built on a base frame (a 2×4 box works) rather than directly on the cabinet feet. The trade-off is a slight height increase from the casters. Most people add about 3 inches, which can actually bring a standard 36-inch counter closer to bar height.
18. Inset Cabinet Doors for a Clean Furniture Look

Standard overlay cabinet doors sit on top of the cabinet face frame. Inset doors sit inside the frame, flush with the surface. It’s a small detail but it changes how the whole island reads. Inset doors look like furniture, which is what you want when your island is visible from a living or dining area.
Most stock cabinets come overlay. If you want inset, you either need to buy cabinets that come that way (more expensive, usually $100 to $200 more per cabinet) or adjust overlay hinges to sit deeper. The flush look is worth it for an island that sits in a social part of your home, where every visible surface gets seen from multiple angles throughout the day.
More Ideas:
19. Bead Board Panels on the Seating Side

Bead board is that vertical-stripe paneling you see in cottage kitchens, and it works really well as a facing panel on the seating side of an island. Instead of flat painted wood, the bead board adds texture and depth without color. It photographs well and reads as traditional, farmhouse, or classic depending on the rest of your kitchen.
You can add bead board panels to existing cabinet doors or install flat bead board sheets directly on the exposed cabinet side panels. A 4×8 sheet of bead board from a home improvement store runs about $20 to $35. Cut it to size, paint it to match or contrast your other cabinets, and attach it with construction adhesive and finish nails. Takes an afternoon. Looks like a real design choice.
If you like the texture bead board adds, there are some farmhouse paneling ideas for kitchen spaces that take the same material in a few different directions.
20. Under-Counter Fridge Drawer on the Seating Side

The seating side of your island is the perfect spot for an undercounter beverage fridge or fridge drawer. It keeps drinks accessible for people sitting at the island without them having to get up and open the main refrigerator. It’s also a good place for kids’ snacks, overflow drinks during parties, or a dedicated cold-brew station.
Undercounter beverage fridges start around $150 to $200 for a basic model and fit into a standard 24-inch base cabinet opening. You’ll need an outlet nearby, which is another reason to plan electrical at the island from the start. Panel-ready models (where a cabinet door face attaches to the front) blend in with the rest of your cabinets so it doesn’t look like an appliance at all.
Final Thoughts on Kitchen Islands With Cabinets on Both Sides and Seating
You don’t need a designer to pull this off. The builds that work best aren’t the most expensive ones. They’re the ones where someone thought clearly about which side gets the storage, where the seating actually fits comfortably, and what they cook and store every day. That’s the whole thing. The hardware, the color, the countertop material, those are just finishing choices on top of a solid plan.
Start with the seating side. Figure out how much overhang you actually have room for, buy a stool and test the height before you commit to building around it. One afternoon of planning saves a lot of rework.
There’s a lot more on homelypop.com if you’re working through other parts of your kitchen or any other room. Real budgets, real spaces, nothing staged.
If you want to go bigger with your island footprint, there’s also a full look at kitchen remodel ideas on a realistic budget with larger seating configurations.