
21 Large Kitchen Island Dining Table Ideas That Actually Work

Your kitchen island is doing half a job. It preps food, maybe holds a fruit bowl, but it’s not feeding anyone. That’s the gap. A large kitchen island dining table pulls double duty, and once you see how other people have pulled it off, you’ll wonder why you waited.
This list covers 21 real ideas, pulled from homeowner forums, designer projects, and budget-focused renovation communities. Every idea was chosen because it solves a specific problem: too little seating, awkward layout, small square footage, or tight budgets in the $100 to $500 range. Some ideas work for renters. Some are for owners ready to go deeper.
This guide is for kitchens that have at least 12 square feet of island space and homeowners willing to spend anywhere from $150 to $600. If you’re working with a 4-foot passthrough counter, this isn’t your list. But if you have room and just need a direction, you can absolutely pull this off.
By the end you’ll have a clear plan for turning your island into a real dining spot, with specific sizing, seating options, and style choices to match your space.
If you’re still deciding on the base setup, there are some seating layouts worth planning around before you commit to a direction.
What to Know Before You Start a Large Kitchen Island Dining Table
- Islands need at least 42 inches of clearance on all walkable sides for safe traffic flow.
- Standard counter height is 36 inches; bar height is 42 inches. Pick one before buying stools.
- A 4-person dining setup needs roughly 24 inches of counter width per person.
- Overhang depth matters: aim for at least 12 to 15 inches so knees clear the base cabinet.
- Budget reality: a solid butcher block top runs $200 to $400. Waterfall quartz starts at $800.
- Most people forget lighting. A pendant hung too high kills the dining feel entirely.
- Wipe-down surfaces like sealed wood or laminate hold up better than raw wood for daily dining.
- Bolt-on brackets can add overhang to existing islands without a full rebuild.
1. Go Waterfall Edge on One Side

The waterfall countertop is one of those ideas that sounds expensive until you price it out on just one side. Instead of wrapping the entire island, you extend the counter material down one end or one long face to the floor. It creates a clean front panel and defines the dining side without needing a separate table base.
When I tried this in my own space, a single waterfall end in butcher block ran about $380 installed. It completely changed how the island read in the room. Stools tucked under and the whole setup looked like it was designed that way from the start. For a countertop that’s already getting replaced, this is the move.
If you’re weighing material options before committing, there’s a solid breakdown of butcher block and countertop pairings that covers what holds up best for daily use.
2. Use a Double-Sided Overhang
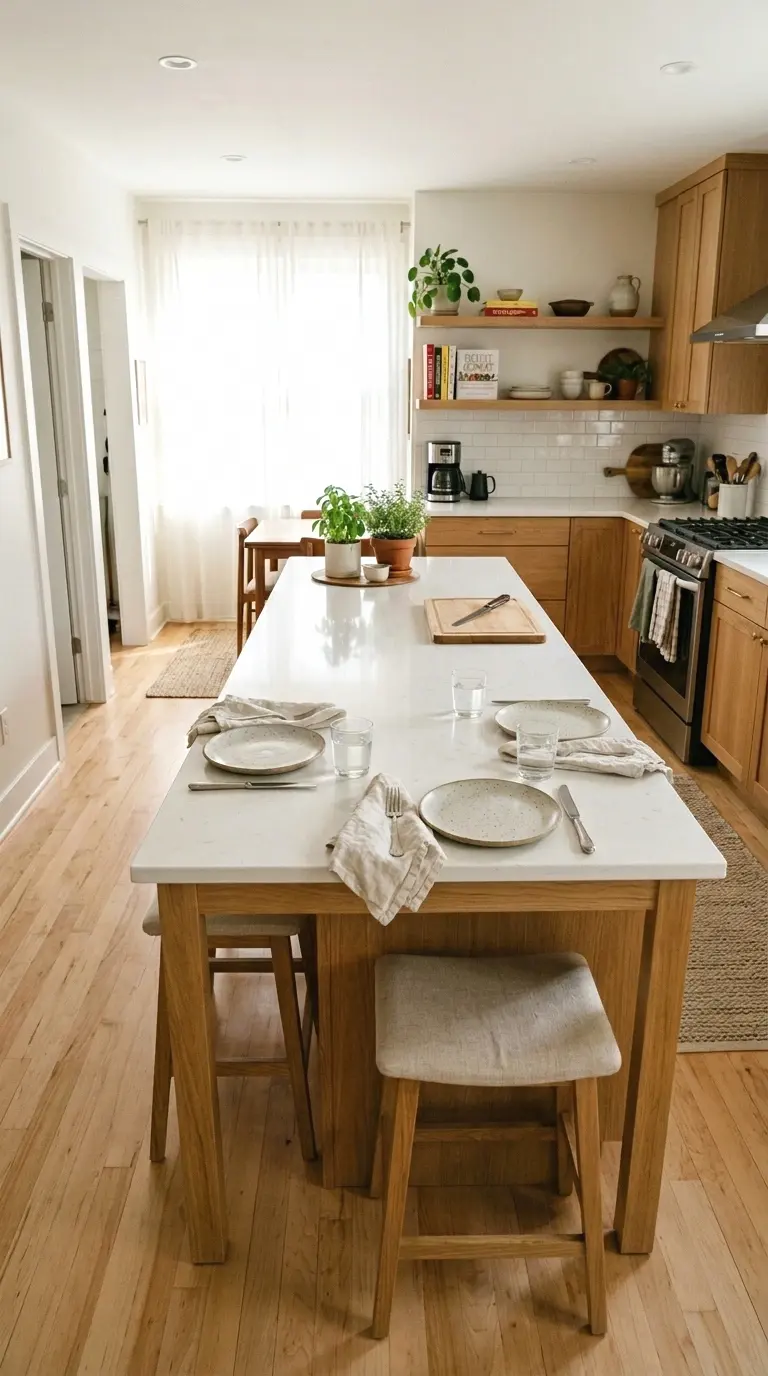
So here’s the thing most people miss: you don’t have to pick just one dining side. A double-sided overhang, where the counter extends 12 to 15 inches on both the kitchen side and the dining side, lets two people sit across from each other at the island. That’s real dining, not just perching on a stool.
The overhang on both sides does require the island base to be narrower, usually 24 to 30 inches of cabinet depth rather than a full 36. If you’re building new or rebuilding the base, plan for this upfront. The tradeoff in storage is real but so is the gain in seating. A lot of families find four seats across a 6-foot island is all they actually need.
More Ideas:
 Kitchen Island With Cabinets on Both Sides and Seating: 20 Ideas That Actually Work
 21 Inspiring Open Kitchen Restaurant Designs for a Memorable Dining
 23 Modern Western Dining Room Decor Ideas That Are Simply Gorgeous!
 22 Kitchen Countertops and Backsplashes Combinations That Look Really Nice Together
3. Add a Butcher Block Extension
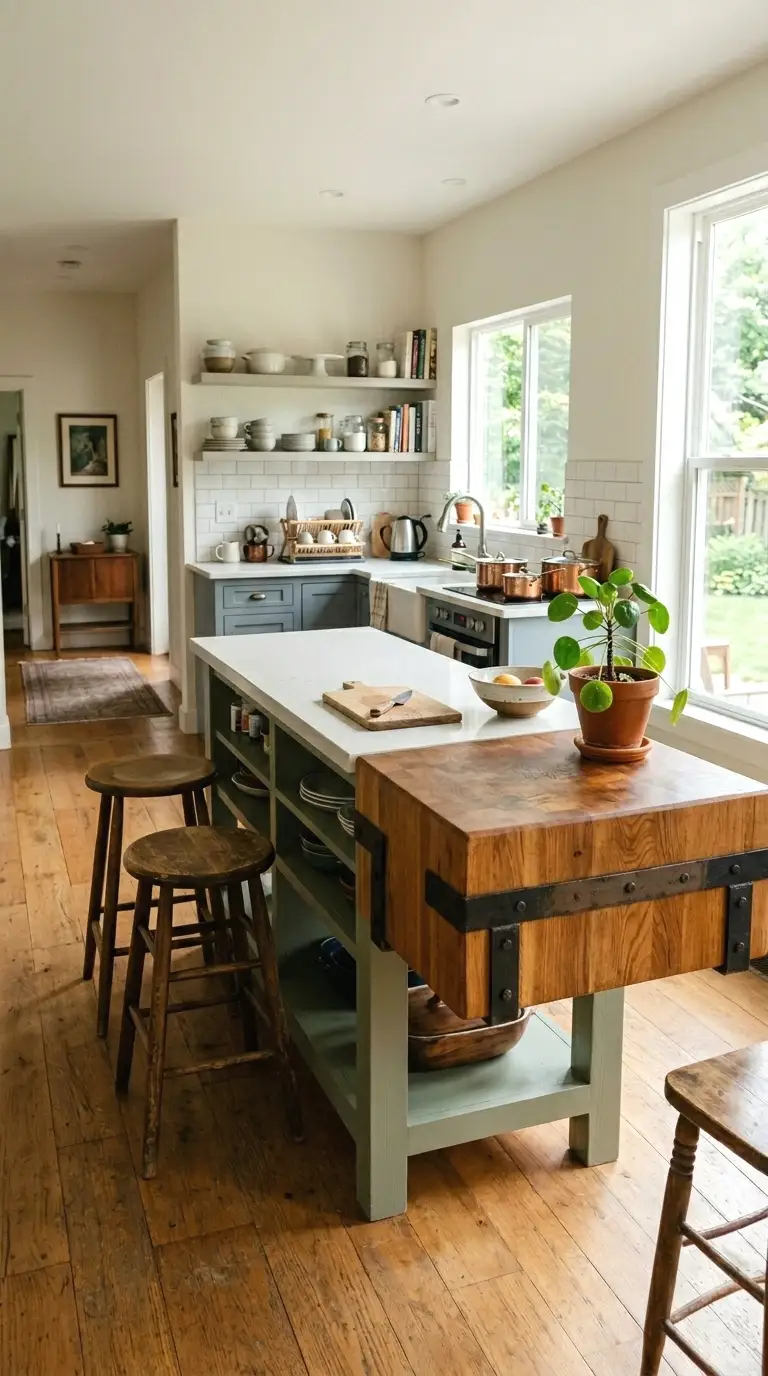
You don’t have to replace your whole countertop. A butcher block extension, a separate slab bolted onto the end of your island, can add 18 to 24 inches of extra surface that works as a dining ledge. They cost between $80 and $200 depending on size, and they attach with brackets you can get at any hardware store.
This is one of the most budget-friendly options on this whole list. Seriously. The wood warms up the kitchen, the extension creates a dedicated seating zone, and you haven’t touched your main countertop. Sand it smooth, seal it with food-safe mineral oil, and it holds up fine for daily use. Two people can eat breakfast at it without bumping into whoever is cooking.
4. Install a Raised Bar Shelf

A raised bar shelf sits about 6 inches above your existing counter on a simple frame at the end of the island. It creates a dedicated eating surface at bar height (around 42 inches) while your prep surface stays at 36 inches. That height difference is what makes the dining zone feel separate even though it’s attached.
The shelf itself can be a piece of painted MDF, solid wood, or even a floating wall shelf bracket system. A basic version runs $50 to $120 in materials. The visual separation it creates is worth way more than that. Add two bar stools underneath and you’ve got a breakfast nook built into your island with almost no demolition.
5. Try Extra-Long Counter Stools
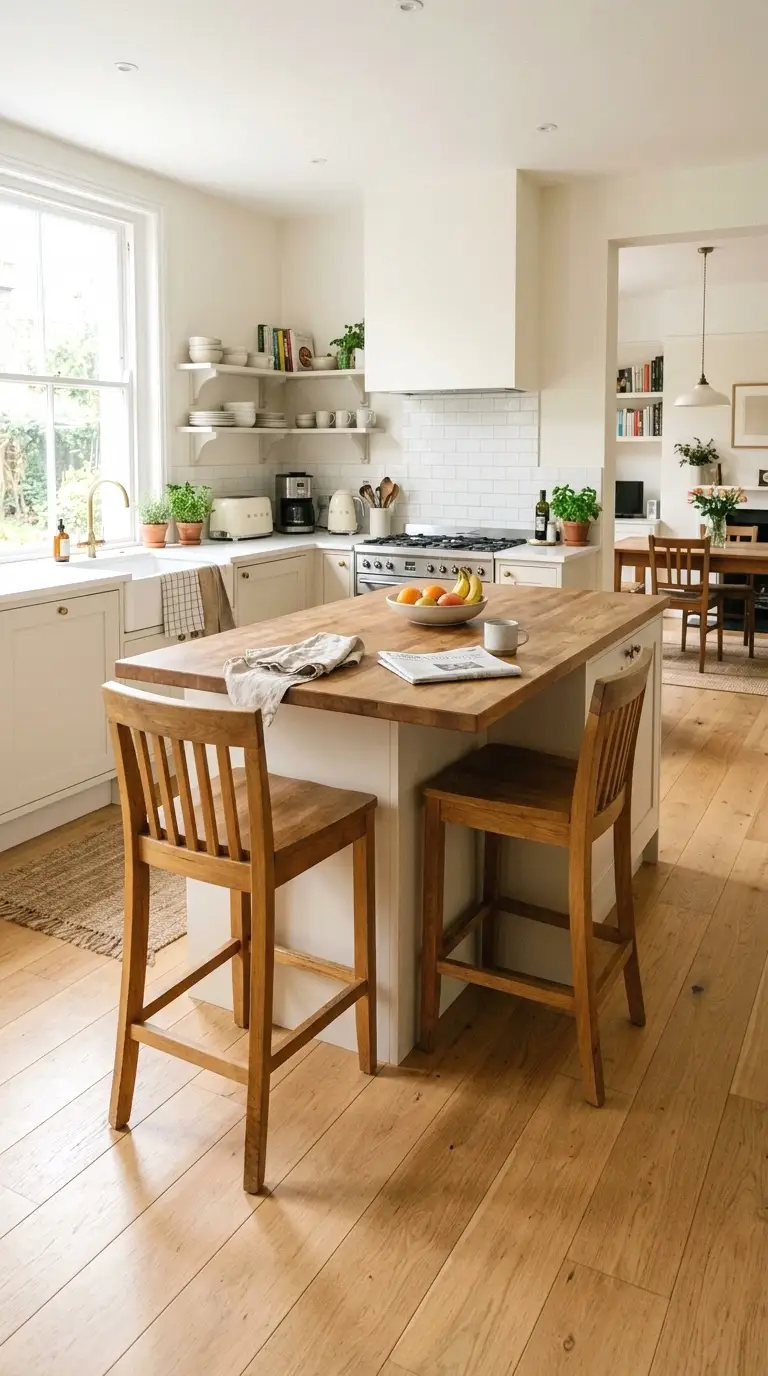
The right stool changes everything about how an island feels as a dining spot. Extra-long counter stools, ones with a footrest that wraps around or sits forward, make eating at a counter actually comfortable for a full meal. Short backless stools are fine for a quick coffee. For 30 minutes at dinner, you want back support and somewhere to rest your feet.
Look for counter stools between 24 and 26 inches seat height for a 36-inch counter, or 28 to 30 inches for a 42-inch bar height island. The difference of even 2 inches matters a lot. I’ve seen people buy beautiful stools that ended up being the wrong height, and the whole dining setup felt wrong no matter what else they did.
6. Create a Color-Blocked Dining End

Here’s a simple visual trick that costs almost nothing: paint the dining-side base of your island a different color from the kitchen-side base. This color blocking visually splits the island into two zones without adding a single inch of material. It reads as “this is the eating end” and “that is the cooking end.”
A quart of cabinet paint runs $25 to $40. You tape off the cabinet doors on the dining end, paint them a deeper or contrasting tone, and step back. The effect is immediate. A warm cream kitchen side with a forest green or charcoal dining end looks genuinely considered and specific, not like a DIY shortcut. And you can repaint if your taste changes.
If you’re second-guessing which tones age well on cabinetry, a look at cabinet color choices that actually hold up can help you narrow it down fast.
More Ideas:
Kitchen Island With Cabinets on Both Sides and Seating: 20 Ideas That Actually Work
21 Inspiring Open Kitchen Restaurant Designs for a Memorable Dining
23 Modern Western Dining Room Decor Ideas That Are Simply Gorgeous!
22 Kitchen Countertops and Backsplashes Combinations That Look Really Nice Together
7. Hang a Double Pendant Over the Island
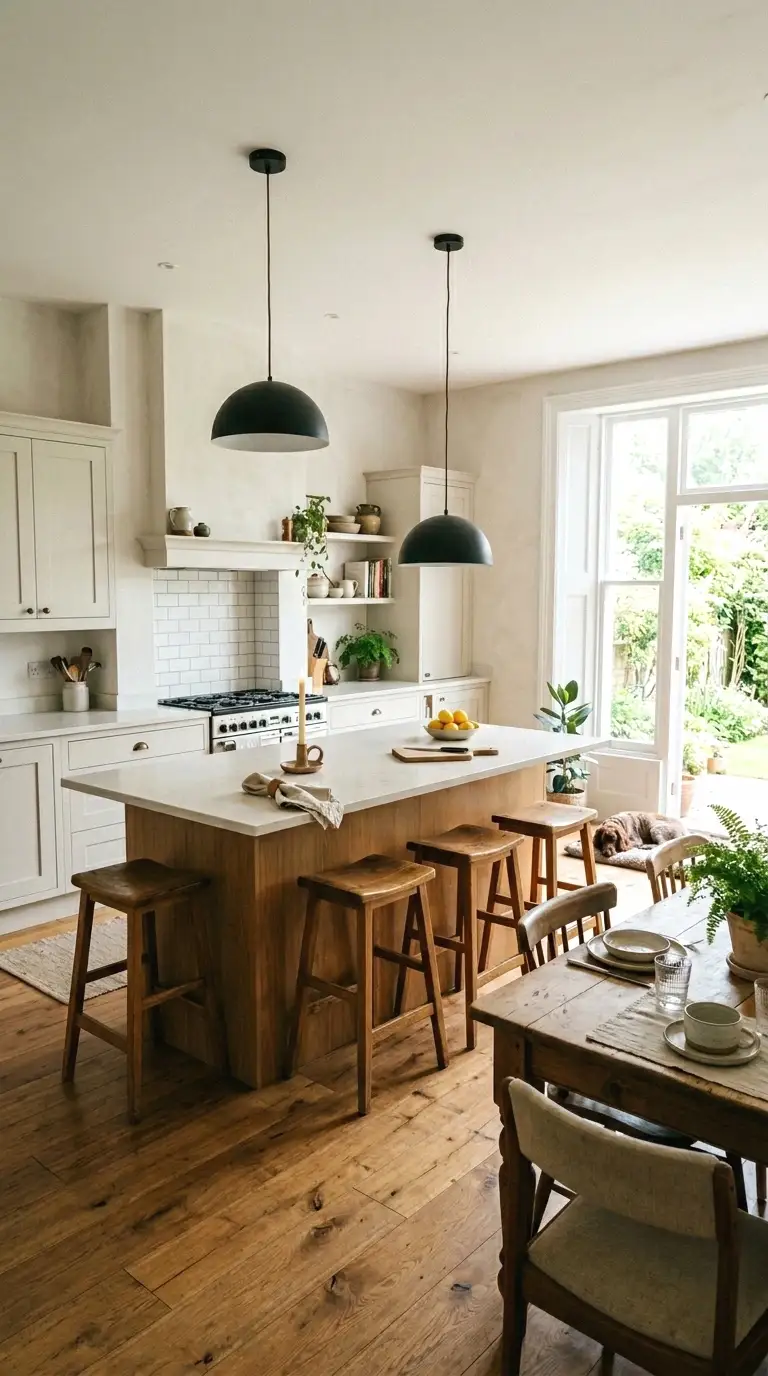
Lighting is the single most overlooked part of making an island work as a dining space. A double pendant hung 30 to 36 inches above the countertop surface creates a dining zone that feels intentional. It pools light over the eating area, dims the rest of the kitchen, and sets a mood that a can light in the ceiling never will.
Pendants don’t need to be expensive. A pair of matte black or aged brass pendants from most home stores runs $60 to $120 total. The key is hanging them low enough. Most people hang them too high. If you can’t feel the warmth of the light when you’re seated, they’re too far up. Drop them lower than feels right and you’ll see the difference immediately.
For a broader look at pendant styles that pool light well over a work surface, there are some fixtures worth comparing before you buy.
8. Use a Waterproof Tablecloth Runner
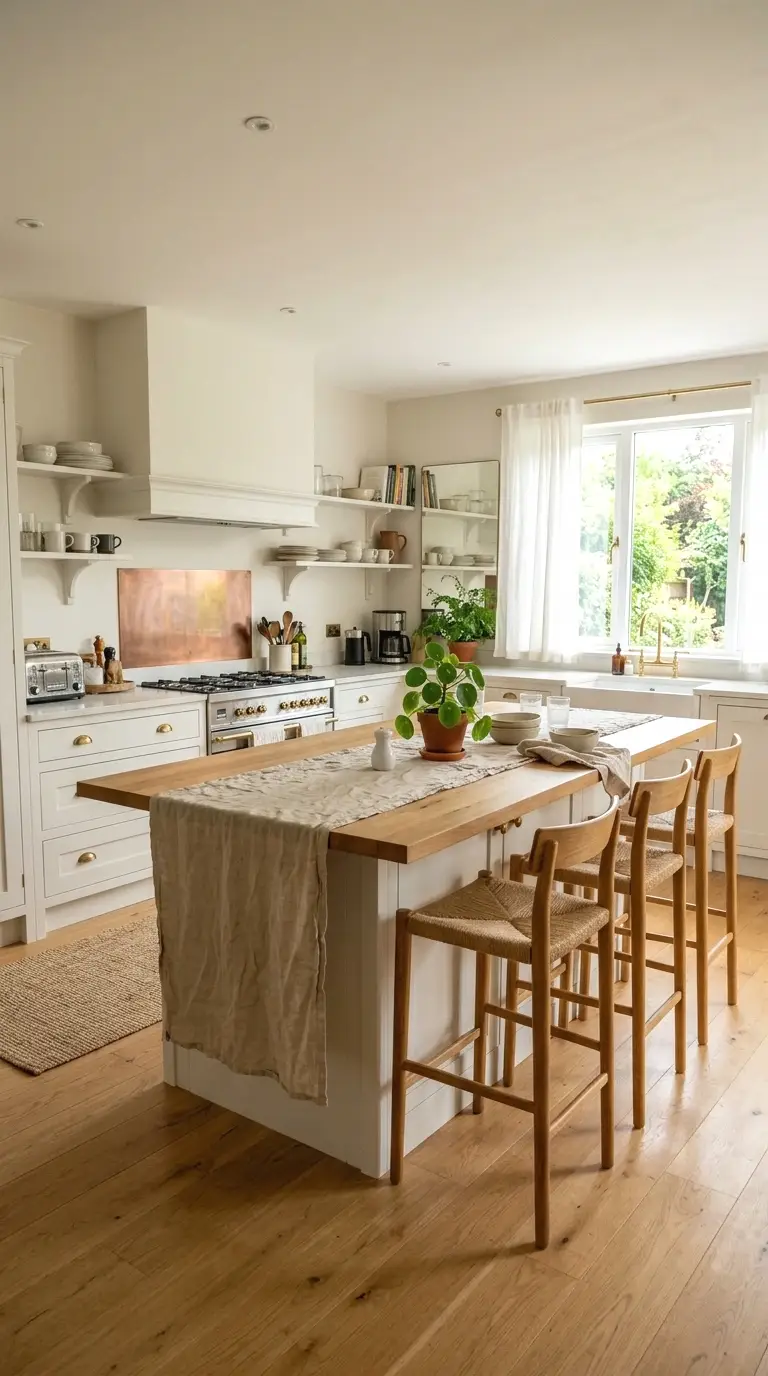
This one is so underrated. A thick, waterproof linen-look tablecloth runner placed across the dining end of your island does three things at once: it protects the surface, signals to everyone in the house that this is the eating area, and adds texture to what is usually a very flat, hard countertop.
Runners in the 14 by 72 inch size work for most standard island ends. They run $20 to $45 and you can find them in cotton, wipe-clean vinyl, or linen blends. Vinyl or polyester-blend ones wipe clean in seconds, which matters a lot when the island is pulling double duty as a cooking and eating surface. Swap them seasonally and the whole kitchen feels refreshed.
9. Build a Booth-Style Banquette at One End
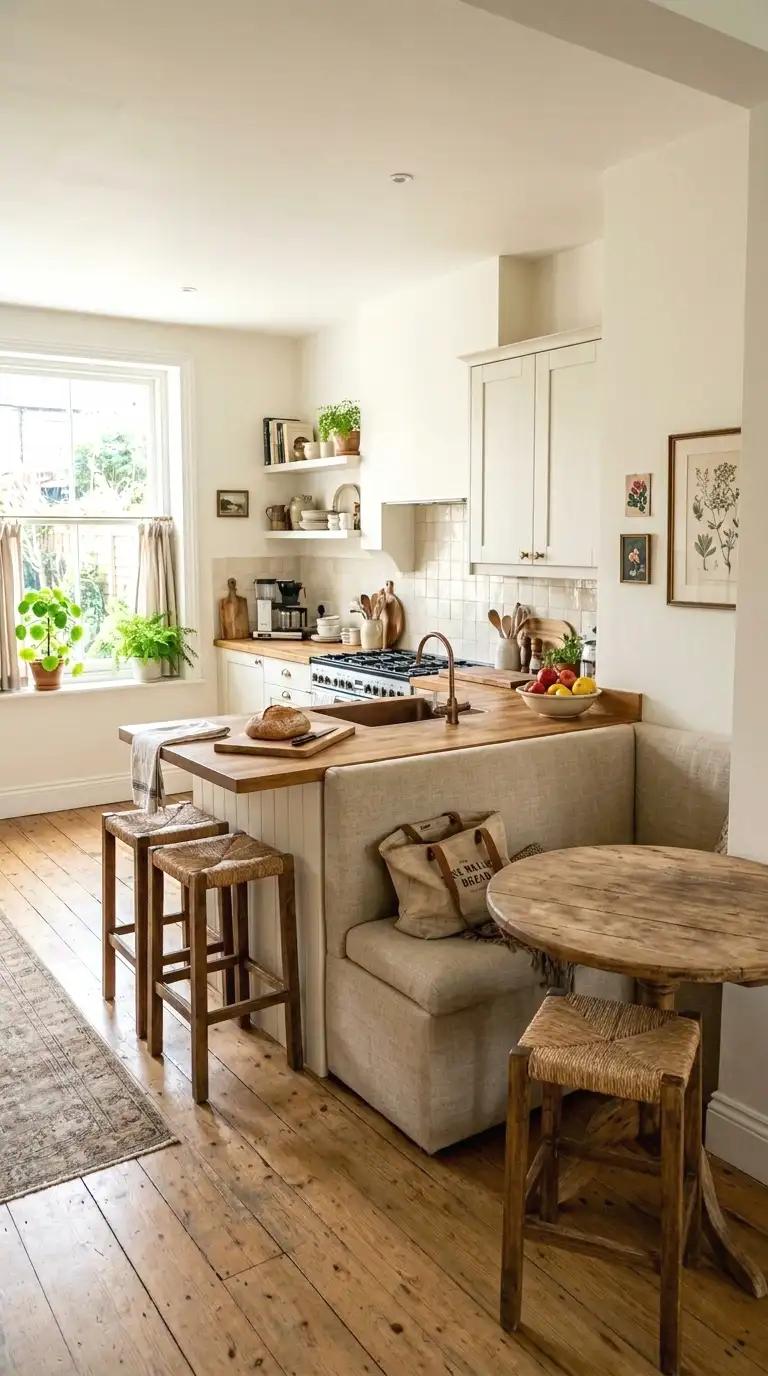
Instead of stools, consider bringing in a small L-shaped bench that wraps around one end of your island. This booth-style setup turns the end of the island into something that genuinely feels like a restaurant corner table. It works especially well when the island is parallel to a wall with about 36 to 42 inches of space between them.
The bench can be a simple built-in with a plywood frame and cushion, costing $150 to $300 in materials if you build it yourself, or a bought bench tucked in. Four people can sit very comfortably in that corner. And the banquette seating stores bags, shoes, or extra blankets in the base. It’s a working piece of furniture, not just a surface to eat at.
10. Add a Fold-Down Leaf Extension

A fold-down leaf attached to the side of the island gives you extra dining surface when you need it and folds flat when you don’t. This is particularly smart for kitchens where traffic flow is tight. The leaf sits flush against the island base when closed and swings out to a flat eating surface when you pull up stools.
Leaf hardware kits are available for around $15 to $30 at hardware stores. The leaf itself can be a piece of solid wood cut to size, finished to match or contrast your island. The whole setup for a 24 by 36 inch fold-down section comes in under $80 if you do it yourself. It’s one of the more practical solutions on this list for tight kitchens.
More Ideas:
Kitchen Island With Cabinets on Both Sides and Seating: 20 Ideas That Actually Work
21 Inspiring Open Kitchen Restaurant Designs for a Memorable Dining
23 Modern Western Dining Room Decor Ideas That Are Simply Gorgeous!
22 Kitchen Countertops and Backsplashes Combinations That Look Really Nice Together
11. Match Your Stools to the Island Material

Here’s something I was skeptical about but it made a real difference: matching the finish of your stools to the material of your island base or countertop creates a cohesive dining area that doesn’t look assembled from random pieces. It’s not about matching perfectly. It’s about echoing the tone.
A white island with white or light wood stools reads clean and planned. A dark walnut island with black iron stools reads polished and specific. The stool seat material matters too. A wood seat on a stone island bridges the cold surface with something warmer and more human. This is a detail most people skip, and it shows in photos of kitchens that feel almost right but not quite.
12. Extend the Island Into an L-Shape
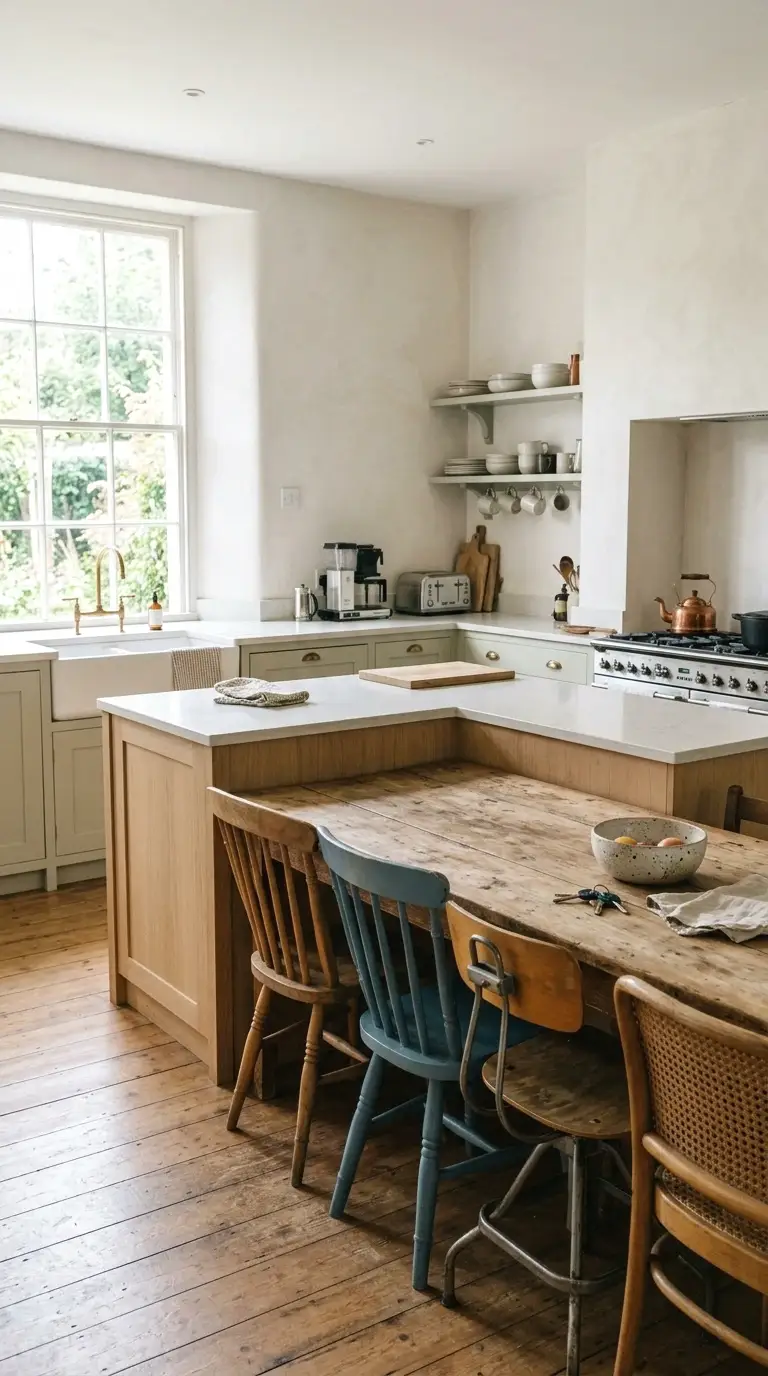
If your kitchen layout allows it, extending the island into an L-shape by adding a lower dining wing creates a defined dining zone that doesn’t eat into walking space. The extended wing sits at 30 to 32 inches, which is standard dining table height, while the main island stays at counter height. That way cooking and eating happen at different heights, which feels natural.
The extension can be a freestanding table piece bolted to the end of the island, or a built-in with matching cabinetry underneath. A freestanding extension using a small butcher block table or repurposed piece of furniture runs $100 to $250. Bolt it to the island base and it becomes permanent enough to feel built-in without the cost of real cabinetry work.
If your main island surface is still undecided, a white quartz surface for busy kitchens is one of the more durable and low-maintenance directions to go.
13. Use Backless Tolix-Style Stools for Small Kitchens
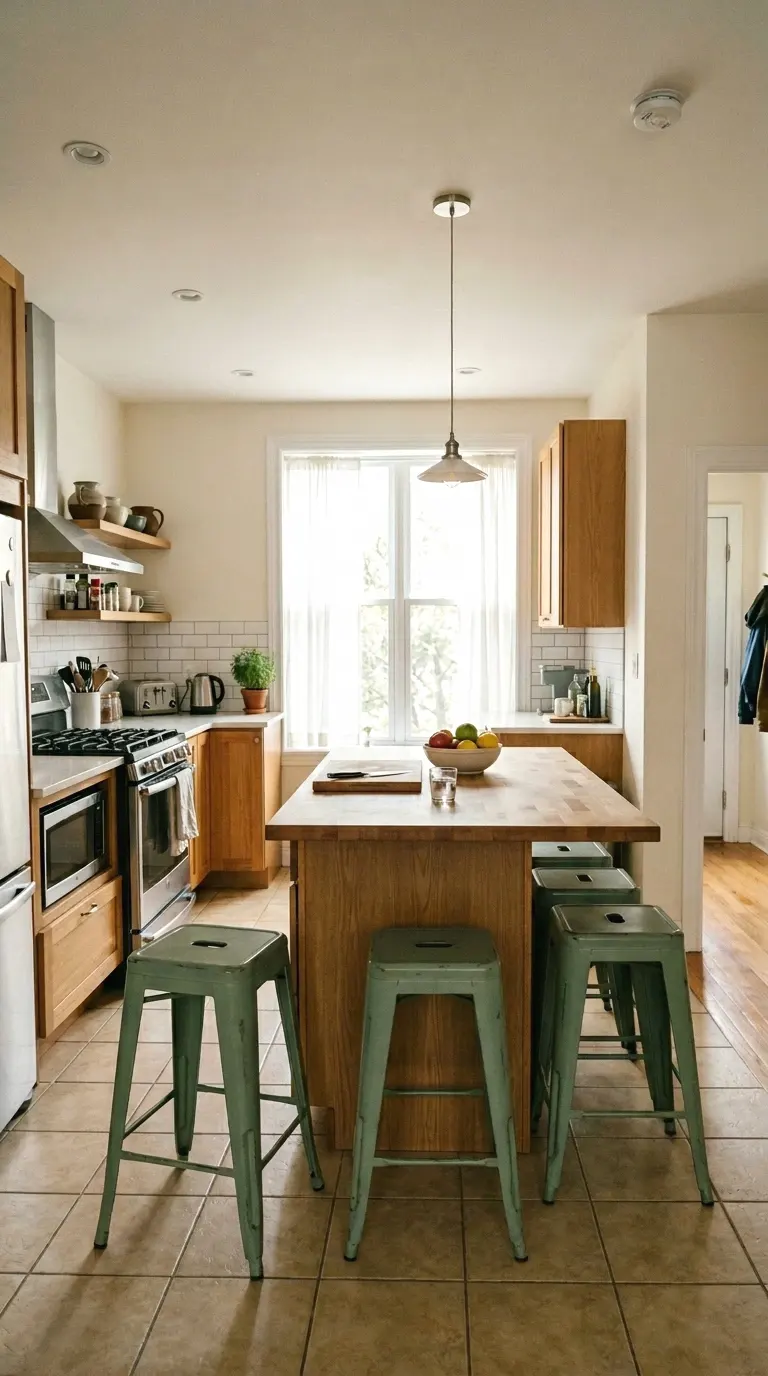
In a smaller kitchen where every inch matters, backless metal stools that slide completely under the overhang are the practical choice. Tolix-style stools in powder-coated steel are stackable, lightweight, and slide under the counter until the seat is level with the countertop surface. They disappear when not in use, which is the whole point.
A set of four runs $80 to $160 depending on brand and finish. Matte black, raw steel, and sage green are the colors getting the most attention in 2025 and 2026 kitchen design. They work with almost any island style from industrial to farmhouse. And honestly, the simplicity of a backless stool is its strength. Nothing to snag on. Nothing to clean around. Just sits there and does its job.
14. Add a Marble-Look Vinyl Wrap to the Dining End

The dining end of your island sees more scuffs, bag drops, and casual contact than the cooking end. Instead of worrying about it, wrap the dining-side cabinet face in a marble-look vinyl film. The film protects the paint or wood underneath, adds a visual focal point, and takes about two hours to apply.
Peel-and-stick vinyl film in marble patterns runs $25 to $60 for enough to cover one island end. Apply it with a squeegee and heat gun to smooth out bubbles. It peels off cleanly when you want to change it, which means renters can use it too. The contrast of a marble-look end against a solid-color island base reads like a real design decision, not a budget move.
If you’re rethinking the broader kitchen layout while you’re at it, open kitchen layouts that flow naturally show how the island can anchor the whole room.
More Ideas:
Kitchen Island With Cabinets on Both Sides and Seating: 20 Ideas That Actually Work
21 Inspiring Open Kitchen Restaurant Designs for a Memorable Dining
23 Modern Western Dining Room Decor Ideas That Are Simply Gorgeous!
22 Kitchen Countertops and Backsplashes Combinations That Look Really Nice Together
15. Install Pendant Lights on a Dimmer
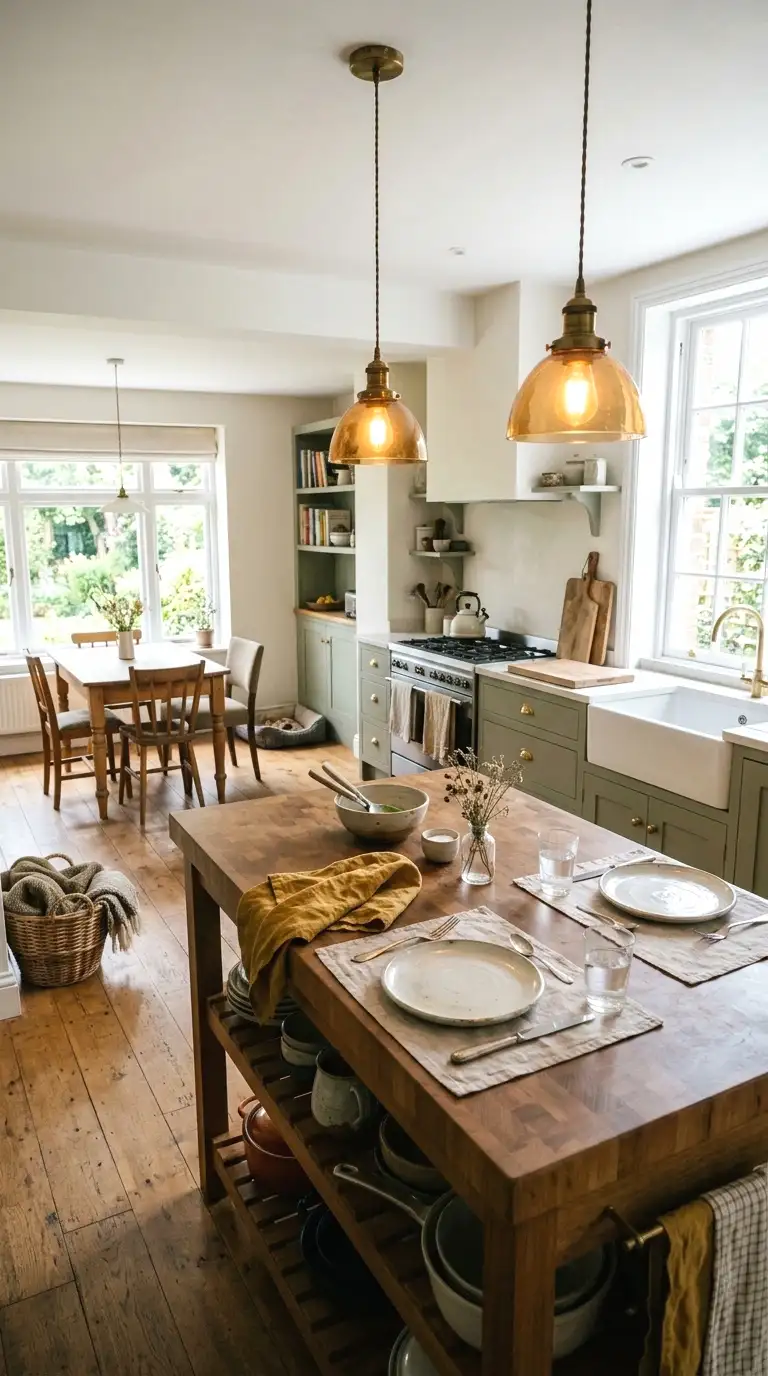
This builds on the pendant idea from earlier but the dimmer switch is the specific piece most people skip. A dimmer turns dining at your island from “we’re eating in the kitchen” to “we set a mood.” The same pendants at full brightness feel overhead and harsh. At 40 to 60 percent, they feel warm, low, and intentional.
A single smart dimmer switch runs $20 to $40 and installs in 20 minutes if your light is already on a standard switch. You don’t need new wiring. The quality of a shared meal at an island changes noticeably when the light shifts. It’s a $30 fix that punches well above its weight in how the whole dining experience feels.
16. Build in a Wine or Cup Rack on the Dining End
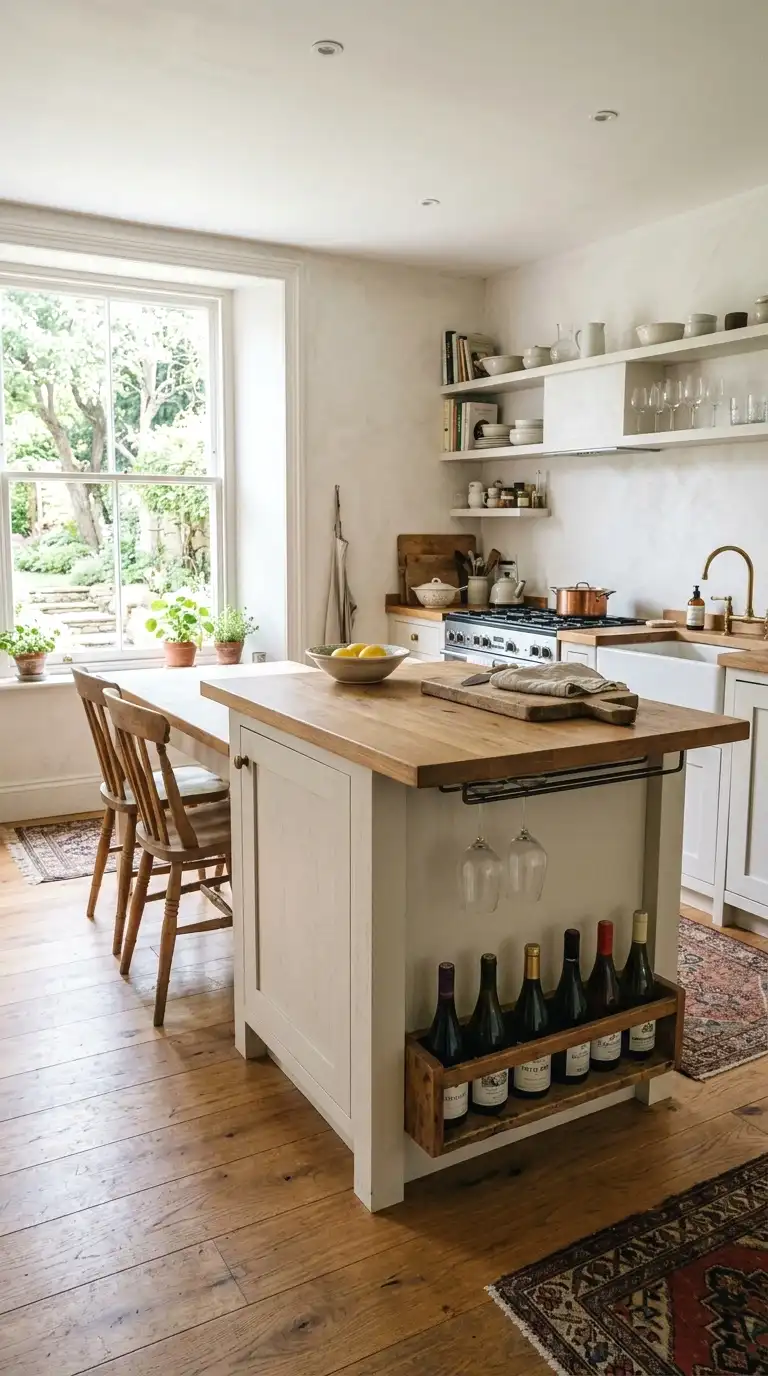
The dining end of your island can do more than just seat people. A small open shelf, wine glass rack, or cup storage built into the dining-side base keeps drinks and glasses within reach of whoever is sitting there. It also signals that this end of the island is the hospitality zone, not the prep zone.
A wall-mounted wine glass rack screwed to the underside of the overhang costs $15 to $35. A small open-shelf insert built into the cabinet base below the overhang, with two shelves for glasses or bottles, adds about $40 to $80 in materials. (Took me ages to figure this out, but having glasses right where people sit means fewer trips across the kitchen during meals.)
If you want to take the drink station further, there are some built-in coffee and drink storage ideas that work especially well on the dining end of an island.
17. Use Contrast Grout on a Tiled Island Base

If your island has a tiled base, the grout color is doing quiet design work that most people ignore. Switching to a dark or contrasting grout on the dining end, while keeping light grout on the cooking end, is a subtle way to visually anchor the dining zone. It’s also easier to keep clean since dark grout hides daily scuffs and spills.
Regrout a section yourself with a grout pen for $10 to $20 or fully regrout a small panel for $30 to $60 in materials. The color difference reads as intentional and adds depth to what is often a very flat, uniform surface. Charcoal grout against white subway tile is the classic version, but dark navy grout against a terracotta or warm beige tile is getting more popular this year.
18. Add a Cushioned Overhang Bumper

Here’s a practical one. If your island overhang has a sharp edge or a hard stone lip, add a thin cushioned edge bumper along the dining-side edge. It softens the surface for leaning elbows, protects the counter edge from bags and chairs, and makes the whole eating experience more comfortable for extended meals.
Adhesive foam edge guards meant for furniture or countertops run $15 to $30 for a 6-foot section. They come in neutral tones that blend with most countertop colors. It’s not a glamorous upgrade but it’s one of those things where once you have it, you notice how much more comfortable sitting at the island becomes. Especially if you have kids eating there daily.
More Ideas:
Kitchen Island With Cabinets on Both Sides and Seating: 20 Ideas That Actually Work
21 Inspiring Open Kitchen Restaurant Designs for a Memorable Dining
23 Modern Western Dining Room Decor Ideas That Are Simply Gorgeous!
22 Kitchen Countertops and Backsplashes Combinations That Look Really Nice Together
19. Place a Statement Tray on the Dining End

A large wooden or stone tray placed on the dining end of your island serves as a visual anchor and a practical catch-all for napkins, salt and pepper, a candle, and whatever else belongs at a real table. It defines the eating zone without any physical barrier or construction. Move it when you need to prep, set it back when you’re eating.
Tray sizes between 18 and 24 inches work best on a standard island overhang. Acacia wood trays run $25 to $45. Marble-look resin trays are in the same range and wipe clean instantly. The tray trick is one of those styling moves that makes a kitchen feel put-together in a very low-effort way. It also gives guests a visual cue that the island is set for eating, which matters more than you’d think.
20. Add Soft Seating With Low-Back Chairs
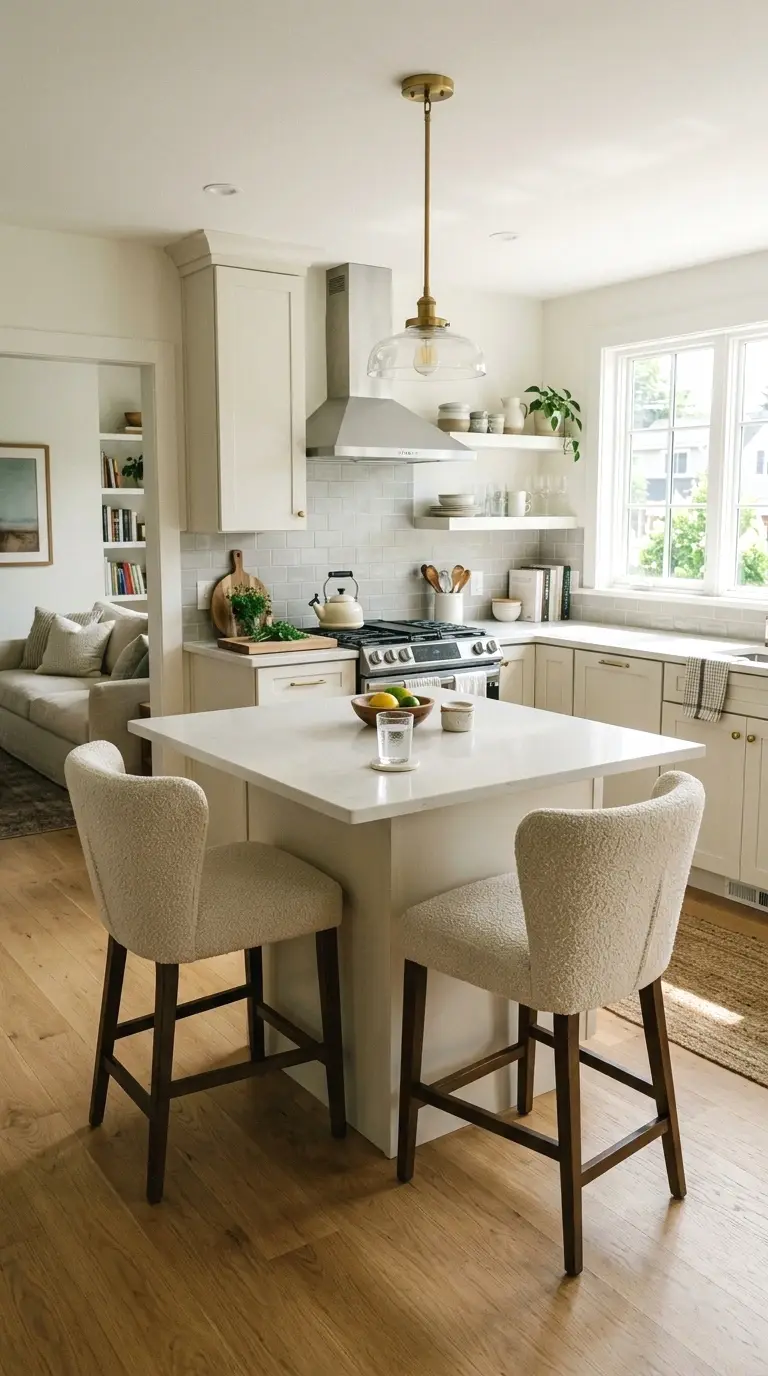
Bar stools aren’t the only option for island seating. Low-back upholstered chairs at bar height, with a padded seat and a short back panel, give people somewhere to lean without taking up extra visual space. They feel more like dining chairs than stools, which shifts the whole experience of eating at the island.
Upholstered counter-height chairs in linen, boucle, or performance fabric run $80 to $150 each. A set of two for a 4-foot dining end is a $160 to $300 investment. They’re harder to slide under the overhang than backless stools, so you need at least 15 inches of overhang clearance. But for families who eat most meals at the island, the comfort is worth the trade.
21. Use a Live-Edge Slab as the Dining Surface

The live-edge slab is the top of this list for a reason. A slab of wood with a natural irregular edge, used as the dining surface of your island, is the single upgrade that makes a kitchen feel completely specific to the people who live there. No two slabs are identical. It’s the opposite of a catalog kitchen.
Live-edge slabs in walnut, maple, or white oak run from $200 to $600 for a dining-size piece. Have it sealed with a matte or satin poly finish so it stands up to daily use without constant maintenance. Set it on a simple metal or wood base attached to the end of your island and it becomes the focal point of the whole room. Worth saving for if your budget needs a stretch.
Final Thoughts on Large Kitchen Island Dining Table Ideas
What you’ve got now is a real toolkit. Not a mood board of things that cost $10,000, but a working set of ideas across different budgets, skill levels, and kitchen sizes. The through-line in all 21 ideas is the same: your island already has the bones. What it needs is commitment to one direction.
Start with the lighting and the stools. Those two things together will show you what the island can feel like as a dining space before you commit to anything permanent. One pendant swap and a couple of well-chosen stools can do it this weekend.
If this project is part of a bigger kitchen refresh, there’s a useful guide to kitchen remodel ideas on a real budget that covers what’s worth spending on and what isn’t.
If you want more ideas like this, with the same level of specificity and no fluff, homelypop.com covers kitchens, living rooms, and small spaces with real budgets in mind. Worth a look when you’re ready for the next project.