
19 Living Room With Dining Table Layout Ideas That Actually Work

Squeezing a dining table into your living room sounds fine on paper, but then you actually try it and nothing fits right. The sofa crowds the chairs. The table blocks the walkway. Every arrangement looks off and you can’t figure out why. It’s not you. It’s a real problem.
This list covers 19 layout ideas, picked specifically for combined living and dining spaces. Each one earned its spot because it solves a real spacing issue, works within a realistic budget, and is doable without a designer. Prices in this list mostly fall between $100 and $300, and I’ve flagged where you can spend less or more depending on your setup.
This is for people working with rooms under 400 square feet, renters who can’t knock down walls, and anyone juggling a sofa and a six-seater in the same space. If you have a dedicated dining room already, this list isn’t for you. But if your living room is doing double duty, you’ll find something here that works.
By the end you’ll have a clear picture of how to place, size, and style a combined space that feels intentional, not accidental.
If you want a broader starting point before diving in, this breakdown of a shared space that actually works covers the core principles worth knowing first.
What to Know Before You Start a Living Room Dining Table Layout
- A room under 250 sq ft needs a table no wider than 36 inches to keep walkways clear.
- Rugs define zones better than furniture arrangement alone. Budget at least $80 for one that fits under the full dining set.
- Round tables save roughly 20% more floor space than rectangular ones in tight rooms.
- Most people underestimate chair depth. Pulled-out dining chairs need at least 36 inches of clearance behind them.
- Pendant lights over the dining table cost $40 to $150 and do more for zone separation than almost any other single item.
- A common mistake: placing the sofa back-to-back with dining chairs. Leave at least 18 inches between them.
- Fold-down or extendable tables ($80 to $200) add 12 to 18 inches of surface only when you need it.
- Matching furniture finish between zones, even slightly, makes the combined room look planned rather than patched together.
1. Use a Round Table to Open Up the Room

Round tables are genuinely underrated in combined living and dining spaces. No sharp corners means no bruised hips every time you walk past, and the shape naturally makes a tight room feel less blocked. A 42-inch round seats four people and takes up noticeably less visual space than a rectangular table the same size.
When I tried this in my own space, I was surprised by how much it changed the traffic flow. You can squeeze past at almost any angle. Pair it with chairs that have slim legs, not chunky upholstered ones, and the whole area reads as open. Budget around $150 to $250 for a decent solid-wood or metal-base round table at this size.
For pairing ideas and chair options, there are some examples of round table styling done well that might help you narrow down the look.
2. Anchor Each Zone With Its Own Rug
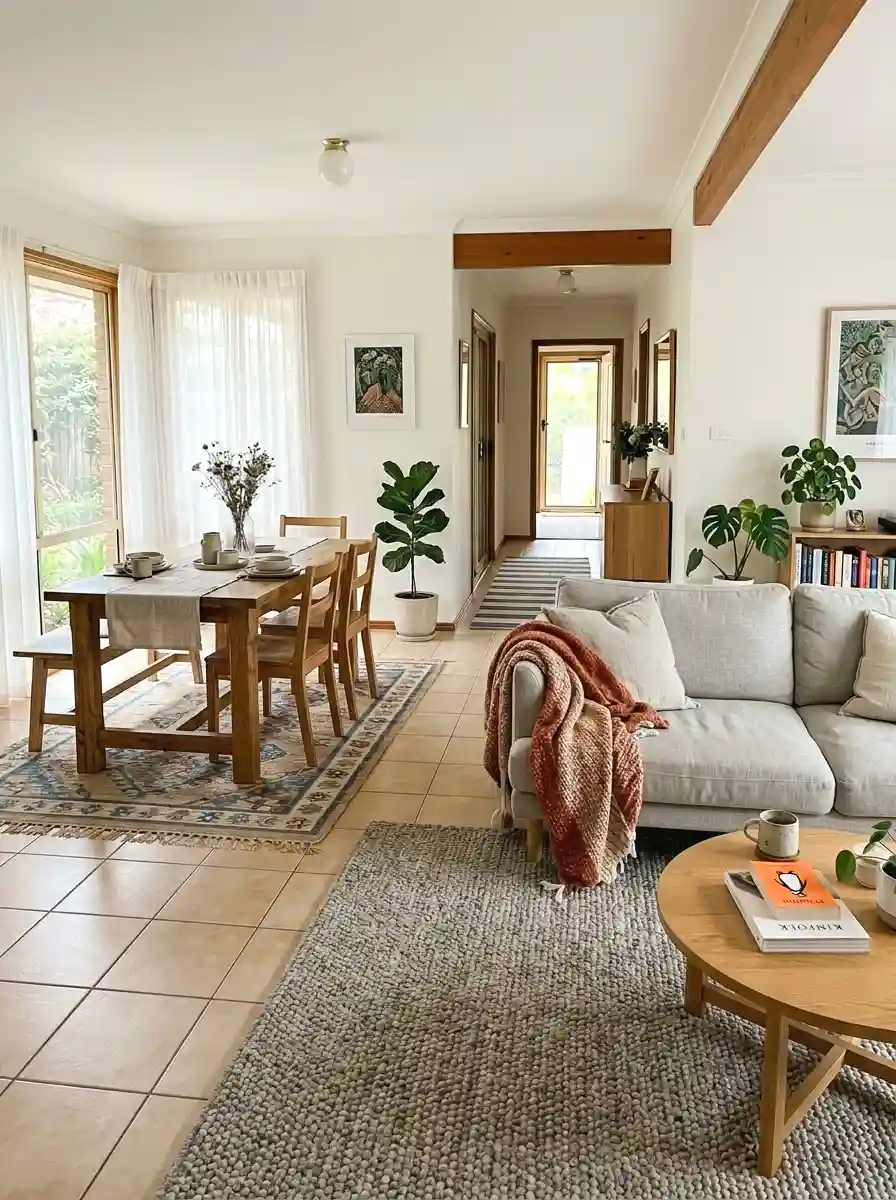
So here’s the thing most people skip: rugs do the layout work for you. Place one under the sofa and coffee table for the living area, and a separate one under the dining table and chairs for the eating area. Two rugs, two zones. The room reads as organized even if the furniture is close together.
The dining rug needs to be large enough that chair legs stay on it even when pulled out. For a four-person table, that usually means at least a 5×7 rug. You can find solid flatweave options at that size for $60 to $90. The living room rug can go up to $150 to $200 if you want something with texture.
More Ideas:


3. Put the Dining Table Against One Wall
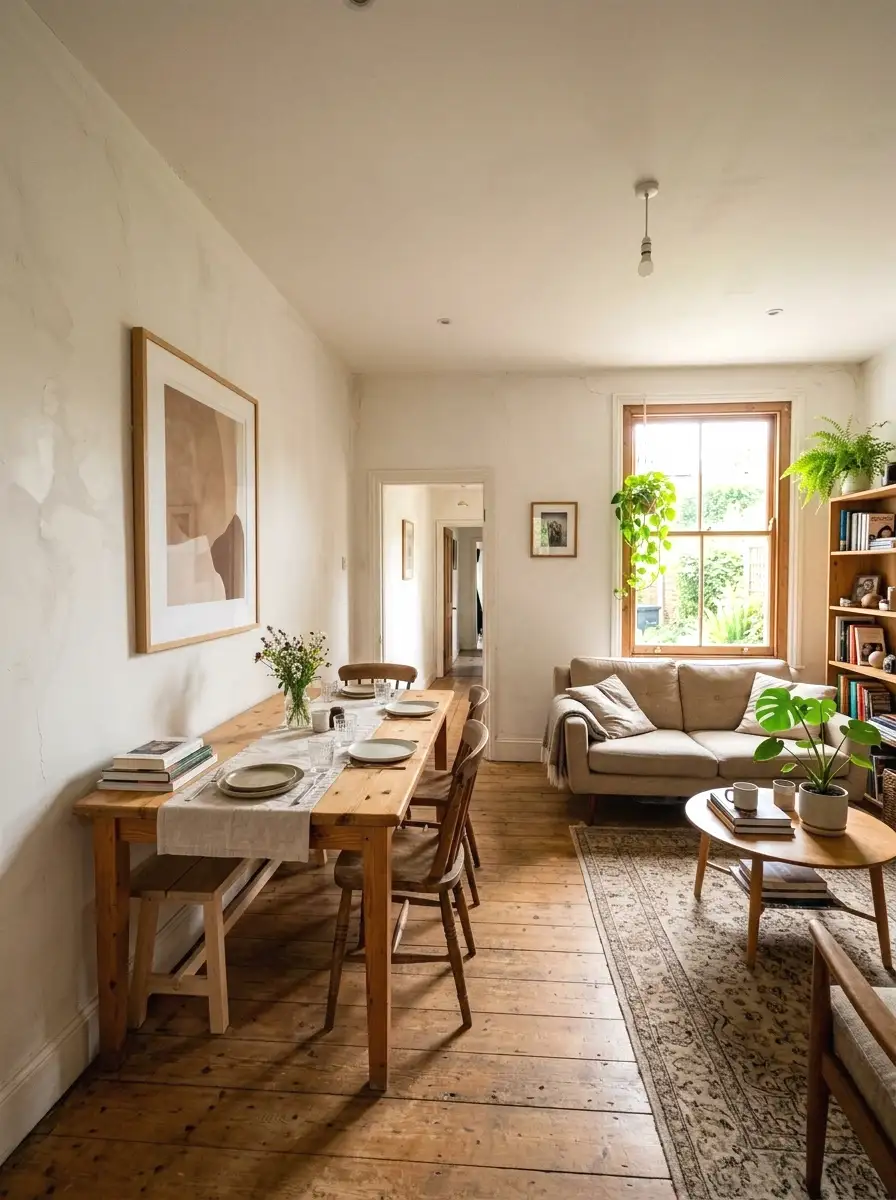
If your room is a rectangle and space is tight, push the dining table flush against the longest wall. It sounds obvious but a lot of people resist it because they think it’ll look like a school cafeteria. It won’t, as long as you hang something on the wall above it.
A piece of art or a mirror behind the table makes it feel intentional. The table doesn’t float awkwardly and the rest of the room opens up for the sofa and seating. This works especially well in rooms under 300 sq ft. Bench seating on the wall side saves even more space since benches don’t need to be pulled out.
If you’re unsure what to hang there, a few ideas on art placement above a dining table can point you in the right direction.
4. Try a Narrow Console or Sofa Table as a Divider

The right piece of furniture between the two zones does a lot of work. A narrow sofa table or console, around 12 to 14 inches deep and 48 inches wide, can sit behind the sofa and face the dining area. It marks where one space ends and another begins without using extra square footage.
You can find these for $80 to $160. Style the top with two or three items: a small lamp, a plant, a bowl. It becomes a functional back-of-sofa shelf and a subtle visual divider at the same time. Honestly one of the most useful pieces you can add to a shared space.
5. Match the Dining Table Finish to Your Coffee Table
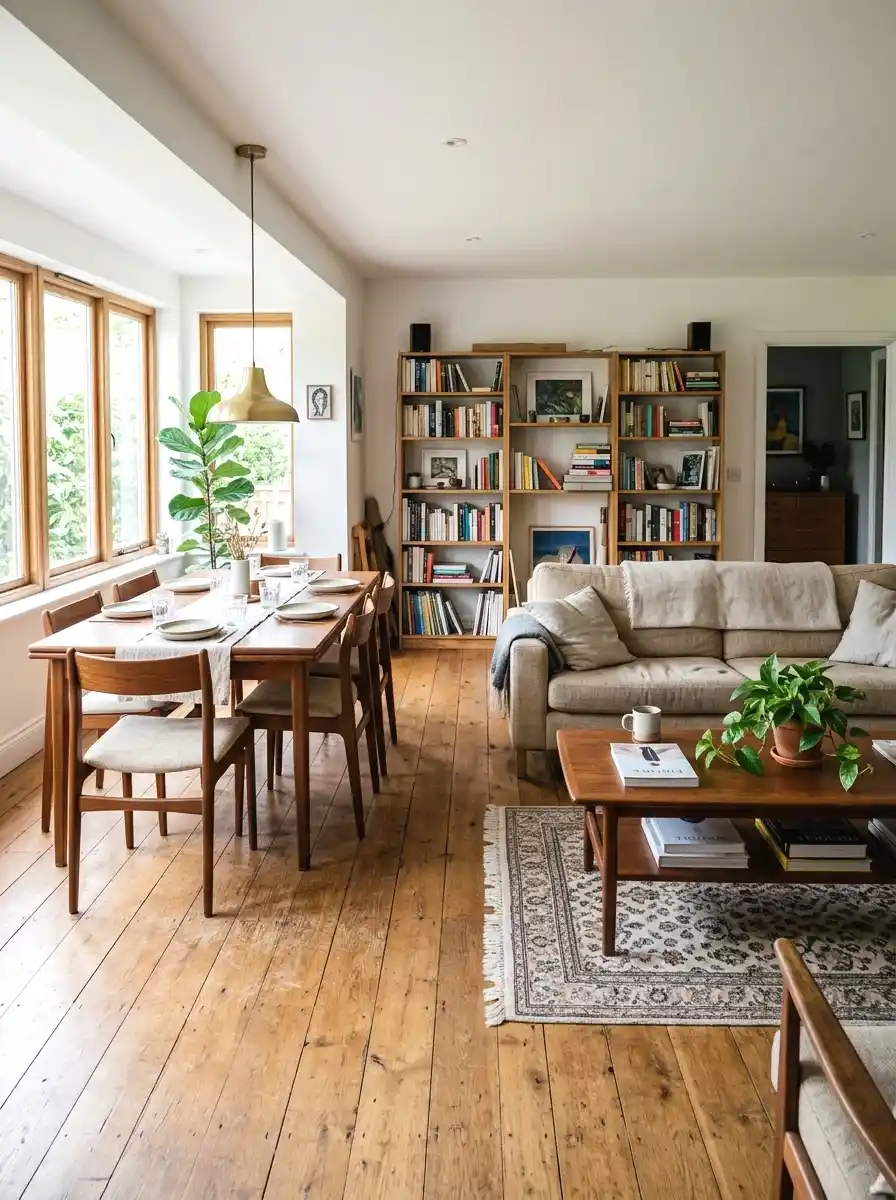
Here’s what nobody tells you: when your dining table and coffee table share a finish or material, the combined room looks like it was decorated on purpose. It creates a visual thread the eye follows across the whole space. You don’t need to buy matching sets. Just look for similar wood tones or metal finishes.
If your coffee table is a walnut-tone wood, find a dining table in a similar warm brown. If your coffee table has a black metal frame, look for that same black in a dining chair leg or table base. This costs nothing extra. It just requires some patience when shopping.
6. Hang a Pendant Light Directly Over the Dining Table
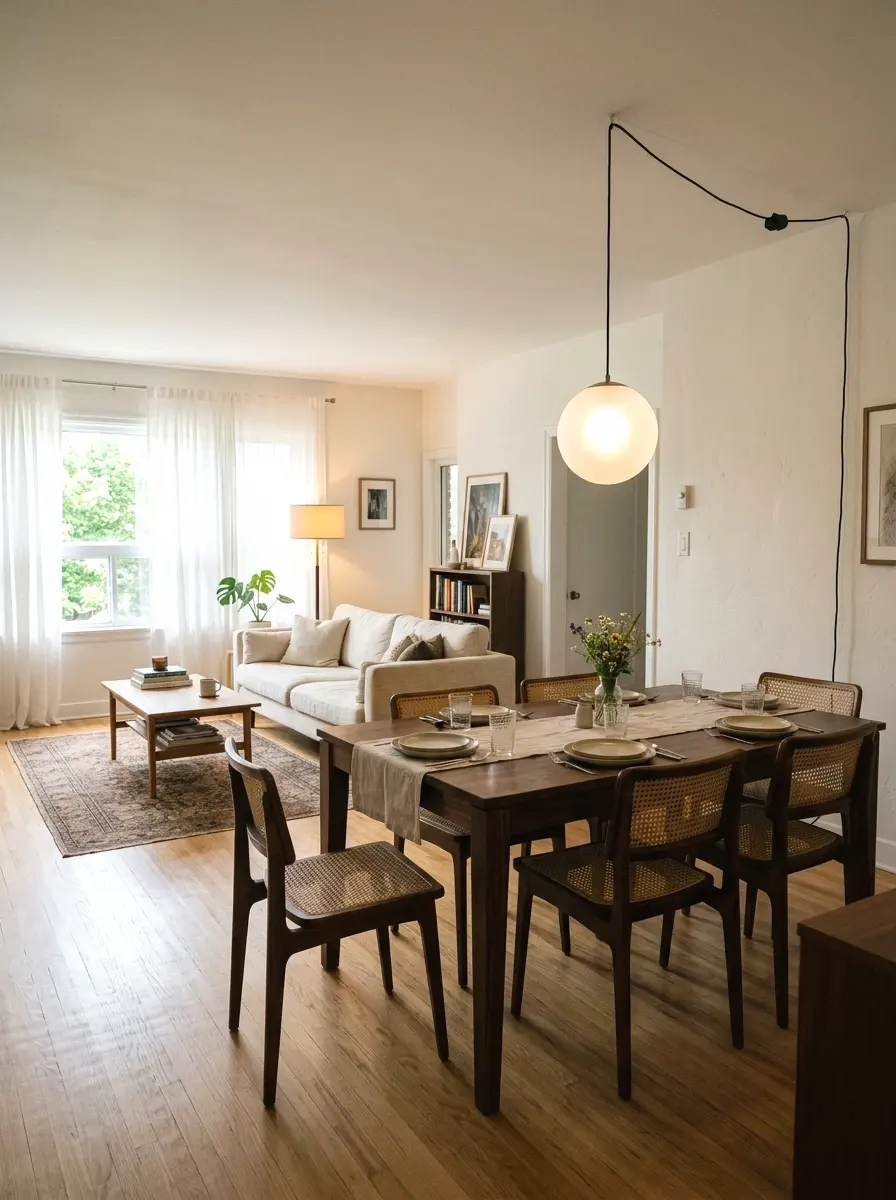
Lighting is one of the most powerful ways to separate zones in a combined room. A pendant light hung over the dining table tells everyone’s brain “this is the eating area.” The living area stays lit differently, usually with floor lamps or sconces, and the two zones feel distinct even when they’re feet apart.
A simple plug-in pendant with a cord that runs along the ceiling costs $40 to $80 and requires no electrical work. For a hardwired option, you’re looking at $100 to $150 plus install. Hang it 30 to 34 inches above the tabletop. That’s the standard and it really does look right at that height.
There are some pendant styles worth considering that show how lighting choices shift the feel of a dining zone entirely.
More Ideas:
7. Use Bench Seating on One Side of the Dining Table

Benches are space-smart in a way that chairs aren’t. A bench seats two to three people but takes up far less depth when pushed in under the table. That means more walkway. In a combined living and dining room, every inch of floor space matters and benches give a lot of it back.
You can find a 48-inch wooden bench for $60 to $120. Put it against the wall side of the table. The wall acts as a backrest and you don’t need to leave clearance for pushing chairs out. Pair the bench with two regular chairs on the other side for a setup that works for two people daily and four people when needed.
You can find bench and chair combos that work across a range of layouts and table sizes if you want to see more real-room examples.
8. Choose a Rectangular Extendable Table

A table that starts at 48 inches and extends to 64 or 72 inches is the most practical piece of furniture you can own in a combined room. Day-to-day it stays compact. When you have people over, you pull out the leaf. It costs a bit more than a fixed-size table, usually $180 to $300, but it replaces the need for two different tables.
Look for extension tables where the leaf stores inside the table itself, not separately in a closet. Drop-in leaves that store externally are a hassle. Built-in butterfly or self-storing leaves are worth the slight extra cost. IKEA’s EKEDALEN and similar options start around $180 and are solid for the price.
9. Define the Living Area With a Sofa Facing Away From the Table
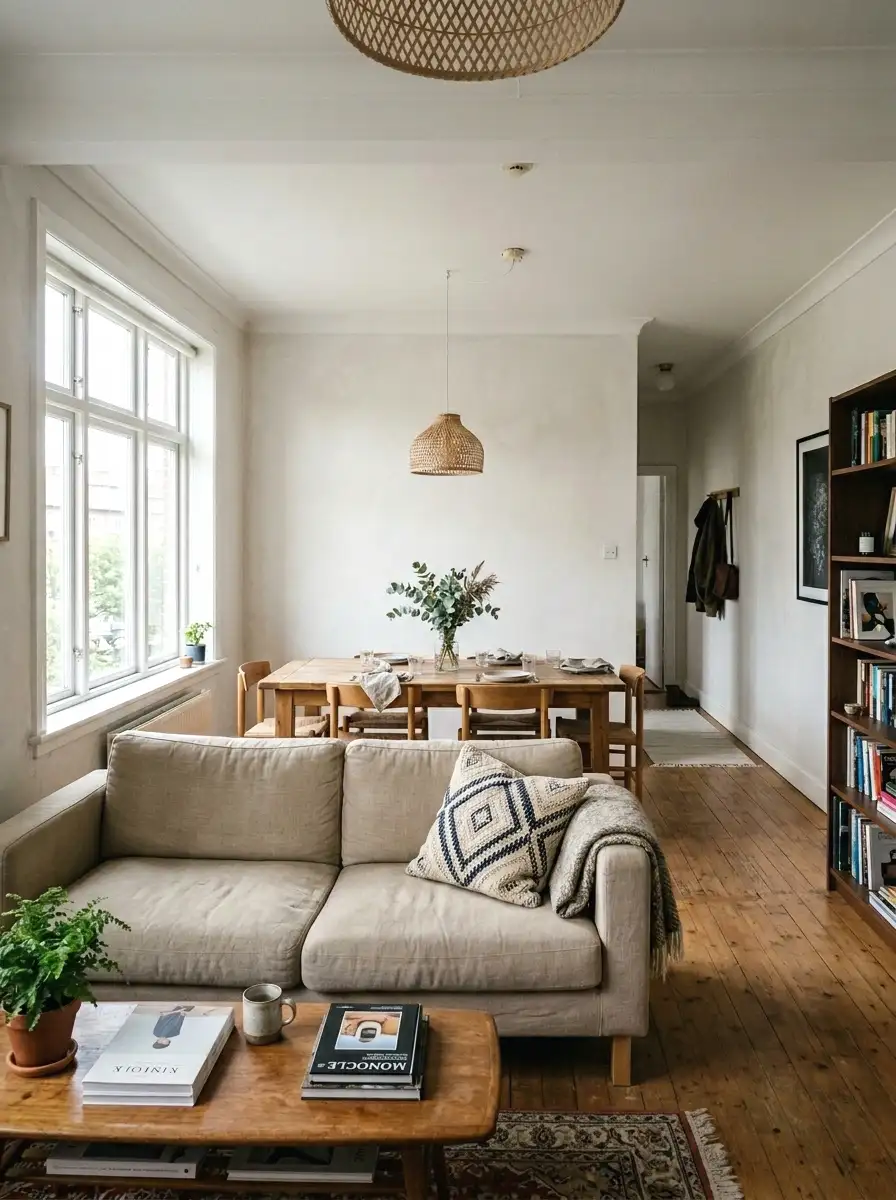
One of the most effective layout moves is positioning the sofa so the back faces the dining table. This creates a physical and visual separation. The sofa becomes a room divider of sorts. It doesn’t take up extra space and it naturally draws a line between sitting and eating.
Make sure the sofa back isn’t so close to the dining chairs that it feels cramped. Aim for 18 to 24 inches between the sofa back and the nearest dining chair. In a room that’s at least 12 feet wide, this is very doable. In tighter rooms, consider a loveseat (about 58 inches wide) instead of a full three-seater.
There’s a helpful look at sofa placement in an open floor plan that covers exactly this kind of tight-room tradeoff.
10. Add a Sideboard or Buffet for Extra Storage
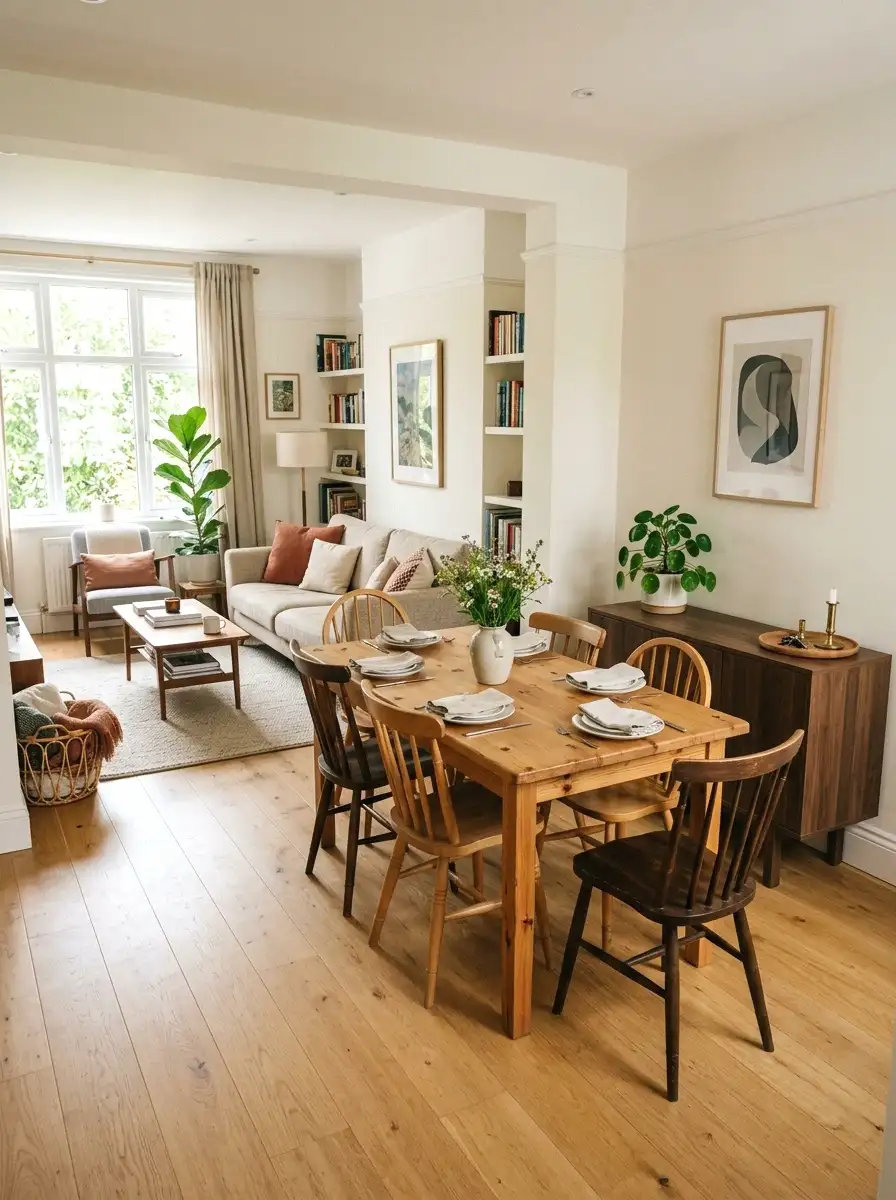
A sideboard along one wall near the dining table solves two problems at once: it adds storage for dishes, table linens, and serving pieces, and it fills a wall so the dining area looks complete. A sideboard around 54 to 60 inches wide and 16 to 18 inches deep doesn’t stick out much and holds a lot.
Budget $150 to $300 for a solid option. Look at thrift stores and Facebook Marketplace for sideboards in the $40 to $80 range. A quick paint job in white or black makes an old piece look current. Style the top with a plant, a lamp, or a small tray and it reads like a deliberate design choice.
More Ideas:
11. Keep the Color Palette Consistent Across Both Zones
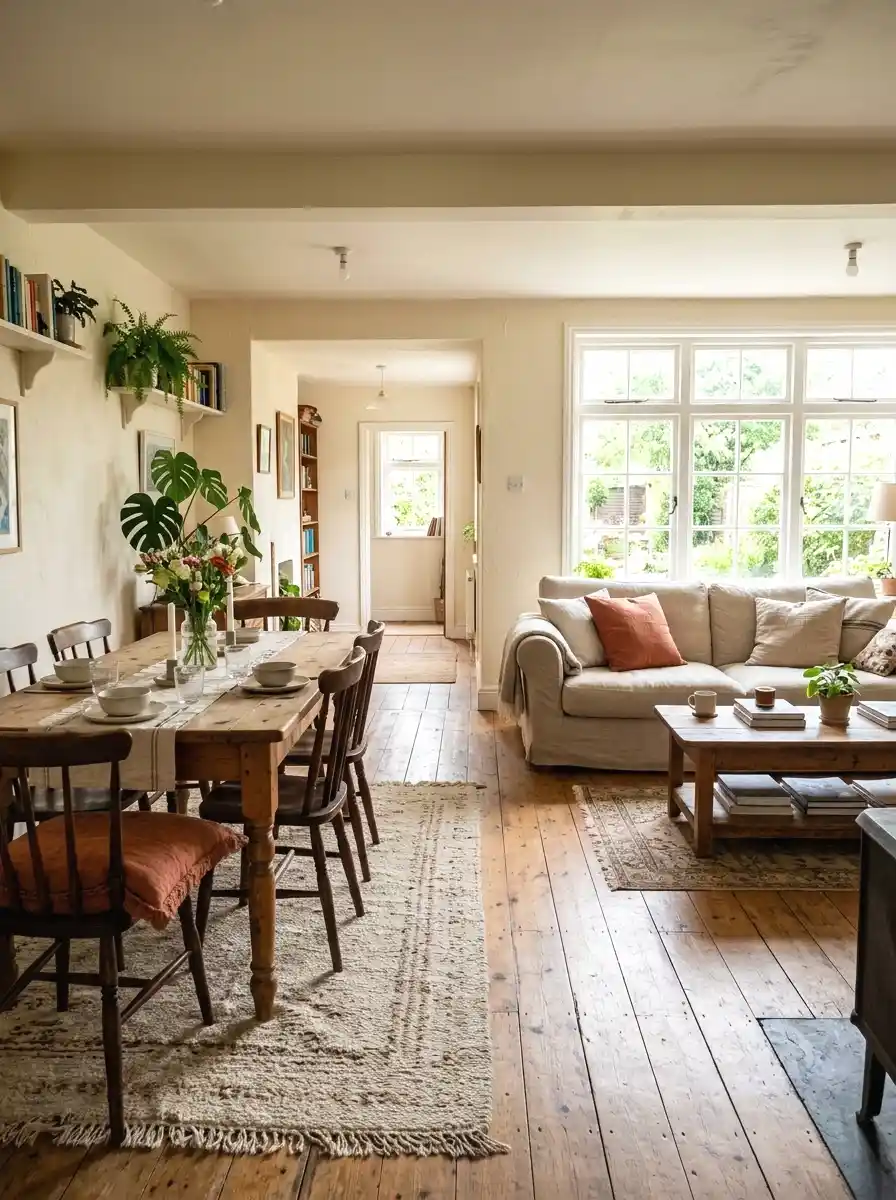
When the living area and dining area share two or three colors, the combined room looks like a single cohesive space instead of two awkward areas shoved together. Pick a base neutral, one main accent, and one secondary accent. Repeat each color in both zones. It doesn’t have to be exact, just close enough that the eye connects the spaces.
For example: cream walls, a terracotta dining chair cushion, and a terracotta throw pillow on the sofa. The color links the two zones without being matchy-matchy. This costs nothing if you already own the pieces. If you’re buying new, look for items in your chosen accent color for around $20 to $60 each.
For more on color continuity across connected rooms, there’s a practical guide that walks through this without overcomplicating it.
12. Float the Dining Table in the Middle of Its Zone
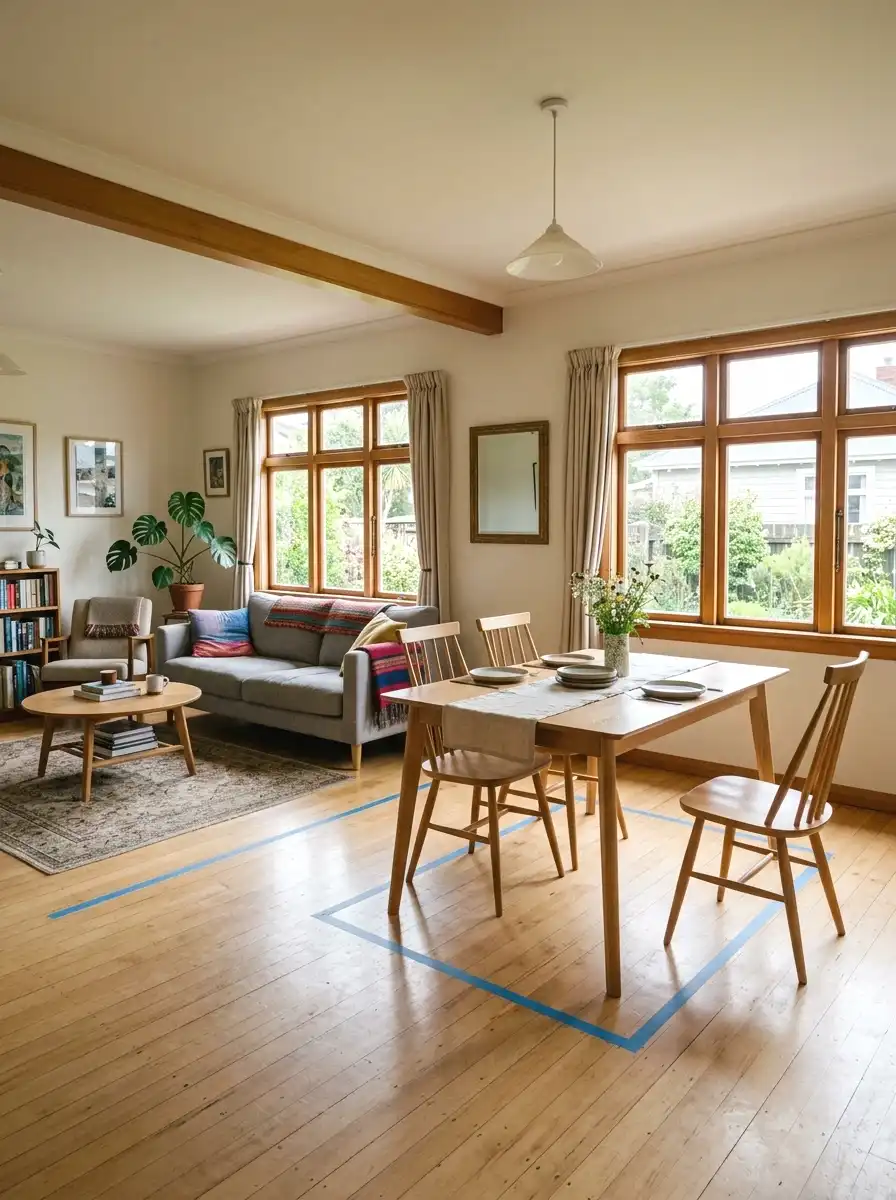
I was skeptical about this one but floating the dining table, meaning not pushing it against any wall, actually works well in rooms over 300 sq ft. It gives the table presence and makes the dining area feel intentional. The key is making sure there’s at least 36 inches of clearance on all sides for chair movement.
In a 12×14 foot room, you can float a 36×60 inch table and still have room for a sofa on the other side. Draw it out on paper first, or use painter’s tape on the floor to see how much space it actually takes. Most people overestimate how crowded it will look.
13. Use Slim Dining Chairs With No Arms
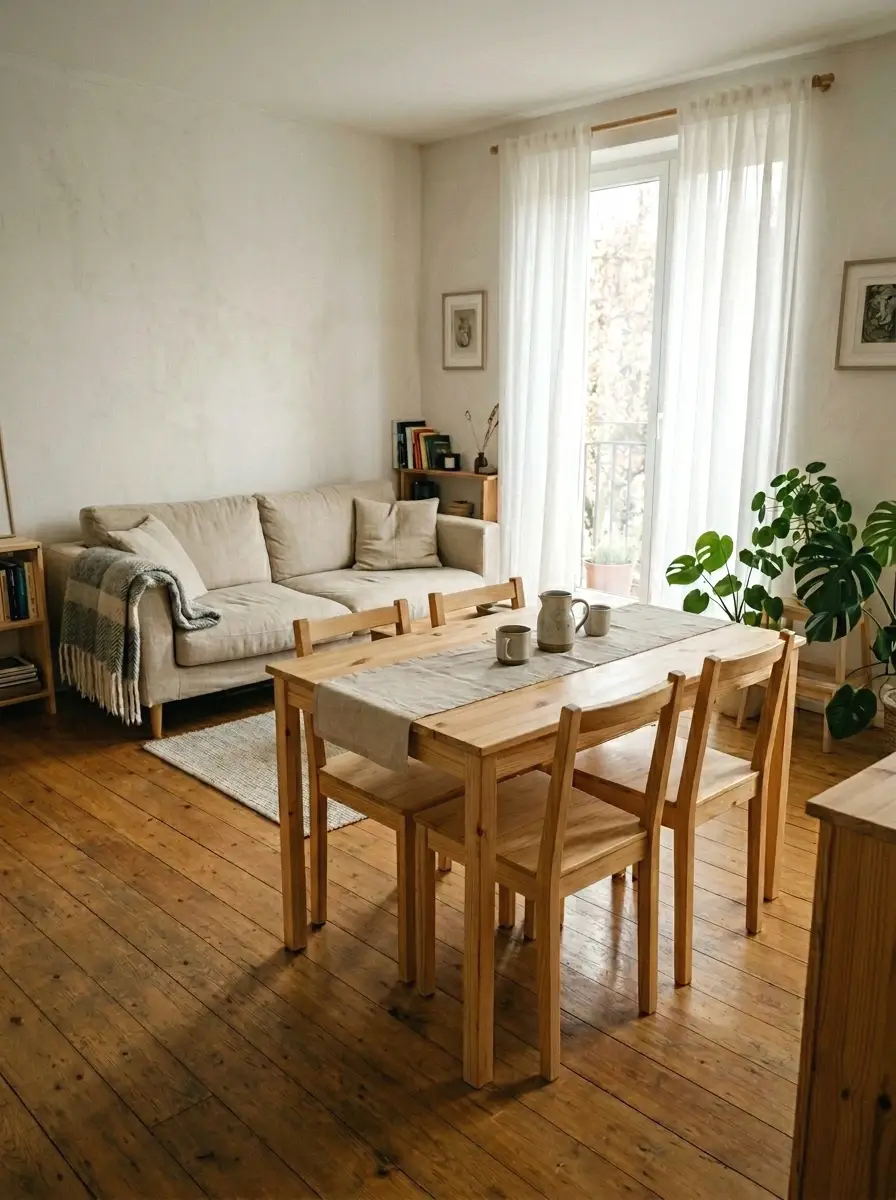
Armchairs at the dining table look nice in a separate dining room. In a combined living and dining space, they eat too much room. Slim side chairs, the kind with four straight legs and no arms, slide fully under the table and shrink the footprint of the dining area by a noticeable amount.
And honestly, for everyday use, armless dining chairs are more comfortable at a table anyway. Your arms rest naturally on the table surface. Look for sets of four slim dining chairs in the $100 to $200 range. Scandinavian-style chairs in natural wood or black metal are widely available and work in almost any combined room.
If that style appeals to you, there’s a whole look at slim chair options for smaller spaces built around that same Scandinavian approach.
14. Mirror on the Wall Behind the Dining Table

A large mirror behind the dining table does the same thing it does in any small room: it makes the space look bigger and reflects light back into the room. In a combined living and dining setup, it also gives the dining area a focal point. Without one, the eating area can feel like an afterthought.
A 30×40 inch frameless or wood-framed mirror costs $40 to $100. Hang it at eye level when seated, which is usually around 48 to 54 inches from the floor to the center of the mirror. If you’re not allowed to drill into walls, a leaner-style floor mirror placed behind the table works just as well.
More Ideas:
15. Bring in One Tall Plant to Break Up the Space

A floor plant, something in the 4 to 6 foot range, placed at the edge of the dining zone or in the corner between the two areas, does a lot of visual work. It signals a transition between spaces without using any wall or floor area. It also adds a living element that softens a room full of hard furniture edges.
Fiddle leaf figs, monstera, and snake plants are the usual options. Snake plants are the most low-maintenance and grow well in lower light. A real plant in a ceramic pot costs $30 to $80 depending on size. If you genuinely cannot keep plants alive, a high-quality faux in a real pot from $40 to $70 looks fine from a normal distance.
16. Choose a Table With Open Legs, Not a Solid Base

Tables with a solid pedestal base or a big boxy base make a combined room feel heavier than it needs to. Tables with four slim legs, or trestle legs, let light pass through underneath and make the floor space read as more open. This is a small detail that makes a surprisingly big difference in tighter rooms.
(Took me ages to figure this out.) The visual weight of furniture matters as much as its actual footprint. A 60-inch table on four tapered legs looks lighter than the same size on a thick pedestal. Look for this specifically when shopping. It’s usually not priced differently, so there’s no reason not to prioritize it.
17. Add a Small Bookshelf or Open Shelving Unit as a Divider

An open bookshelf, around 30 to 36 inches tall and 12 inches deep, placed perpendicular to the sofa can create a soft room divider between the living and dining areas. It doesn’t block sightlines completely, which keeps the room feeling open, but it does create a sense of separation that flat furniture arrangement alone can’t.
Style the shelves with a mix of books, small objects, and one or two plants. Avoid filling every shelf so the piece stays visually light. A solid bookshelf at this size costs $60 to $120. The IKEA KALLAX in a 2×4 configuration runs about $80 and works well for this exact use.
18. Use Woven or Rattan Dining Chairs for Visual Texture
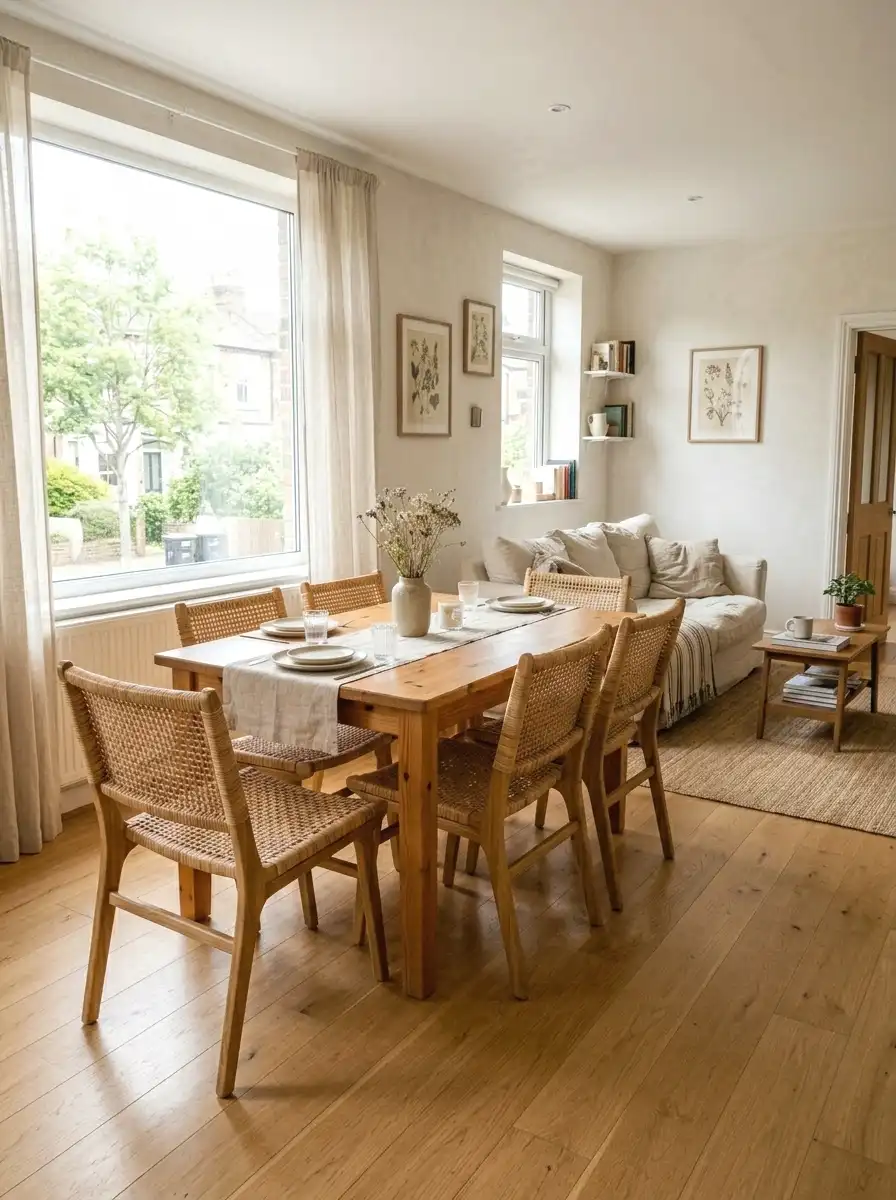
All-wood or all-upholstered chairs in a combined room can make everything feel flat. Rattan or woven dining chairs add texture that reads differently from the typical sofa fabric and wood tones in the living area. That contrast helps the two zones feel distinct even when they share the same open floor plan.
Rattan side chairs are widely available now and not as expensive as they used to be. A set of two runs $80 to $150. Four chairs from $160 to $280. They’re also lighter in weight than wood or metal chairs, which makes rearranging easier. White or natural rattan works in most color palettes without clashing.
More Ideas:
19. Keep the Walkway Clear at All Times
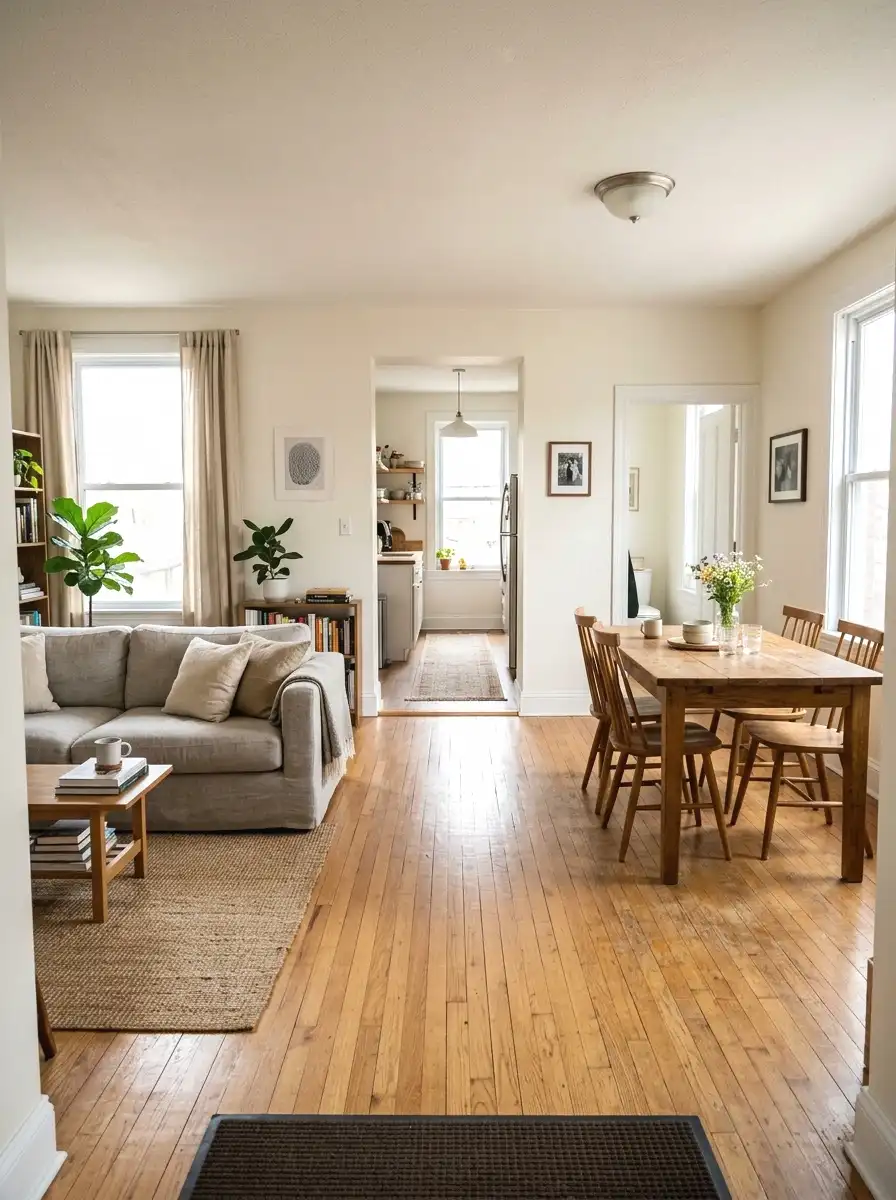
This is the one rule that overrides every other layout idea on this list. The path from your entry to your kitchen or hallway needs to stay clear. At least 36 inches wide. No exceptions. If any furniture arrangement blocks that path, it’s the wrong arrangement no matter how good it looks in a photo.
Walk the room before you commit to any layout. Tape out the furniture on the floor and physically walk through it at a normal pace. If you have to turn sideways anywhere or step around something, the layout isn’t working. Fix the path first, then work on making it look good. The best-looking layout that you can’t walk through isn’t a layout at all.
Final Thoughts on Living Room With Dining Table Layout
You’ve got 19 real ideas here, not mood board fantasies. The through-line across all of them is this: zone separation, walkway clearance, and visual continuity. Nail those three things and the combined room works. Get one wrong and the whole space feels off no matter how much you spend on furniture.
Start with the walkway. Walk your room today and see if you can get from the entry to the kitchen without turning sideways. If you can’t, that’s your first fix. Move whatever is blocking it before you change anything else.
If you want more ideas like these, homelypop.com covers a lot of real-home layout and decor topics with the same approach: honest, specific, and actually doable on a normal budget.
There are also some apartment-specific layout ideas worth trying at home if your space is on the smaller or rental side.