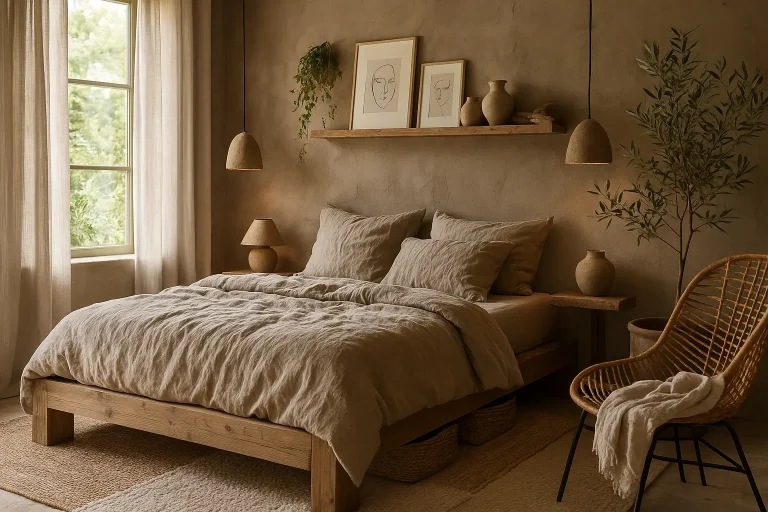
20 Multilevel Kitchen Island Ideas That Work in Real Homes
Your kitchen island is doing too much on one level and not enough overall. You cook, prep, eat, and pile stuff there, and it all competes for the same flat surface. It’s messy and it doesn’t have to be.
This list covers 20 multilevel kitchen island ideas pulled from real homeowner forums, kitchen renovation threads, and actual build projects. Each idea was chosen because it solves a specific space or function problem. You’ll find options spanning roughly $100 to $300, with a mix of DIY builds, prefab upgrades, and smart add-ons. Some are renter-friendly. Some need a drill.
This is for people with a working kitchen who want it to function better without gutting it. If you’re mid-renovation with a $10,000 budget, this isn’t your list. But if you want a real upgrade without calling a contractor, you’re in the right place.
By the end, you’ll know exactly which multilevel setup fits your kitchen and what it’ll actually cost you.
If you’re also thinking about a broader refresh, there are some smart ways to rethink your cooking space without overspending.
What to Know Before You Start a Multilevel Kitchen Island
- A second level raises the eating surface to bar height, typically 42 inches versus standard 36-inch counter height.
- Measure your kitchen clearance first. You need at least 42 inches on all sides for traffic flow.
- Most prefab multilevel islands run $150 to $280. Custom builds cost more but fit odd spaces.
- The raised tier blocks the cook’s view of guests unless it’s open-shelf style. Plan for that.
- Attaching a raised section to an existing island often just needs four bolts and a drill.
- Overhang on the eating tier needs at least 12 inches for knee clearance when seated.
- Seal wood tiers annually. Unsealed wood near a prep zone warps within one year.
- Electrical outlets in islands must be GFCI-protected per code. Plan cord management early.
1. Add a Raised Breakfast Bar Tier to an Existing Island
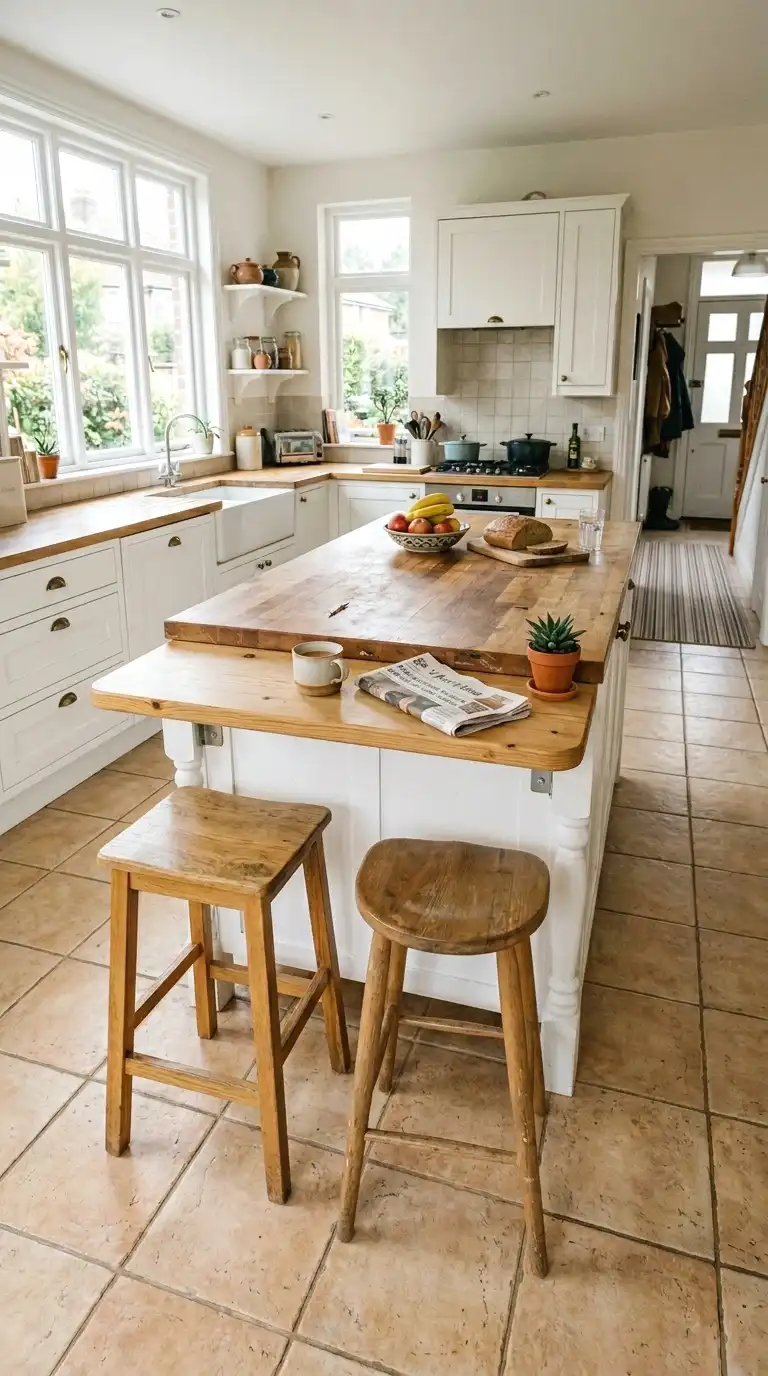
Your flat island can grow a second level without replacing the whole thing. A bolt-on raised bar shelf, usually a butcher block or painted MDF panel on legs, sits at 42 inches and creates a dedicated eating zone while the lower surface stays clear for prep. It’s one of the most popular fixes on renovation forums and for good reason.
When I tried this in my own space, I used a 12×48-inch pine board on hairpin legs bolted into the side of my existing island. Total cost was around $65. It added seating for two without touching the prep zone. The separation between cooking and eating made the whole kitchen feel less chaotic, which I did not expect from one $65 piece of wood.
2. Use a Freestanding Cart with a Built-in Upper Shelf

So here’s the thing about freestanding kitchen carts: the ones with a built-in upper shelf tier are underrated in every way. You get two working levels, wheels for flexibility, and zero installation drama. They’re perfect for renters who can’t drill. Prices start around $120 for solid options at IKEA or Amazon.
Look for carts where the upper shelf is at least 10 inches deep. Shallower than that and it’s only useful for spice jars. A 10-inch depth holds a small appliance, a cutting board standing upright, or a full row of containers. The lower surface stays at standard counter height for actual prep work. Two levels, zero commitment.
If you’re serious about the eating side of your island, it’s worth looking into counter height seating that actually works for different kitchen sizes.
More Ideas:


3. Build a Simple Waterfall Tier with Concrete Board

The waterfall look, where the counter material continues down the side in one unbroken piece, can be faked at low cost using fiber cement board and a coat of concrete paint. You add a raised side panel to one end of the island that creates a visual second level and a small hidden shelf below it. Materials run about $40 to $60.
This one takes a Saturday and basic tools. Cut the cement board to size, attach it to the island side with construction adhesive and screws, then paint with concrete-look paint from any hardware store. It doesn’t actually add a functional upper tier, but it adds a visual one that makes the island look more expensive and custom. Sometimes that matters as much as the function.
4. Install a Hanging Pot Rail Above One Section

Here’s a version of multilevel that goes up instead of out. A ceiling-mounted or cabinet-mounted pot rail directly above one end of your island creates a functional upper zone for hanging cookware. It opens up cabinet space and makes the island feel taller and more intentional. Basic rails start at $40.
The key is mounting it at 18 to 24 inches above the counter so pots hang within reach but don’t block your head. If your ceilings are under 8 feet, skip this one. But at 9 feet or higher, it looks really nice and clears a lot of cabinet clutter at the same time. Took me ages to figure out that the mounting height is everything here.
5. Add Open Shelving Below the Counter on One Side

The lower tier doesn’t have to go up. Adding open shelves below the island surface on the seating side creates a second level going down. Pull out one cabinet panel, add two fixed shelves, and suddenly you have visible cookbook storage, basket storage, or a small appliance zone at knee height.
Each shelf runs about $15 to $25 in pine or MDF. Paint it to match and it looks intentional. This works especially well on islands that face the living area because the shelves become a display feature, not just storage. Baskets on those shelves hide mess while still keeping the open look. Real fix, real budget.
For inspiration on how open shelving fits into a cohesive kitchen look, there’s some great open shelving styled for real kitchens worth browsing.
6. Use a Two-Tiered Kitchen Island Cart from IKEA

IKEA’s RÅSKOG and FÖRHÖJA carts are not marketed as kitchen islands but they function exactly like one in small kitchens. The two-tier design gives you a prep level and a lower storage level. They’re sturdy, mobile, and cost $40 to $80. I was skeptical about this one but ended up recommending it more than anything else on this list for studio apartments.
The top tier sits at 35 inches, close enough to standard counter height. The lower tier at about 22 inches holds bulky items like mixing bowls or small appliances. Add a wood board cut to size on top for a real counter feel. That upgrade costs around $20 and makes the cart look like actual furniture instead of a rolling shelf.
If you want more seating without a full rebuild, there are clever options for extending your island with a table attachment.
More Ideas:
7. Mount a Flip-Up Extension on One Side

A flip-up counter extension creates a second working level that folds flat when you don’t need it. It’s mounted on a piano hinge to the side of the island and supported by a folding leg bracket when raised. The raised section sits a few inches higher than the main surface, which naturally separates prep from eating.
Hardware runs about $15 to $25 for the bracket and hinge. A piece of butcher block or painted plywood for the surface adds another $20 to $40 depending on size. Full cost lands around $40 to $60. It’s a smart move in small kitchens where you can’t add a permanent second tier but still want the option when you’re entertaining.
8. Create a Raised Prep Station with a Thick Butcher Block Riser

A butcher block riser, basically a solid wood block 4 to 6 inches tall, elevates one section of your island surface to a higher working level. This is a real ergonomic fix. Chopping and kneading at a slightly higher surface reduces back strain if you’re taller than average. And it visually defines a prep zone separate from the eating zone.
Butcher block risers run $30 to $80 depending on size and wood type. Acacia and bamboo are the cheapest options. Look for one at least 18×24 inches so it’s actually useful. Place it on the prep end, keep the eating end at standard height, and you’ve got two functional levels without any installation.
9. Add a Wine Glass Rack Below the Upper Tier

If you already have or are building a raised eating tier, the underside of that raised section is wasted space in most kitchens. A mounted wine glass rack fills it. The glasses hang upside down from the rack, stems visible, which looks really nice and frees up cabinet space at the same time.
Hanging wine glass racks cost $15 to $35 and mount with screws. Standard racks hold 6 to 12 glasses. Make sure there’s at least 10 inches of vertical clearance between the lower counter and the underside of the upper tier before you commit. This is one of those upgrades that looks like it cost a lot more than it did.
10. Build a Two-Level Island Using Two IKEA KALLAX Units

Two KALLAX shelf units side by side, one standard height and one taller, create a multilevel island when topped with a wood board or butcher block cut to fit. The height difference between the two units becomes your level change. Total cost for two units plus a wood top runs $150 to $220.
This is a popular IKEA hack on homeowner forums and it works well. The cubbies give you open storage on both sides. Put baskets in the lower cubbies for hidden storage. Leave the upper section open for display. Add furniture feet to the bottom for a more built-in look. Anchor both units to the wall for safety before using as a work surface.
More Ideas:
11. Install a Cantilevered Eating Ledge at Bar Height
A cantilevered ledge is a single board that extends from one side of your island at bar height, 42 inches, with no visible support legs. It’s held by heavy-duty brackets hidden inside the island cabinet. It gives you seating for two or three without any extra floor footprint, which matters a lot in small kitchens.
Brackets run $20 to $40 per pair. A butcher block or painted MDF ledge in 12×48 inches costs another $40 to $60. Total project is around $80 to $120. The no-leg design means barstools tuck fully under the ledge, keeping the floor clear. That alone makes the kitchen feel bigger than it is.
12. Use a Rolling Kitchen Island with Adjustable Shelves

Some rolling kitchen islands come with an adjustable shelf that can sit at different heights inside the cart. Setting one shelf at counter level and one at a lower position gives you effective two-level storage and function. These run $130 to $200 at most home goods stores.
Look for ones with a weight rating of at least 50 pounds per shelf. Cheap carts flex under appliance weight and that gets annoying fast. Stainless steel carts hold up better than the powder-coated MDF ones for anything near a sink or stove. Wheels with locking mechanisms are worth paying a bit more for.
13. Add a Raised Spice and Oil Tier at the Back of the Island

A narrow raised shelf at the back of your island, about 4 to 6 inches deep and 4 to 8 inches tall, keeps oils, spices, and small containers off the main prep surface while staying within arm’s reach. It’s a second level, just a small one. And it changes how the whole surface feels.
You can buy a prefab spice shelf for $20 to $40 or make one from a piece of 1×6 pine cut to length. Attach it with L-brackets to the back edge of the island. Paint it to match. Now the prep surface stays clear and everything you reach for constantly is visible and accessible without opening a cabinet.
14. Create a Tiered Island Look with Contrasting Counter Heights via Prefab Inserts

Some kitchen cabinet manufacturers sell prefab inserts that raise one section of an island countertop by 6 to 8 inches. These slot into the cabinet frame and hold a separate counter surface at the higher level. They run $90 to $180 and require basic cabinet hardware skills to install.
The visual result is a clean, built-in two-tier look that doesn’t look like an add-on. The lower tier stays at 36 inches for prep. The upper tier hits 42 to 44 inches for eating or display. Paint both sections the same color and it looks like you paid a lot more for it than you did.
More Ideas:
15. Hang a Floating Shelf Directly Above One End of the Island

A floating shelf mounted to the wall directly above one end of your island creates an upper storage tier that feels like part of the island design. It’s not physically attached to the island, but visually it reads as a second level. Great for open kitchens where the island floats in the middle of the room.
Wall-mounted floating shelves run $25 to $60 depending on material and size. Mount at 18 to 24 inches above the countertop. Any lower and it gets in the way. Use it for cookbooks, a plant, or a small basket of fruit. The vertical element draws the eye up and makes the island feel more designed.
16. Add a Built-In Cutting Board Tier at a Lower Height

Standard counter height is 36 inches, but a pull-out or fixed cutting board at 32 to 33 inches gives you a lower prep tier that’s easier on the back and shoulders for extended chopping. It’s a second level going down, not up, and it’s more ergonomically useful than most people realize.
A slide-out cutting board insert with a wood board runs $30 to $60. It fits into an existing drawer opening in the island cabinet. No major carpentry needed. Pull it out when you’re prepping, push it back in when you’re done. And the main surface stays clear for plating and serving.
Islands with built-in cabinet layouts offer even more pull-out prep surfaces worth considering if you want to go further.
17. Build a Two-Level Island with Repurposed Dresser and Countertop

A solid wood dresser with the top drawers removed and a piece of butcher block glued on top makes a usable island. Add a separate raised section using a second, smaller piece of wood on feet at one end and you have a two-level island for $100 to $200 total. It’s a real thing people do and it works.
The dresser body stores everything. The top functions as a counter. The small raised section at one end creates the level change that makes it feel more like a kitchen fixture and less like a piece of furniture sitting in the middle of the room. Seal the top well. Sand the edges smooth. That’s most of the work.
While you’re refreshing the island, it might be a good moment to look at backsplash styles that pull a kitchen together on a similar budget.
18. Use Bar Height Stools to Define the Eating Tier Visually

Sometimes the two-level effect comes from the seating, not the surface. If your island has any overhang at all, even 6 inches, pairing it with counter-height stools at 24 to 26 inches creates a clear visual separation between where you cook and where you eat. The stools define the tier.
Counter stools in that height range run $40 to $80 each. Pick ones with a footrest because people sit more comfortably with a place to rest their feet. Metal stools with a wood seat look really nice in most kitchens and are easy to wipe down. It’s not a structural change, but visually it reads as a two-level setup.
More Ideas:
19. Install Open Shelving on the Side of the Island Facing the Living Room

The side of your island that faces the living area is usually a blank cabinet panel. Replace that panel with open shelving at two or three heights and you’ve added both a visual tiered element and actual storage. It works especially well in open-plan homes where the island divides the kitchen from the living area.
Materials cost $30 to $60 for pine shelves and simple brackets. Paint them the same color as the island base so they look built-in. Use the shelves for books, plants, or baskets. It adds depth to the island, makes the living side of it more interesting, and gives you storage that doesn’t require opening any doors.
If your kitchen opens into a living area, there’s a lot of useful thinking on open-plan rooms that actually flow well.
20. Add a Chalkboard or Whiteboard Panel at a Raised Height

This one is a little different but it earns its place on the list. A raised panel on one end of the island, finished in chalkboard or whiteboard paint, creates both a visual upper tier and a functional message board, meal planner, or grocery list zone. The panel rises above the countertop level, giving you that two-level silhouette.
A sheet of MDF cut to size, primed, and painted with chalkboard paint costs about $15 to $25. Attach it to the end of the island with L-brackets. You get a visual level change, a functional surface, and something that looks intentional. That combination is hard to beat at that price.
Final Thoughts on Multilevel Kitchen Island Ideas
You’ve got 20 real options here, from bolt-on breakfast bar tiers to repurposed dresser islands to simple raised spice shelves. The through-line in all of them is the same: separating your prep zone from your eating zone makes the whole kitchen work better. That one change, whatever form it takes, is what you’re actually after.
Pick the smallest version that fits your space and budget and do that first. If you’re renting, start with the two-tier IKEA cart or the raised butcher block riser. No drilling, no landlord conversations, real result. One change this weekend.
If you want more real-budget kitchen ideas and home projects like this, homelypop.com has a lot more where this came from.
One popular next step for people who finish the island is looking into more real-budget home upgrades like this for the rest of the kitchen.