22 Green Kitchen Cabinet Ideas for Real Homes on a Real Budget
Your kitchen cabinets are fine. They’re just not yours. You repaint a wall, add a rug, swap out the hardware, and still nothing feels right. The cabinets are the problem and you know it. Green Kitchen Cabinets
This list covers 22 green kitchen cabinet ideas researched across real homeowner forums, renovation threads, and budget design communities. Each idea was picked because it works in actual kitchens, not showrooms. From $40 peel-and-stick contact paper fixes to a proper $200–$300 cabinet repaint, there’s something here for every situation.
This is for renters and homeowners spending between $100 and $300. It’s not for people planning a full kitchen gut renovation with a designer. But if you want real, visible change without blowing your savings, these ideas will get you there.
If you’re weighing bigger changes alongside the cabinet color, there are some solid ways to rethink your whole kitchen without hiring a contractor.
By the end, you’ll know exactly which green shade fits your kitchen, which approach fits your budget, and what to do first this weekend.
What to Know Before You Start Painting Kitchen Cabinets Green
- Green reads differently at night. Always check your paint sample under kitchen lighting, not daylight.
- Darker greens like hunter or forest can shrink a small kitchen visually. Sage and mint expand it.
- Repainting just the lower cabinets costs 40–50% less than doing upper and lower together.
- Cabinet-specific paint (not wall paint) stays hard and wipeable. It costs $15–$25 more per quart but lasts years longer.
- Most people forget to sand between coats. Skipping this is what causes that bubbly, peeling finish later.
- Remove cabinet doors before painting. It’s faster, the finish is smoother, and you won’t get drips on hinges.
- Degreaser is a must before any kitchen paint job. Even “clean” cabinet surfaces have cooking grease embedded in them.
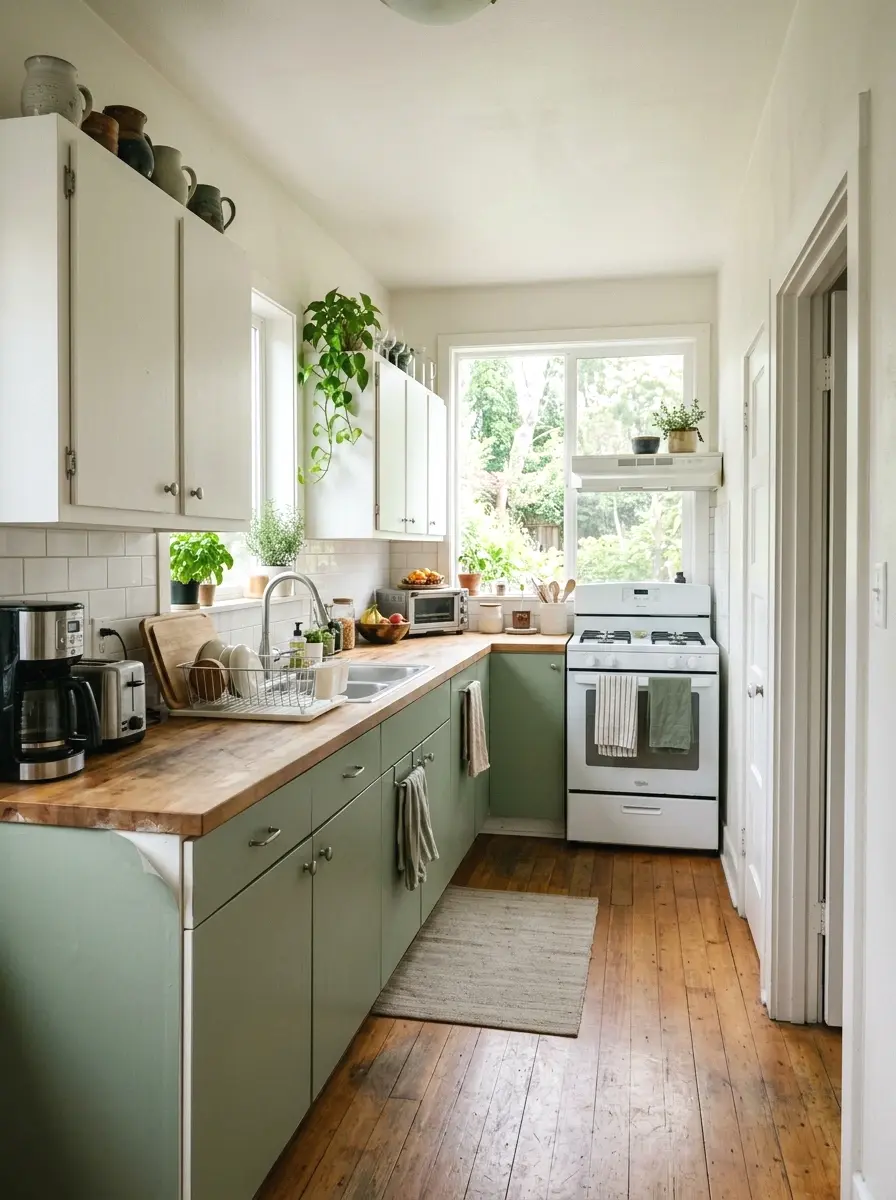
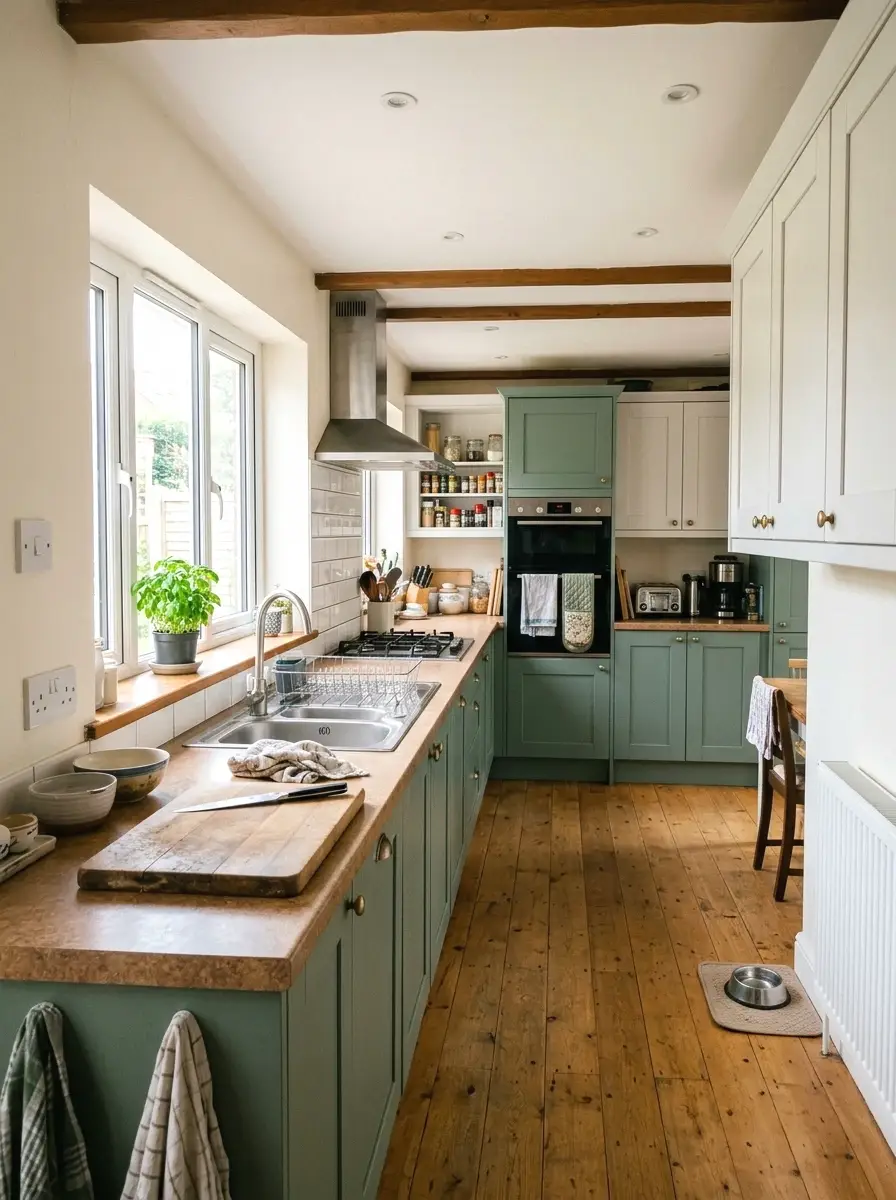
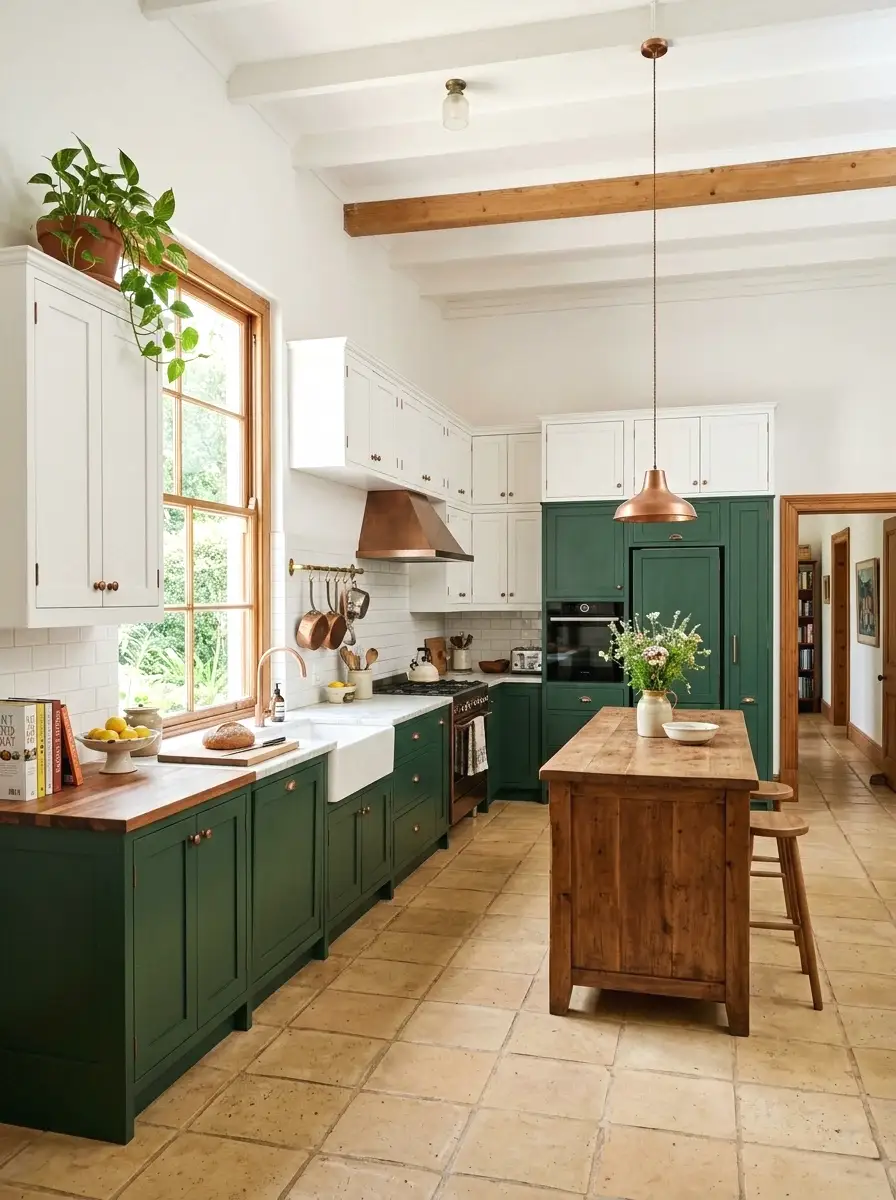
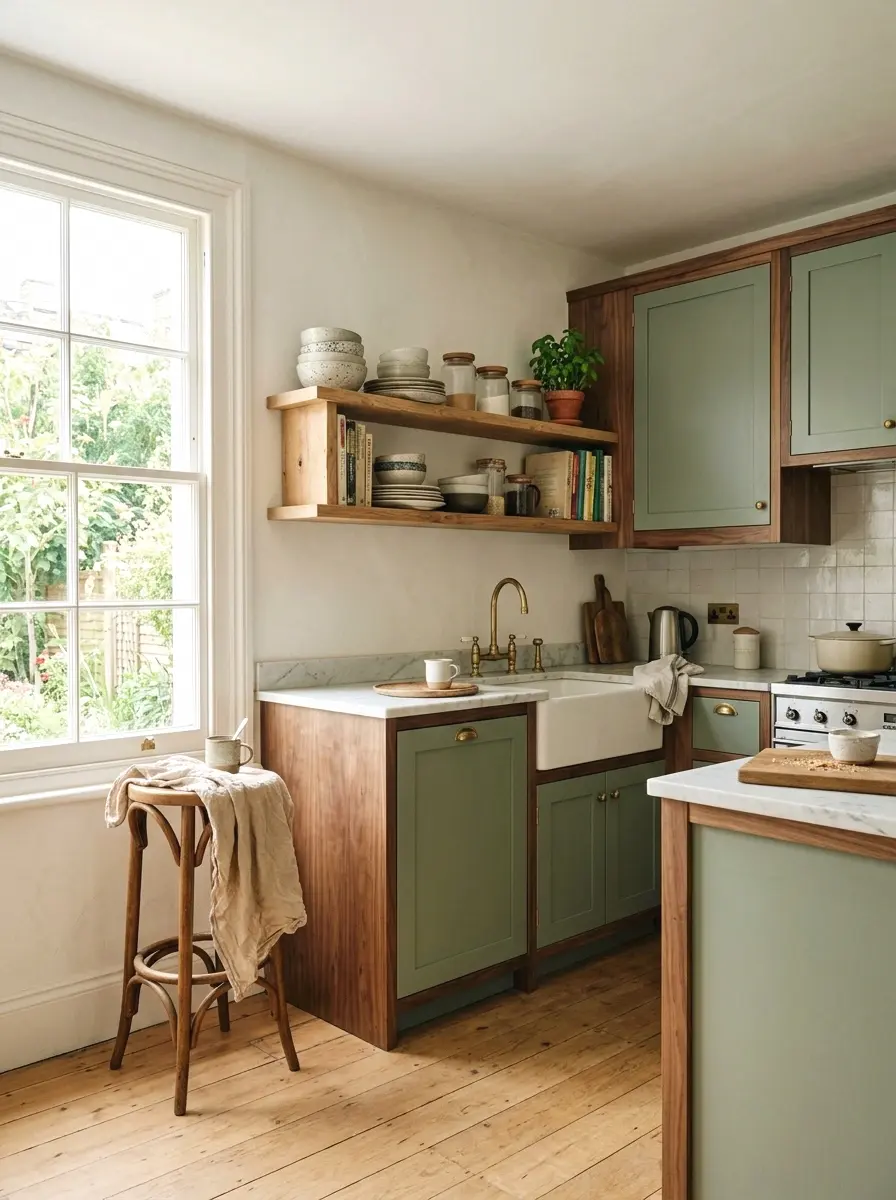
1. Sage Green Lower Cabinets Only
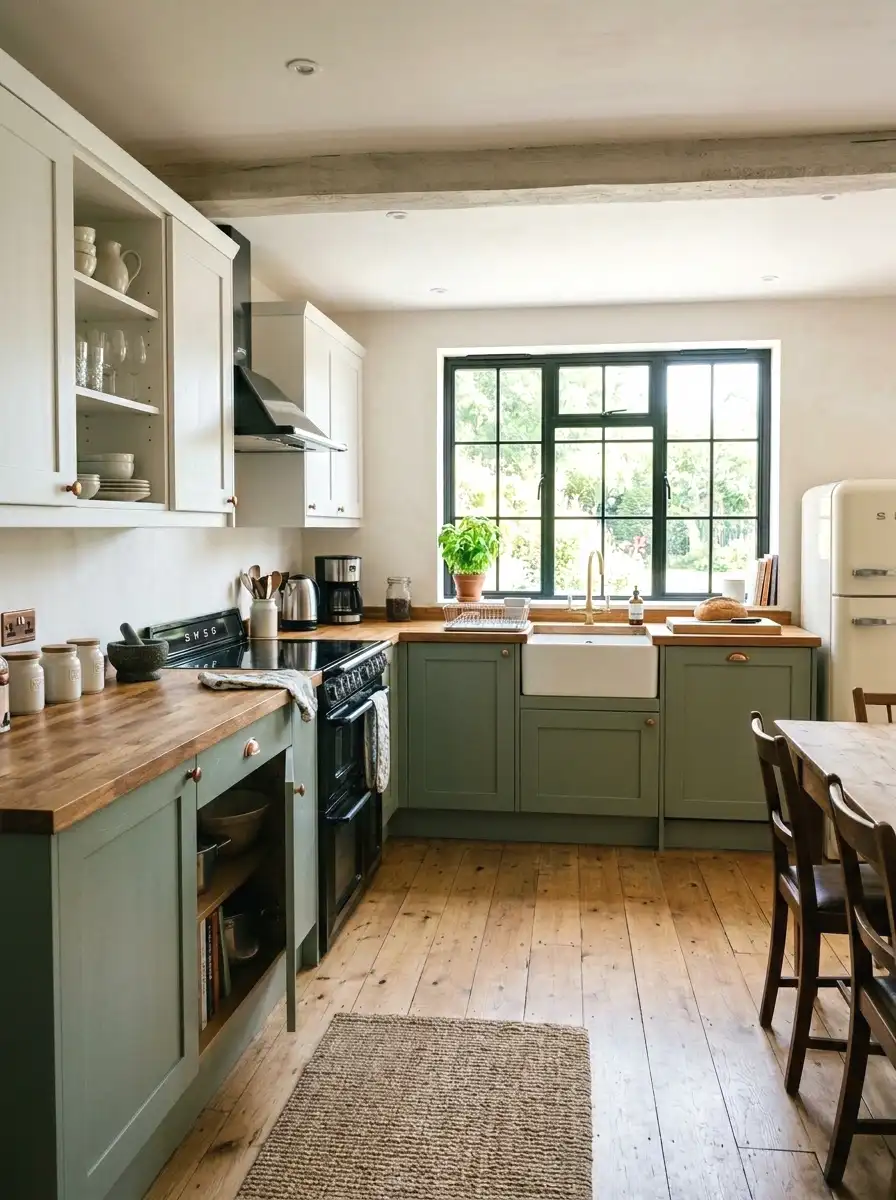
Sage is the most forgiving green you can pick. It reads as warm in natural light, soft in evening light, and pairs with almost every countertop color already in your kitchen. Starting with just the lower cabinets keeps the space from feeling heavy and cuts your paint and time investment roughly in half.
When I tried this in my own space, I used about one quart of cabinet-specific paint for four standard lower cabinet doors. The whole project ran around $85 including the primer. Two coats, light sanding in between, and the result looked like something from a renovation magazine. The upper cabinets stayed white and the contrast actually made the room feel taller.
If you’re keeping the upper cabinets white, it’s also worth thinking through the paint colors worth trying on walls to make sure everything reads cohesively.
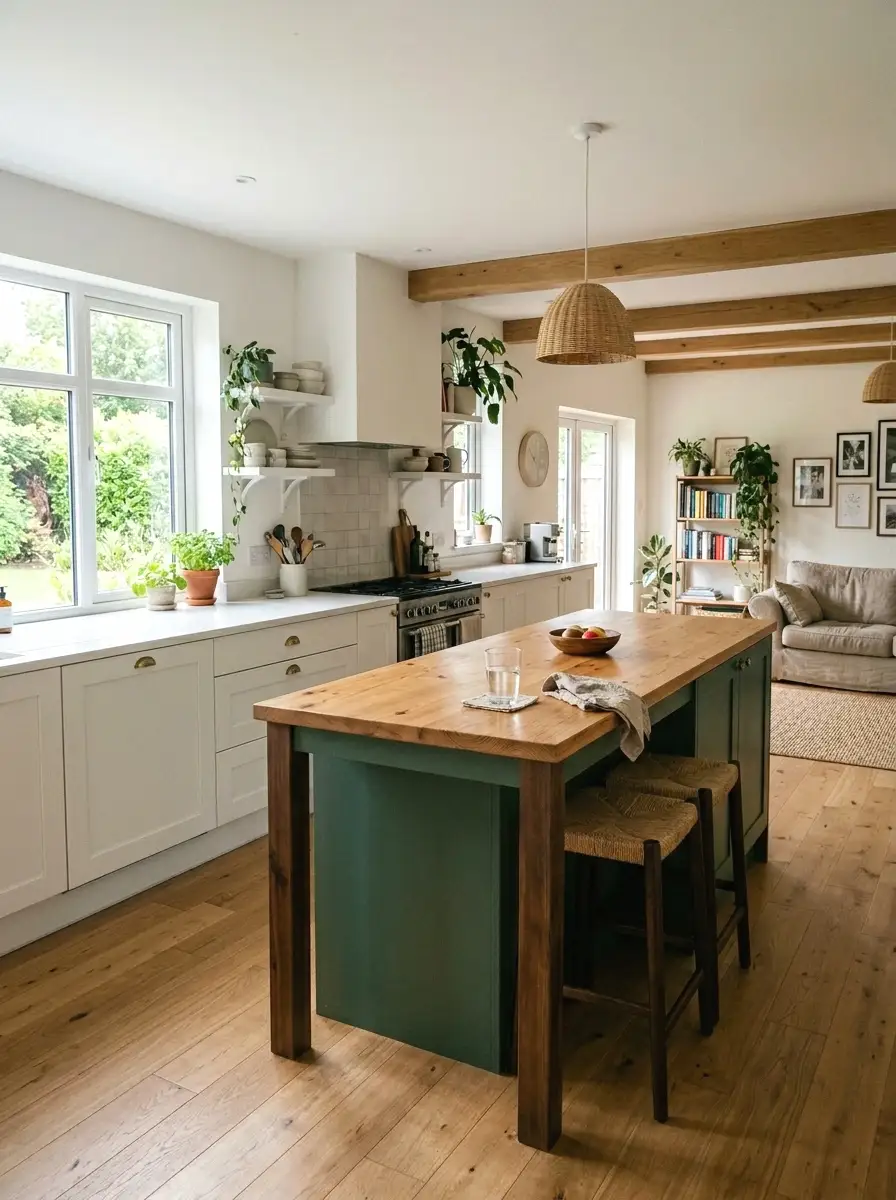
2. Forest Green Island Cabinet
You’ve probably seen this look all over renovation accounts lately, and it earns the attention. Painting just the kitchen island a deep forest green while keeping surrounding cabinets white or cream is one of the smartest moves you can make in a budget kitchen refresh. It creates a focal point without overwhelming the room.
The island reads like a piece of furniture rather than built-in cabinetry, which is exactly the effect you want. A good quart of dark-toned cabinet paint runs $30–$45. Add $10–$15 for brushes and a small roller, and you’re well under $75 for a change that shifts the entire feel of the kitchen. Pair it with brass or matte black hardware for the full effect.
More Ideas:
3. Peel-and-Stick Green Cabinet Wrap
This one is so underrated, especially for renters who can’t touch their cabinets. Cabinet wrap film in sage or olive green costs $20–$40 for a standard roll and goes on with no tools, no paint, and no landlord permission needed. It mimics the look of painted wood surprisingly well when applied cleanly.
The key is prep. Clean the surface completely, let it dry for at least an hour, then apply from the center outward to avoid air bubbles. A credit card works as a smoothing tool. The wrap peels off clean when you’re done with it, leaving zero residue on most cabinet surfaces. It won’t fool anyone up close, but from three feet away, the look is genuinely solid.
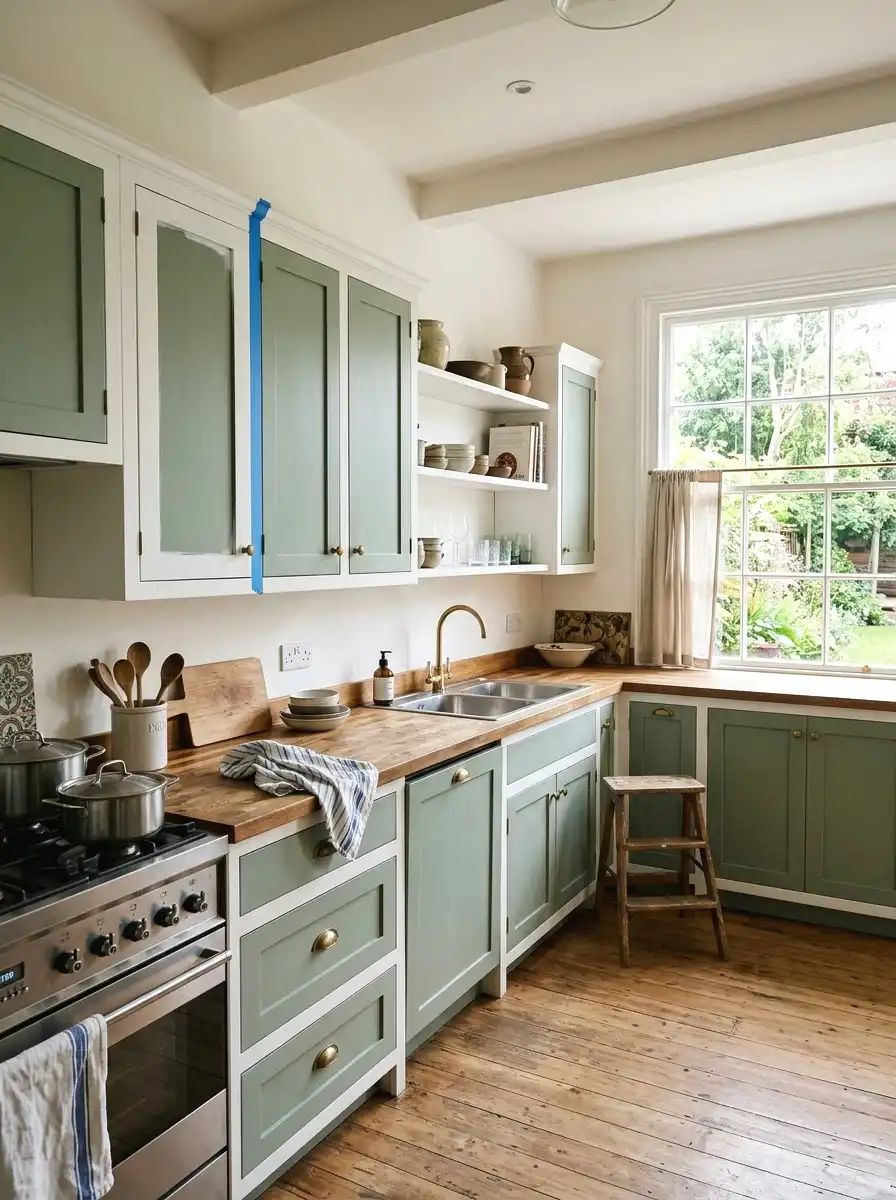
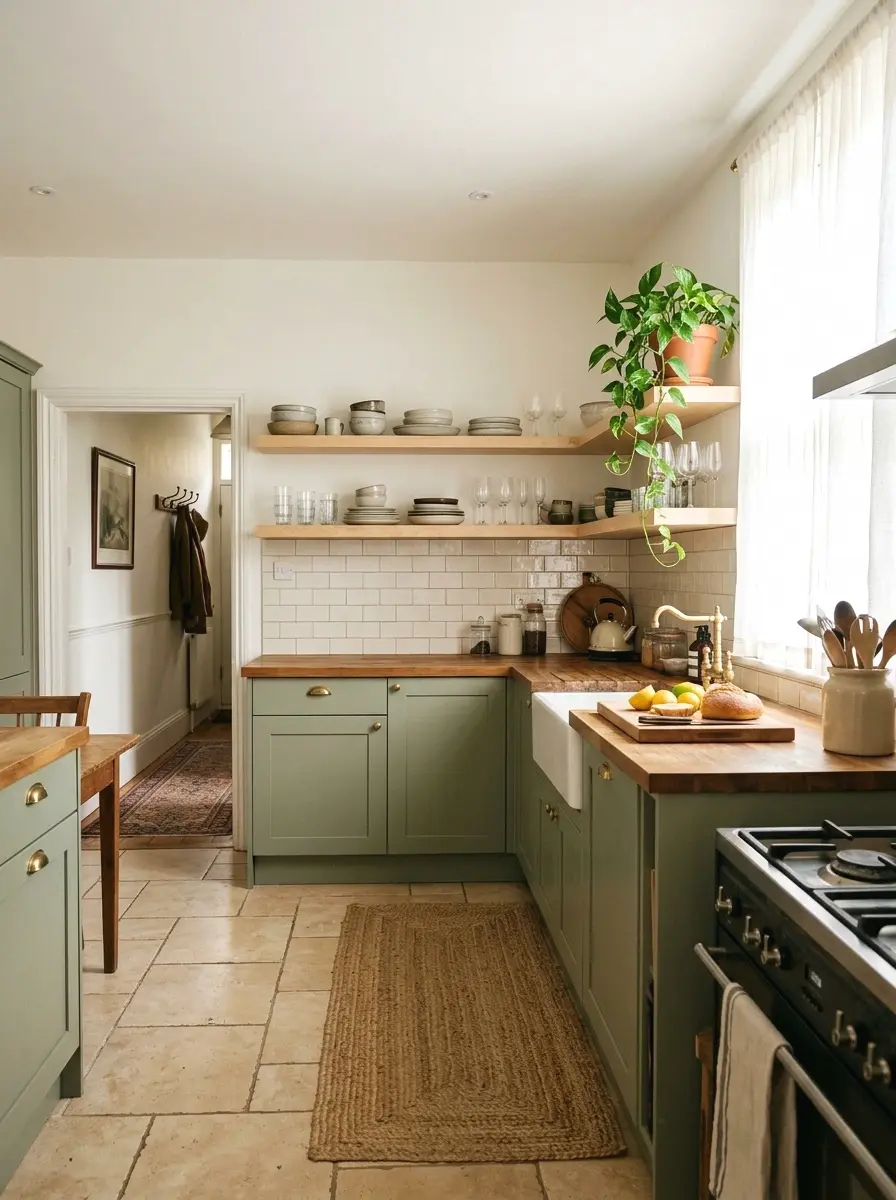
4. Two-Tone Green and White Shaker Cabinets
So here’s the thing about two-tone cabinets: the split has to be intentional. Upper cabinets in soft white, lower cabinets in a medium green like eucalyptus or dusty moss, with the break happening right at the countertop line. This is the most classic version of the look and the hardest to get wrong.
The visual effect is grounding. The green anchors the lower half of the room and the white keeps the upper half open and light. You don’t need matching countertops or a new backsplash to pull this off. It works with existing white tile, butcher block, or laminate surfaces. Budget for two separate quarts of cabinet paint, around $60–$80 total, plus primer if your cabinets are a darker stain.
5. Olive Green Cabinet Paint with Black Hardware Swap
Olive green is earthy and warm without leaning too cool or too yellow. Combined with matte black hardware, it’s one of the best-looking combinations you can achieve in a budget kitchen. The hardware swap alone costs $30–$60 depending on how many cabinet pulls and knobs you’re replacing.
I was skeptical about this one but the contrast works in a way that’s hard to explain until you see it. The black hardware stops the olive from reading as muddy or dated and gives the whole cabinet run a clean, current look. Paint the cabinets first, let them cure for at least 48 hours, then install the new hardware. Getting the order right matters because it protects the new paint finish.
6. Mint Green Cabinets for a Retro Kitchen
Mint is having a genuine moment right now. It’s bright but not loud, and in a smaller kitchen it adds personality without closing the space down. Think 1950s diner energy but grown up. It looks best with chrome hardware, white subway tile, and light wood or butcher block countertops.
If the subway tile behind your cabinets is looking tired, there are some tile styles worth exploring nearby that pair especially well with lighter greens.
The trick with mint is saturation. You want a soft mint, not a toothpaste green. Look for paint chips with gray or cream undertones rather than pure aqua. Benjamin Moore’s Spearmint and Behr’s Breezy are both solid starting points in the $40–$50 range per quart. Mint cabinets also tend to brighten dark kitchens more effectively than any other green shade.
More Ideas:
7. Dark Green Lacquered Cabinet Finish
A high-sheen lacquer finish in deep green reads polished and intentional, and it photographs beautifully if that matters to you. The sheen also makes cabinets easier to wipe down, which is actually a practical benefit in a kitchen. This is one of the few looks that benefits from a foam roller rather than a brush because it produces a smoother, more even surface.
Lacquer-finish cabinet paint costs $45–$65 per quart and is worth every extra dollar. It levels itself as it dries, which hides minor brush marks. Dark green lacquered lowers with polished brass hardware look like something from a Manhattan apartment. Total project cost for standard lower cabinets, including primer and materials, typically lands around $150–$200.
8. Contact Paper Green Cabinet Interior Trick
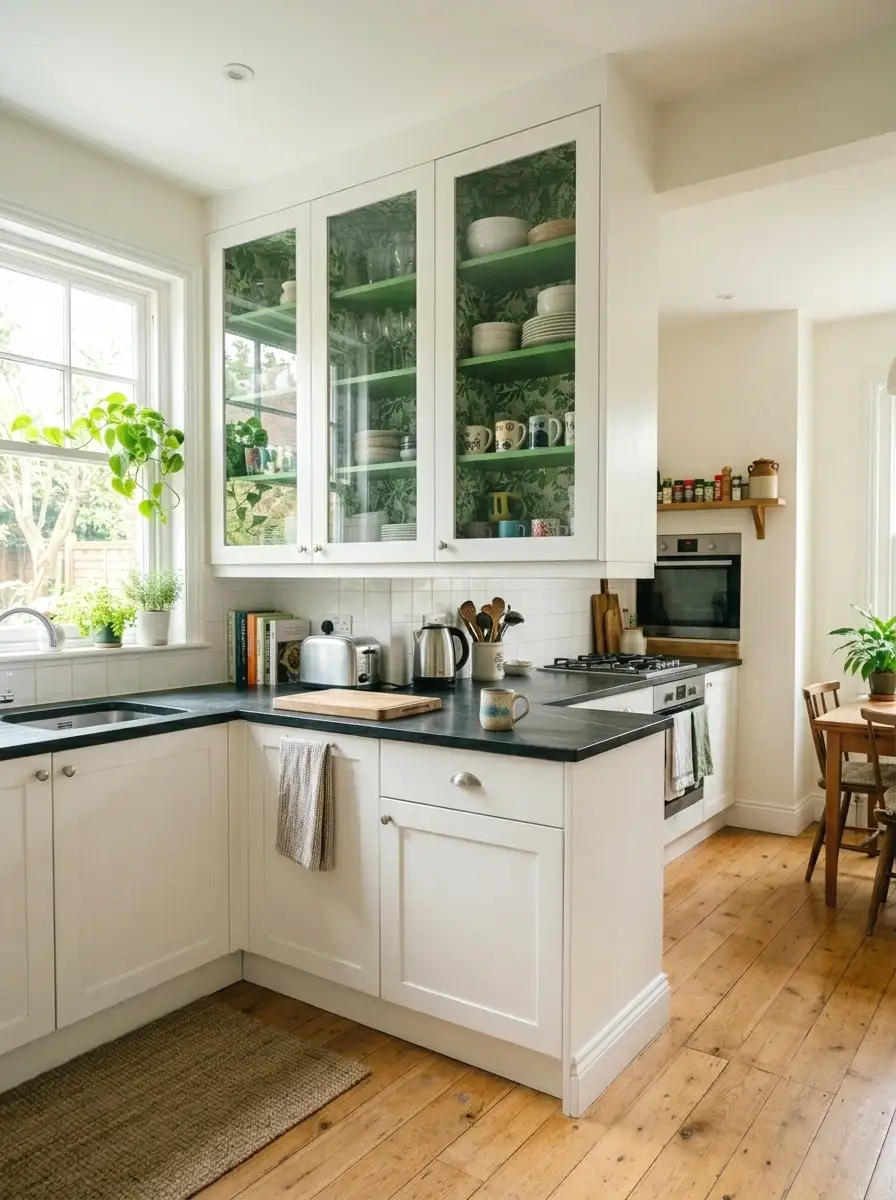
Here’s a move that almost nobody talks about: lining the inside of open-shelf cabinets or glass-front cabinet interiors with green contact paper. You leave the cabinet exterior its original color and add the green only where it’s visible through glass or open shelving. It’s a $15–$25 project that has serious visual impact.
This works especially well in kitchens where the cabinets have glass inserts or are open-shelf style. The green interior makes dishes and glassware pop against the color. And because you’re not painting the exterior, the work is reversible and takes under an hour. Use a smooth finish contact paper rather than textured for the cleanest look.
9. Sage Green Painted Cabinet Doors Only (Keep the Frames White)
This is a very specific version of the two-tone approach, but the detail matters. Paint the recessed panel doors in sage green while leaving the surrounding cabinet frame in white. The result is almost like adding picture frames to your cabinets. The two colors create dimension on a flat surface.
It’s a slightly more precise painting job because you need clean tape lines between the door and the frame. But a steady hand and painter’s tape make it manageable. Each door takes about 30–40 minutes to tape, paint, and clean up. For a standard kitchen of 10–14 cabinet doors, budget a full weekend and around $100 in materials including tape, primer, and paint.
10. Eucalyptus Green with Open Shelving Mix
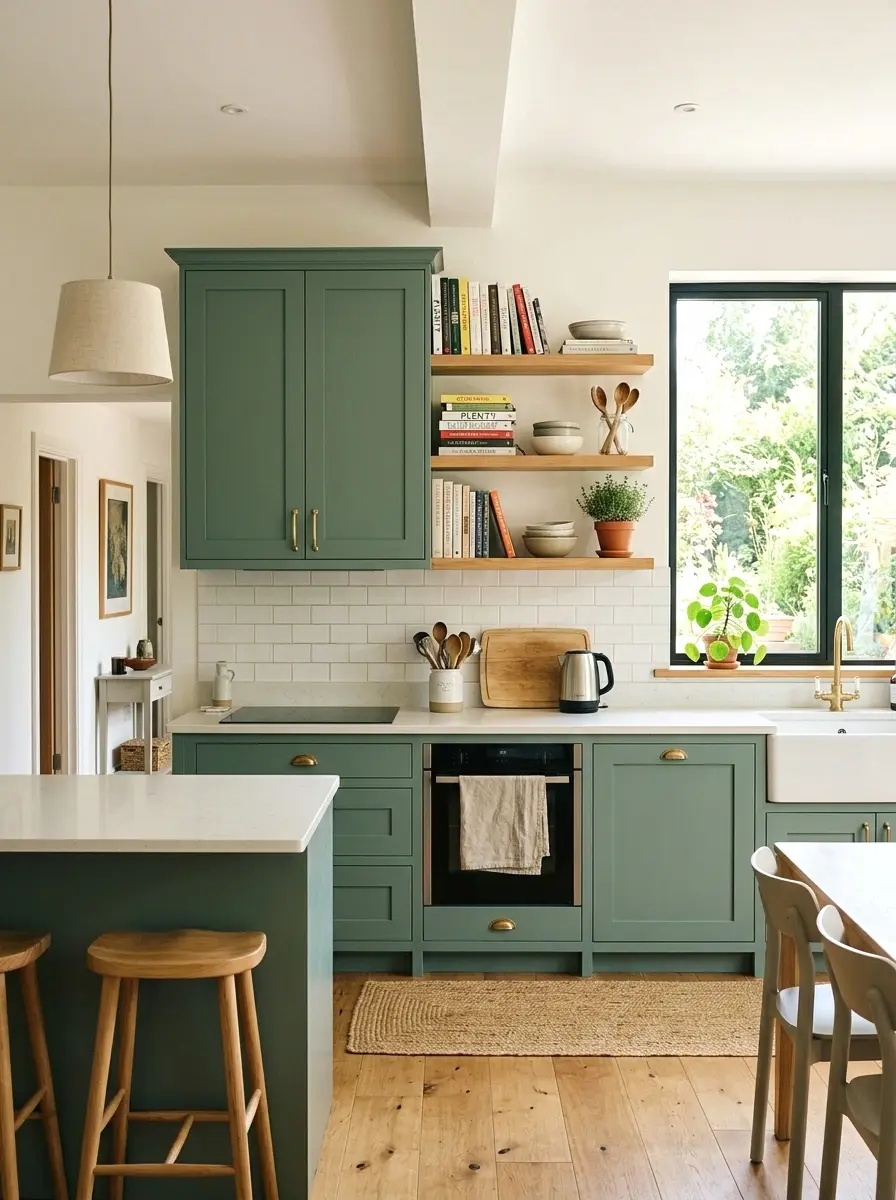
Replacing some upper cabinets with open shelving and painting the remaining upper cabinets eucalyptus green creates an airy, layered kitchen. This is a bigger project, but you don’t have to remove the cabinet doors permanently. You can simply take them off without drilling into anything new, store them, and reinstall them whenever you want.
The floating shelf replacements can be found at hardware stores for $15–$40 each depending on material and length. Eucalyptus is a blue-green shade that reads fresh without feeling cold. It’s a great choice if your kitchen gets a lot of natural light. The mix of open and closed storage also makes smaller kitchens feel larger because the eye moves through the space instead of stopping at a wall of cabinet doors.
More Ideas:
11. Chalk Paint Green Cabinet Makeover
Chalk paint is the most beginner-friendly option for cabinet painting. It requires minimal prep, doesn’t always need primer, and dries quickly between coats. The matte, slightly flat finish it produces looks soft and handmade in the best way. It works on wood, laminate, and even thermofoil cabinets with very little surface prep.
The cost is about $30–$45 per quart for a dedicated chalk paint, and you’ll need a wax or matte sealer on top to protect the finish, which runs another $15–$25. Annie Sloan Antibes Green and Rust-Oleum’s Sage chalk paint are both genuinely good starting points. Total project cost for a small kitchen lands around $80–$120 depending on how many cabinets you’re covering.
12. Hunter Green Cabinets in a High-Ceiling Kitchen
Hunter green is bold and it needs space to breathe. In a kitchen with high ceilings and plenty of natural light, it’s one of the most dramatic and satisfying color choices you can make. It reads rich without being fussy and works with brass, copper, or matte black hardware.
The ceiling height matters here. In a standard 8-foot ceiling kitchen, hunter green can feel a bit much on all the upper and lower cabinets together. But on lower cabinets only, or in a kitchen with 9-foot-plus ceilings, it has room to be itself. Budget $150–$250 for a full lower cabinet repaint in hunter green using a premium cabinet enamel. The deep pigment usually needs three coats for full coverage, which means more paint and more time.
13. Green Cabinet Hardware Upgrade Without Painting
Sometimes the cabinets themselves are fine and the hardware is the problem. Swapping in green-toned hardware, like patina brass, verdigris, or dark green ceramic pulls, is a $40–$80 project that adds a subtle nod to the green kitchen trend without any painting at all. It’s also completely reversible.
Green ceramic cabinet pulls are trending right now and are easy to find online for $2–$5 per pull. For a kitchen with 20 knobs and pulls, you’re looking at $40–$100 total. The install takes a screwdriver and about an hour. Keep the old hardware in a bag in case you ever want to put it back. This is the lowest-commitment version of the green kitchen update and it genuinely works.
14. Painted Green Cabinets with White Grout Refresh

This one is about the combination, not just the cabinets. Painting lower cabinets a soft green and then re-grouting or using a grout pen to whiten the existing tile backsplash at the same time makes the whole kitchen feel new. The two projects together cost $100–$150 and the impact is much bigger than doing either one alone.
A grout pen costs $8–$15 and covers a standard backsplash in about 45 minutes. When the grout looks fresh and bright, the green cabinets read cleaner and more intentional. Dirty or gray grout makes any cabinet color look off. Do the grout last, after the cabinet paint has fully cured, so you don’t risk getting cabinet paint on fresh grout.
If you want to push the refresh even further, there are some backsplash ideas that stay under budget and work well alongside freshly painted green cabinets.
More Ideas:
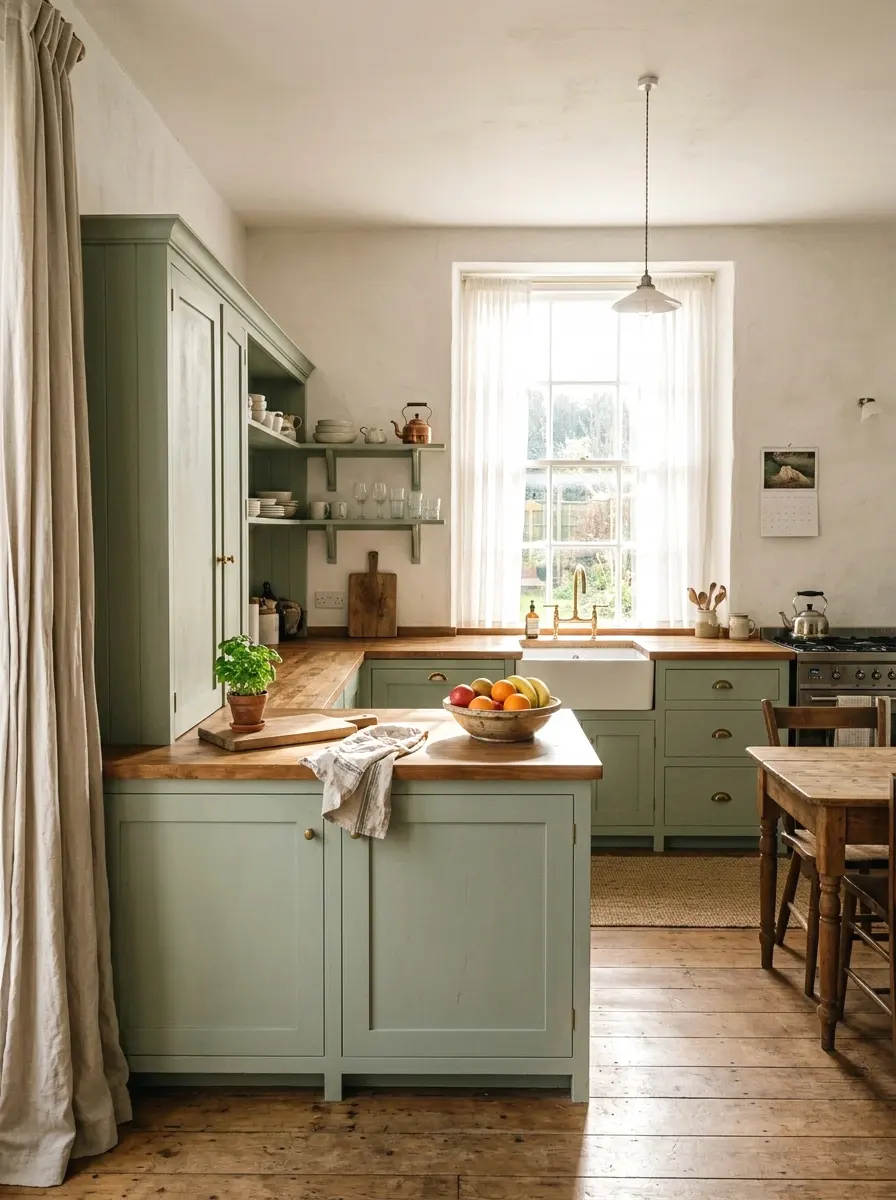
15. Green Cabinet Stain Instead of Paint
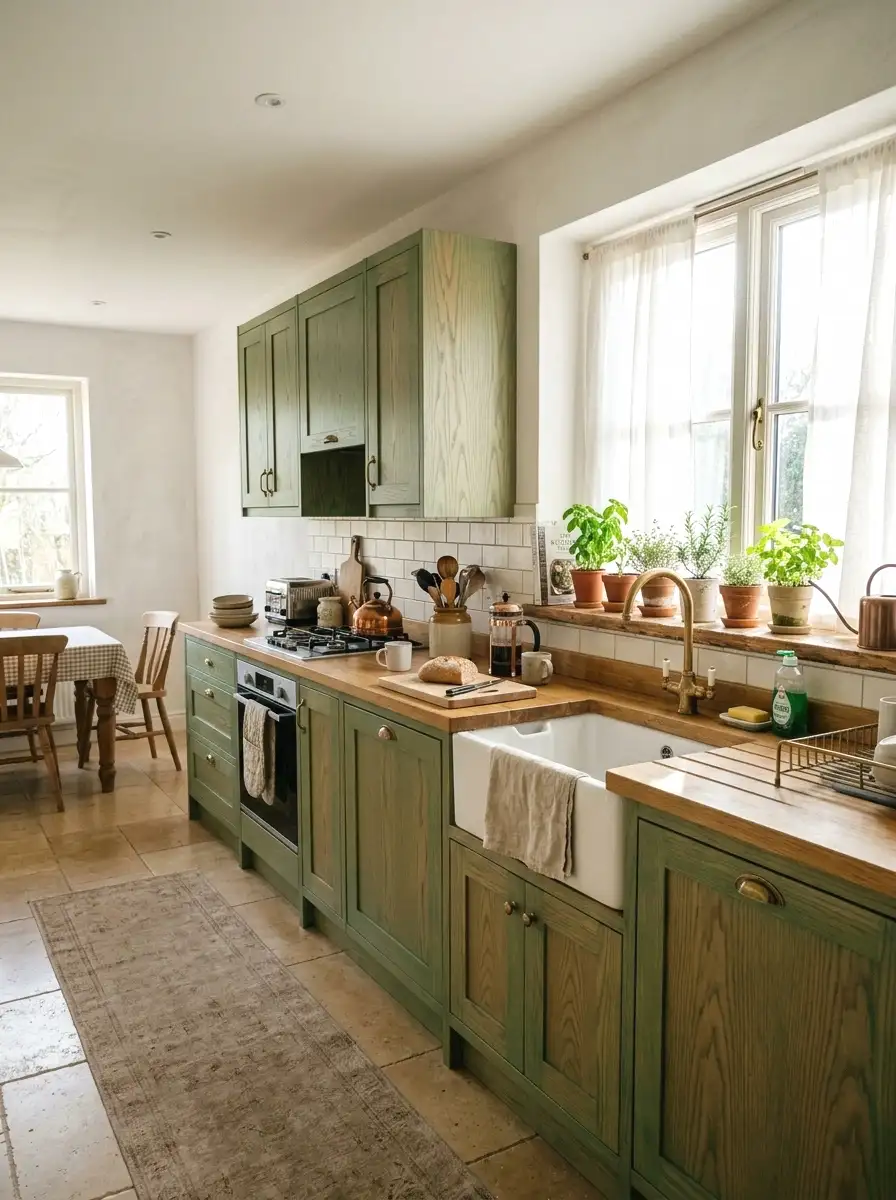
If your cabinets are solid wood and the grain is worth showing off, a green stain instead of a solid paint color keeps the wood texture visible while still adding color. It’s a softer, more natural look than a painted finish and particularly good for kitchens with a farmhouse or nature-forward style.
Green wood stains are less common on store shelves but Minwax and Varathane both make tinted stains that can be mixed to a green tone at most hardware stores. A quart runs $20–$35. The result is semi-transparent, meaning the green reads through the grain rather than covering it. It’s a different look from painted cabinets, quieter and more textured, and some kitchens are better served by this approach.
This natural, textured approach pairs especially well with farmhouse-leaning backsplash options to consider if you’re updating more than just the cabinets.
16. Moody Dark Green Kitchen Peninsula Cabinets
A peninsula is its own natural design element, separated from the main cabinet run by a walkway or counter overhang. Painting just the peninsula cabinets in a moody dark green, think deep juniper or pine, while keeping the main cabinets white creates a two-zone kitchen that looks planned and considered.
This works especially well in open-concept layouts where the kitchen connects to a dining or living area. The dark green peninsula acts as a visual anchor that defines where the kitchen ends. Total cost for repainting peninsula cabinets is usually $60–$100 in materials. The visual payoff is well above what the price suggests.
17. Removable Wallpaper on Cabinet Exteriors
This is technically not paint, but the visual effect is close enough that it belongs here. Removable wallpaper in botanical green patterns, vintage tile prints, or solid sage colors can go directly on cabinet exteriors and lifts off cleanly. A standard roll covers about 20–25 square feet and costs $25–$50.
The best patterns for cabinets are small-scale, not large. Big pattern repeats look fine on walls but get cut off awkwardly on cabinet doors. Look for small repeat geometric or floral patterns in green that read as solid from a normal viewing distance but have detail up close. It’s a slightly experimental approach and it won’t look exactly like painted cabinets, but in the right kitchen it’s a genuinely interesting move.
18. Emerald Green Accent Cabinet in a Neutral Kitchen
Pick one cabinet. Just one. A tall pantry cabinet, a corner unit, or a single upper cabinet directly above the stove. Paint it emerald green and leave everything else exactly as it is. This is the most conservative entry point into the green kitchen idea and the easiest to live with long term.
Emerald green is saturated and jewel-bright. Used on one cabinet, it reads as a deliberate design choice rather than a paint experiment. One quart of cabinet paint is more than enough for a single unit and costs $30–$45. The rest of the cabinet hardware, countertops, and walls stay untouched. If you love it, you have a clear path to expanding it. If you change your mind, it’s just one cabinet to repaint.
More Ideas:
19. Green and Natural Wood Mixed Cabinet Finish
This look pairs painted green cabinet doors with natural wood-tone cabinet frames or open wood shelving. It draws from the Japandi style, that mix of Japanese minimal and Scandinavian warmth, where painted surfaces and raw materials sit next to each other intentionally. The green grounds the space and the wood keeps it from feeling stark.
The easiest version of this is painting the cabinet doors while leaving the frame in its original wood stain. You get a significant visual change without painting every surface. Keep the green on the muted side, sage or eucalyptus, so it complements rather than fights the wood. This look ages well because the natural wood element keeps it from feeling too trend-specific.
If you like finishes that hold up over time, there’s a minimal style that ages just as well by leaning into a single consistent tone throughout the kitchen.
20. Green Cabinet Paint with Penny Tile Hardware Upgrade
(took me ages to figure this out) The hardware you choose after painting has as much visual impact as the paint color itself. After painting cabinets in any green shade, swapping to handmade ceramic or clay-finish knobs in cream, rust, or warm white makes the green read earthy and intentional rather than trendy.
Ceramic and clay hardware is available on Etsy and at kitchen stores for $3–$8 per piece. For 20 handles and knobs, you’re spending $60–$160 total depending on the maker. The handmade quality is visible up close and it adds a level of finish to painted cabinets that standard pulls don’t. Measure your existing hardware holes before ordering so the new pieces align without new drilling.
21. Green Cabinet Refresh with New Open Shelving Above
Instead of repainting upper cabinets, remove them entirely and replace them with a few open shelves in natural wood or white. Then repaint the lower cabinets in any green shade you like. The open upper space makes the kitchen feel bigger and draws attention down to the green lower cabinets where you want the focus.
Removing upper cabinets sounds dramatic but most upper kitchen cabinets are attached with 4–8 screws per unit and come off in under 10 minutes. Patch the screw holes, hang floating shelves, and you’ve fundamentally changed the architecture of the kitchen without any structural work. Budget $50–$100 for shelves and brackets plus $60–$80 for the lower cabinet repaint.
Once the uppers are down, open shelving in natural wood tones that ground the space can make the whole lower cabinet color read more intentional.
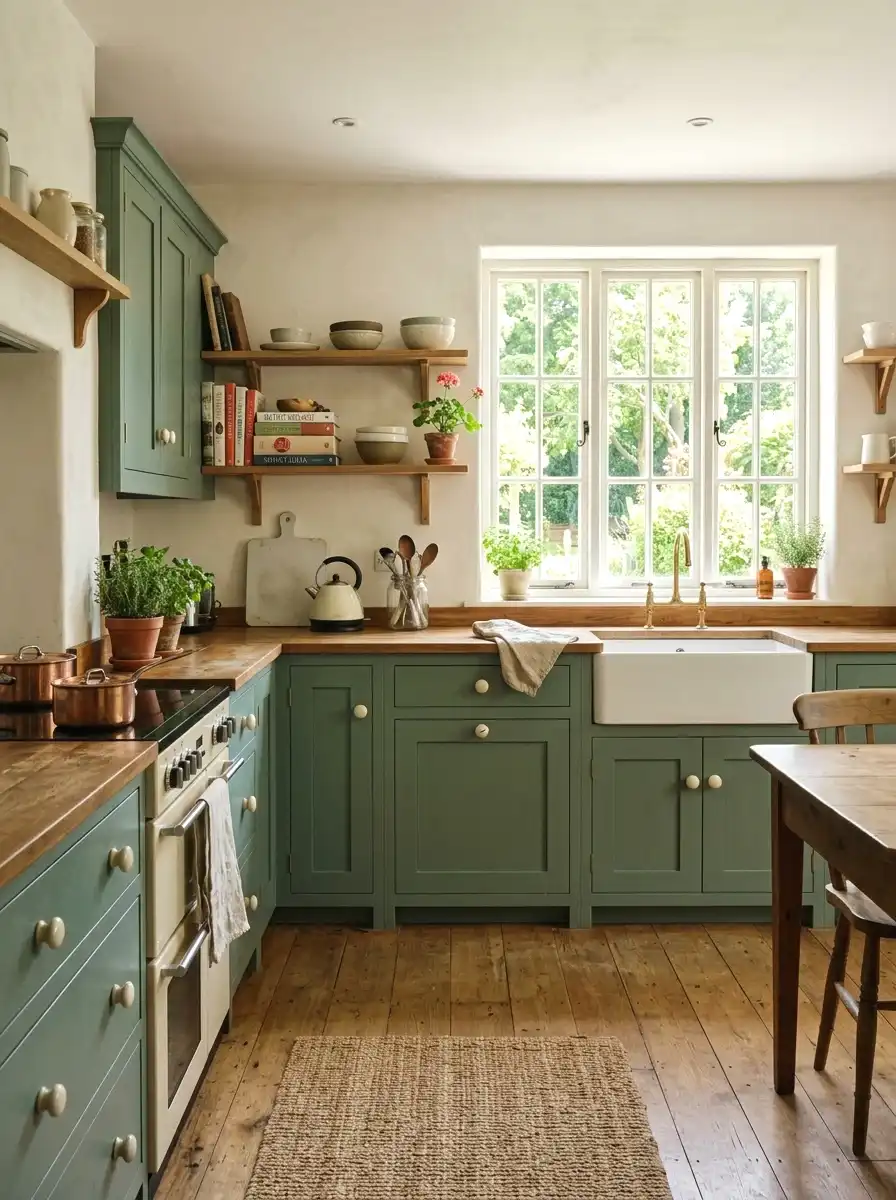
22. Full Kitchen Cabinet Repaint in Dusty Green with Professional Finish

If you’re going all in, a full kitchen repaint in a dusty, muted green is one of the best investments you can make in a kitchen that needs a reset. Dusty green, sometimes called dried sage or muted olive, sits in the middle of the green spectrum and works with almost every countertop and flooring combination already in your kitchen.
If you’re unsure what surface to pair with dusty green, there’s a useful breakdown of countertop combinations that do the heavy lifting of matching for you.
A full cabinet repaint done yourself costs $200–$300 in quality materials, including cabinet-specific paint, primer, a foam roller, brushes, painter’s tape, degreaser, and sandpaper. Take the doors off, work in batches, and give each coat 4–6 hours to dry fully before the next. Three coats plus a final light sand gives a finish that holds up to daily kitchen use for 5 to 7 years easily.
More Ideas:
Final Thoughts on Green Kitchen Cabinets
You don’t have to go all in to see real results. A lot of the best changes on this list start with one cabinet, one section, or one small commitment. The sage lower cabinets, the painted island, the single emerald accent unit. These aren’t partial ideas. They’re complete ones.
Start with the color. Get three paint chips in green shades you like and tape them to your actual cabinet surface. Live with them for two days under your kitchen lights. That step alone will save you from a color you’d regret. One paint chip this weekend. That’s the whole first step.
If you want more ideas like this, homelypop.com has a lot more where this came from. Real budgets, real homes, real results.
If green isn’t quite landing for you, there are more real-budget kitchen transformations here covering the full range of cabinet and wall color directions.