22 Natural Wood Kitchen Ideas for a Warm, Organic, Beautiful Space
Your kitchen feels cold. Maybe it’s the stark white cabinets, the grey counters, or just the way it looks like every rental you’ve ever lived in. You’re not looking for a renovation. You just want it to feel like yours, warm and real and lived in. That feeling is possible. It doesn’t take a gut remodel or a designer.
These 22 natural wood kitchen ideas were picked after digging through real homeowner forums, Pinterest saves with thousands of repins, and Houzz discussions from people who actually did this work themselves. Each idea covers a different part of the kitchen, from shelving to hardware to full cabinet swaps, and the prices range from under $30 to around $300. Everything here works for renters and owners alike.
This list is for people with a budget of $100 to $300 and a kitchen that needs warmth, not a full remodel. It’s not for anyone planning a complete rebuild from scratch. Everything here is achievable with a weekend and basic tools.
By the end you’ll have a clear, specific plan for bringing natural wood into your kitchen, starting today.
If you’re also rethinking your wall color alongside the wood, there are some warm tones worth stealing from real homes that pair beautifully with natural materials.
What to Know Before You Start a Natural Wood Kitchen
- Wood tones vary wildly. Walnut runs dark brown, oak reads warm gold, pine is pale yellow. Pick one as your base.
- Mixing two wood tones works well if one is dominant and one is an accent, not 50/50.
- Sealing open wood shelves costs $15 to $25 and protects against kitchen grease for years.
- Most people skip sanding prep on wood pieces. It’s the reason paint peels within months.
- Wood near a stove needs heat-resistant finish rated above 200°F or it’ll discolor fast.
- A single unfinished wood shelf can bow within a year if it’s over 36 inches without a center support.
- Peel-and-stick wood contact paper looks convincing for about 12 months before lifting at edges.
- Real wood veneer panels for cabinet fronts cost $40 to $90 per door and are far more durable long term.
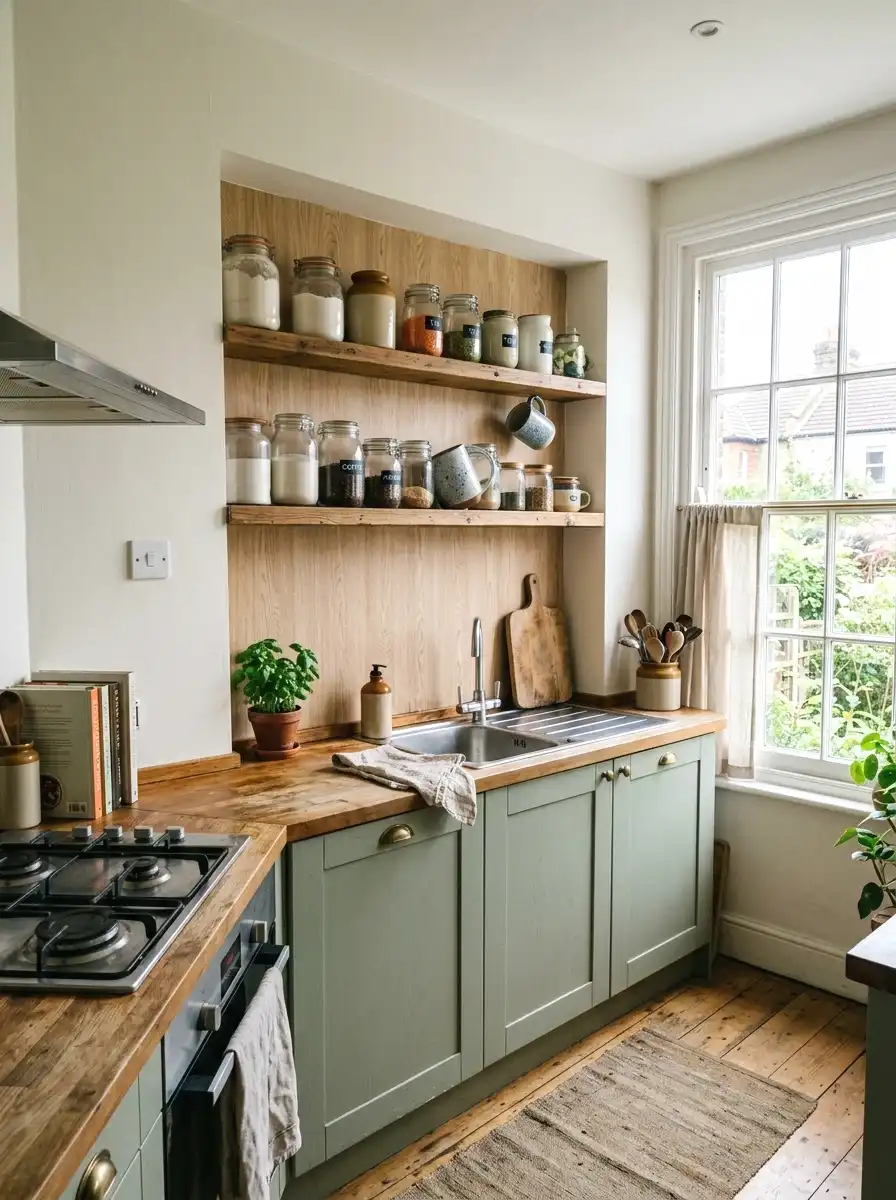
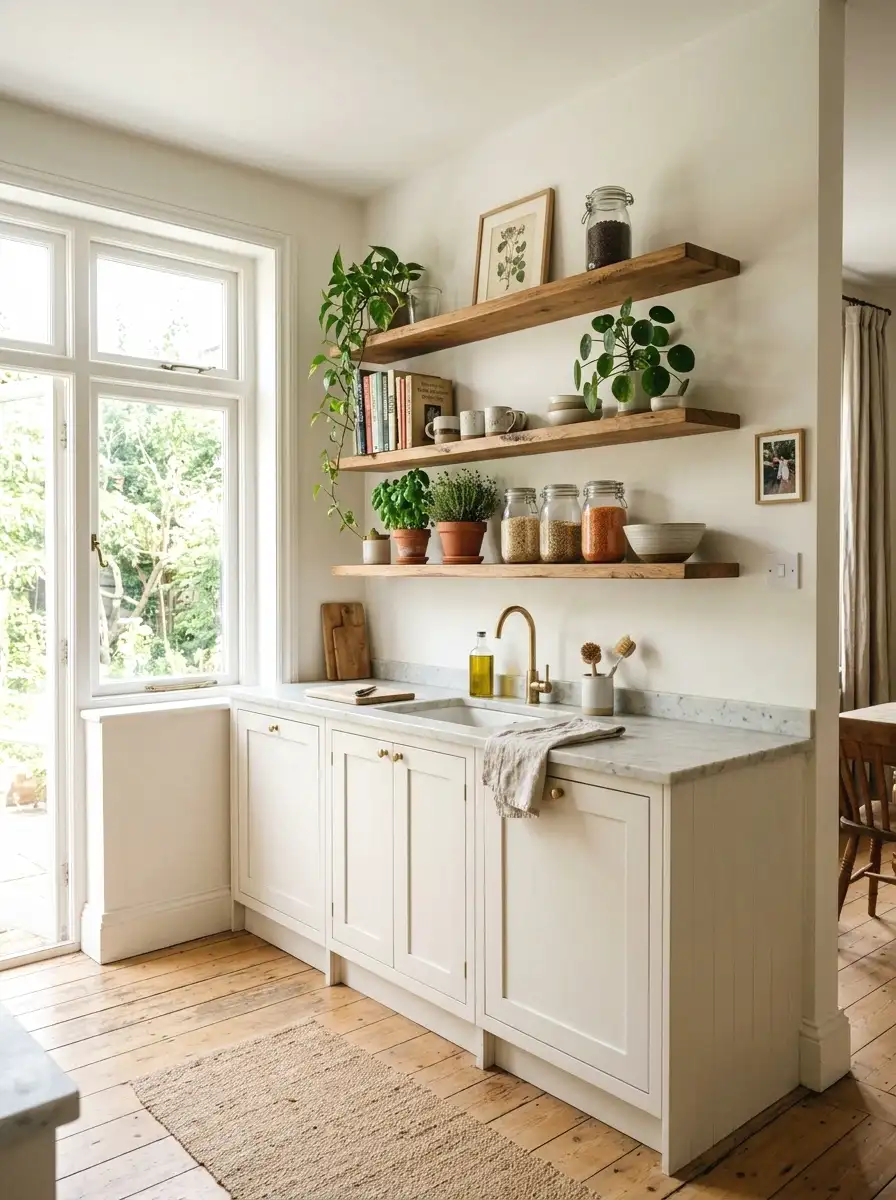
1. Add a Floating Wood Shelf Above the Counter
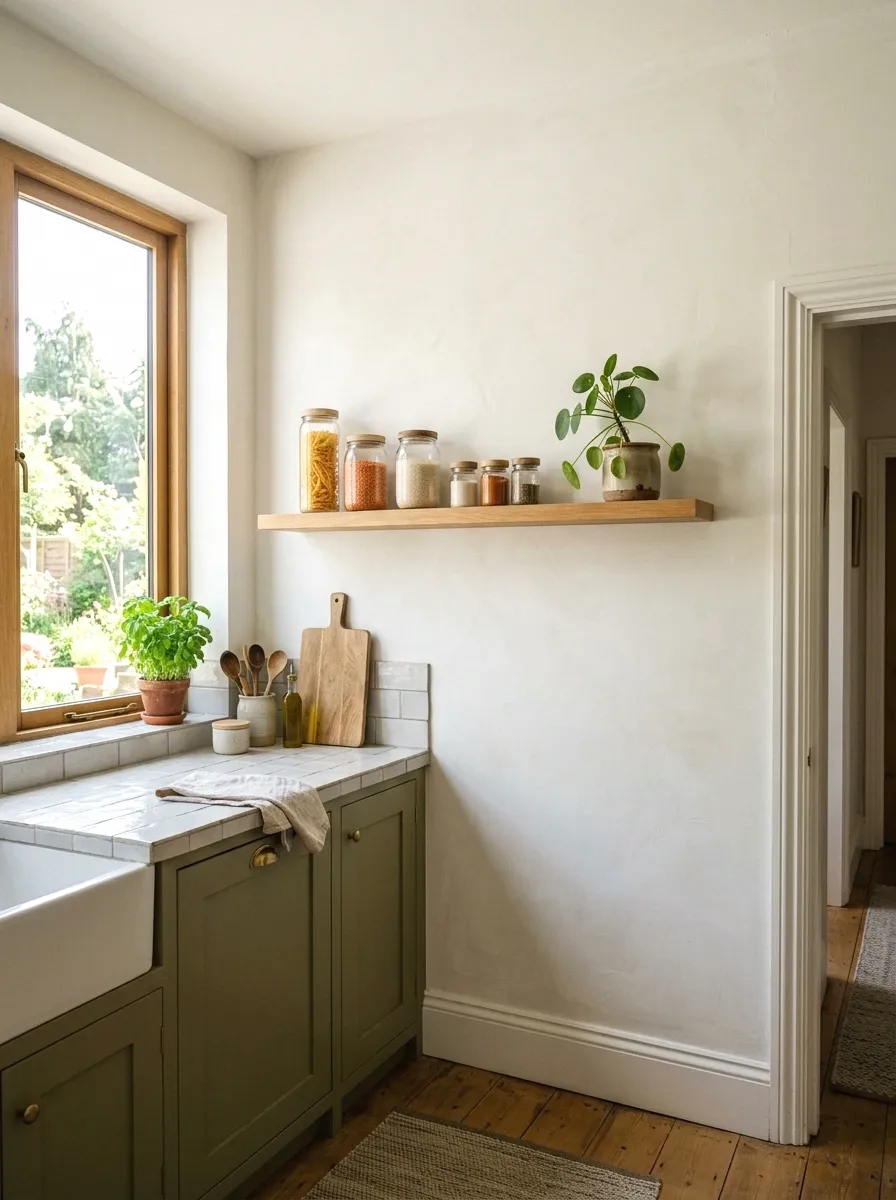
A single floating wood shelf changes how a kitchen feels more than almost anything else you can do for under $50. You hang it above the counter or the sink, put a few things on it, and suddenly the wall has purpose. The wood adds warmth where paint used to just sit there doing nothing.
Go with a 1.5-inch thick oak or pine board, around 36 to 48 inches wide. Unfinished boards from a hardware store run $20 to $35. You seal it yourself with a food-safe wax or oil. I put one in my own kitchen two years ago above the stove and it’s the thing every single person asks about first. Mount it with proper wall anchors and it holds up to 40 pounds easily.
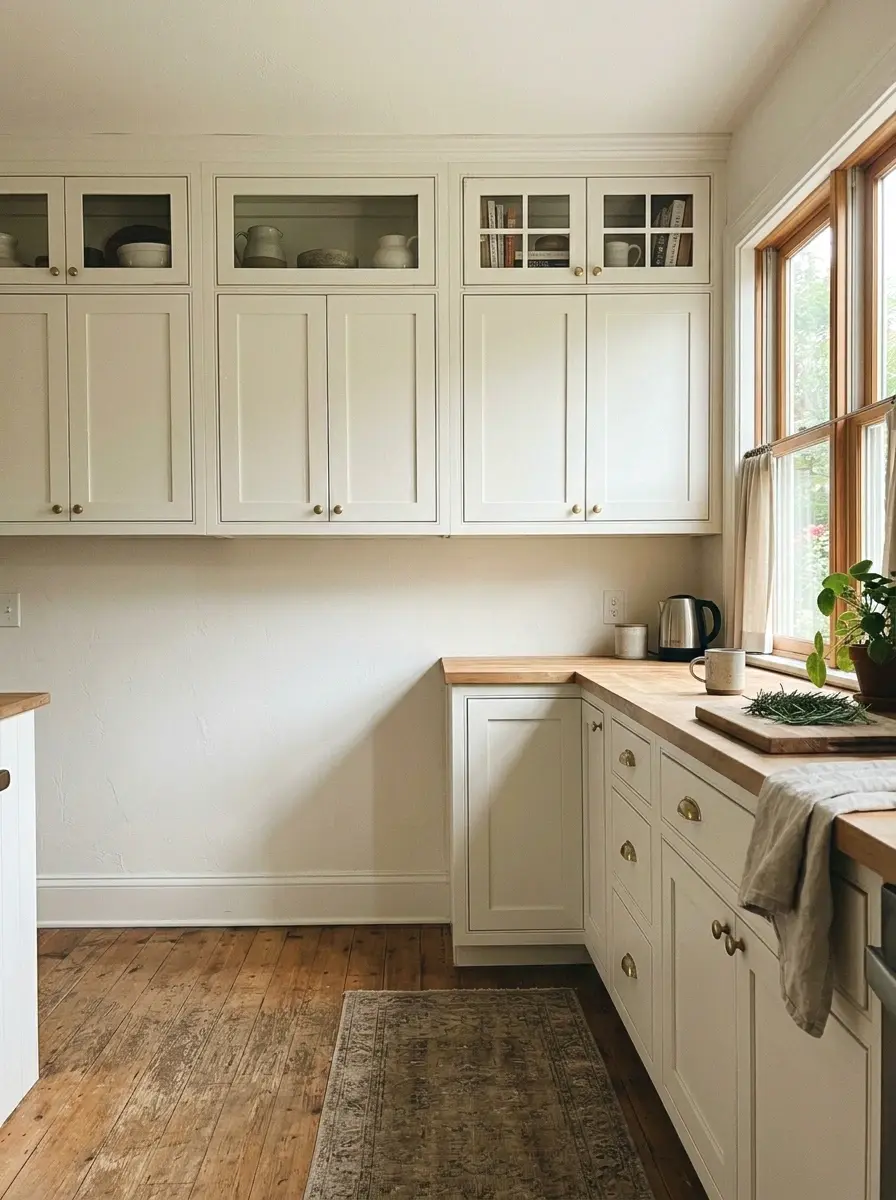
2. Swap Out Cabinet Hardware for Brass or Bronze Wood-Tone Pulls
You’d be surprised how much cold kitchen vibes come from the hardware. Chrome and matte black pulls are everywhere. They’re fine. But switching to warm-toned brass, antique bronze, or even raw wood knobs shifts the whole palette without touching a single cabinet.
A full set of 20 pulls runs $30 to $60 on Amazon or at your local hardware store. You need a screwdriver and maybe 30 minutes. That’s the whole project. This is a renter-friendly change too since you just swap them back when you leave. (This one is so underrated. Nobody talks about hardware enough.)
If you’re working through a full budget refresh, there’s a solid breakdown of hardware swaps that quietly change everything without major spend.
More Ideas:

3. Install a Wood Butcher Block Section as an Island Top
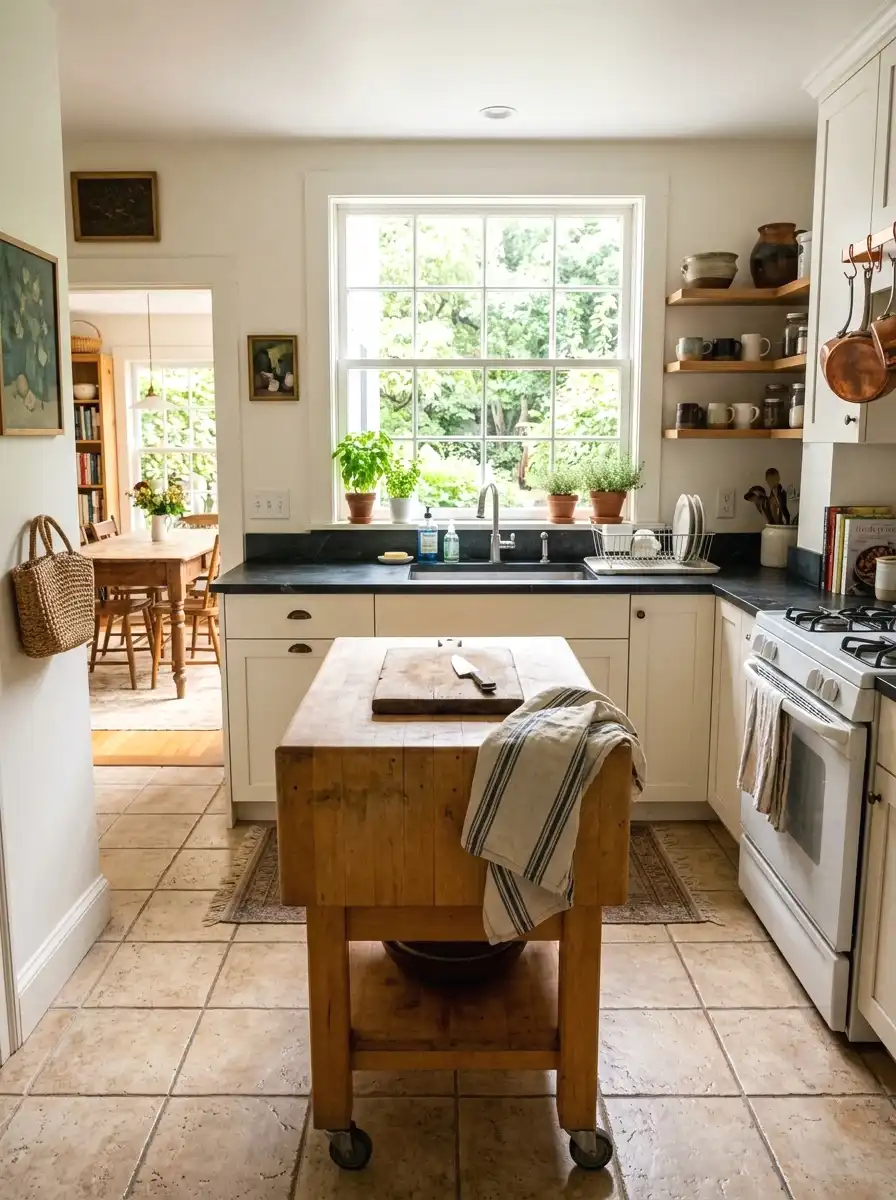
So here’s the thing about butcher block. It’s not just a cutting surface. It’s one of the warmest materials you can bring into a kitchen and it works on any island, cart, or peninsula. A 2-inch thick butcher block top in maple or acacia makes a cold kitchen feel like someone actually lives there.
An 18 by 24 inch section from IKEA or Home Depot runs $60 to $120 depending on wood type. You can set it on top of a stock base cabinet or an existing cart. Oil it with food-safe mineral oil when it arrives and every few months after. It’ll darken slightly over time, which makes it look even better.
It’s also worth seeing how butcher block beside other countertop pairings holds up visually before you commit to a surface choice.
4. Use Peel-and-Stick Wood Wallpaper on the Back of Open Shelves
The inside back panel of open shelves is basically wasted space visually. Painting it an accent color helps. But sticking a wood-grain contact paper or peel-and-stick wallpaper on it adds texture and warmth behind everything you display, and it takes 20 minutes.
This works on built-in shelves and freestanding ones. You measure, cut, and press. That’s it. A roll of quality peel-and-stick wood wallpaper is about $18 to $25 online. I was skeptical about this one but the difference in how the shelves photograph, and just how they feel day to day, is real. Stick with light natural oak or blonde wood tones if your kitchen gets limited natural light.
For kitchens leaning toward a cleaner palette, there are some open shelf styling ideas worth borrowing that balance wood with restraint.
5. Bring in a Wood Kitchen Cart or Rolling Island
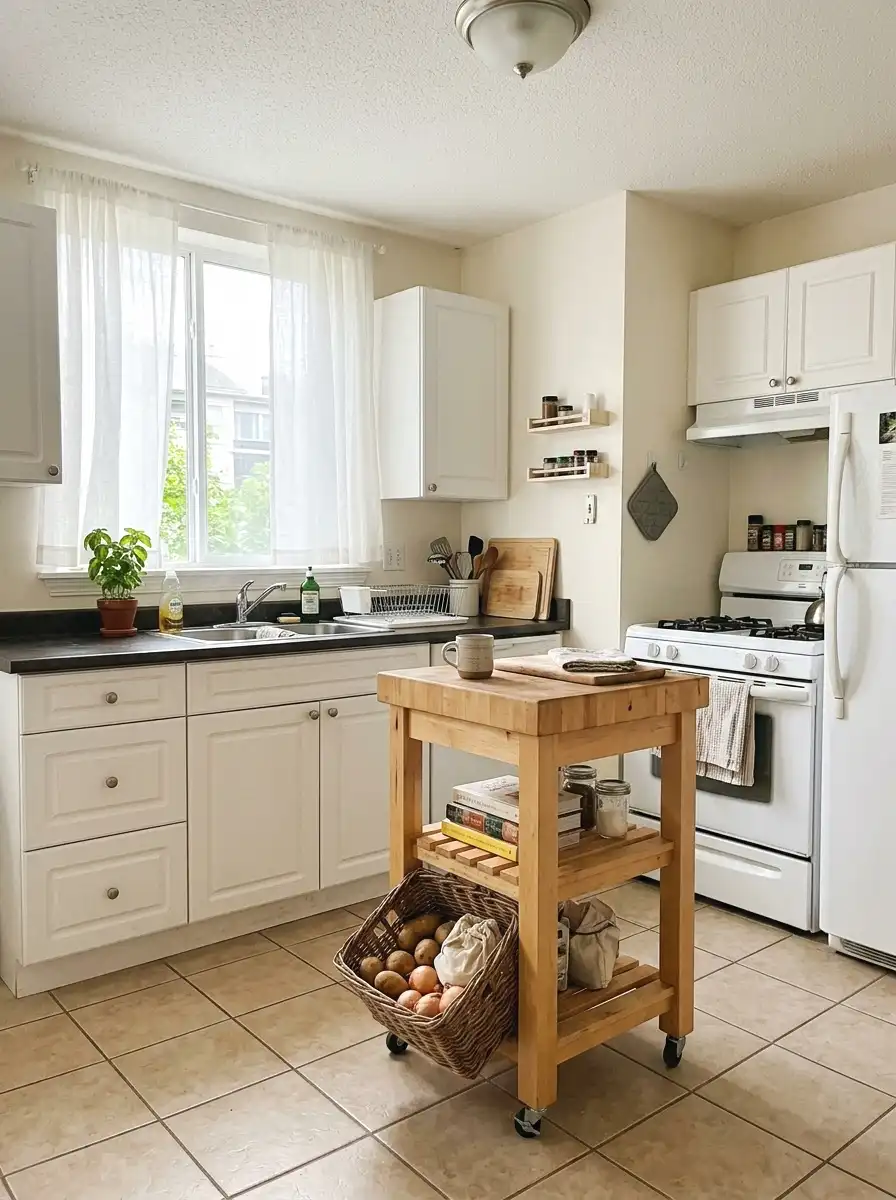
A wood cart is one of the most functional things you can add to a small kitchen. It gives you prep space, storage, and warmth all at once. And you can move it out of the way when you need floor space back, which almost no other kitchen addition lets you do.
Butcher block top carts start around $80 at IKEA or Target. The Bekväm cart from IKEA is a favorite for good reason. It’s solid, cheap, and looks great raw or painted. If you want more character, look at secondhand carts at thrift stores or Facebook Marketplace and refinish the top with Danish oil for under $15. Solid oak rolling islands with shelves run $150 to $250 new.
If space is tight, it’s worth checking out rolling cart options sized for tight kitchens before buying anything fixed.
6. Frame Your Kitchen Window with a Wood Valance
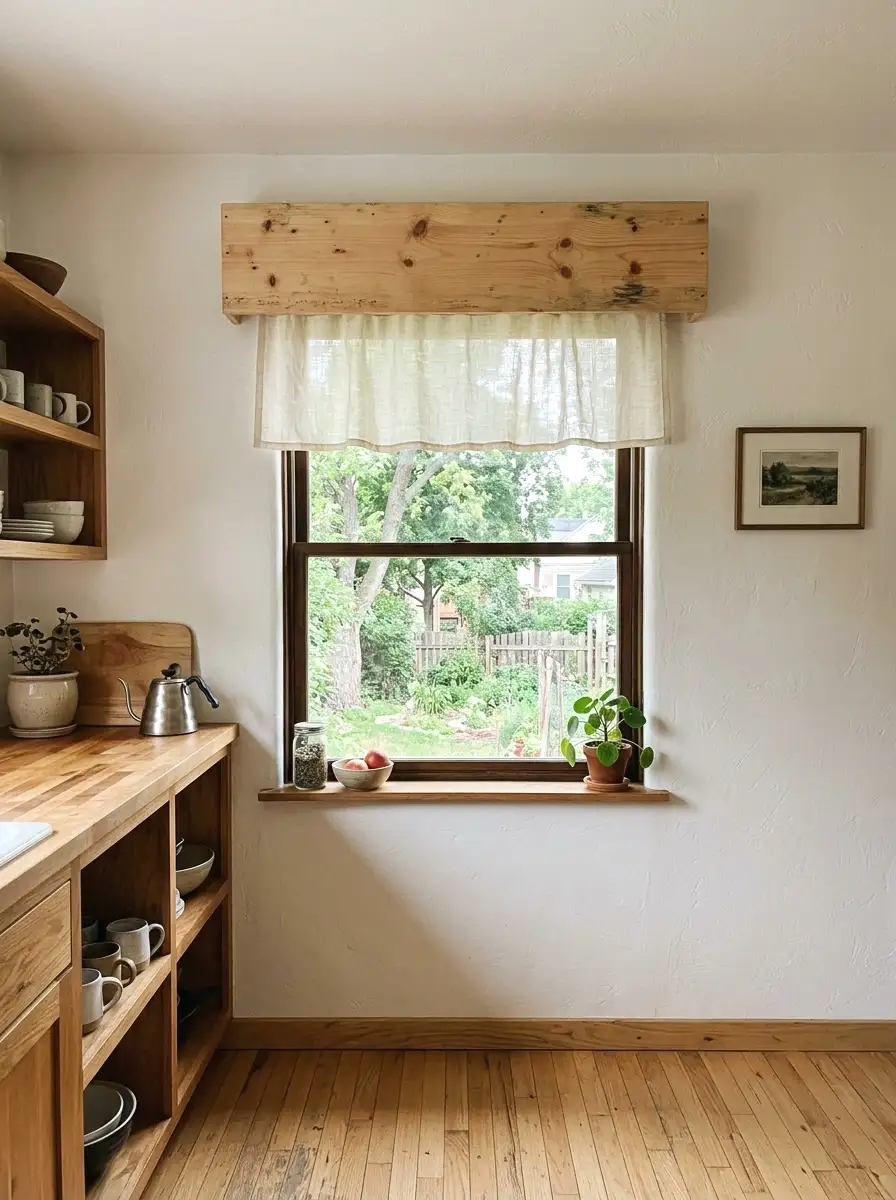
Most people hang curtains in kitchens and call it done. But a wood valance, basically a simple wooden box frame at the top of the window, gives the whole window a built-in look without any actual built-in work. It frames the view and adds a natural element right where your eye goes for light.
You can build a simple box valance with pine boards from any hardware store for about $20 in materials. Cut three boards into a U shape, nail them together, and hang. Paint it or stain it. A 36-inch wide window needs three 1×4 pine boards. If building isn’t your thing, unfinished wood valances are sold ready to hang on Etsy and Amazon for $35 to $70.
While you’re thinking about that window zone, there are also smart ways to style a window above the sink that work alongside a wood valance.
More Ideas:
7. Replace One Cabinet Door with a Wood-Frame Glass Front
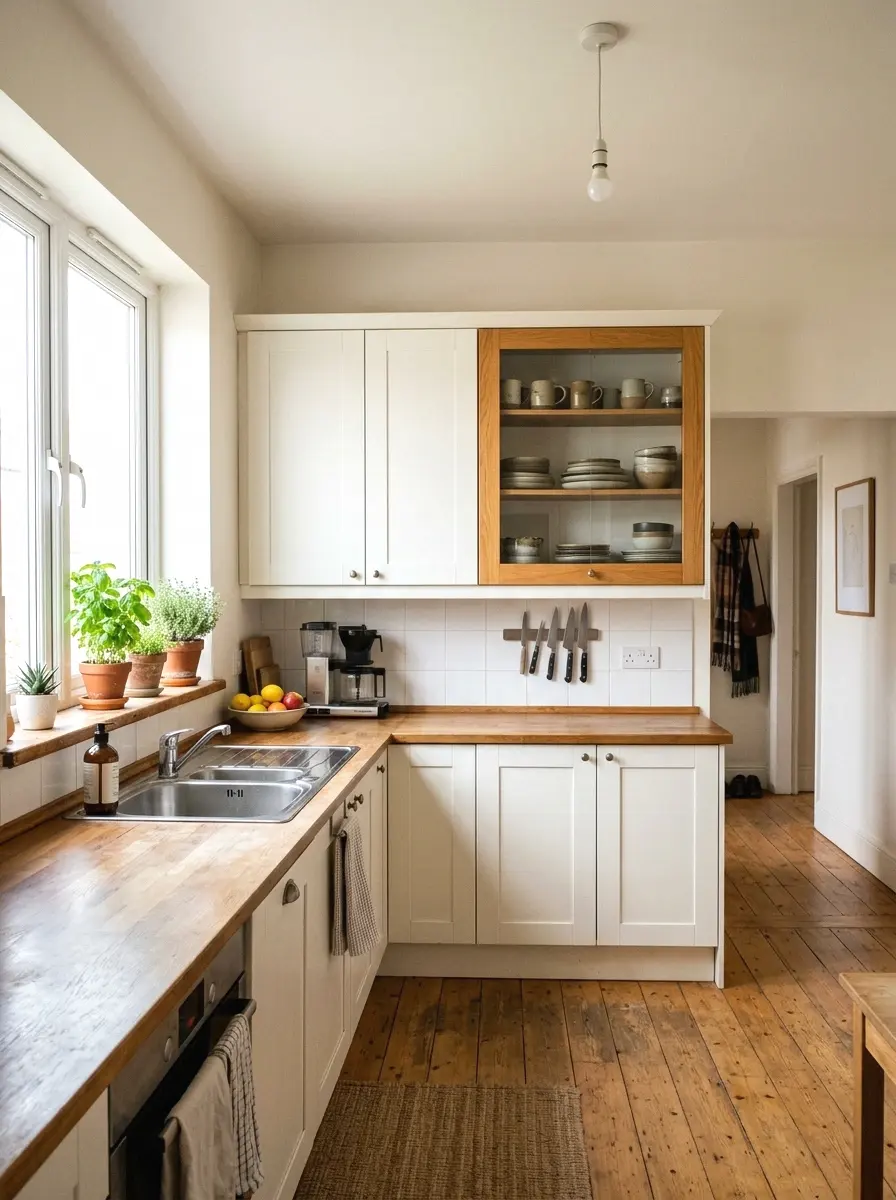
You don’t have to replace all your cabinets to get that natural wood look. Pull one door off a upper cabinet, take it to a hardware store or glass shop, and have them help you add a simple wood frame with glass. Or buy a pre-made wood and glass cabinet door insert and swap it for your existing one.
This single change creates a focal point and breaks up a wall of flat cabinet fronts. It also forces you to style what’s inside it, which makes the whole kitchen feel more intentional. Replacement glass-front cabinet doors in natural wood run $40 to $90 depending on size. You can find them on Amazon, at Ikea, or from local cabinet shops that sell single doors.
If you’re opening up that cabinet wall anyway, it’s a good moment to look at tile and wood backsplash combinations that work behind open sections.
8. Lay a Wood-Look Runner on the Kitchen Floor
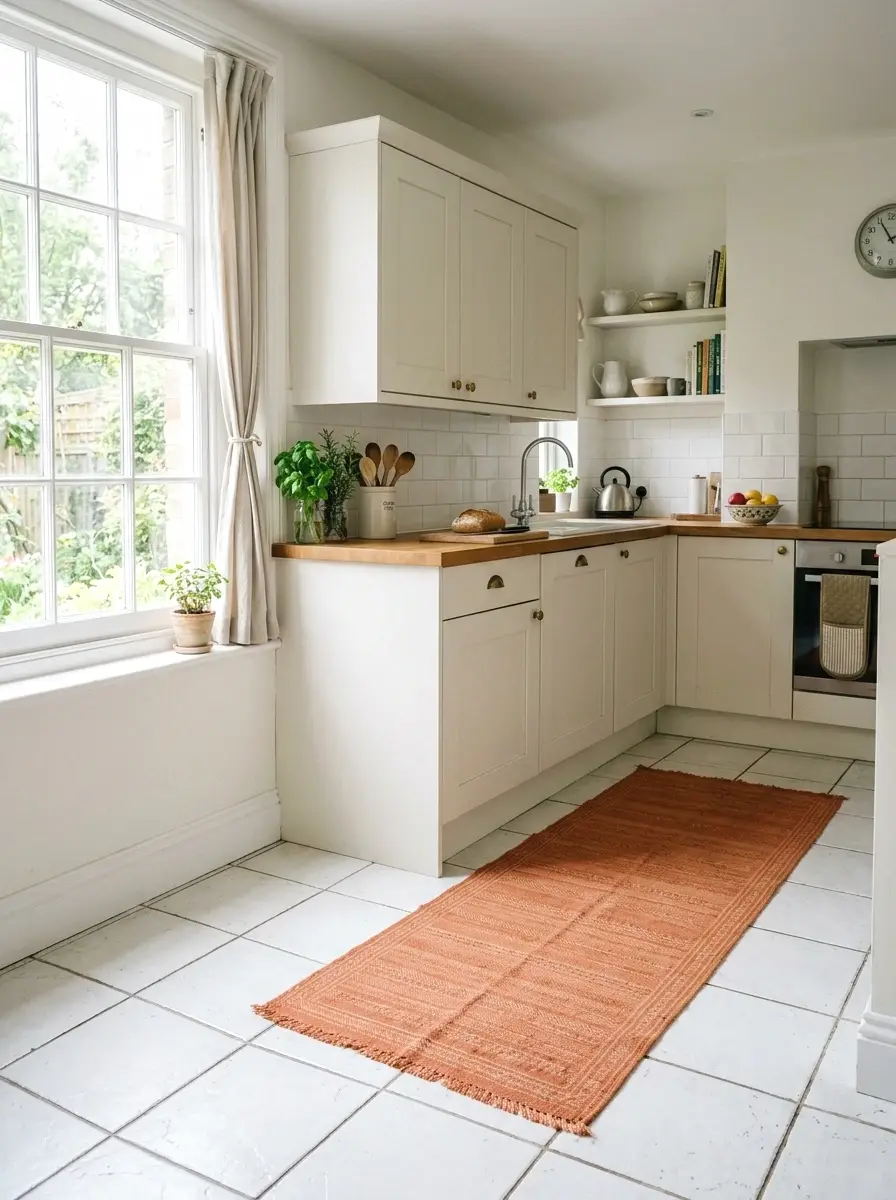
Hard floors in a kitchen are practical but they can read cold and bare. A wood-look runner, either a real flat-weave rug with warm tones or a vinyl plank runner, adds texture underfoot and visually warms the whole room. This is especially noticeable if your floors are grey or white tile.
A flat-weave cotton kitchen runner in warm brown or terracotta runs $25 to $60. For something more durable around the sink and stove, a vinyl or rubber-backed runner with a wood pattern works great and wipes clean. Sizes of 2 by 6 feet or 2 by 8 feet cover most kitchen work zones without crowding the space. Machine-washable options make this a no-brainer.
9. Build or Buy a Simple Wood Spice Rack for the Wall

The typical spice situation in most kitchens is a drawer or a cabinet shelf where nothing is visible and half the jars get forgotten. Mounting a small wood spice rack on an empty wall strip adds storage and shows off the wood grain close up where you’ll actually see it.
A 3-tier wood wall-mounted spice rack is $20 to $40. Or you can make one from a single 1×4 pine board cut into three shelves and mounted with brackets. Sand, oil, and hang. The whole thing takes an afternoon and around $15 in materials. (Took me ages to figure out that wall spice racks need to be mounted into studs or they fall. Use toggle bolts if there’s no stud where you need it.)
10. Hang a Wood Pegboard for Pots and Utensils
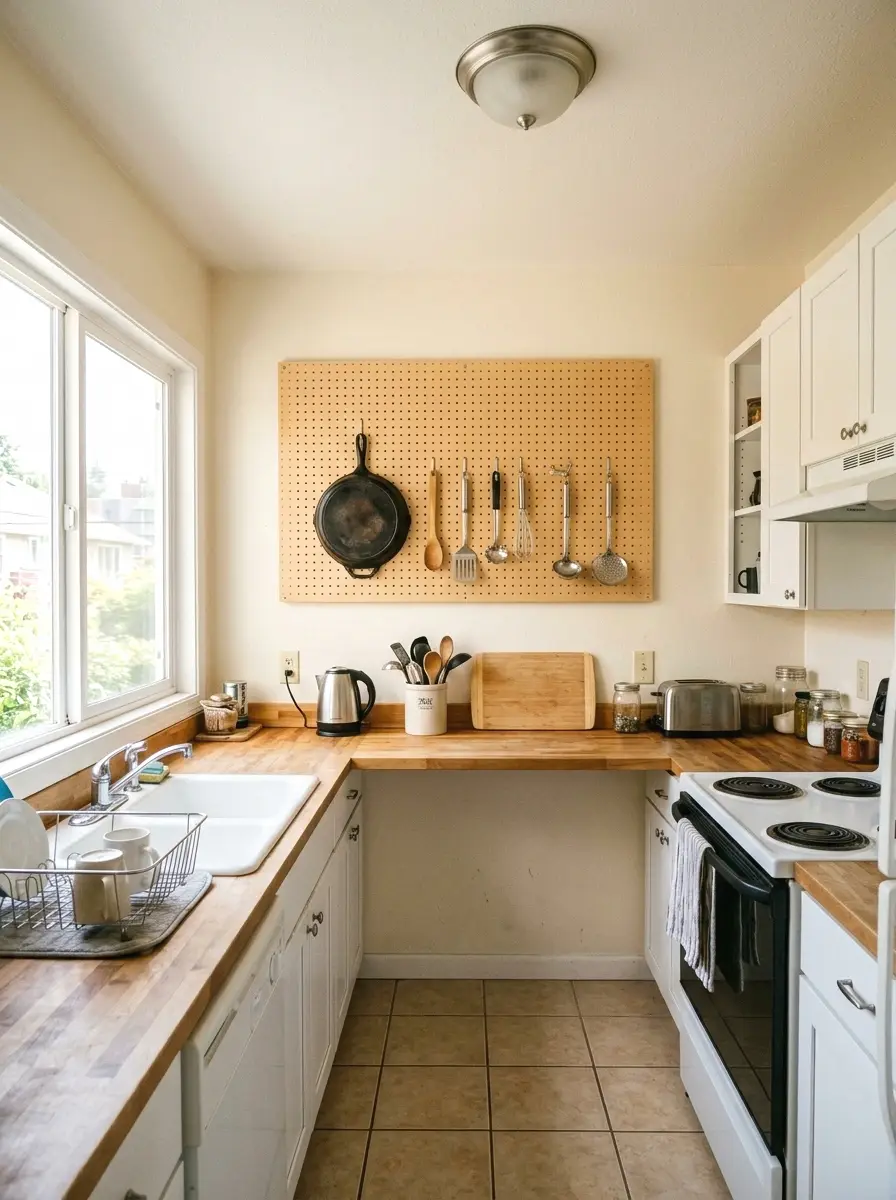
Here’s something most people only see in fancy magazine kitchens but it’s genuinely easy to do yourself. A wood pegboard panel mounted on one kitchen wall lets you hang pots, pans, utensils, and small baskets. It looks great and pulls items off your countertops entirely.
Pre-finished wood pegboards in birch or maple run $35 to $75 depending on size. A 16 by 32 inch panel works well for most kitchen walls. You’ll need pegboard hooks, which are $8 to $15 for a full set. The real trick is mounting it with spacers so the hooks have room to go in from the back. Without spacers it won’t work. Hardware stores sell simple standoff kits for about $5.
More Ideas:
11. Add a Wood Cutting Board Collection as Wall Art
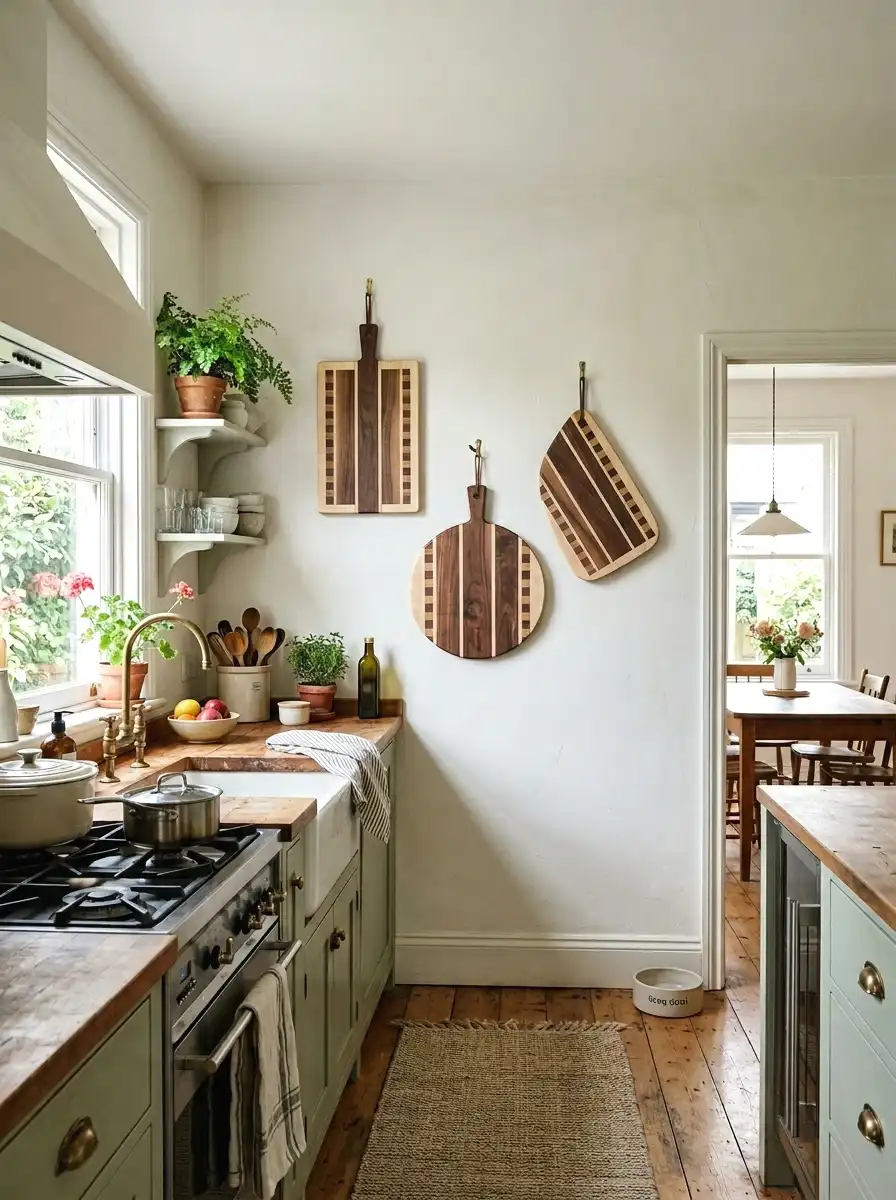
This one’s genuinely functional and decorative at the same time. A grouping of three or four wood cutting boards in different shapes and sizes hung on the wall looks intentional and warm. You’re not sacrificing storage. You’re using the boards you already have as part of the room’s visual texture.
Hang them on simple S-hooks over a small rail or use adhesive picture-hanging strips. End grain boards in walnut or cherry are especially rich looking. A mix of round, rectangular, and paddle shapes works better than all the same shape. If you don’t have boards worth displaying, a set of three maple cutting boards is around $30 to $50. You use them, you hang them, you look at them. All three at once.
12. Wrap a Kitchen Island in Wood Planks
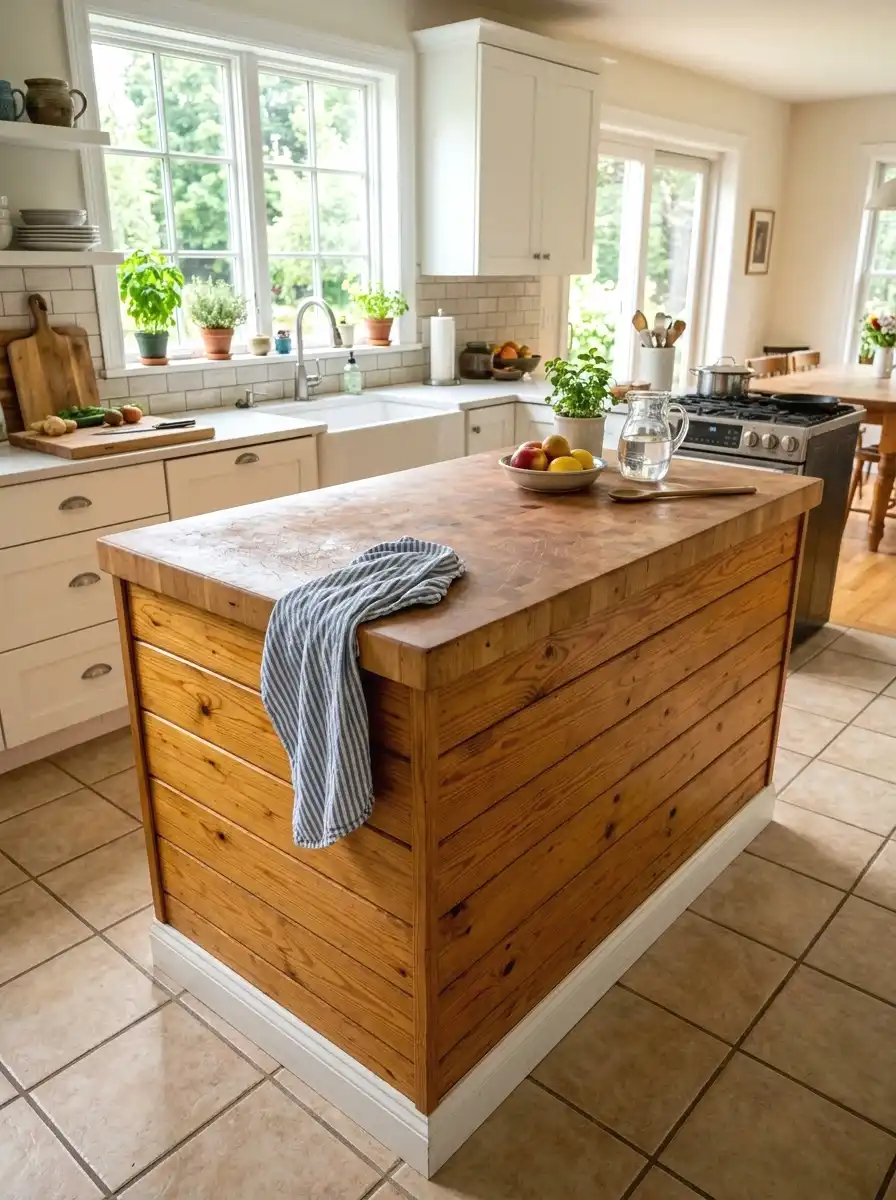
If you have a basic white or builder-grade kitchen island, you can wrap the outside of it in thin wood planks without touching the top or the inside. This is a popular DIY and it makes a plain box look like furniture you actually chose.
Tongue-and-groove pine planks from a hardware store cost $1 to $2 per linear foot. A standard 24 by 36-inch island takes about 40 linear feet of planking. So your material cost is under $80. You nail or glue the planks horizontally around the perimeter, sand, and apply a satin polyurethane. The whole project takes a weekend and changes how the island reads completely.
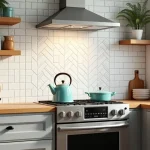
13. Swap a Metal Range Hood for a Wood-Wrapped One
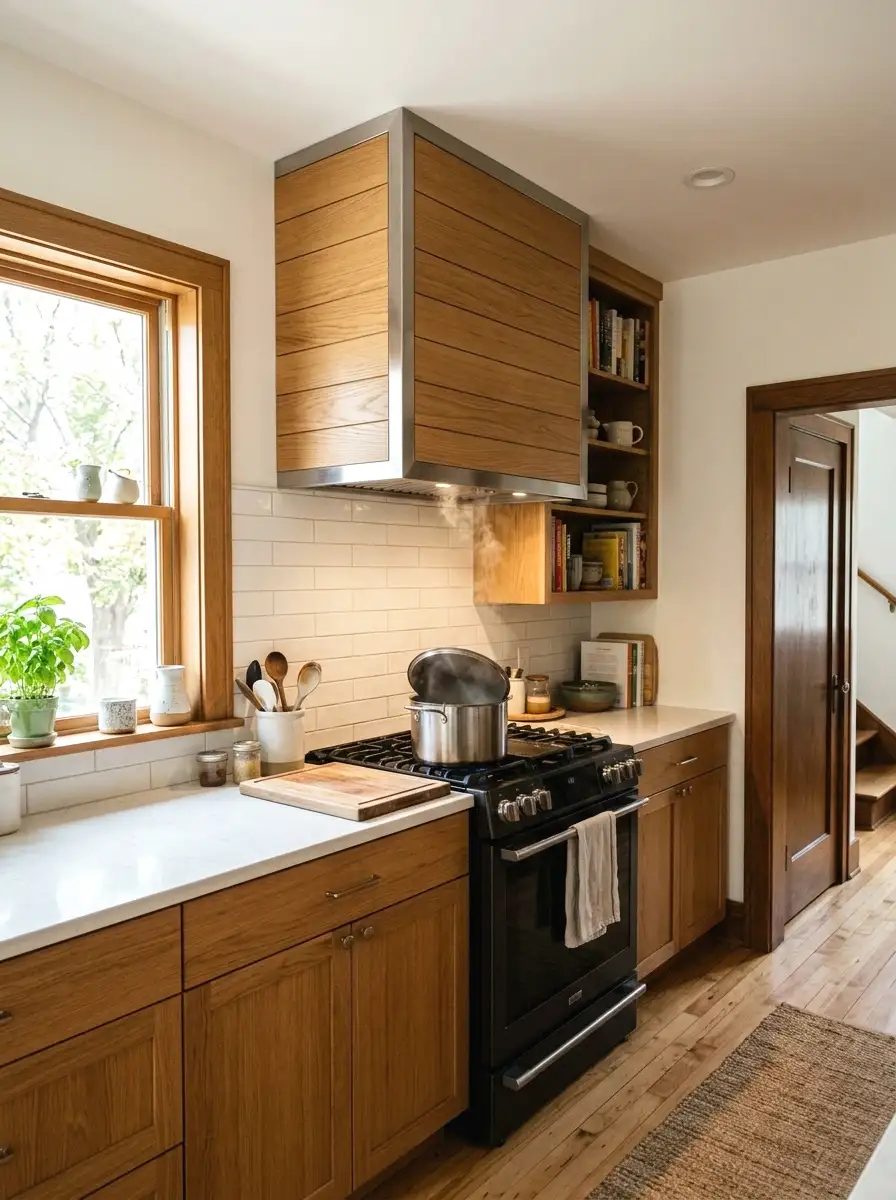
Range hoods are some of the ugliest, most visible things in a kitchen. Most come in stainless steel that reads cold and dated fast. Wrapping the outside of your existing hood in thin wood veneer or reclaimed wood panels is a very achievable DIY that makes the whole kitchen look more designed.
The hood still functions exactly the same. You’re just covering the exterior shell. Wood veneer sheets are $15 to $30 per sheet and can be cut with scissors. Real thin wood panels or peel-and-stick planks run $40 to $80 for the job. Make sure nothing you attach is within 18 inches of open flame areas. For gas stoves this matters more than electric.
14. Display Wood Bowls and Boards on Open Counters
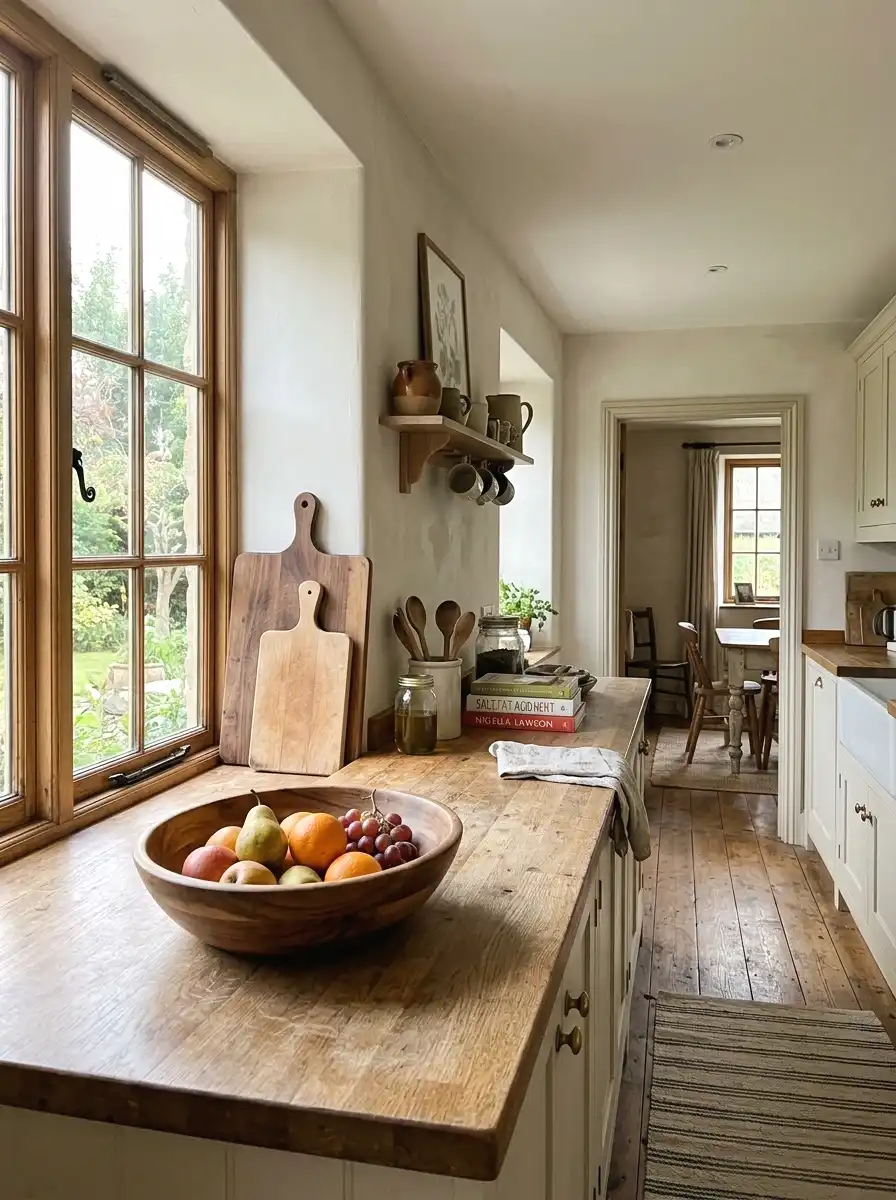
Counter styling in kitchens is usually an afterthought. A fruit bowl here, a coffee maker there. But swapping plastic or ceramic bowls for wood ones and adding a couple of wood boards to the counter creates a quiet, organic layer of warmth that costs almost nothing if you shop secondhand.
A large olive wood or acacia serving bowl runs $20 to $45 new. Two or three wood boards in varying sizes grouped near the counter edge look great and stay useful. The trick is keeping it to three items max in any one zone. More than that starts reading as clutter rather than styling. Thrift stores often have solid wood bowls for $3 to $8 each.
More Ideas:
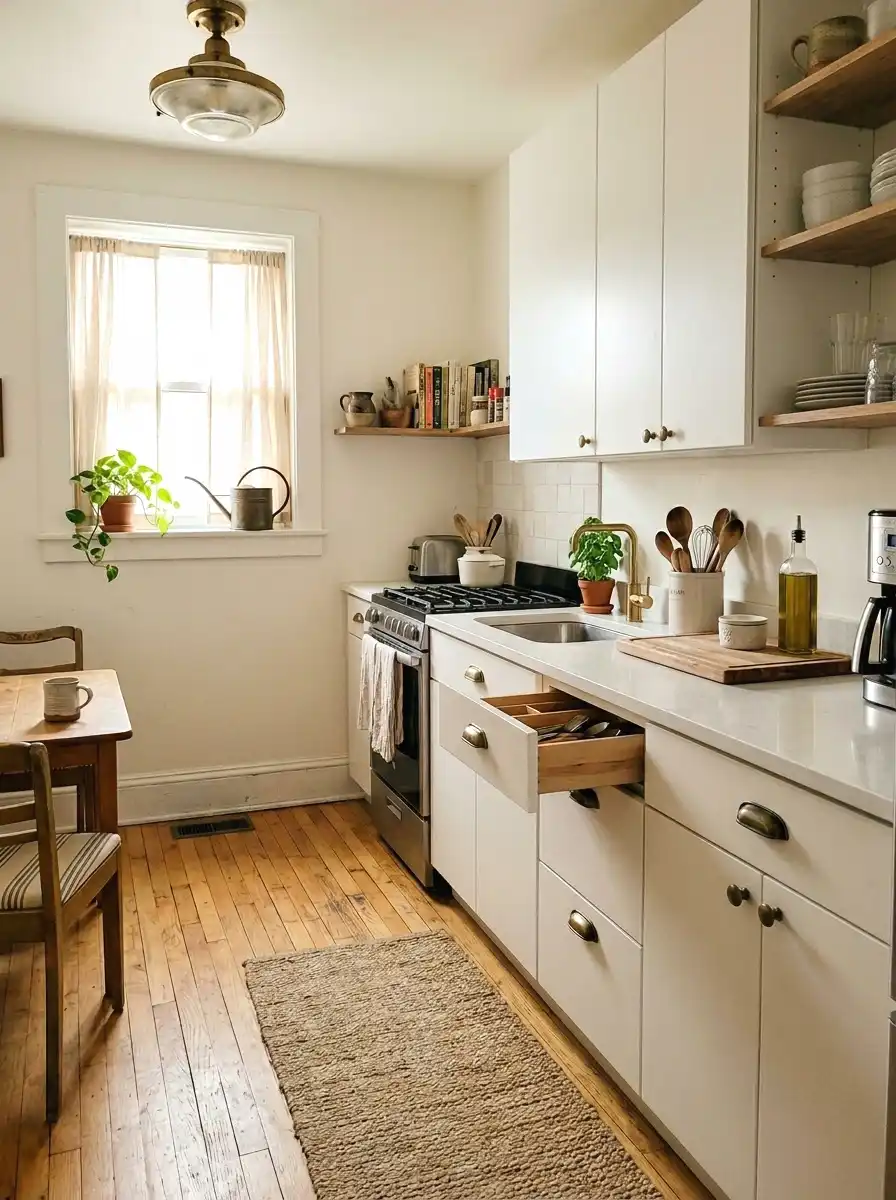
15. Paint Lower Cabinets and Add a Wood Floating Shelf Above
This is one of the bigger moves on this list but it pays off. If your kitchen has upper and lower cabinets in the same flat color, pulling down the upper cabinets on one wall and replacing them with open wood floating shelves completely changes how airy and natural the space feels.
You’d need to patch the wall where the upper cabinets were, which takes spackle and one afternoon. Then mount two or three wood shelves at different heights. The whole material cost for shelving, brackets, and wall repair runs $80 to $200 depending on shelf length. It feels like a renovation but it’s just demo and hardware. Renters can’t do this one, but owners with builder-grade kitchens absolutely should consider it.
16. Add a Live Edge Wood Shelf as a Breakfast Bar Ledge
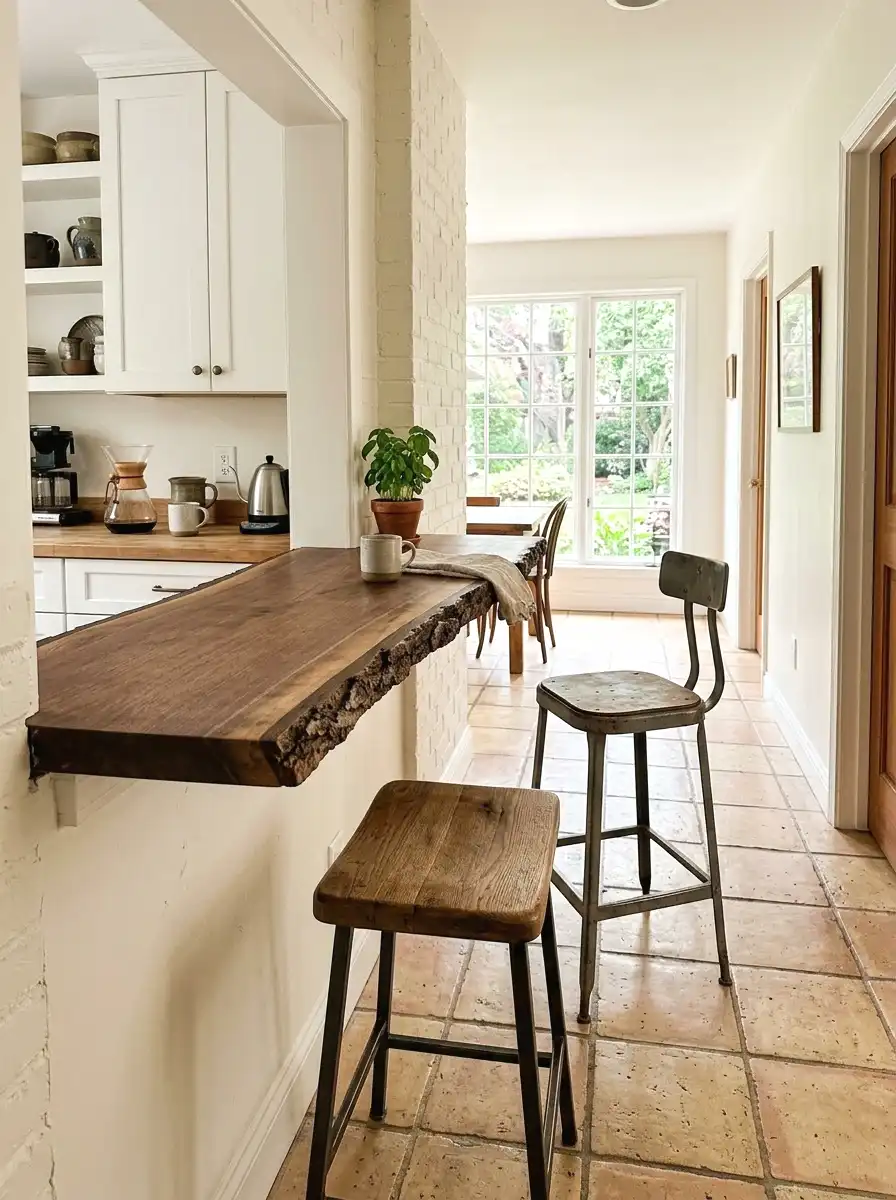
A live edge wood shelf, one where the natural uncut edge of the tree is still visible, is something people usually see in expensive restaurant interiors. But a single live edge slab as a narrow breakfast bar ledge or a pass-through shelf is very achievable on a real budget.
Live edge slabs vary wildly in price. Small slabs 8 to 12 inches wide and 48 inches long go for $40 to $100 at lumber yards, wood shows, or online. Mount it at counter height with two heavy-duty brackets and it becomes both a perch and a real visual anchor. No two look alike. That’s the whole point.
17. Stain Your Kitchen Table or Breakfast Nook in a Warm Wood Tone
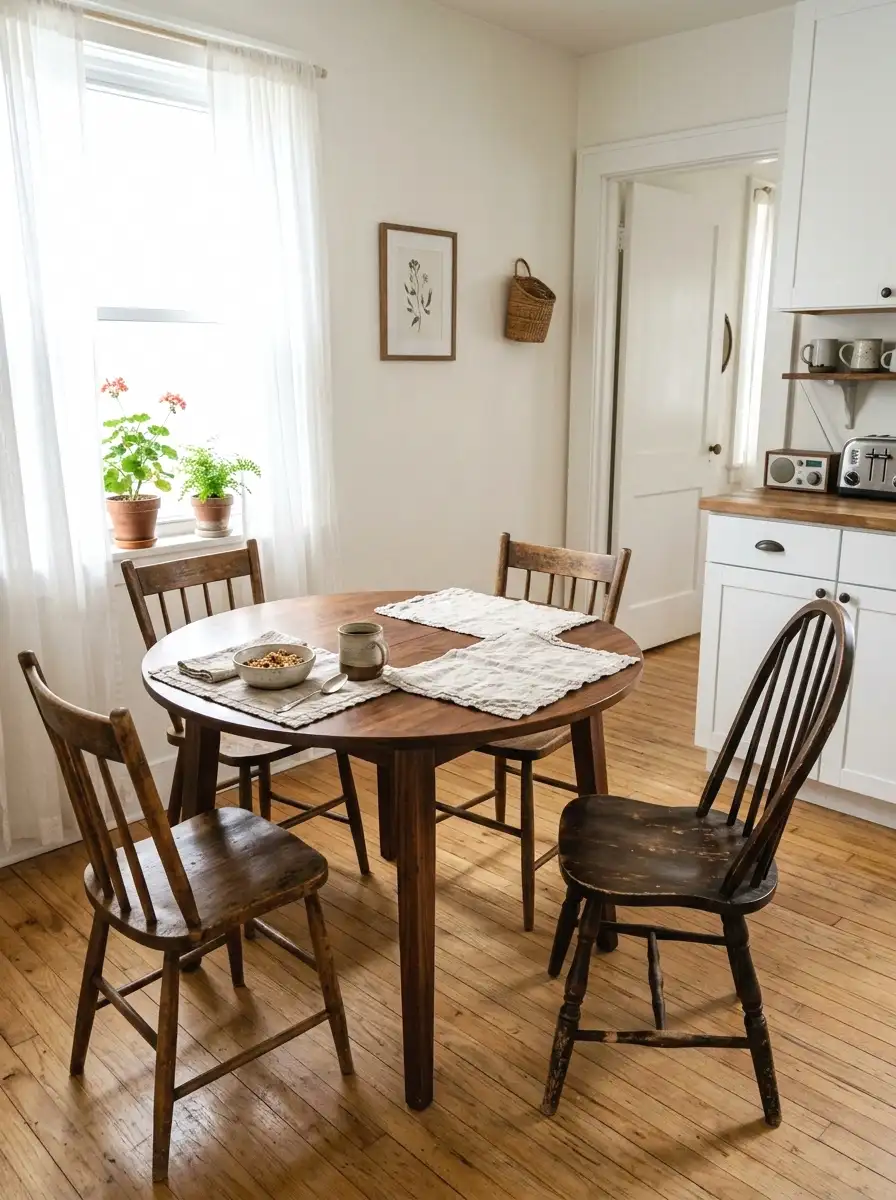
The table is part of the kitchen, especially in open-plan spaces. And a lot of tables are either painted white or stained in that bland medium brown that went out around 2015. Restaining a table in a warm walnut, honey oak, or natural teak tone brings it into the natural wood palette you’re building.
Sand the top down to bare wood, apply a pre-stain conditioner if using pine, then brush on your stain and finish with two coats of satin polyurethane. Materials run $30 to $60. The actual work is one full day. A table that was reading tired and dated comes back strong. This works on any solid wood table. Don’t try it on veneer tables because sanding through the veneer is easy to do accidentally.
When choosing your stain, it helps to see stain colors that read warm not orange next to real cabinet and wall combinations before committing.
18. Hang a Woven Wood Blind in the Kitchen Window
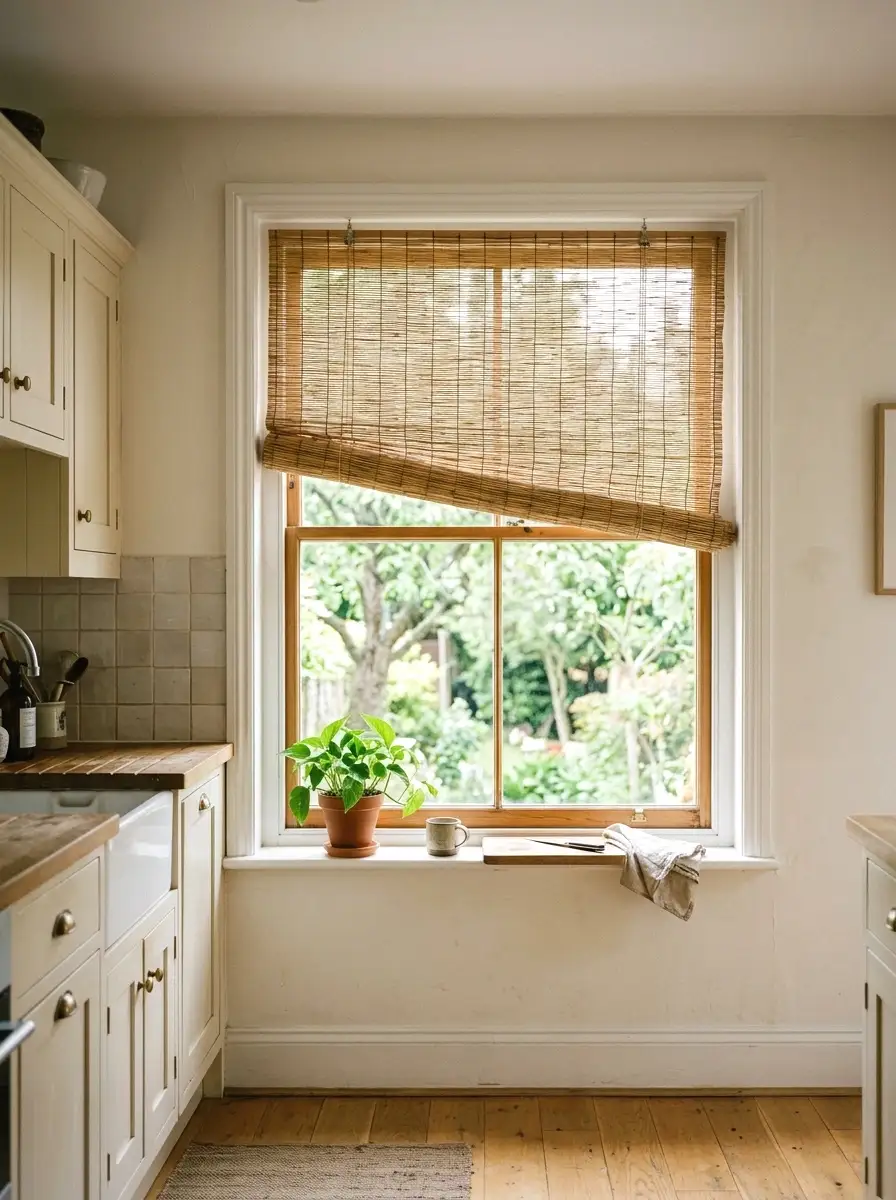
Fabric blinds in kitchens get greasy fast. Plastic mini-blinds look bad within a year. Woven wood or bamboo roller shades hold up well in kitchen conditions and bring a very natural, warm texture that works alongside almost any wood element in the room.
These run $30 to $80 for most kitchen window sizes. Cordless options are safer around kids and look cleaner. Light-filtering woven wood lets diffused natural light through during the day, which warms the whole kitchen with a golden glow. In white or pale kitchens especially, a woven blind is one of the fastest ways to shift the tone of the whole room.
More Ideas:
19. Add Wood Trim Around Cabinet Openings
Builder-grade cabinets often have plain, hard edges with no visual finish. Adding simple wood trim molding around the frame of open cabinet sections or appliance alcoves gives the whole kitchen a more custom, intentional look. It’s the kind of detail that makes a space look like someone actually cared.
Pine base molding or casing trim is $0.50 to $1.50 per linear foot. A full kitchen might need 60 to 80 feet, so materials cost $30 to $120. You cut with a miter saw or have the hardware store cut it, nail in place, caulk the joints, and paint or stain. This is a Saturday project that makes your kitchen look like it cost twice what it did.
20. Use Rattan or Woven Wood Baskets in Cabinet Storage
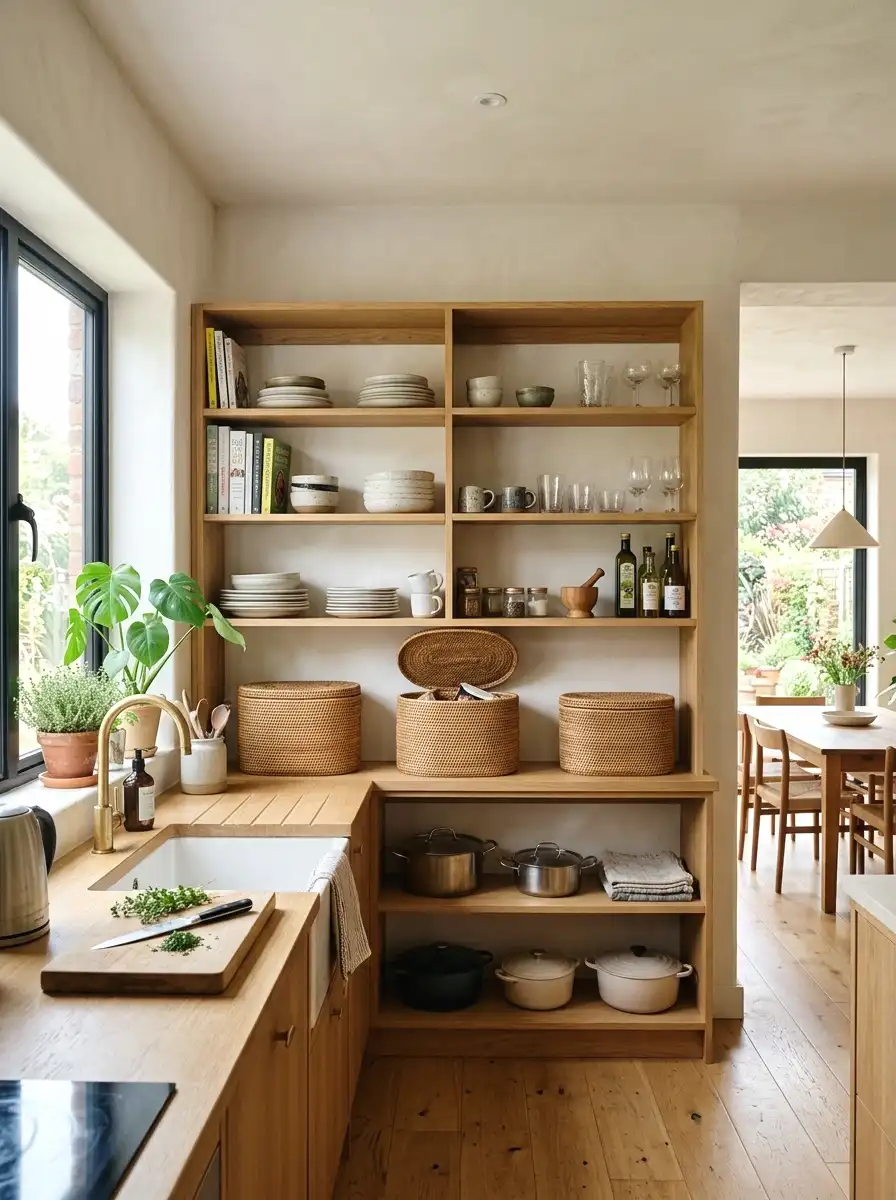
Open shelves and lower cabinet shelves look more curated and warm when you use woven or rattan baskets to hold pantry items. This is not a trend that’s going away because it actually solves a real problem. Loose cans and bags on shelves look chaotic. Baskets group things visually and bring a natural material into the cabinets themselves.
A set of three matching woven baskets runs $20 to $45. Seagrass, rattan, and water hyacinth are all good options in natural finishes. They hold snacks, spice overflow, baking supplies, anything really. The baskets do double duty as storage and as part of the wood-and-natural-material story you’re building throughout the kitchen.
21. Install a Wood Plank Accent Wall Behind Open Shelves
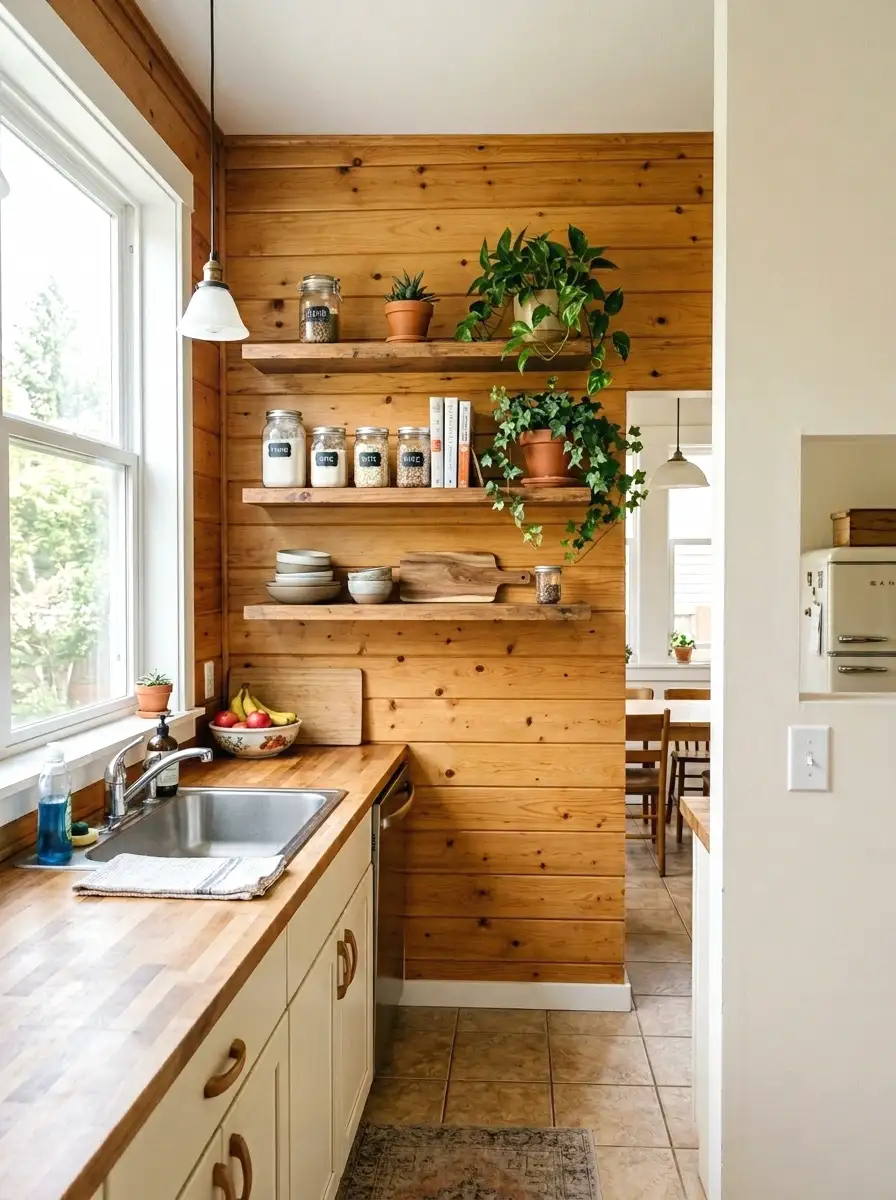
If one wall in your kitchen is basically blank except for floating shelves, adding a wood plank treatment to just that wall turns a basic feature into a real focal point. It doesn’t have to be shiplap. Vertical boards, herringbone, or even horizontal planks all work depending on the ceiling height and room proportions.
Tongue-and-groove pine or poplar planks for a standard 8-foot by 6-foot wall section cost $60 to $120 in materials. Add $20 for stain or paint. You nail them directly to drywall, stagger the joints, and finish. Renters can use a peel-and-stick wood plank product that removes cleanly. Those run $40 to $80 for the same area.
22. Refinish Your Kitchen Cabinets with a Natural Wood Stain
And honestly, if you want the biggest single shift for under $300, it’s this. Refinishing existing cabinet doors in a natural wood stain instead of paint brings the whole room into the wood palette without buying new cabinets. This works on solid wood or real wood veneer doors. Not MDF or thermofoil.
You strip the old finish, sand to bare wood, and apply a warm stain like golden oak, natural walnut, or honey pecan. Finish with a water-based satin polyurethane. Supplies run $80 to $150 for a full kitchen. Labor is yours. Two full weekends of work, but when you’re done you have a kitchen that reads warm, real, and completely different from the flat-painted box you started with.
More Ideas:
Final Thoughts on Natural Wood Kitchen Ideas
What all 22 of these ideas share is this: warmth comes from material, not money. You don’t need new cabinets or expensive appliances to make a kitchen feel like it belongs to you. Wood tones, natural textures, and a few well-placed real materials do that work quietly and well. A kitchen that’s lived in is a kitchen that actually got used.
Pick one thing from this list. Just one. The shelf, the hardware, the cutting boards on the wall. Do that first and see how the room shifts before you plan the next step. Real changes happen in small moves, not overwhelming weekends.
Once the wood elements are in place, rounding out the room with storage ideas that double as room decor keeps the whole kitchen feeling intentional rather than improvised.
If you want more ideas like these broken down by room, budget, and skill level, homelypop.com has a lot more where this came from.