

21 Wood Backsplash Ideas That Add Warmth and Natural Beauty to Any Kitchen
Your kitchen backsplash feels flat, cold, and kind of boring. Tile grout is showing its age, the color is off, and every time you stand at the sink you wonder why it feels so uninspiring. You want warmth. You want that natural, lived-in look you keep seeing everywhere. But you don’t know where to start, and you’re not sure how much this is going to cost you.
This list covers 21 wood backsplash ideas I pulled from real homeowner forums, design communities, and hands-on projects. Each idea was included because it works in actual kitchens, not just magazine shoots. Some are for renters using peel-and-stick panels. Some are for owners doing full installs. Budget ranges from about $80 on the low end to around $300 for more involved projects.
This is for people working with $100 to $300 and who want a real, doable result. It’s not for anyone planning a full kitchen renovation with a contractor. The good news is you don’t need one to make a real difference here.
By the end, you’ll know exactly which wood backsplash direction fits your kitchen, your budget, and your skill level.
If you’re still weighing your options, there are plenty of ways to refresh tired kitchen walls beyond wood alone.
What to Know Before You Start a Wood Backsplash
- Wood near a stove needs a heat-resistant sealer. Two coats of polyurethane rated for 300°F minimum.
- Peel-and-stick wood panels run $3 to $6 per square foot. A standard backsplash area is about 15 to 20 square feet.
- Most kitchens need 2 to 3 boxes of shiplap planks. Measure twice, buy one extra box.
- Skip unfinished raw wood directly behind the sink. Moisture warps it within months.
- A common mistake is skipping primer on painted surfaces. The panels won’t stick properly without it.
- Reclaimed wood adds character but check for old paint or lead before sanding it.
- Sealed wood backsplash wipes clean with a damp cloth. Re-seal every 2 to 3 years to keep it looking sharp.
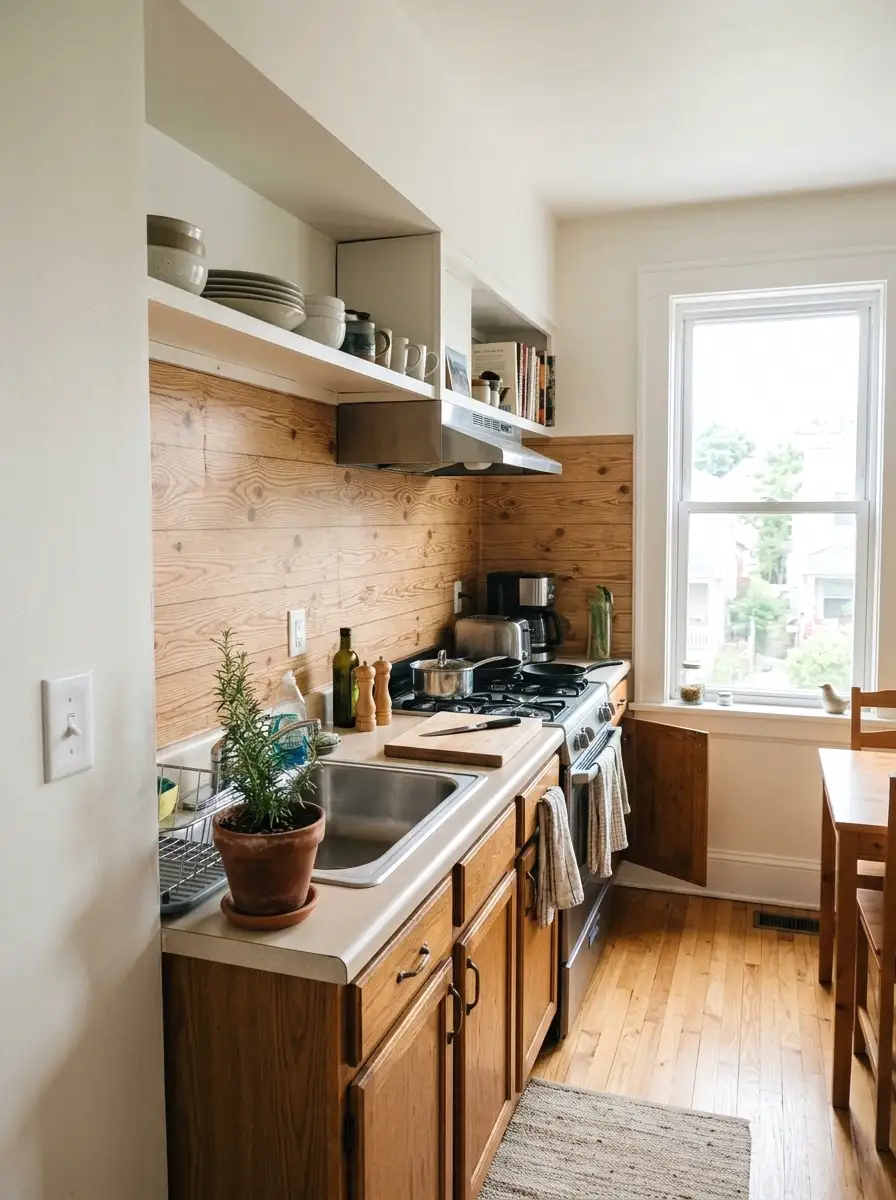
1. Shiplap Plank Panels
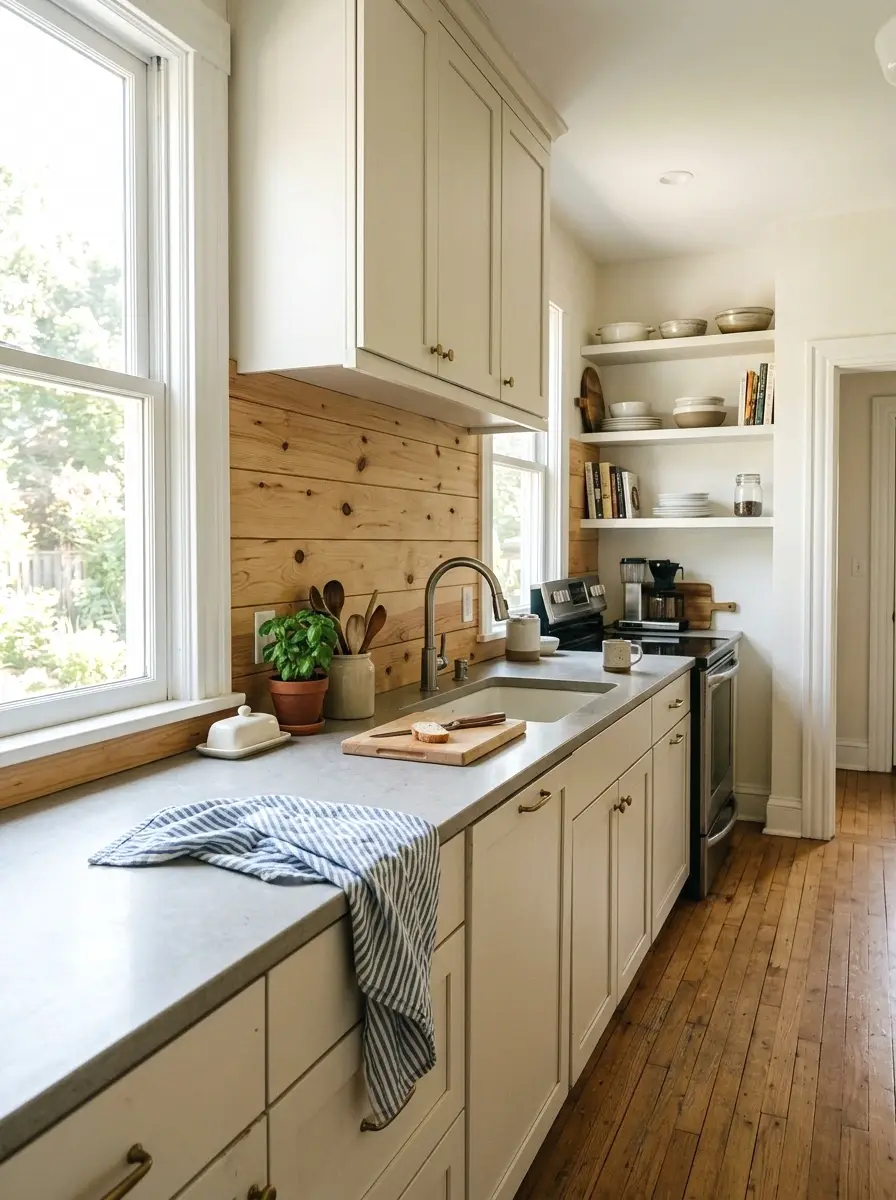
Shiplap is the entry point for most wood backsplash projects, and honestly it earns that reputation. The horizontal planks with thin gap lines give your kitchen a clean, farmhouse-influenced look without being over the top. It works behind a range, along a full wall, or just in one accent section.
A standard shiplap kit for a 15-square-foot backsplash runs about $80 to $120 at most home improvement stores. I painted mine with a matte white paint and it looked like something out of a catalog. But the natural wood finish is where it really shines. Sand it smooth, seal it, and you’re done.
If you like the horizontal plank styles worth trying, beadboard is another direction that delivers a similar clean rhythm on the wall.
2. Reclaimed Barn Wood Strips
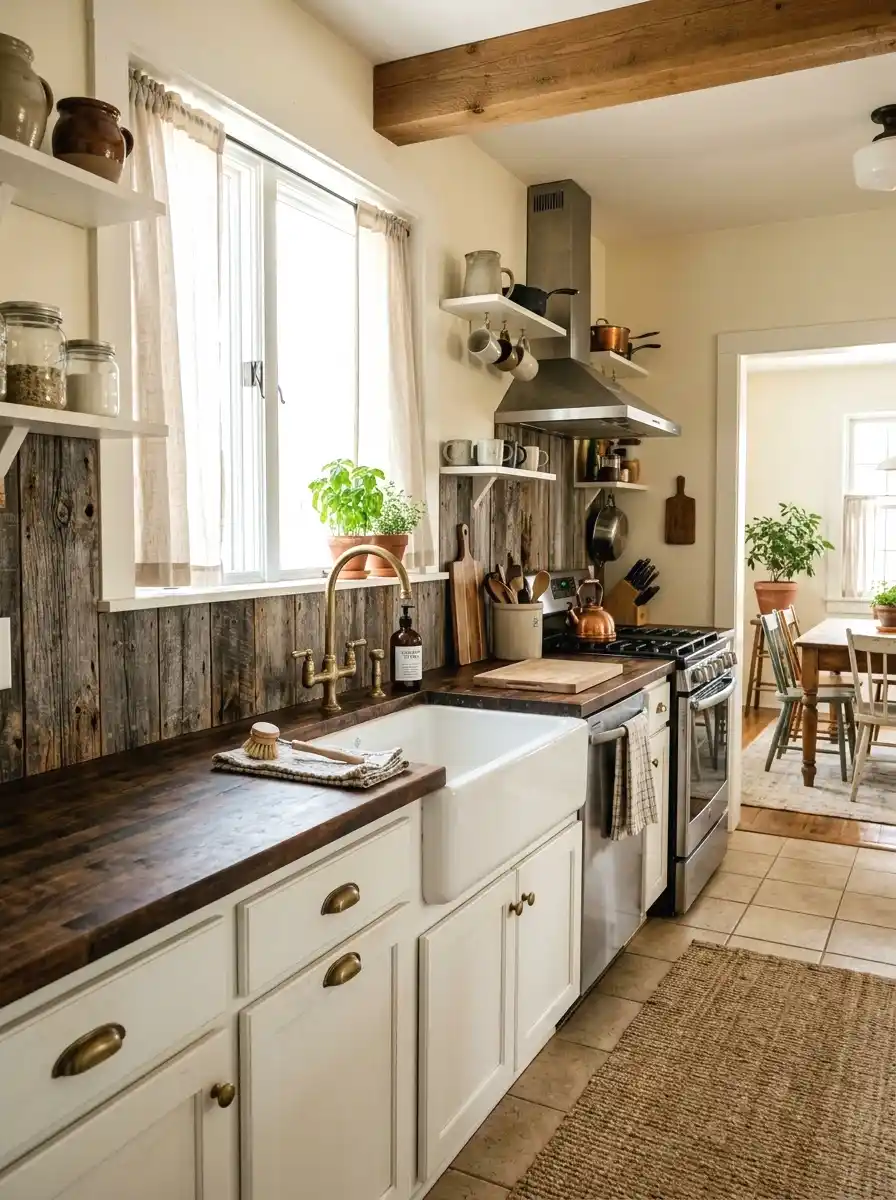
Reclaimed wood is the kind of thing you either love immediately or have to be talked into. I was in the second camp. Then I saw it behind a white farmhouse sink and it just clicked. The mix of weathered grays, browns, and the occasional knot or split gives a kitchen a history it didn’t earn.
You can source reclaimed boards from salvage yards for $1 to $3 per linear foot. Clean them thoroughly, check for old fasteners, and seal well before installing. The imperfections are the whole point. No two kitchens will look the same.
There’s a whole world of salvaged material ideas for real kitchens that lean into that same worn-in character.
More Ideas:


3. Peel-and-Stick Wood Wallpaper Panels
So here’s the thing about peel-and-stick wood panels: they’ve gotten really good. The texture and print quality on current products is miles ahead of where they were a few years ago. For renters, this is basically the only real option, and it’s a solid one.
Brands like NuWallpaper and Art3d sell realistic wood-look peel-and-stick sheets for around $30 to $50 for a pack covering 20 square feet. Clean your wall surface first, use a smoothing tool to push out bubbles, and trim edges with a craft knife. Totally removable when you move.
4. Thin Wood Veneer Sheets
Thin wood veneer is one of those materials that looks like it costs three times what it does. It’s real wood, just sliced very thin and backed with paper or adhesive. You get the grain, the color variation, and the warmth of solid wood at a fraction of the price and weight.
A 4-by-8 sheet of maple or walnut veneer runs about $40 to $70. You cut it with scissors or a sharp utility knife, peel the backing, and press it directly onto a primed surface. Finish with two coats of satin polyurethane. It looks genuinely polished.
5. Herringbone Wood Tile Pattern
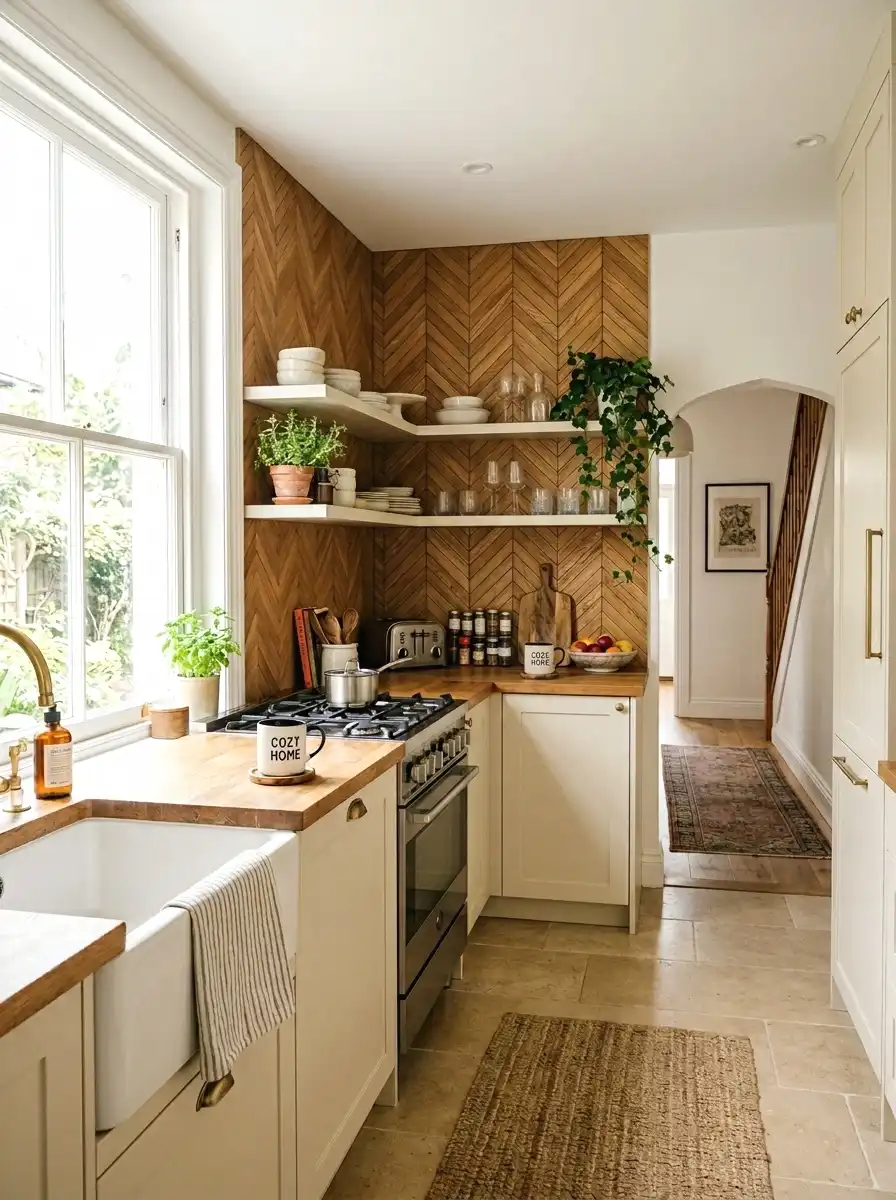
The herringbone pattern takes flat planks and turns them into something that reads as intentional design. The diagonal V-shape draws your eye along the wall in a way that adds visual movement without adding clutter. It works especially well in smaller kitchens where you want the space to feel more dynamic.
You can buy pre-cut herringbone wood mosaic tiles at around $8 to $12 per square foot. These come on a mesh backing, so installation is basically like laying regular tile. Seal after grouting with a penetrating sealer. Total cost for a standard backsplash area sits around $130 to $200.
6. Whitewashed Wood Planks
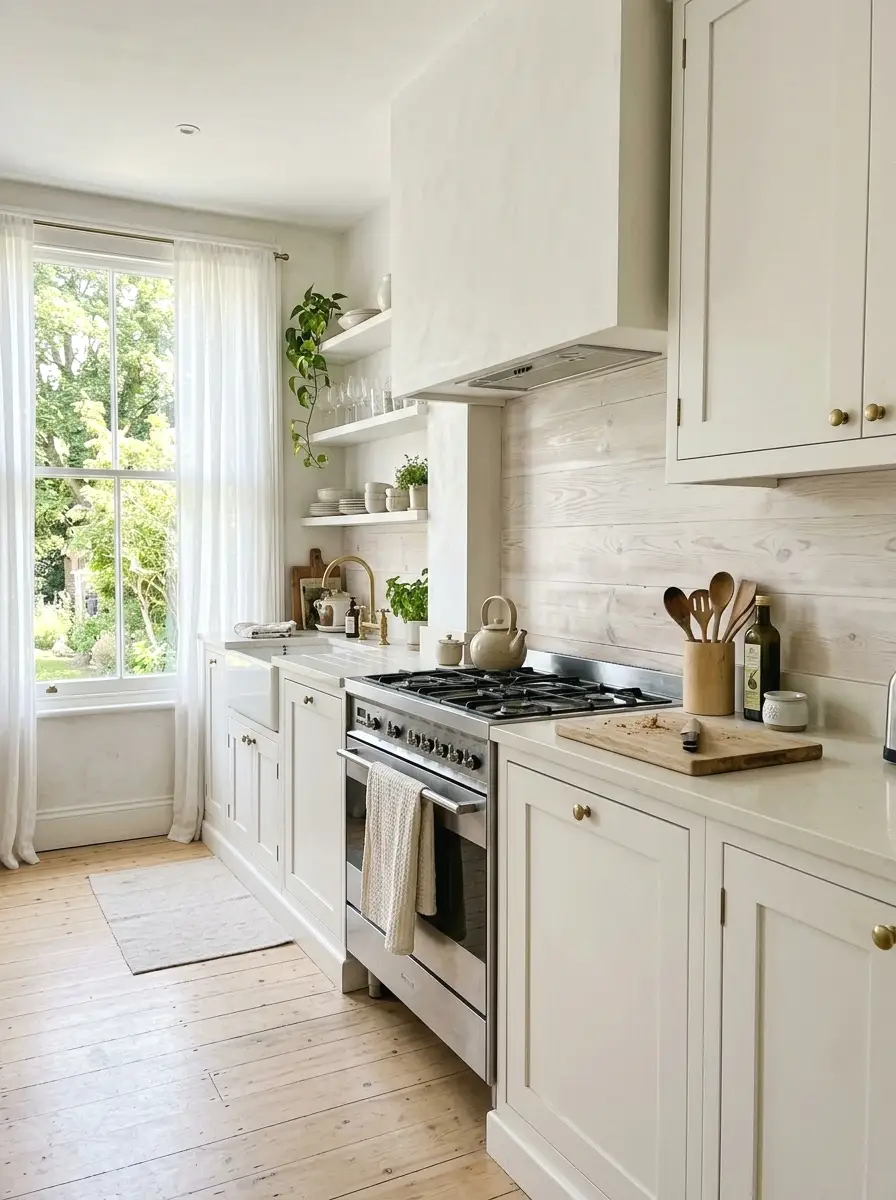
Whitewashing is a technique where you water down white paint and brush it over raw or lightly sanded wood. The grain still shows through. The color reads as warm and soft, not stark. It’s a good bridge between the “I want wood” feeling and the “but my kitchen is mostly white” reality.
When I tried this in my own space, I used a 1-part white paint to 3-parts water ratio and applied it with a dry brush. Wipe off excess before it dries for a more subtle effect. Total material cost is almost nothing if you have wood planks already. A bag of shiplap and a can of paint will run you around $60 to $90.
More Ideas:
7. Dark Stained Wood Accent Strip
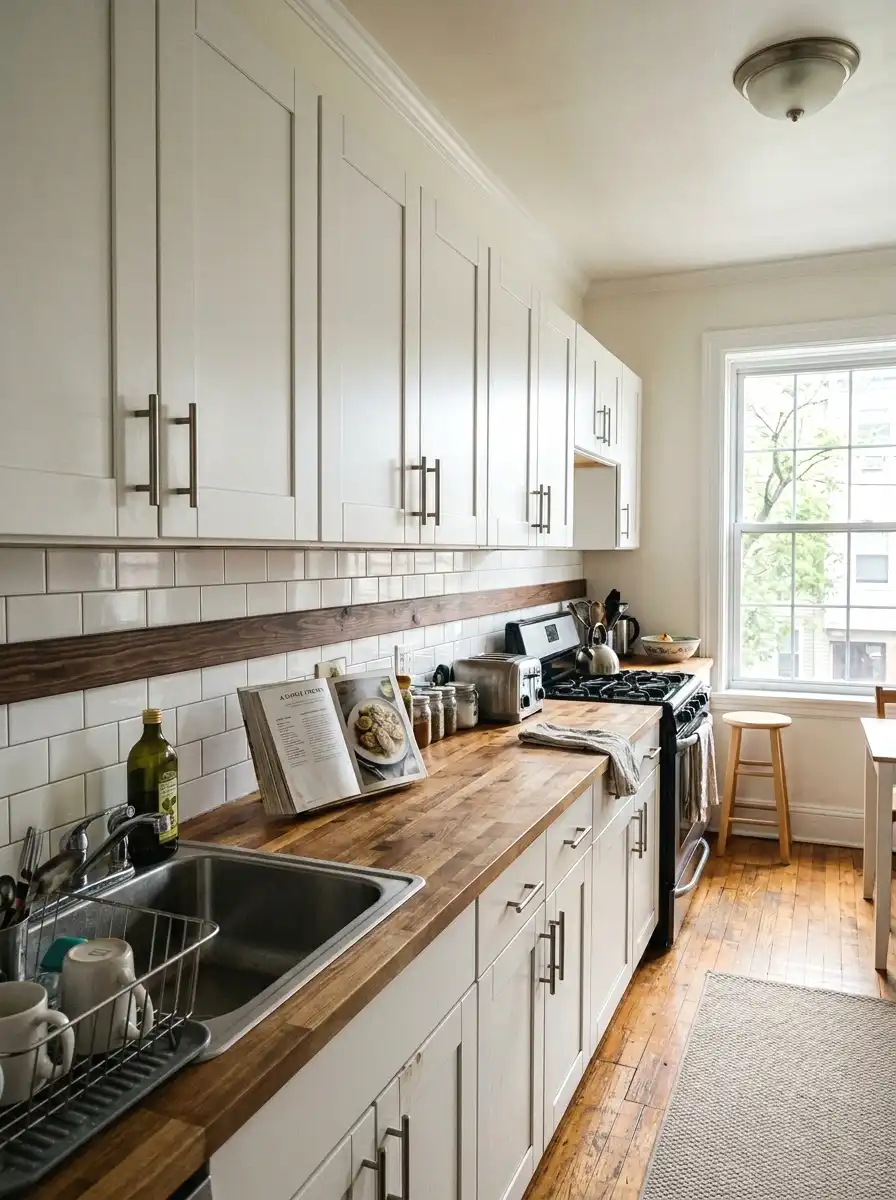
Here’s an idea that gets overlooked constantly. Instead of covering the full backsplash, you install a single horizontal strip of dark-stained wood at counter height, maybe 6 to 8 inches tall, running the full length of the counter. It acts like a visual anchor.
Walnut stain on pine gives you a rich brown that pairs really well with light countertops and white cabinets. A 6-foot run of 1×8 pine costs about $20 to $30, and a small can of oil-based stain is another $15. Seal it well. This whole project can come in under $60 and it makes the kitchen feel more finished.
If you’re working with white cabinetry, pairing light countertops with dark accents is a combination that keeps showing up in well-designed kitchens for good reason.
8. Bamboo Panel Backsplash
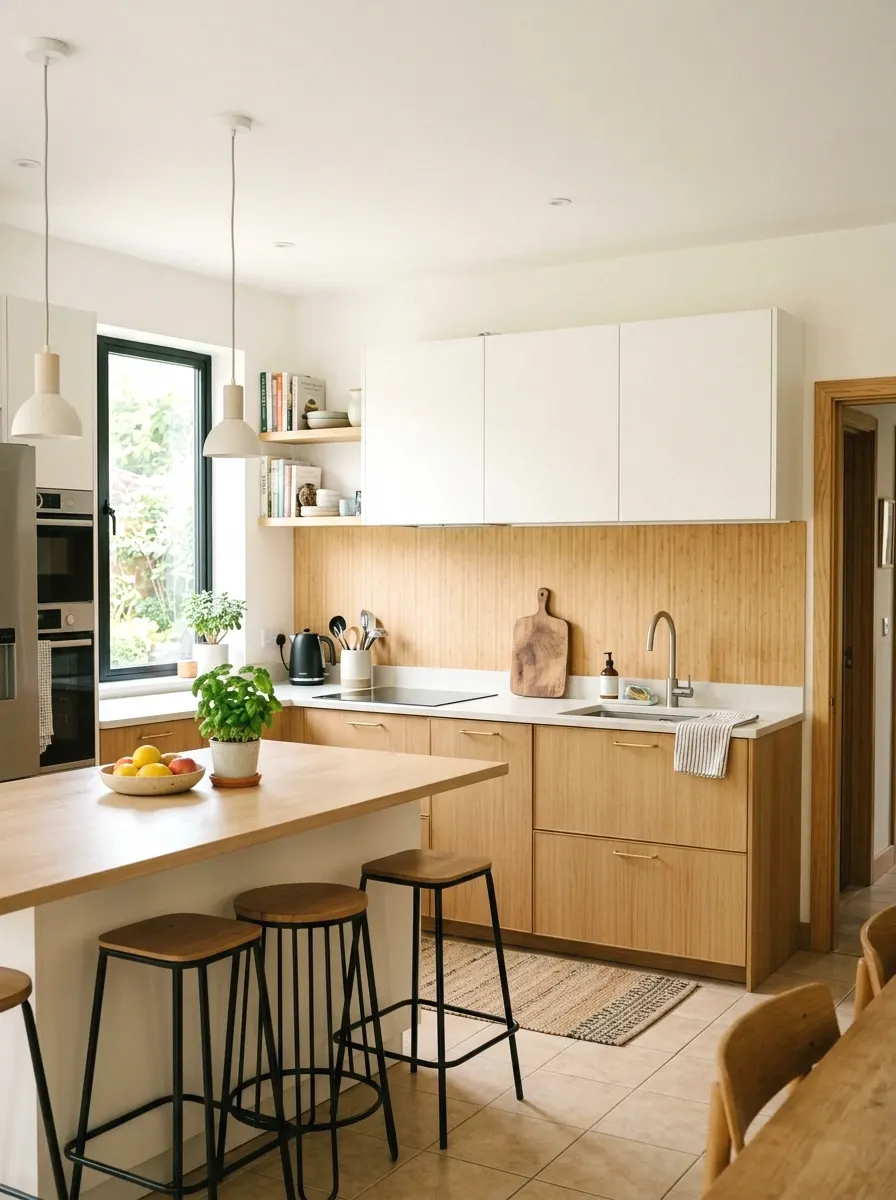
Bamboo is technically a grass, but it installs and behaves like wood and it’s harder than most hardwoods. That’s relevant because backsplashes take splashes, steam, and heat, and bamboo handles all of it well when properly sealed. It also has a slightly different grain pattern that reads as a bit more modern.
Bamboo panels come in natural blonde or carbonized (darker) tones. They run about $4 to $7 per square foot. A 20-square-foot backsplash project comes to roughly $80 to $140 in materials. Cut with a fine-tooth saw, adhere with construction adhesive, and apply two coats of waterproof sealer.
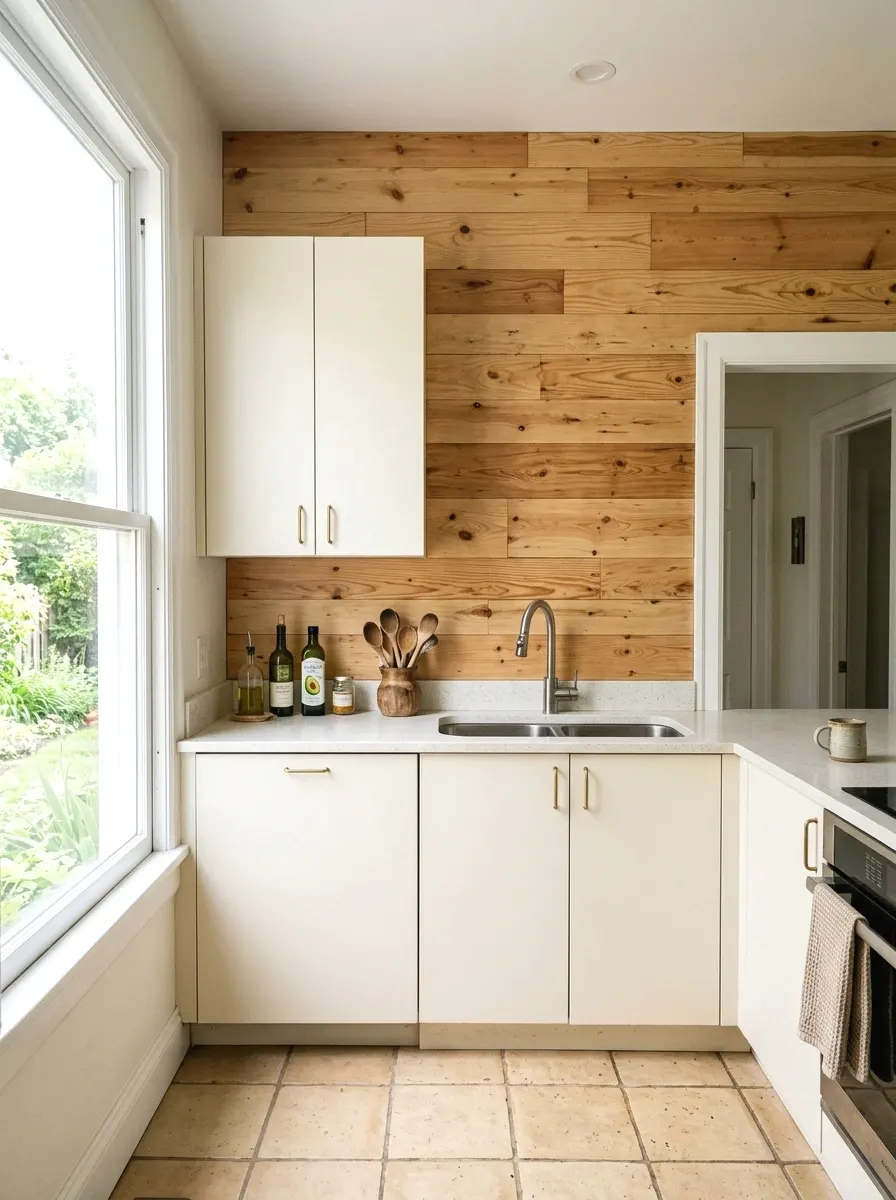
9. Stacked Vertical Plank Wall
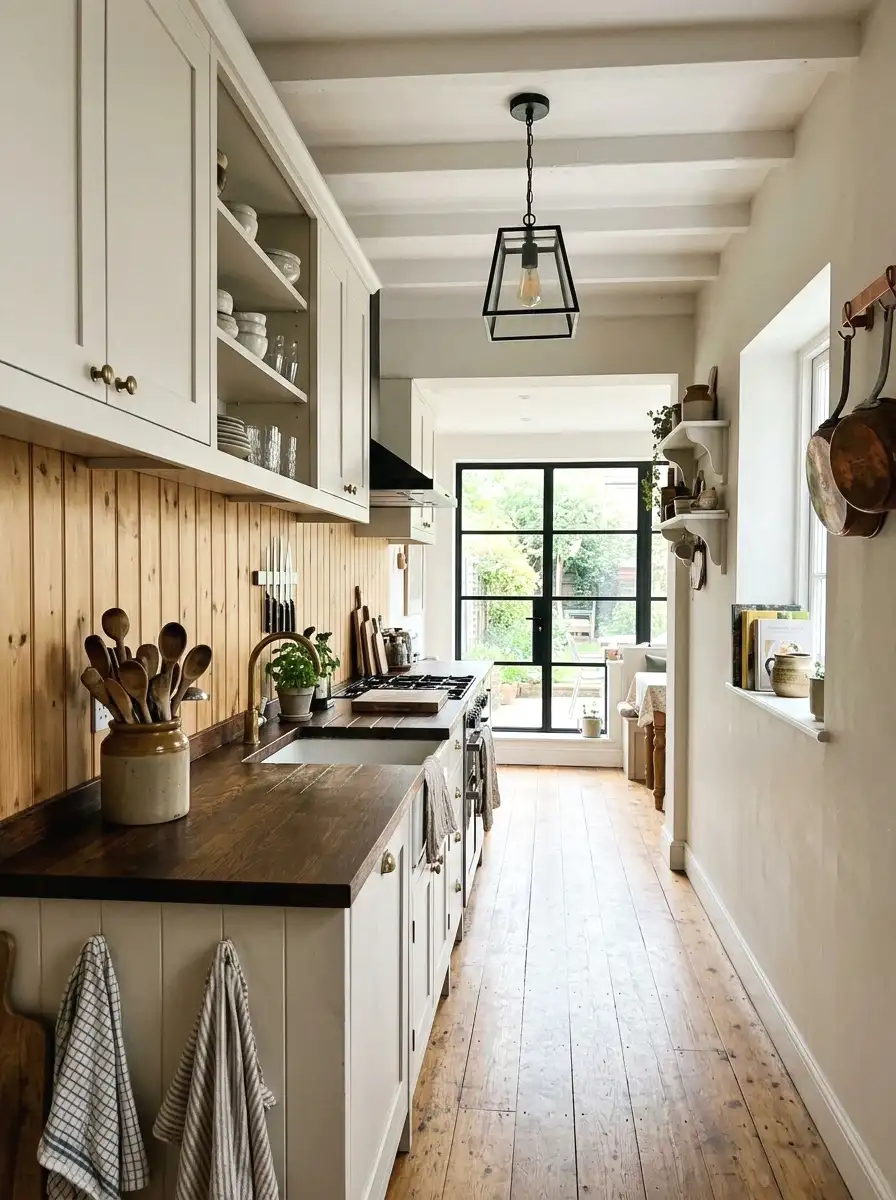
Most wood backsplashes go horizontal. Running the planks vertically does something different. It makes the ceiling feel higher and the space feel more narrow in a good way, especially in a galley-style kitchen. The lines draw your eye up and the whole room feels taller.
You can use the same shiplap or tongue-and-groove boards you’d use for a horizontal install, just turned 90 degrees. The technique is the same, the cut angles change slightly at the top and bottom. Standard material cost stays around $80 to $130. The visual result is surprisingly different from the horizontal version.
10. Cedar Wood Planks
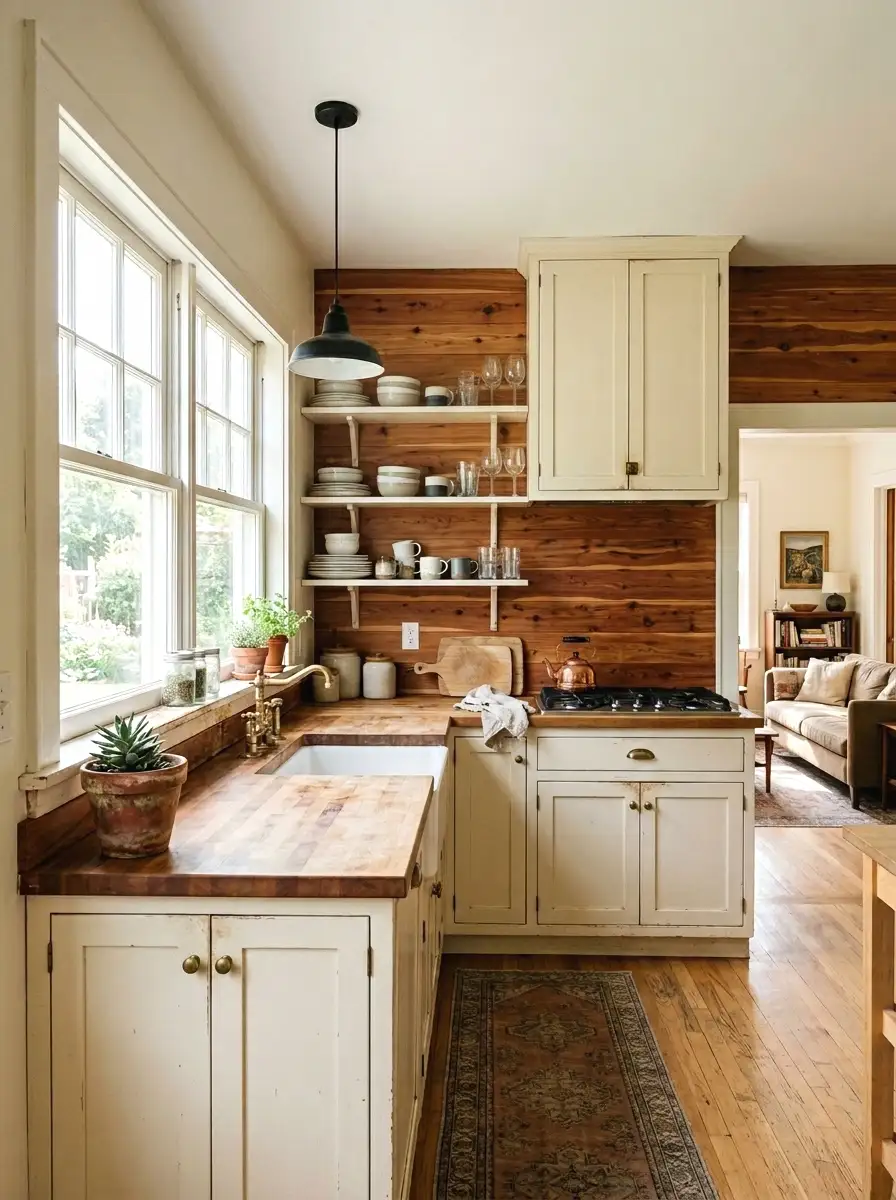
Cedar is naturally resistant to moisture and insects, which makes it a smarter choice for kitchen backsplashes than most people realize. It also has a warm reddish-brown color and a distinctive straight grain that looks rich without trying too hard. Plus the scent when it’s freshly cut is genuinely nice.
Cedar fence boards at the hardware store are cheap. A standard 6-foot fence board runs about $3 to $5. For a 15-square-foot backsplash you’d need roughly 10 to 12 boards. Total wood cost comes to $40 to $60. Seal well because cedar still needs protection from cooking steam and grease.
More Ideas:
11. Wood Slat Screen Panel
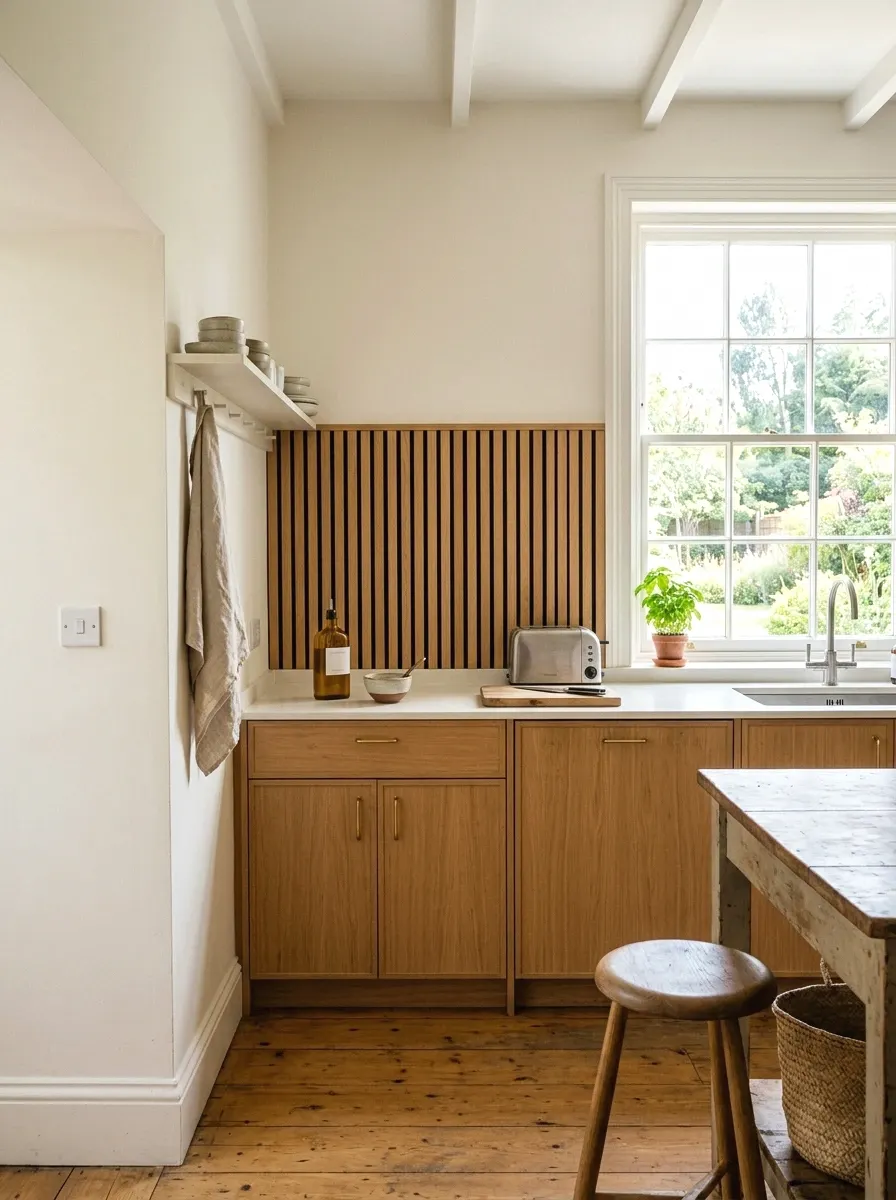
Wood slat panels are the more architectural version of a wood backsplash. Think evenly spaced vertical strips of wood with gaps between them, mounted to a backing panel. It adds dimension and shadow lines that change how the wall looks depending on the light. It’s more of a statement.
These panels are sold as room dividers and accent walls, and they work just as well in a kitchen. An 8-by-4 panel from brands like WOODEK or Walcraft runs $120 to $200. Cut to fit with a circular saw. Mount with construction adhesive or screws. The look is very current for 2025 and 2026.
For more modern panel looks for current kitchens, a monochrome approach can make these architectural details hit even harder.
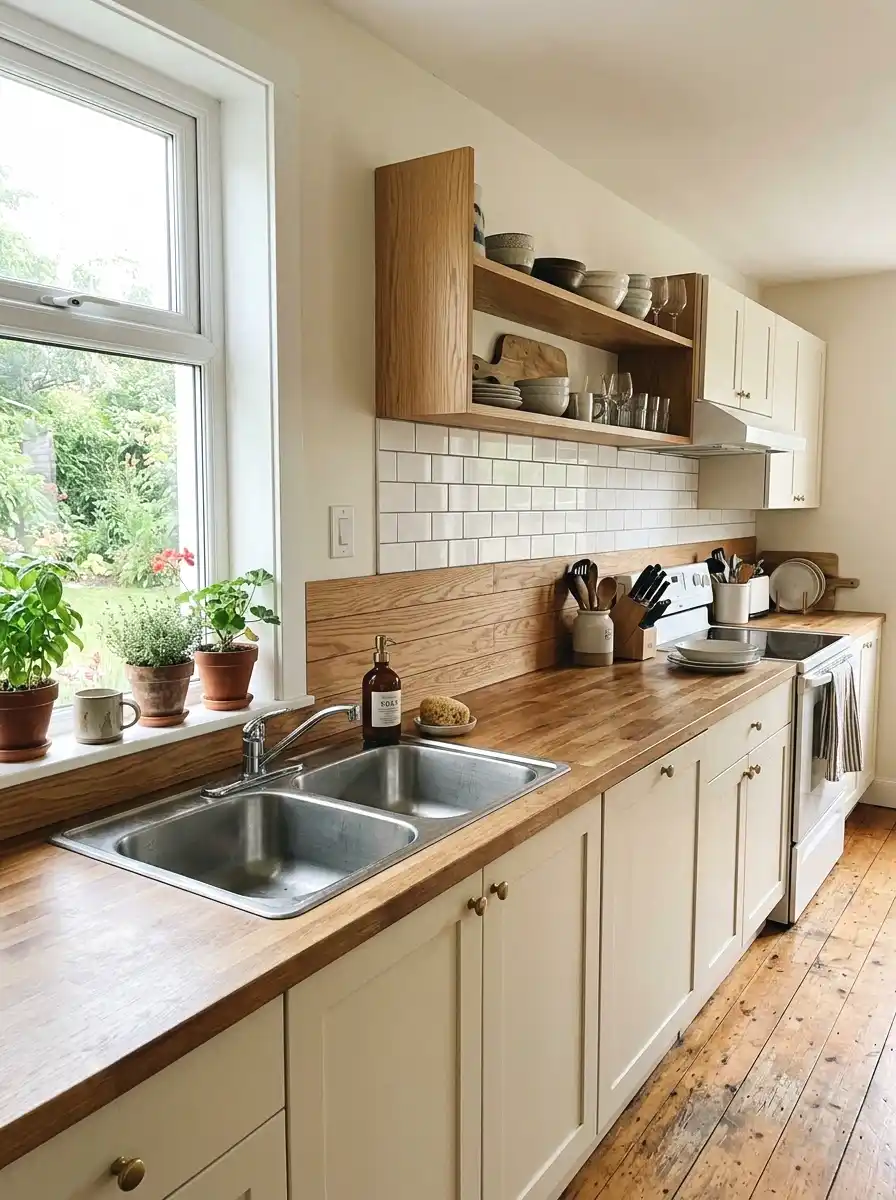
12. Floating Wood Shelf with Matching Backsplash
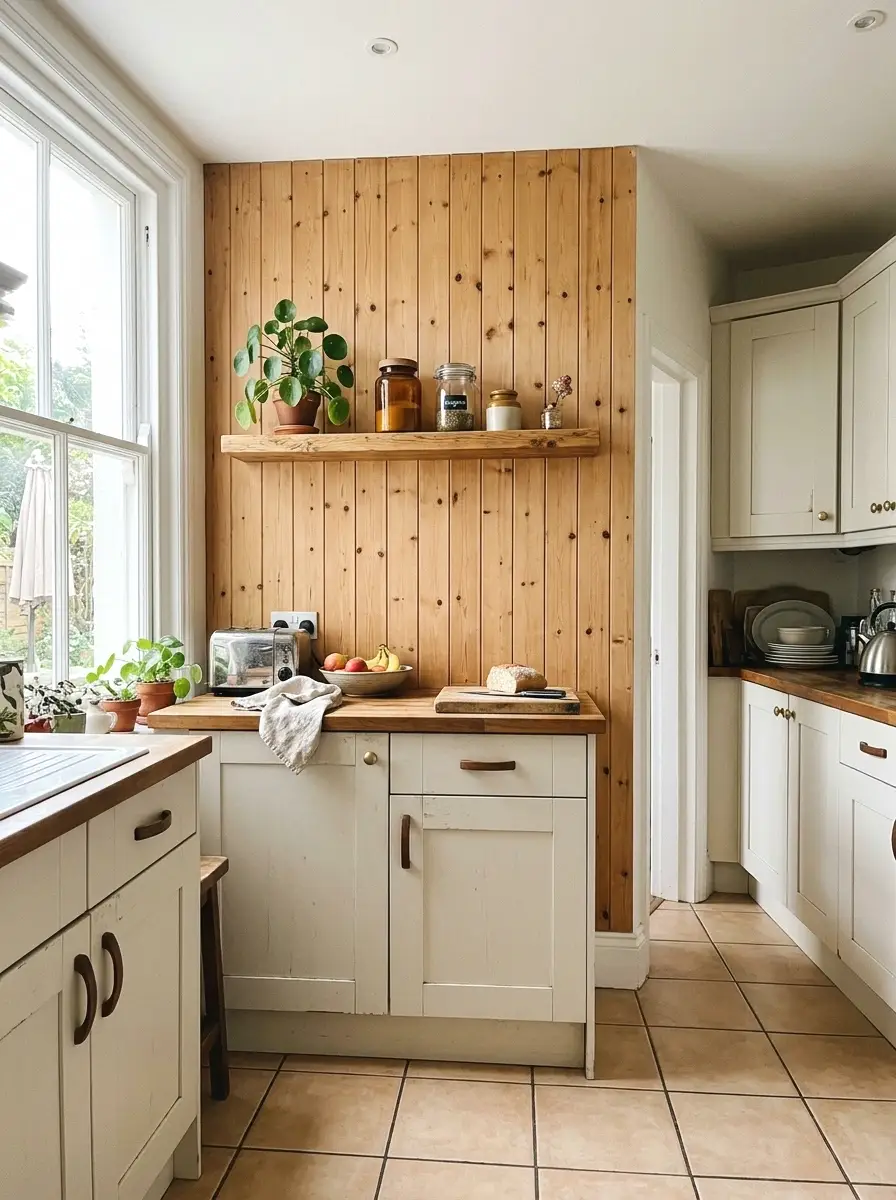
This one is a two-in-one idea. You install a narrow floating shelf at mid-height on your backsplash wall, then use the same wood species for the backsplash planks below it. The shelf and the wall become one cohesive element instead of two separate things fighting for attention.
I was skeptical about this one but it ended up being one of the most functional ideas on this list. A pine floating shelf bracket kit runs about $25. The matching planks below cost another $50 to $80. The shelf holds oils, spices, or plants, and the whole assembly looks intentional and clean.
13. Burnt Wood (Shou Sugi Ban) Backsplash
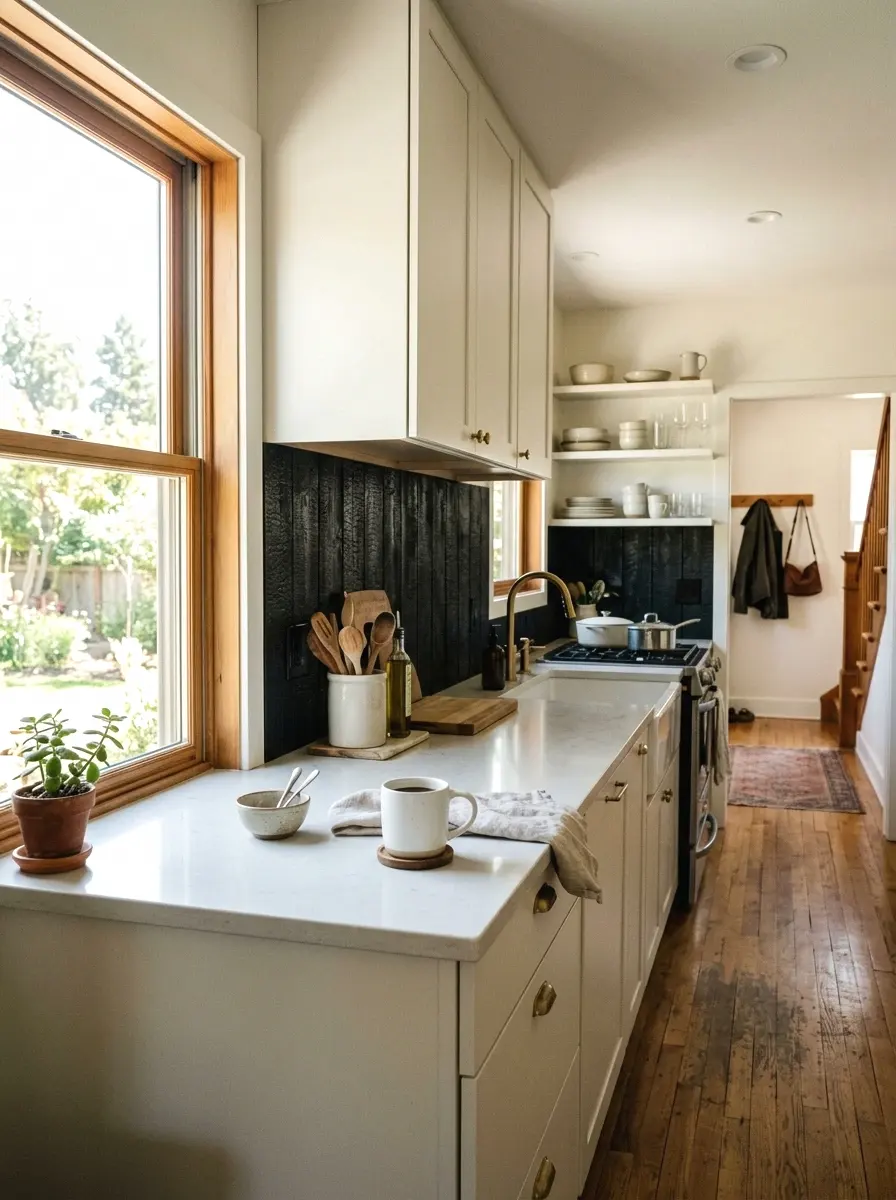
Shou sugi ban is a Japanese technique where you char the surface of wood with a torch, then brush off the ash to reveal a dark, textured grain beneath. The result is carbon-black or deep brown wood with a surface that’s actually more durable and water-resistant than raw wood. It’s dramatic in the best way.
You can do this yourself with a handheld propane torch on pine or cedar boards. Char the surface evenly, let it cool, scrub with a stiff brush, and seal with a matte finish oil. Total cost for a 15-square-foot backsplash including boards and sealer is around $70 to $100. The look is completely unique.
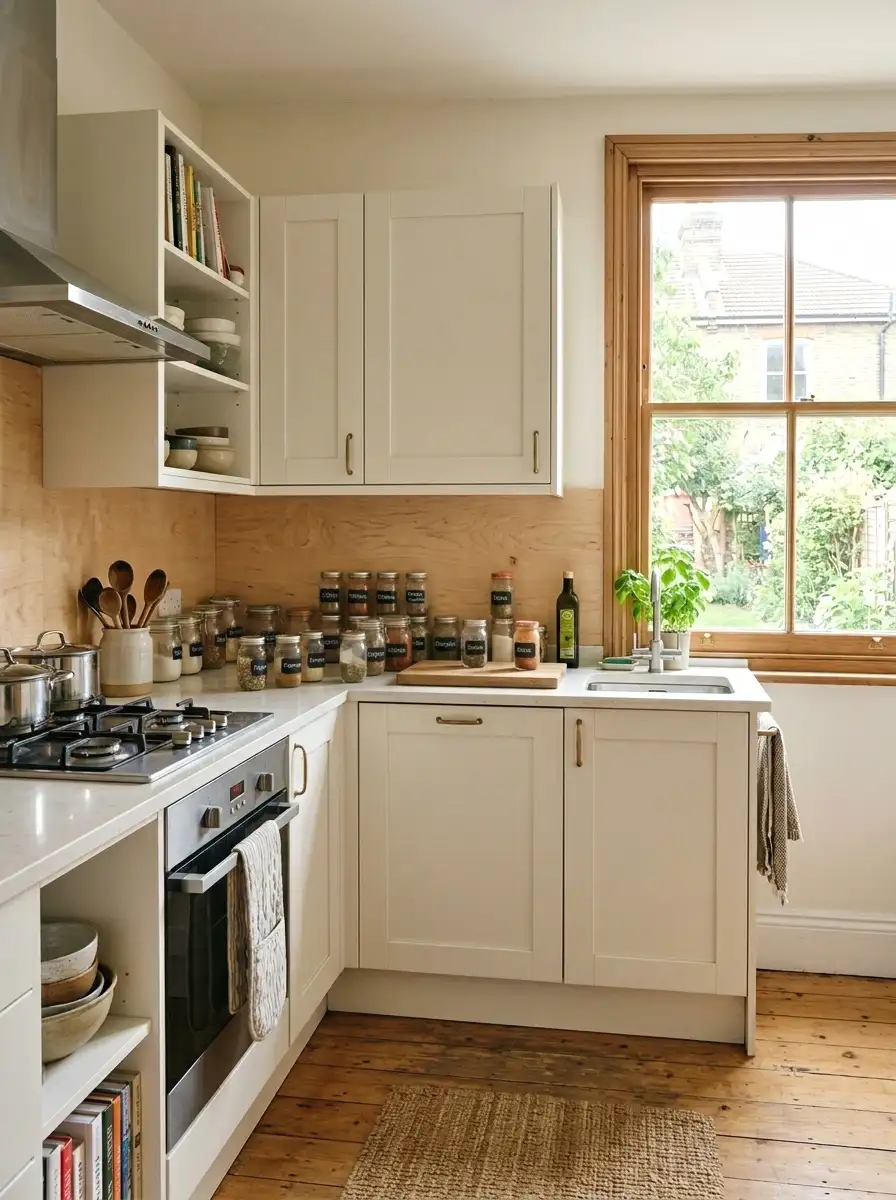
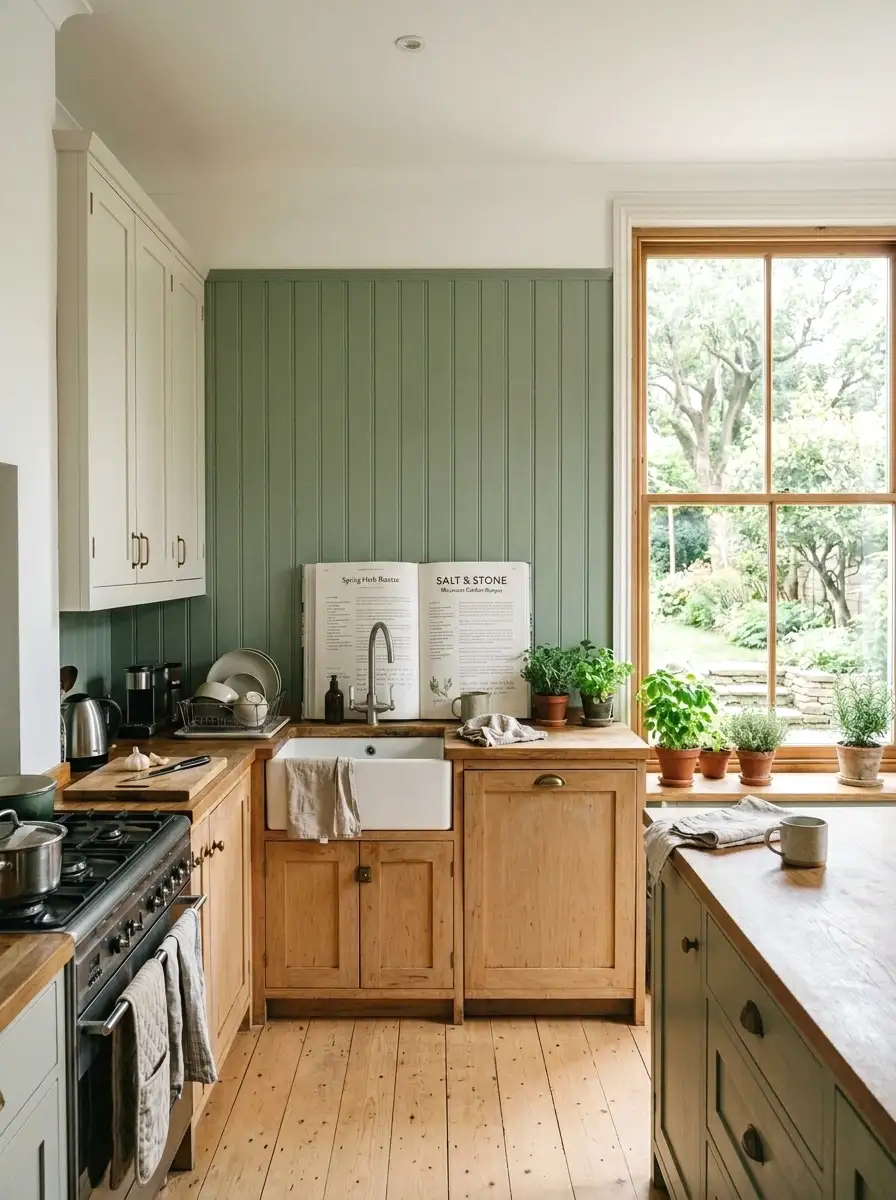
14. Tongue-and-Groove Pine Panels
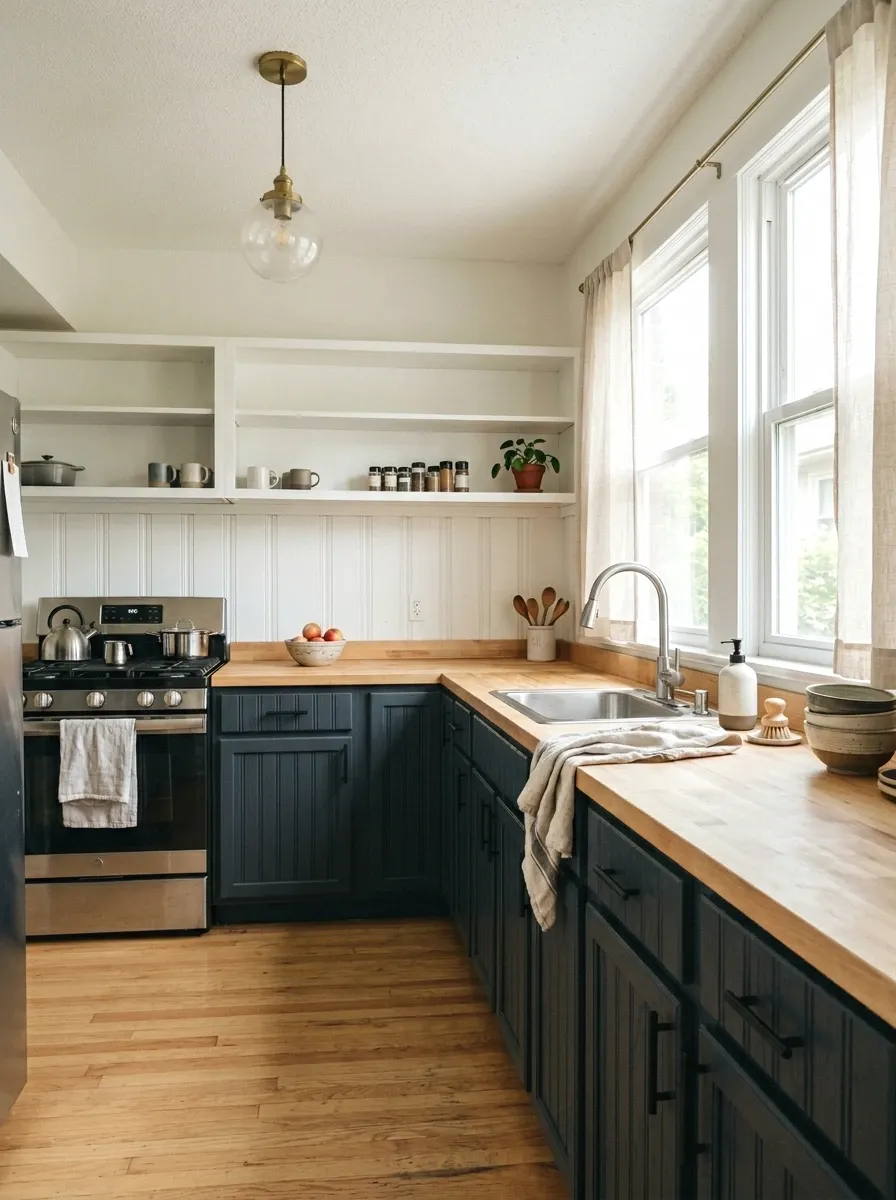
Tongue-and-groove is the most traditional wood paneling method. Each board has a ridge on one edge and a groove on the other, so they slot together with no visible gaps. The result is a tighter, more finished look compared to shiplap’s thin reveal lines.
Pine is the most affordable option for tongue-and-groove. A pack of pre-primed boards covering about 20 square feet runs $60 to $90. Paint it any color or leave it natural and seal it. White-painted tongue-and-groove against dark lower cabinets is a classic combination that holds up well visually.
More Ideas:
15. Live Edge Wood Slab Backsplash
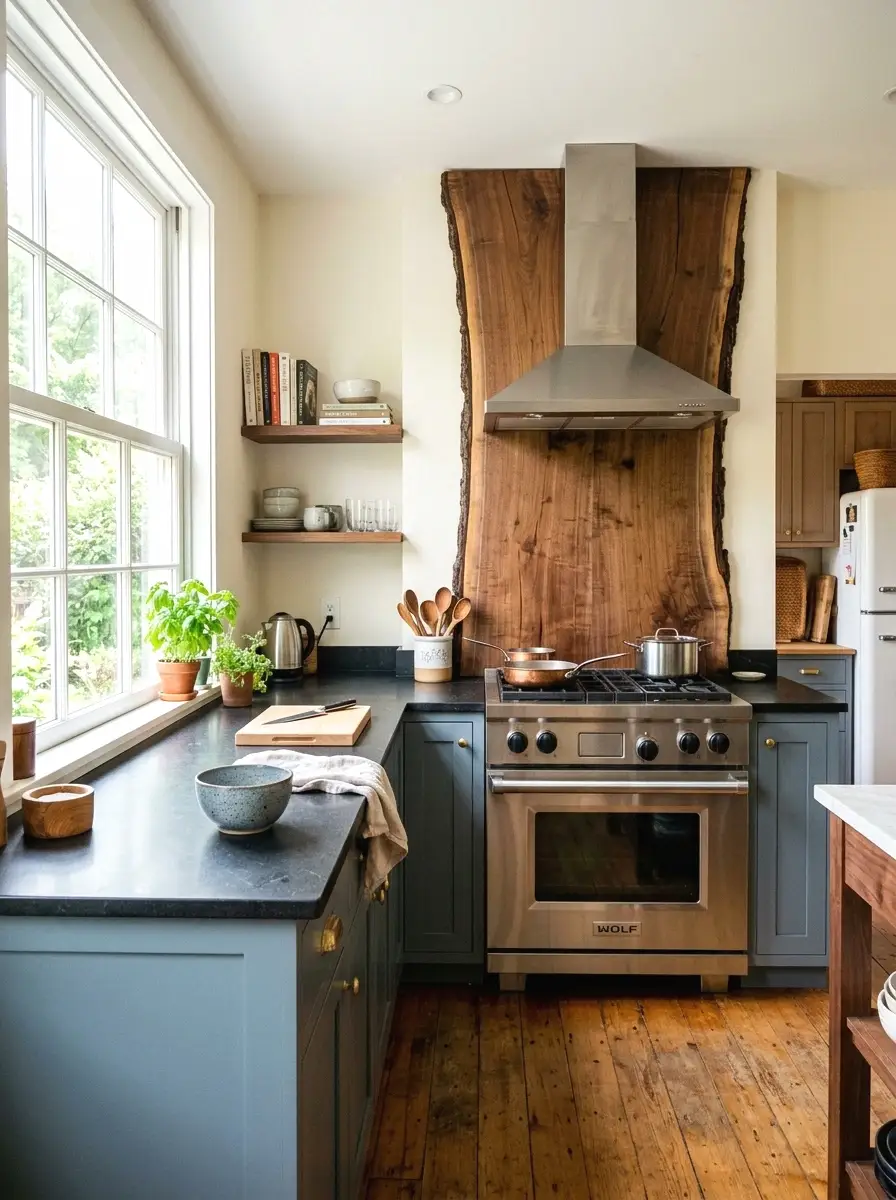
A live edge slab keeps the natural edge of the tree intact on at least one side of the board. You get these irregular, organic curves that look like the wood was cut from a tree this morning. It’s the most dramatic option on this list and also the most unique.
Smaller live edge slabs from a local lumber yard or Etsy seller run about $80 to $180 depending on species and size. Walnut and maple are the most popular. Mount with a few well-placed screws into studs, seal with bar-top epoxy or hardwax oil. This works best as a feature section behind the range.
16. Painted Wood Plank Backsplash
This is for anyone who likes the texture of wood but wants the color of something else. You install the planks, prime, and then paint in whatever color works for your kitchen. Navy, sage green, terracotta, and matte black are all really good with wood plank texture showing through the paint.
The texture of the grain is still visible even under two coats of paint, which gives you dimension without the full natural wood look. This is a good option if you’re not ready to commit to visible wood grain but still want the structural interest that planks provide. Total cost is under $100.
17. Mixed-Width Wood Plank Arrangement
Using planks of different widths in the same backsplash adds visual complexity that a single-width install doesn’t get. You alternate between 3-inch, 5-inch, and maybe one wider 8-inch board, and the result looks more hand-crafted and intentional. It reads as custom even when it’s not.
The planning step is the key part here. Sketch out your pattern before cutting anything. Most lumber yards sell boards in multiple widths for the same price per linear foot. Buy a mix and plan your layout first. The added material cost is minimal since you’re just combining different widths of the same wood species.
If you’re chasing kitchen upgrades that feel custom without the contractor bill, this kind of mixed-width approach is exactly the kind of trick that gets results.
18. Wood and Subway Tile Combination
You don’t have to choose between wood and tile. Running wood planks from counter height to about 24 inches up, then continuing with white subway tile from there to the cabinets, creates a two-material backsplash that’s both warm and practical. The tile stays behind the stove and sink where moisture is highest.
This setup solves the main concern people have about wood near water. The wood sits in the lower zone where there’s less splash risk, and the tile handles the wet zone. Material cost for both runs about $150 to $250 for a standard kitchen. It’s the most practical version of the wood backsplash idea.
If you want to keep exploring tile and material combinations that hold up in high-use zones, there’s a lot more to work with than just subway tile.
More Ideas:
19. Reclaimed Pallet Wood Backsplash
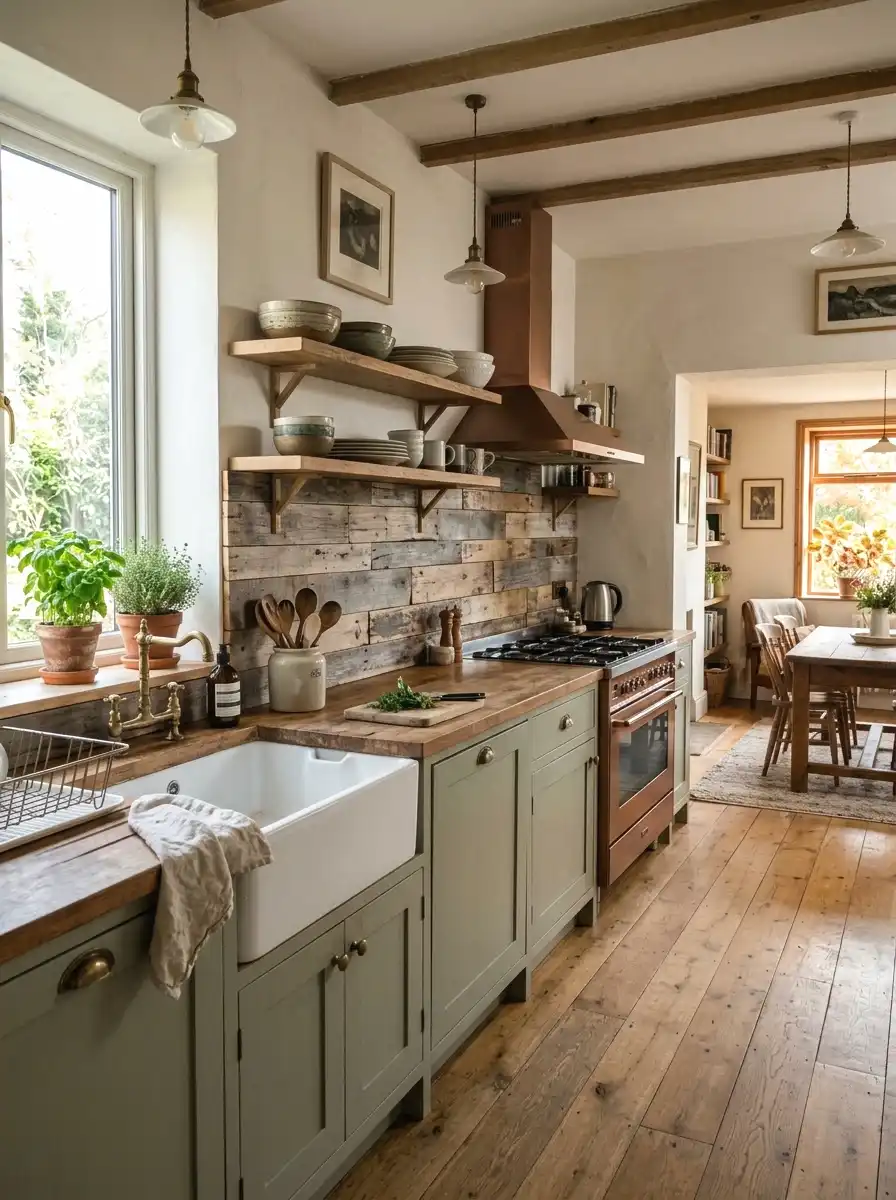
Pallets are the DIY world’s favorite free material, and for good reason. Disassemble a clean heat-treated pallet, sand the boards, cut to length, and nail or glue them directly to the wall. The varied patina and imperfect edges are the whole point. No two pallets look the same.
The wood itself can be free or very cheap. The main cost is time, sandpaper, and a good sealer. Budget about $30 to $50 for supplies. This one took me ages to figure out, but the key is using only HT-stamped pallets, not MB (methyl bromide), which is treated with chemicals you don’t want in your kitchen.
20. Wood-Look Ceramic Tile Backsplash
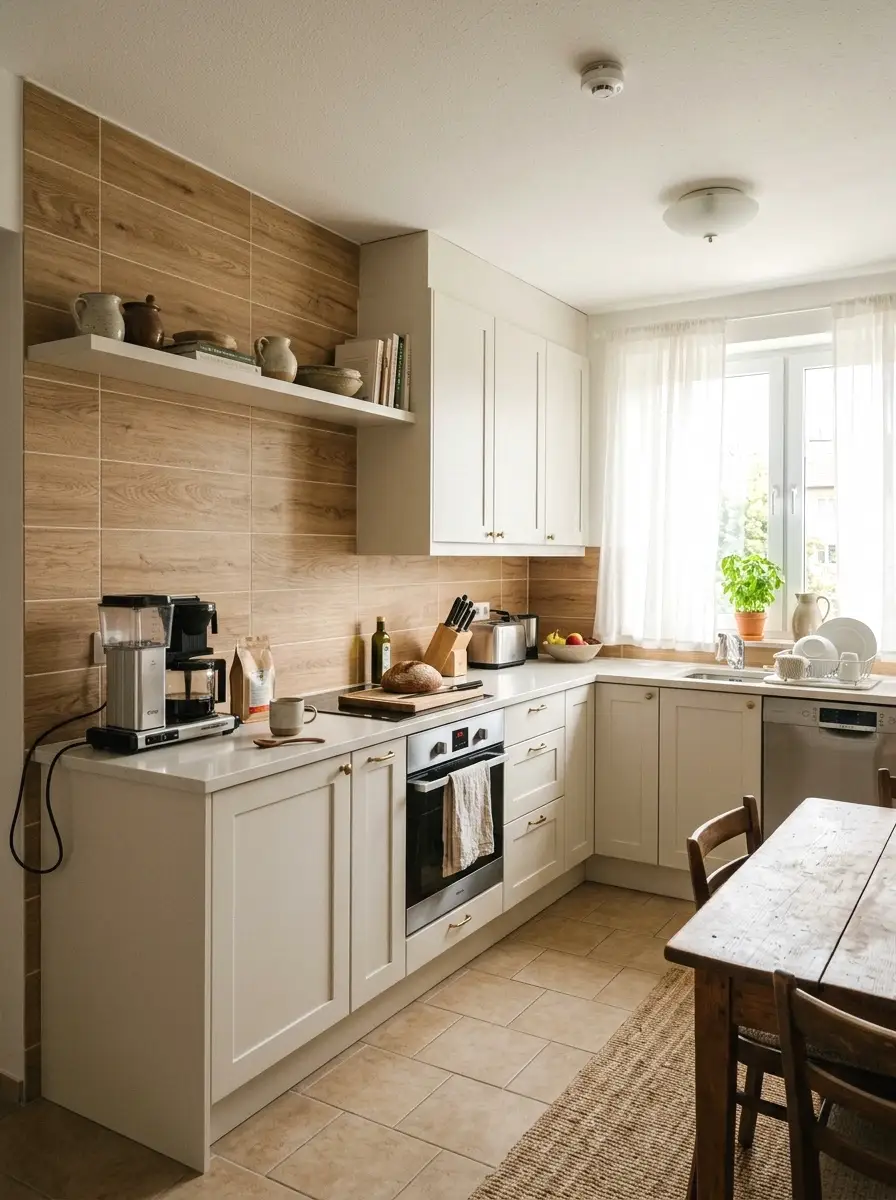
This is the version for people who want the look of wood without any of the maintenance questions. Wood-look ceramic tiles have gotten incredibly realistic. The digital printing technology gives you convincing grain patterns, knots, and color variation on a fully waterproof, heat-resistant surface.
These tiles run about $3 to $8 per square foot, putting a standard backsplash project at $60 to $160 in tile alone. You still need grout and adhesive, but the install is identical to regular tile. Good for rental situations where you’re replacing existing tile. It’s also the lowest-maintenance option on this list by far.
21. DIY Wood Frame Panel Grid
The last one is a surface treatment, not a full wood covering. You mount thin strips of wood in a grid pattern directly on a painted wall, creating a paneled effect without covering the entire surface. The wall color shows through the grid and becomes part of the design. It’s graphic and modern.
Use 1×2 pine strips at about $1 to $2 per linear foot. Paint the wall first in a deep color, let it dry, then mount the strips in a clean grid with construction adhesive. Paint the strips the same color as the wall or a contrasting one. Total cost for a full backsplash section runs $60 to $90. It’s a smart way to add structure without adding bulk.
Final Thoughts on Wood Backsplash Ideas
You now have 21 real options across a wide range of budgets, styles, and skill levels. Some of these you can do in an afternoon with materials from the hardware store. Others take a weekend and some planning. But none of them require you to gut your kitchen or hire anyone.
If the warmer, textured direction resonated most, there are farmhouse-style details worth borrowing that pair well with just about everything on this list.
The thing most of these ideas share is that they add texture. That’s what changes how a kitchen feels. Not a new color, not new hardware, just something with grain and depth on the wall behind your counter.
Start with one section. Measure the wall behind your range, pick one wood type, and get the materials this weekend. One small section done well is worth more than a whole wall planned and never started.
If you want more ideas like these, homelypop.com covers a lot of real-home projects across every room and budget range.
And if you’re curious about small changes that shift how a room feels, paint is always worth looking at alongside whatever you put on the wall.


