19 Tongue and Groove Backsplash Ideas for a Warm, Textured Kitchen
Your kitchen backsplash is a blank wall you’ve been staring at for months, maybe longer. Tile felt too expensive. Paint felt too boring. And everything on Pinterest looks like it belongs in a magazine, not your actual house. You’re not looking for a renovation project. You’re looking for something real that works.
These 19 tongue and groove backsplash ideas come from actual homeowners who did this on budgets between $100 and $300. I went through forums, real home Q&As, and hundreds of photos to find what actually holds up in a kitchen, not just what looks good in a showroom. Each idea was picked because it solves a real problem, fits a real budget, and works in a real kitchen.
This list is for renters who want texture without damaging walls, and for owners ready to commit to something with character. If you want marble slab or high-end tile, this isn’t for you. But if you want a warm, finished kitchen without spending a lot, these ideas will get you there.
If you’re still weighing your options, there are plenty of budget-friendly wall covering options worth a look before you commit.
By the end of this, you’ll know exactly which style fits your space and what it’ll cost you to make it happen.
What to Know Before You Start Tongue and Groove Backsplash
- Tongue and groove boards interlock edge to edge, so gaps and warping are much less common than with plain planks.
- Measure your backsplash area in square feet before buying anything. Most kitchens run 15 to 30 sq ft behind the stove.
- Budget reality: a basic pine tongue and groove kit for 20 sq ft runs $80 to $140 at most home improvement stores.
- Wood near a stove needs a sealant or the steam will warp it within months. Two coats of polyurethane is the minimum.
- Most people underestimate how much adhesive they need. Buy 10% more than your square footage calculation.
- If you’re renting, use construction adhesive on a thin plywood backer panel that lifts out instead of gluing to the wall.
- Clean the wall with a degreaser before installing. Kitchen grease makes adhesive fail faster than anything else.
- Primed boards take paint better and stay looking clean far longer than raw wood.
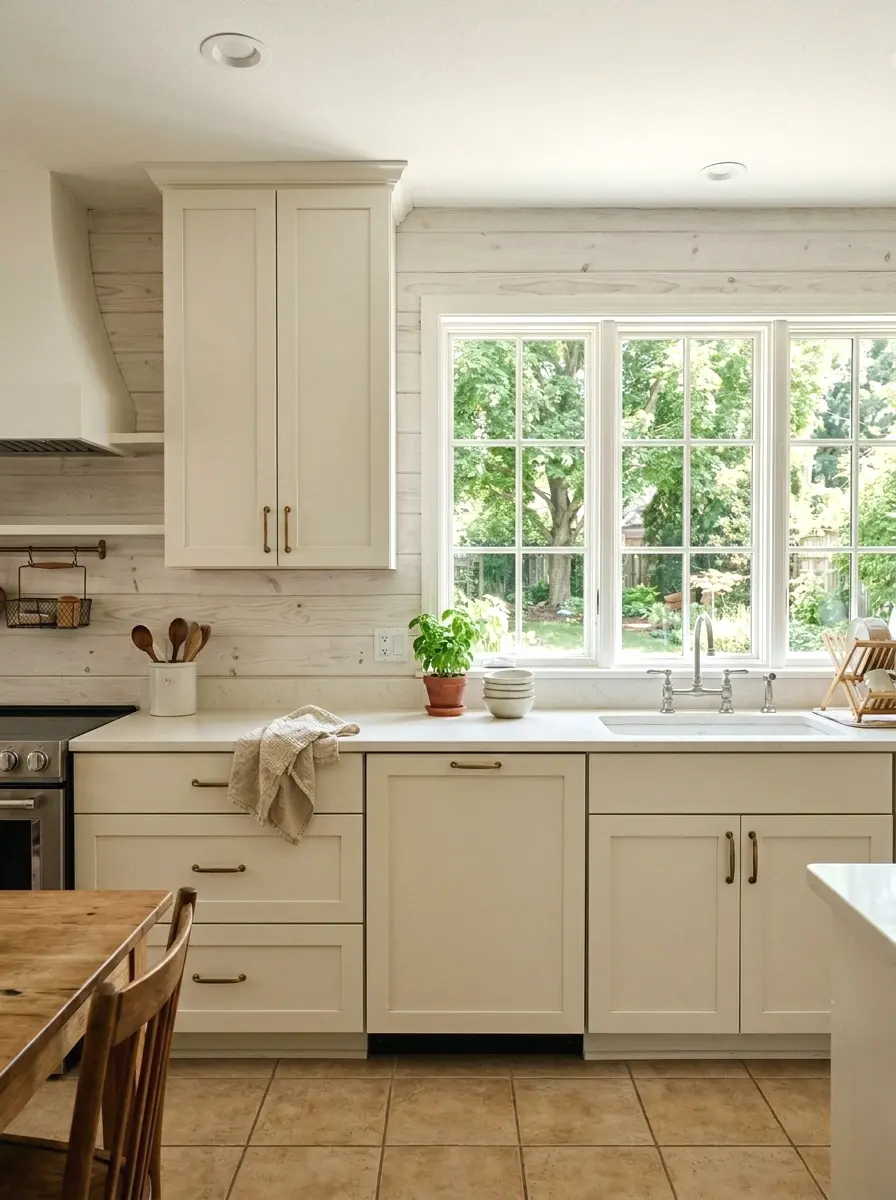
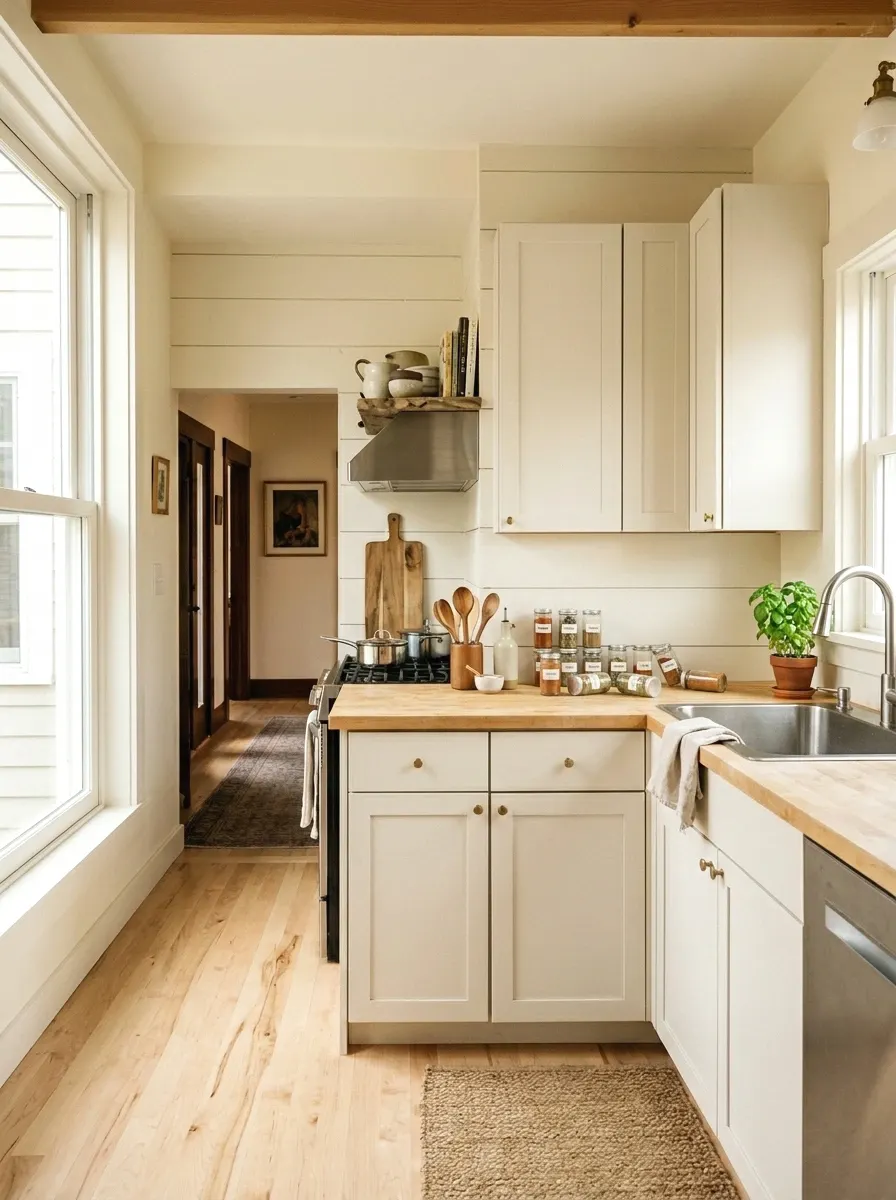
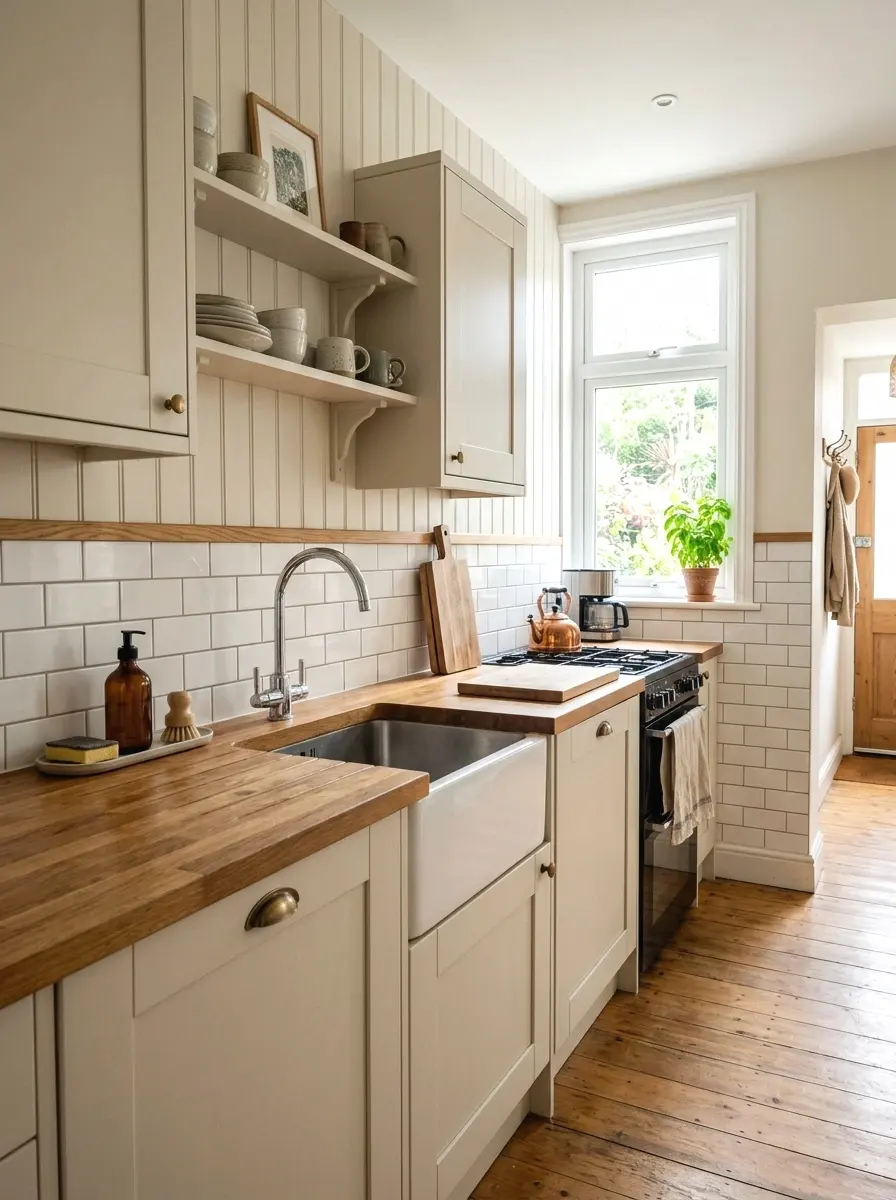
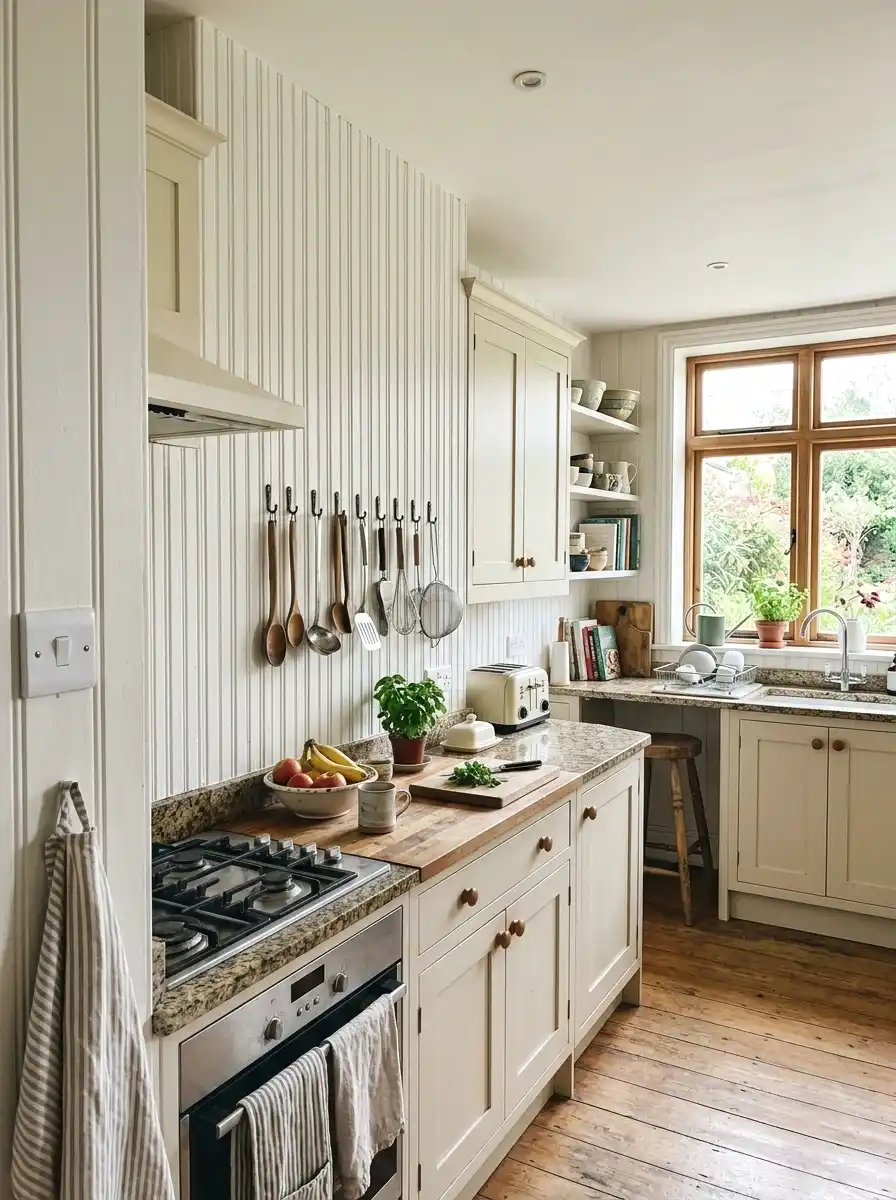
1. Classic White Painted Pine

White painted pine is probably the most popular tongue and groove backsplash choice, and honestly, it earns that spot. The boards bring texture and depth while the white keeps everything bright. It reads as clean and finished without feeling cold or clinical. I used this in a narrow galley kitchen and the difference was immediate. The wall went from flat and forgettable to something that actually looked intentional.
Use a semi-gloss or satin paint finish, not matte. Matte absorbs grease and moisture and you’ll be repainting within a year. The boards themselves are usually $2 to $4 per linear foot for pine, and a quart of semi-gloss runs about $20. Total cost for a typical kitchen backsplash comes in around $100 to $150.
If you love warm wood tones in the kitchen, there are even more directions you can take this material.
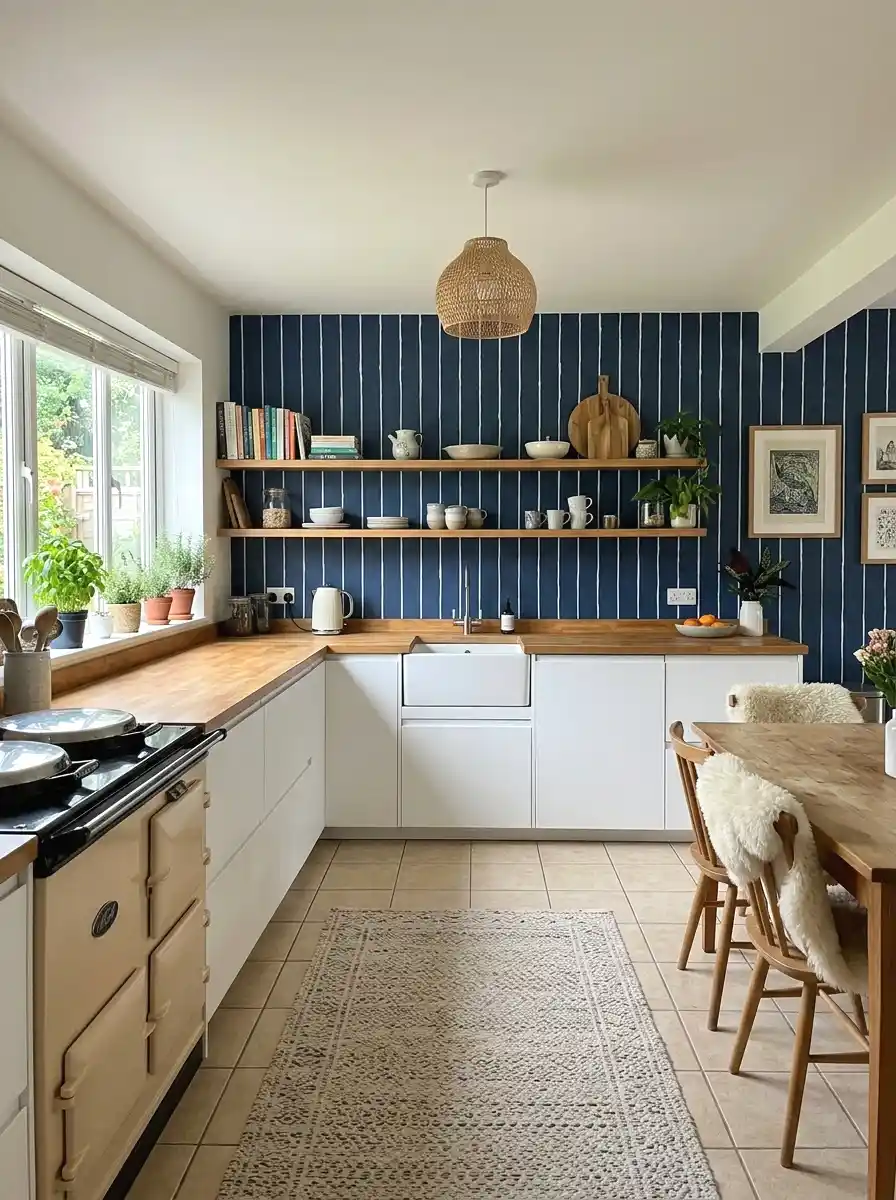
2. Vertical Layout for Low Ceilings
So here’s a trick most people skip: running the boards vertically instead of horizontally makes your ceiling look taller. It works because the eye follows the lines upward. In kitchens with 8-foot ceilings or lower, this is a real fix, not just a style choice. The effect is subtle but it genuinely makes the room breathe more.
You install it exactly the same way as horizontal, just rotated. The boards interlock just as well. The only extra step is making sure your top and bottom cuts are level. A $10 level and a miter saw rental for a day ($30 to $50) handles it. Total project cost stays around $120 to $160.
More Ideas:


3. Shiplap-Style Horizontal Boards
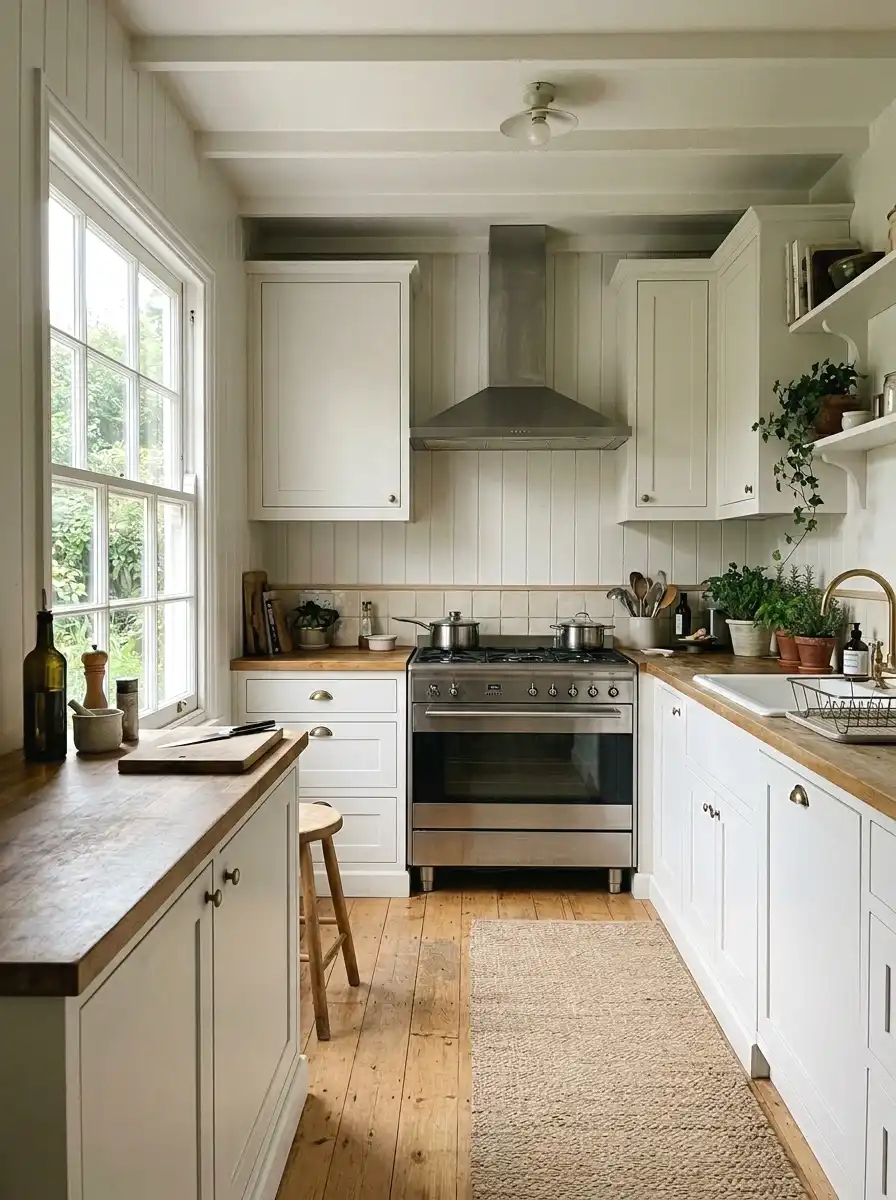
The shiplap look and tongue and groove are close cousins. Tongue and groove gives you the same horizontal line effect but with tighter seams and less chance of warping over time. (this one is so underrated) The tight fit means moisture has fewer places to sneak in, which matters a lot right behind a sink or stove.
You can source tongue and groove pine at most big box stores already primed, which saves you a prep step. Run them horizontally and paint in a warm white or soft cream. Finished, it looks like the kind of backsplash you’d see in a farmhouse kitchen that someone spent real money on. It costs around $130 to $180 depending on your kitchen size.
4. Raw Wood with Clear Sealant
Here’s what nobody tells you about raw wood backsplashes: they look absolutely great and they’re one of the least expensive options if you source the right boards. Cedar or pine left in its natural tone has a warmth that paint can’t replicate. The grain shows through. It feels like something crafted, not installed.
The catch is sealing. Raw wood in a kitchen without protection will warp, stain, and absorb smells. Two coats of water-based polyurethane, sanded lightly between coats, is the right move. The boards might run $90 to $120, and a can of poly is about $15 to $25. Budget around $120 to $160 total, and the result will outlast most tile work if you seal it properly.
5. Beadboard Panel Backsplash
Beadboard is a specific style of tongue and groove with a narrow ridge running down the center of each board. It’s been used in kitchens for over a hundred years and for good reason. The texture it adds is delicate without being fussy. It works in traditional kitchens, farmhouse spaces, and even some modern ones when painted the right color.
You can buy it as individual boards or as pre-made panels, which are faster to install. Panels come in 4×8 sheets and run about $20 to $35 per sheet at most hardware stores. For a 20 sq ft backsplash you’d likely need one to two sheets. Paint white or soft sage and you’ve got a kitchen backsplash that looks like it cost three times what it did.
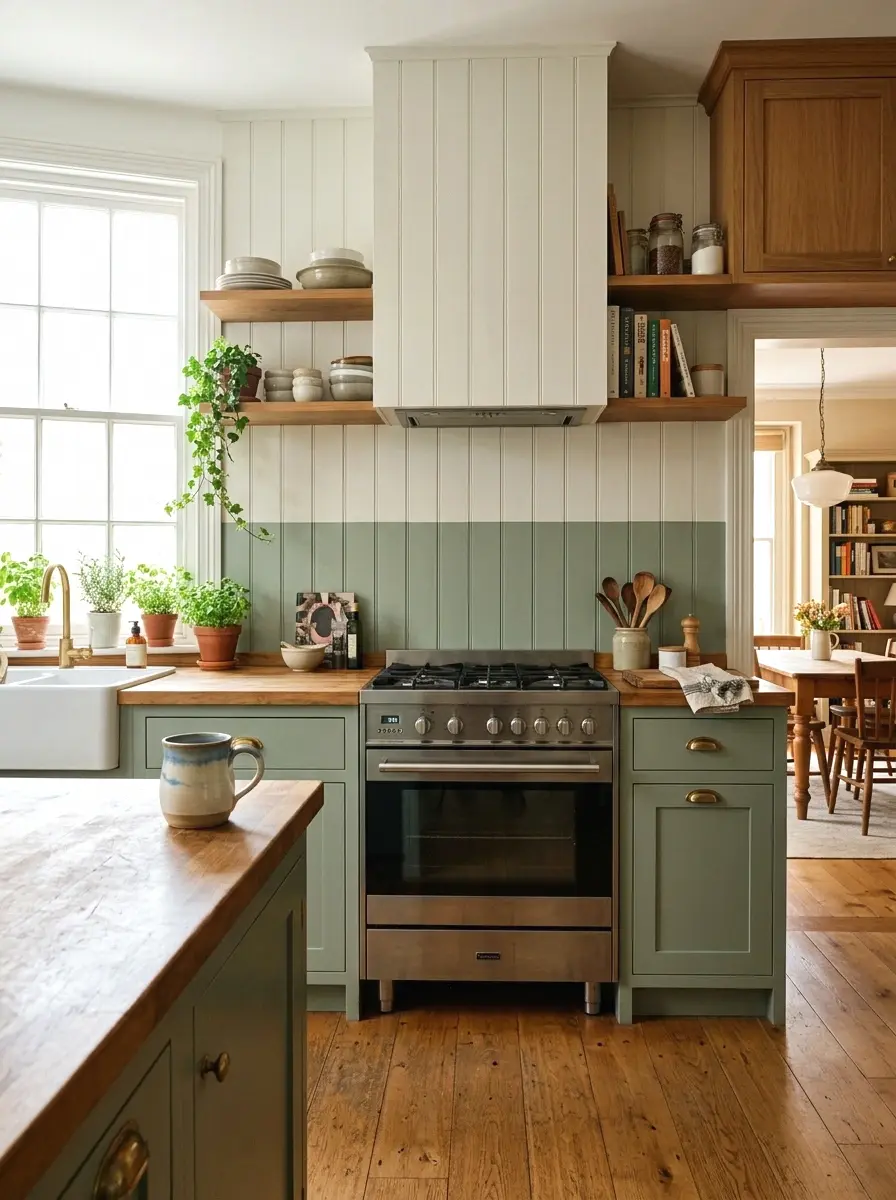
6. Two-Tone Color Block
I was skeptical about this one at first, but two-tone tongue and groove backsplashes are having a real moment right now and they work better than I expected. The idea is simple: paint the bottom half of your backsplash one color and the top half another. Usually a darker shade on the bottom, lighter on top. It adds visual weight and a sense of groundedness to the kitchen.
Sage green on the bottom and off-white on top is a really popular combination right now. So is navy and cream. The boards are the same, the paint is what changes. This is a $130 to $200 project depending on kitchen size, and the two-paint setup adds maybe $30 to the total. Worth every dollar.
More Ideas:
7. Tongue and Groove Behind Open Shelves
If you have open shelves or you’re thinking about adding them, putting tongue and groove behind them is one of the best things you can do for that wall. The boards give the shelves something to contrast against and the whole setup feels much more finished and intentional. It’s the difference between shelves floating on a plain wall and shelves that look like they belong there.
Install the boards first, seal or paint them, then mount the shelves in front. The wood background also protects the wall from the inevitable drips and splatters that happen around kitchen shelves. Total for boards and a basic shelf setup runs $150 to $250, and the visual impact is significant for that price.
For open shelving ideas that actually work alongside a statement backsplash, it helps to see how other kitchens have pulled the combo together.
8. Gray-Stained Wood for a Modern Look

Standard wood tones read warm and rustic. Gray-stained wood sits in different territory: it’s still textured and natural but it reads more modern and collected. (took me ages to figure this out) You get the organic quality of wood without the country-kitchen association that some people want to avoid.
Apply a gray wood stain before sealing. Wipe-on stains are easiest for DIYers and one small can covers a lot of surface area. After staining, seal with two coats of matte or satin poly to protect it. The gray finish pairs well with white cabinets, black hardware, and concrete-look countertops. Total cost: around $140 to $180.
If you’re still deciding on paint direction, looking at modern kitchen color combinations with white cabinets can help you land on the right tone.
9. Tongue and Groove with Subway Tile Combo
So this sounds more complicated than it is. The idea is to use tongue and groove boards on the upper portion of the backsplash and simple subway tile on the lower portion near the counter, where splashing is heaviest. The tile protects where you need it most and the wood adds warmth above.
The transition line is the key. A thin piece of trim or even a small ledge between the two materials makes it look planned. Subway tile is cheap, sometimes $1 to $2 per square foot at discount stores. Add in the boards for the upper section and you’re looking at $180 to $280 total. A practical and really nice looking setup.
If you want simple tile styles behind the stove to compare before committing to this combo, farmhouse-leaning options tend to pair especially well with wood.
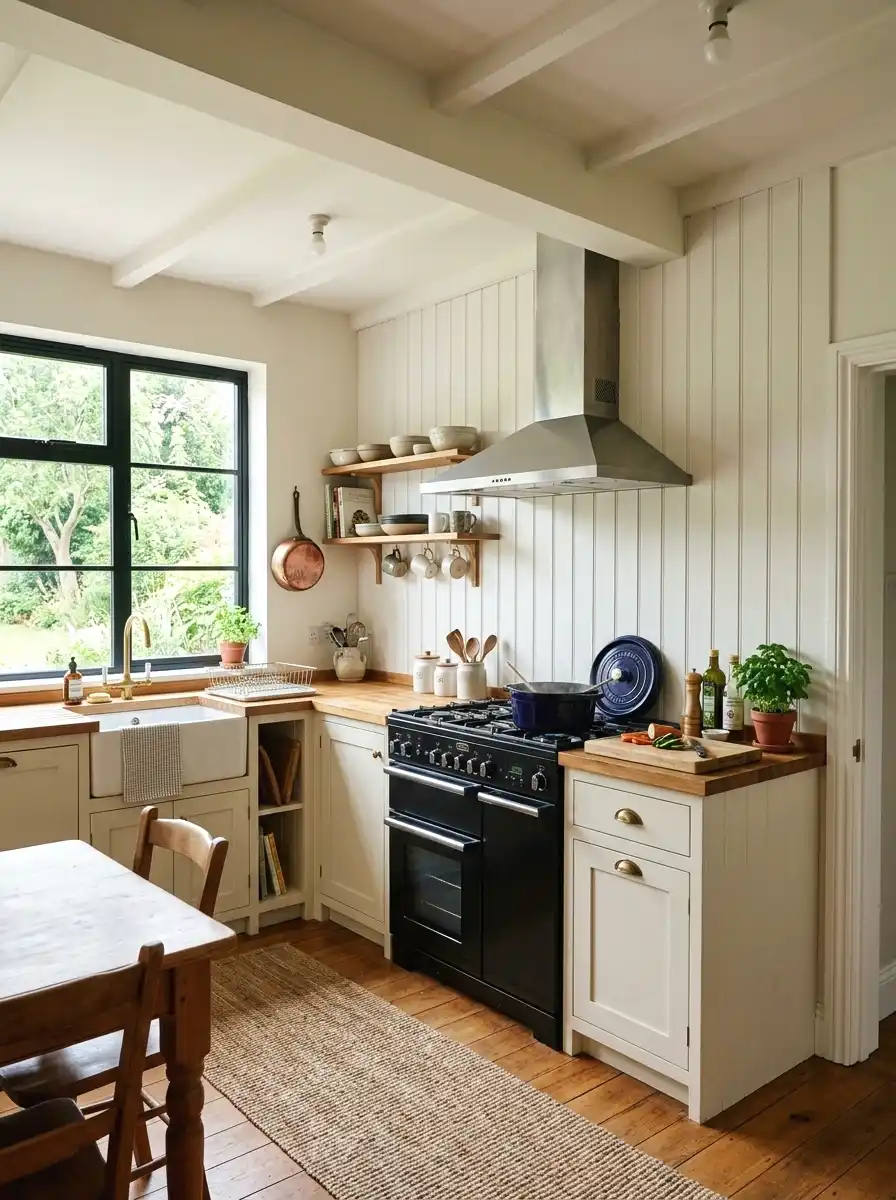
10. Painted Black Boards for Drama

Black tongue and groove backsplash is not for everyone. But if your kitchen has enough natural light and you want something with real presence, it’s worth considering. Against white cabinets and light countertops, black boards create contrast that makes the whole kitchen feel designed and deliberate.
Use a flat or matte black paint for a more muted, moody result. Semi-gloss black reads more graphic and bold. Either way, seal the boards well because dark surfaces show water spots and grease more than light ones. Budget around $120 to $160 for the boards and paint. The result is dramatic in the best way.
More Ideas:
11. Reclaimed Wood Look on a Budget

Real reclaimed wood is expensive and hard to source. But you can get very close to that look using new pine boards and a little technique. Dry brushing a watered-down gray or brown paint over a base coat creates an aged, layered look that reads as reclaimed without the price tag or the hunting around for old barn boards.
The key is working in thin layers and wiping off excess before it dries completely. It takes some practice on a scrap piece first. When I tried this in my own space on a small accent wall, it took three attempts to get the technique right but the final result looked genuinely old. Materials cost $90 to $130. The time investment is real but the outcome is worth it.
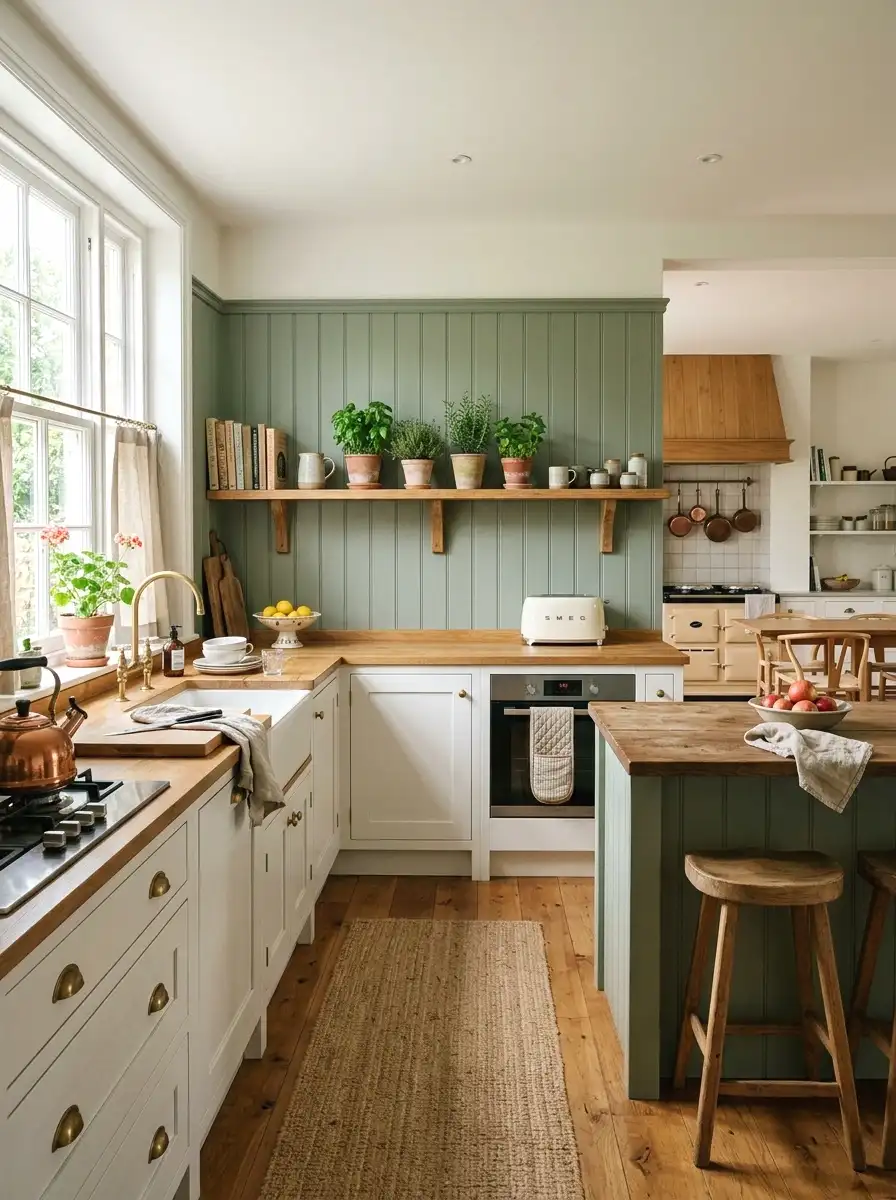
12. Soft Green for a Garden Kitchen Feel
A soft green on tongue and groove boards brings the kitchen into a different register. Not clinical, not rustic exactly. Something in between that feels a little lived-in and warm. Think sage, olive, or a muted eucalyptus tone. These colors have been popular in kitchens since 2022 and they’re still going strong into 2026 because they genuinely work with a lot of cabinet colors.
Pair with brass or unlacquered bronze hardware and the combination feels really put together. The boards are the same as any other tongue and groove project. You’re just making a different paint choice. A quart of specialty paint in these muted tones runs about $25 to $40, total project around $130 to $180.
For a deeper look at sage and green palette ideas alongside natural wood, there’s a whole world of combinations that hold up beautifully.
13. Tongue and Groove in a Rental Kitchen

Renters can do this. The trick is a plywood backer system. Cut a piece of thin plywood (3/8 inch or 1/2 inch) to fit your backsplash area, attach the tongue and groove boards to the plywood, paint or stain the whole panel, then use removable adhesive strips or small L-brackets at the top and bottom to hold the panel against the wall.
When you move out, the panel comes off and the wall is untouched. It takes more planning than a direct-to-wall install, but it’s completely doable in a weekend. Total cost including the plywood backer runs $150 to $220, which is worth it to actually like your kitchen while you’re living there.
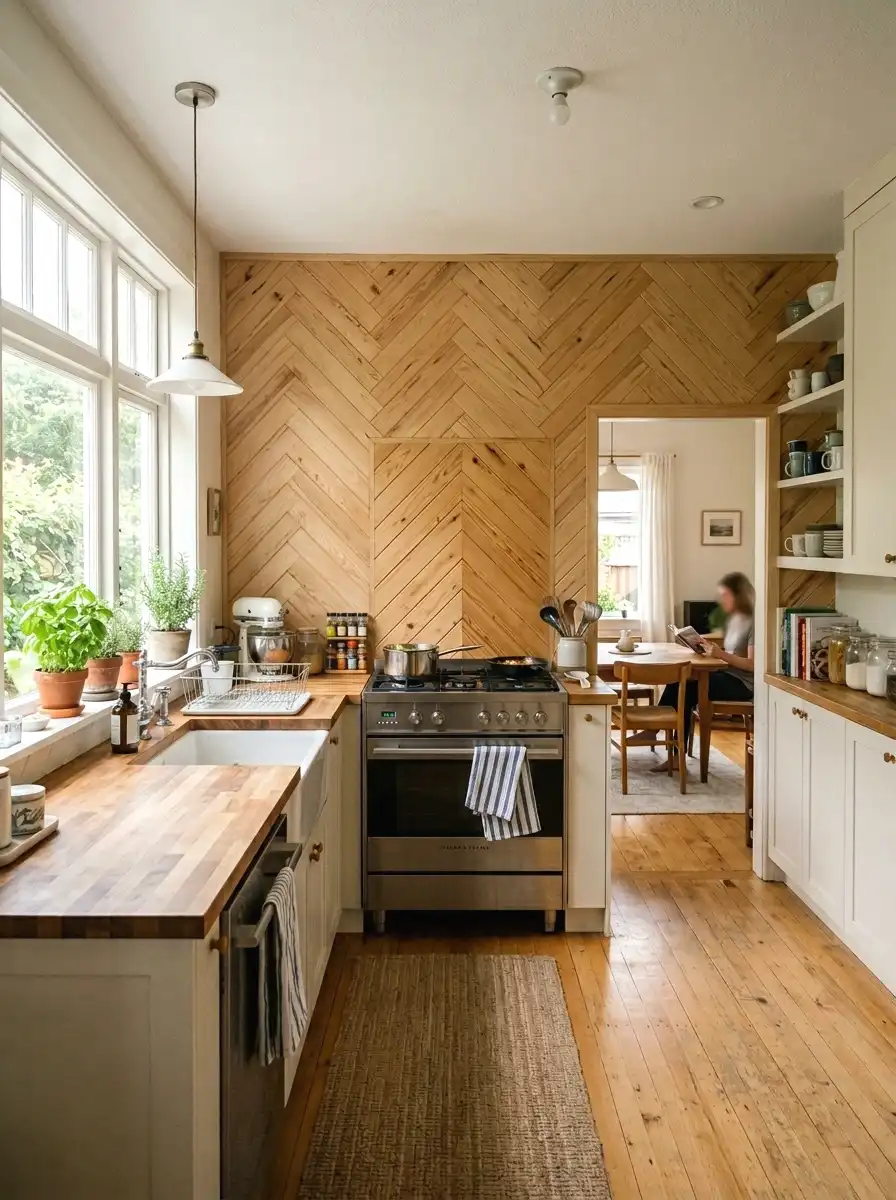
14. Herringbone Pattern for a High-End Look

Herringbone tongue and groove is not the standard horizontal or vertical layout. The boards are cut at 45-degree angles and arranged in a V-pattern. It looks expensive. It looks like something in a high-end renovation. And it costs almost the same as a regular tongue and groove install because the boards themselves are the same price.
The extra cost is in time and careful cutting. You need a miter saw and you need to be accurate. Rent one for about $40 to $50 for a day if you don’t own one. Budget $160 to $250 for this one depending on size, and take your time with the measurements. Done right, it’s the most impressive backsplash on this list.
Before finalizing your herringbone layout, checking a few countertop and backsplash pairings can help you choose a board color that ties the whole kitchen together.
15. Navy Blue Boards with White Grout Lines
This is a painted effect, not actual grout. Paint your tongue and groove boards navy blue, then use white paint and a small artist’s brush to paint thin lines in the seams between each board. It mimics the look of dark tile with white grout lines but costs a fraction of actual tile work.
It sounds tedious and it is a little tedious. But the result is something that most people assume cost $400 or more. Each “grout line” takes about 30 seconds to paint once you get into a rhythm. The whole backsplash takes maybe two hours beyond the regular installation. Boards and paint: $120 to $160 total.
16. Wide Plank Boards for a Bold Statement
Standard tongue and groove boards are 2.5 to 3.5 inches wide. Wide plank versions run 4 to 6 inches and they completely change the visual weight of the backsplash. Fewer seams, bolder presence, more like a real architectural feature and less like a decorative touch.
Wide plank tongue and groove can be harder to find at standard hardware stores. Check specialty lumber yards or order online. Expect to pay a bit more, sometimes $3 to $5 per linear foot instead of $2 to $4. Total for a standard backsplash area comes in around $150 to $220. The look is confident and worth the slight extra investment.
17. Tongue and Groove as a Full Accent Wall

You don’t have to stop at the backsplash area. Running tongue and groove boards all the way up to the ceiling on one kitchen wall creates something bigger: a real focal point. This works especially well on the wall behind a stove, which already draws the eye in most kitchens.
The additional coverage means more boards and more cost, but a full accent wall in a kitchen is usually 40 to 60 sq ft, still manageable for $180 to $300 with paint and supplies. Go with a single solid color across the whole wall for the most impact. White, off-white, or a soft warm gray work well at this scale.
18. Tongue and Groove with Tile Accents
Mixing materials sounds complicated but this version is accessible. Install your tongue and groove boards as the main backsplash, then add one or two rows of simple decorative tile right behind the stove or sink. The tile protects the highest-risk zones and the boards do the visual work everywhere else.
Handmade-look ceramic tiles in a solid matte color pair best with wood. Avoid busy patterns. The tile row is usually just 4 to 6 inches tall, so you need very few tiles. A small box of these accent tiles runs $15 to $35. Add it to a standard tongue and groove project and you’re around $160 to $240 total with a result that feels custom.
More Ideas:
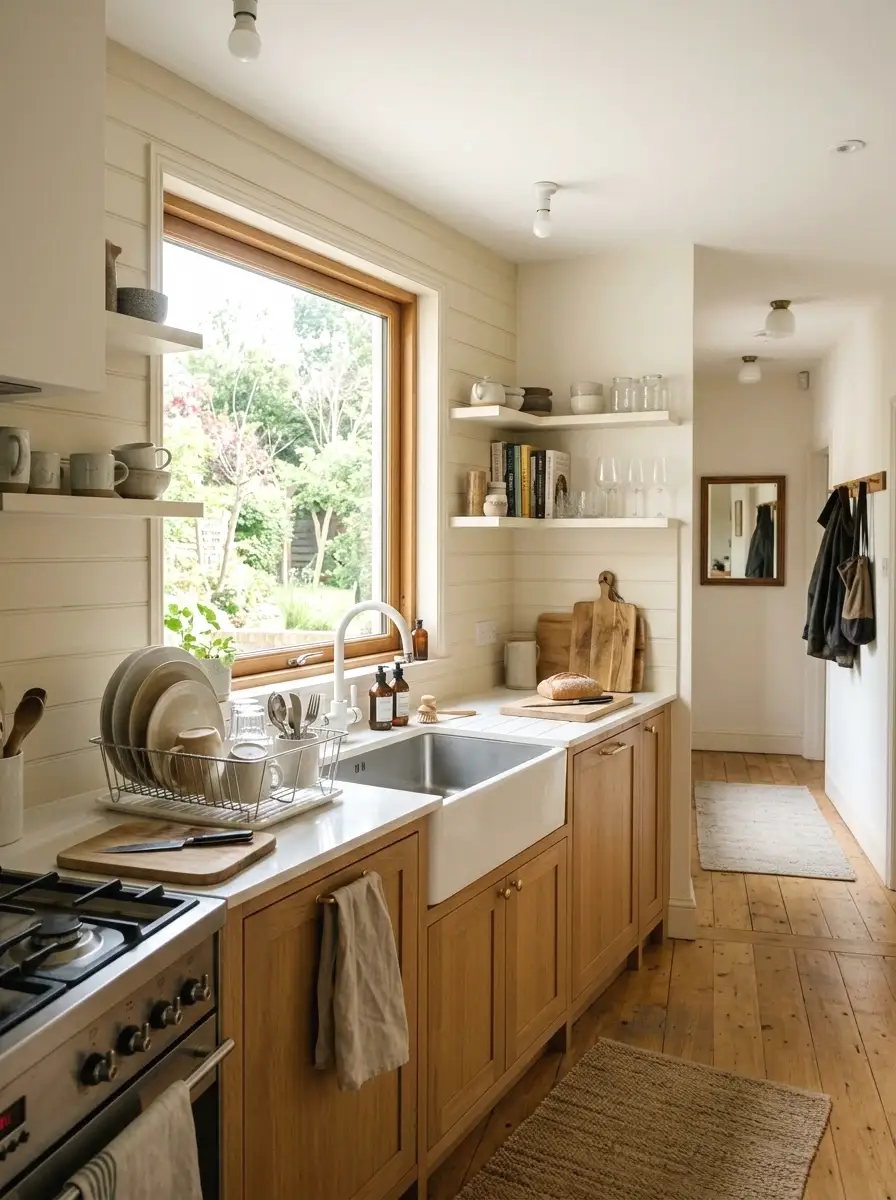
19. Whitewashed Boards for a Coastal Feel

Whitewashing is different from painting white. You mix white paint with water (roughly 1:1) and apply it in thin coats, wiping some off as you go so the wood grain stays visible underneath. The result is soft, layered, a little faded looking. It’s the easiest way to get a coastal or relaxed feel without going full nautical.
This finish works really well in kitchens that get a lot of natural light, where the grain catching the light adds depth throughout the day. Any pine tongue and groove boards work here. You’ll use less paint because it’s diluted, so materials cost is on the lower end: $90 to $130 for the whole project. Clean looking and genuinely warm without trying too hard.
If you’re still on the fence about any material at all back there, there are some no-tile backsplash alternatives worth trying that might surprise you.
Final Thoughts on Tongue and Groove Backsplash
You’ve got 19 real options here, from a simple whitewash to a full accent wall, from renter-friendly panel systems to wide plank statements. The through-line across all of them is the same: tongue and groove gives your kitchen texture and warmth that flat tile or plain paint just can’t match, and it does it at a price that’s actually within reach.
Pick one idea today. Just one. If you’re not sure where to start, go with classic white painted pine. It’s forgiving, it’s versatile, and it works in nearly every kitchen style. Buy the boards this weekend. Get them home and let them sit flat for 24 hours before installing.
If you want more ideas like this, homelypop.com has a lot more where this came from. Real home projects, real budgets, and nothing that requires a contractor to pull off.
And if the backsplash is just the beginning, there’s a full kitchen refresh on a small budget that covers the rest of the room without starting over.