
21 Large Kitchen Island Cabinet Layout Ideas That Actually Work

Your kitchen island has all that cabinet space underneath and you still can’t find anything without pulling half of it out. That’s the problem nobody warns you about when you buy or build a big island.
This list covers 21 layout ideas built from real homeowner feedback, forum deep-dives, and design boards. Every idea was picked because it solves a specific storage, workflow, or style problem, not just because it looks good in a photo. You’ll find options across a wide range of budgets, from free DIY fixes to installs under $400, and it covers renters who can’t drill as well as owners who can go all in.
This is for kitchens with an island that’s at least 4 feet wide with at least one full run of base cabinets underneath. If your island is decorative with no real storage, this list isn’t for you. But if you’ve got the space and it’s just not working, every idea here is doable.
By the end you’ll know exactly how to arrange, stock, and style those cabinets so the island does real work in your kitchen every day.
If you’re also thinking bigger picture, there are some solid ways to rethink your whole kitchen without blowing your renovation budget.
What to Know Before You Start Large Kitchen Island Cabinet Layout
- Islands under 4 feet wide often can’t fit deep drawers. Measure depth first, not just width.
- Cabinet zones work best when they mirror your cooking workflow, prep side near the stove, storage side near the pantry.
- Budget reality: a basic pull-out shelf kit runs $40 to $80 per cabinet bay. Full custom inserts can hit $300 per section.
- Most people overlook the end panels of the island. That vertical face is prime real estate for hooks or a small rack.
- Common mistake: mixing too many door styles under one island. Pick one door type and stick with it or it looks patchy.
- If you’re adding plug-in appliance garages, check outlet locations before committing to a layout side.
- For long-term durability, soft-close hardware on drawers adds about $8 to $15 per drawer but saves the face frame from years of slamming.
- Paint the interior back wall of open shelving a contrasting color. It reads as intentional, not unfinished.
1. Zone Your Cabinets by Task, Not by Size
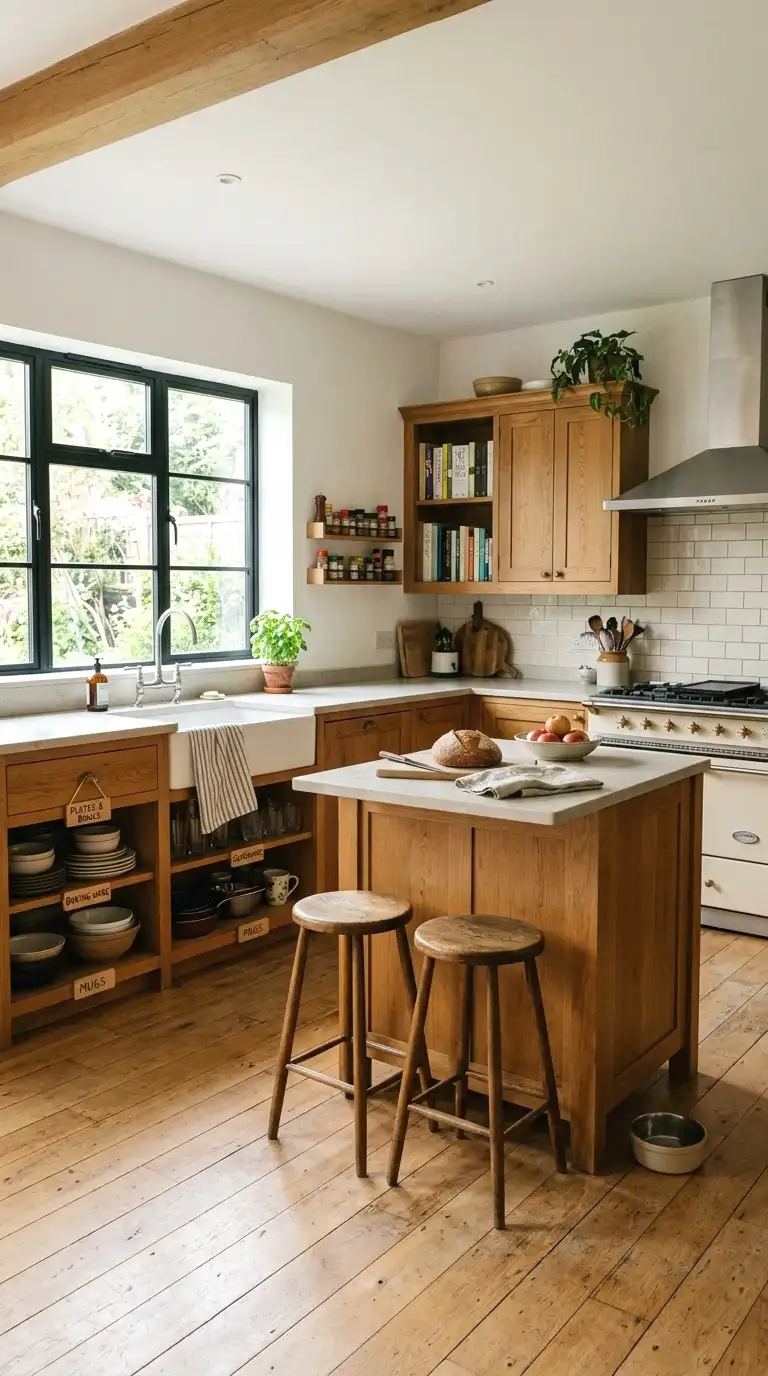
The biggest mistake people make with island cabinets is treating them like one giant junk drawer zone. The fix is task zoning. Split the island into at least two or three distinct zones before you put a single thing in there, prep on one side, baking supplies on another, serving items closest to the dining area.
Once you map it out on paper first, everything finds a logical home. A 6-foot island can realistically hold three zones. Each zone should be no wider than 24 inches, which keeps it reachable without crouching and stretching. I spent two weekends reorganizing before I tried zoning and it made more difference than any new cabinet insert I ever bought.
2. Add Pull-Out Shelves to Deep Base Cabinets
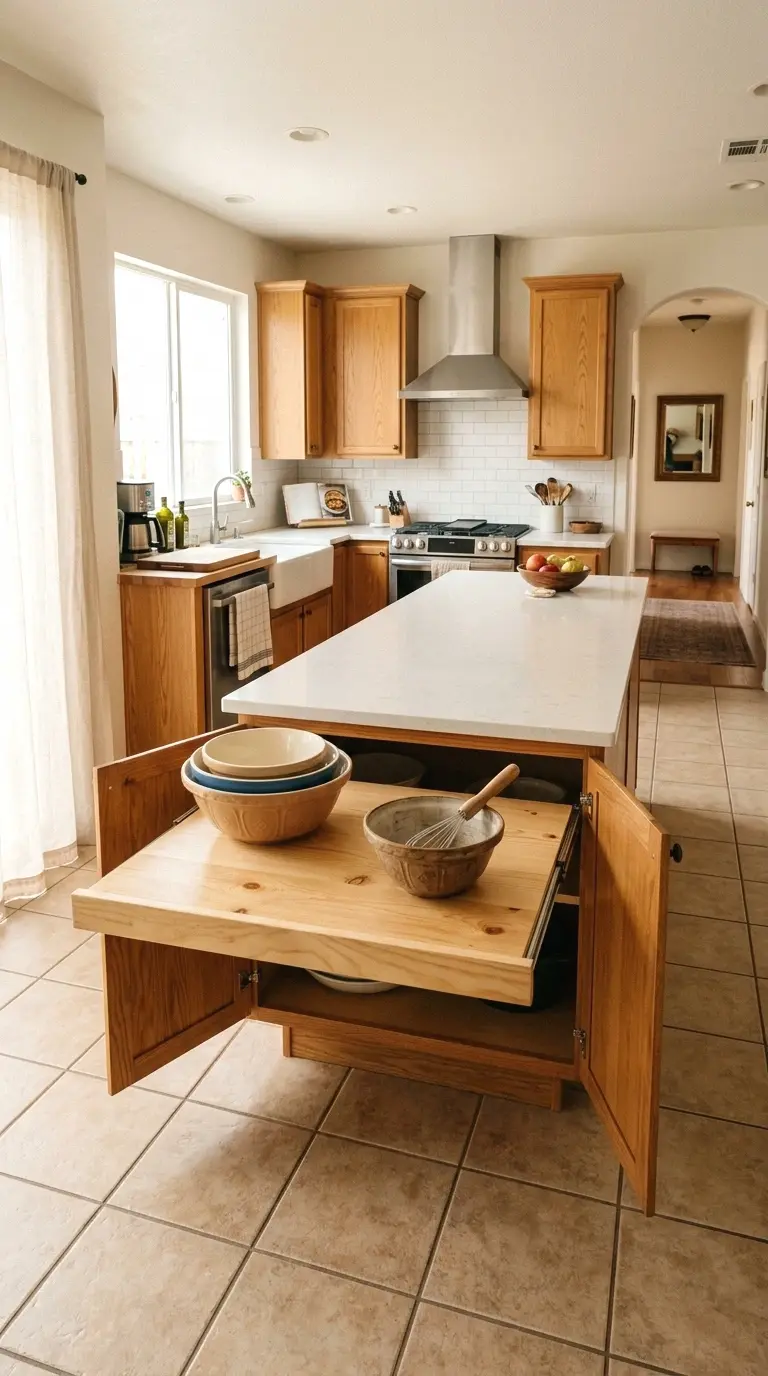
Deep island base cabinets are basically black holes. Things go in and never come back out. Pull-out shelves fix that without a full remodel. You can buy a kit for around $45 to $75 that slides right onto the existing shelf hardware in most standard 24-inch deep cabinets.
Full extension slides are the ones worth buying. They pull all the way out so you can see everything in the back. Half-extension slides save maybe $10 per unit but you’ll still be digging. Go full extension. This one is so underrated for how much it changes day-to-day use. A 30-minute install turns a frustrating cabinet into one you actually open on purpose.
More Ideas:


3. Use One Full-Length Drawer Stack on the Prep Side
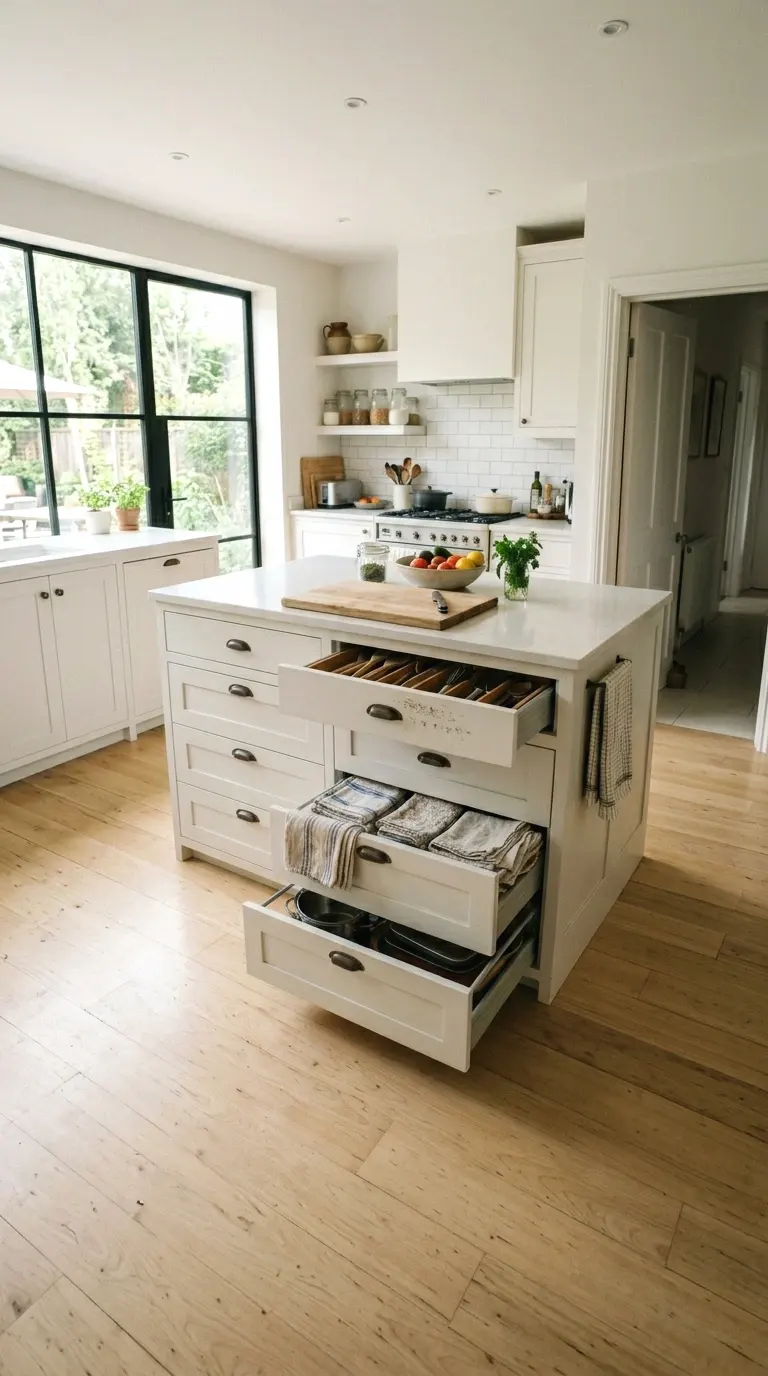
So here’s the thing about drawer stacks: they beat doors almost every time for daily-use items. A full-height drawer stack, typically three drawers tall from the floor to the countertop, gives you one spot for everything you grab constantly: utensils, towels, measuring cups, small tools.
A standard 18-inch wide drawer stack costs around $150 to $250 as a prefab cabinet unit. If your island is frameless construction, you can often add a drawer stack by swapping out one door cabinet. It’s worth calling a kitchen cabinet supplier for a cut-to-fit option if your island isn’t a standard size. The difference in daily workflow is real.
4. Build a Dedicated Baking Zone in One Bay
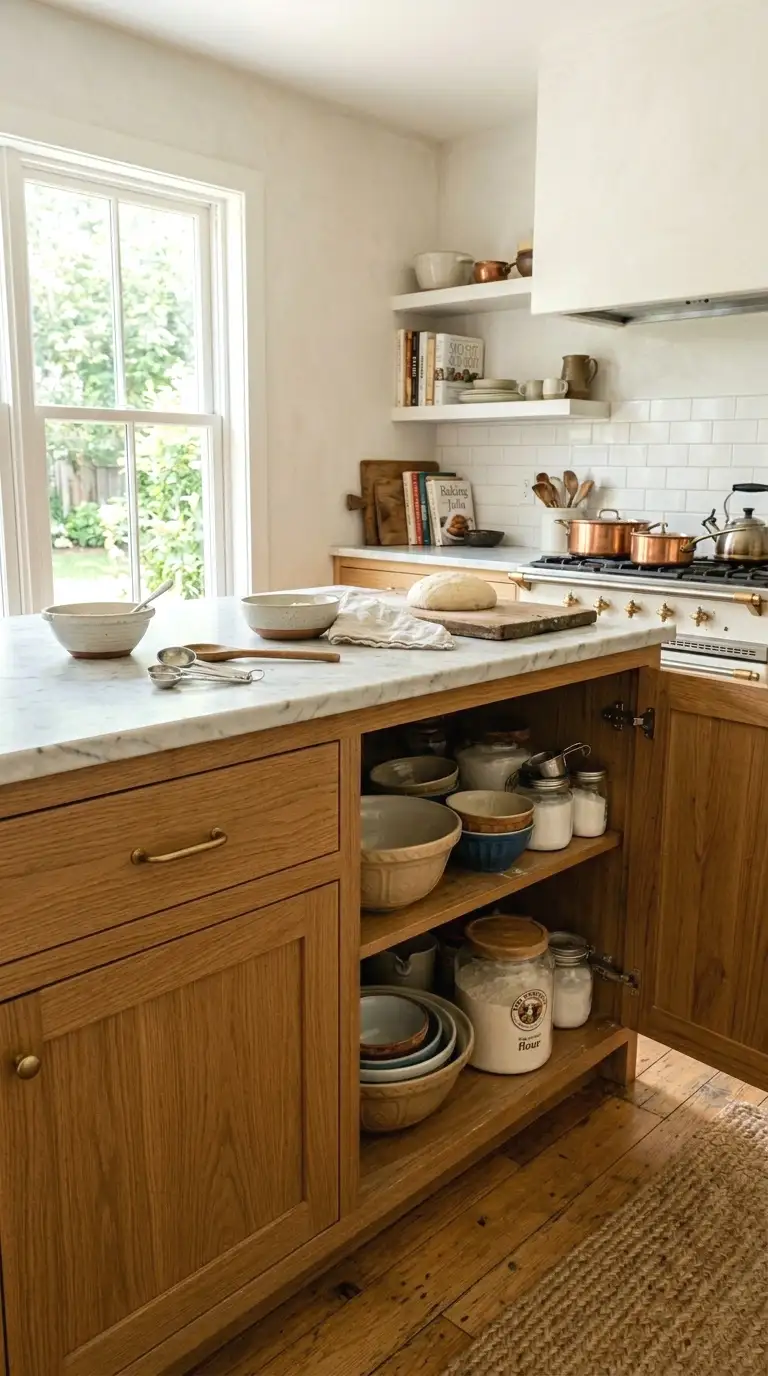
You probably move flour, mixing bowls, and rolling pins from three different spots every time you bake. Putting them all in one island bay stops that. A single 24-inch base cabinet with two deep drawers at the bottom and one shallow drawer at the top handles the whole setup.
The bottom drawers hold big bowls and a stand mixer attachment set. The shallow top drawer is for measuring spoons, a bench scraper, and a pastry brush. Add a non-slip liner inside each drawer for about $8 from any home store. When I tried this in my own space, baking prep went from a 10-minute scramble to about 90 seconds. That part still surprises me.
For kitchens where baking is a regular event, it’s worth looking at island designs built around how you cook rather than retrofitting a standard layout.
5. Install an Appliance Garage at Counter Level
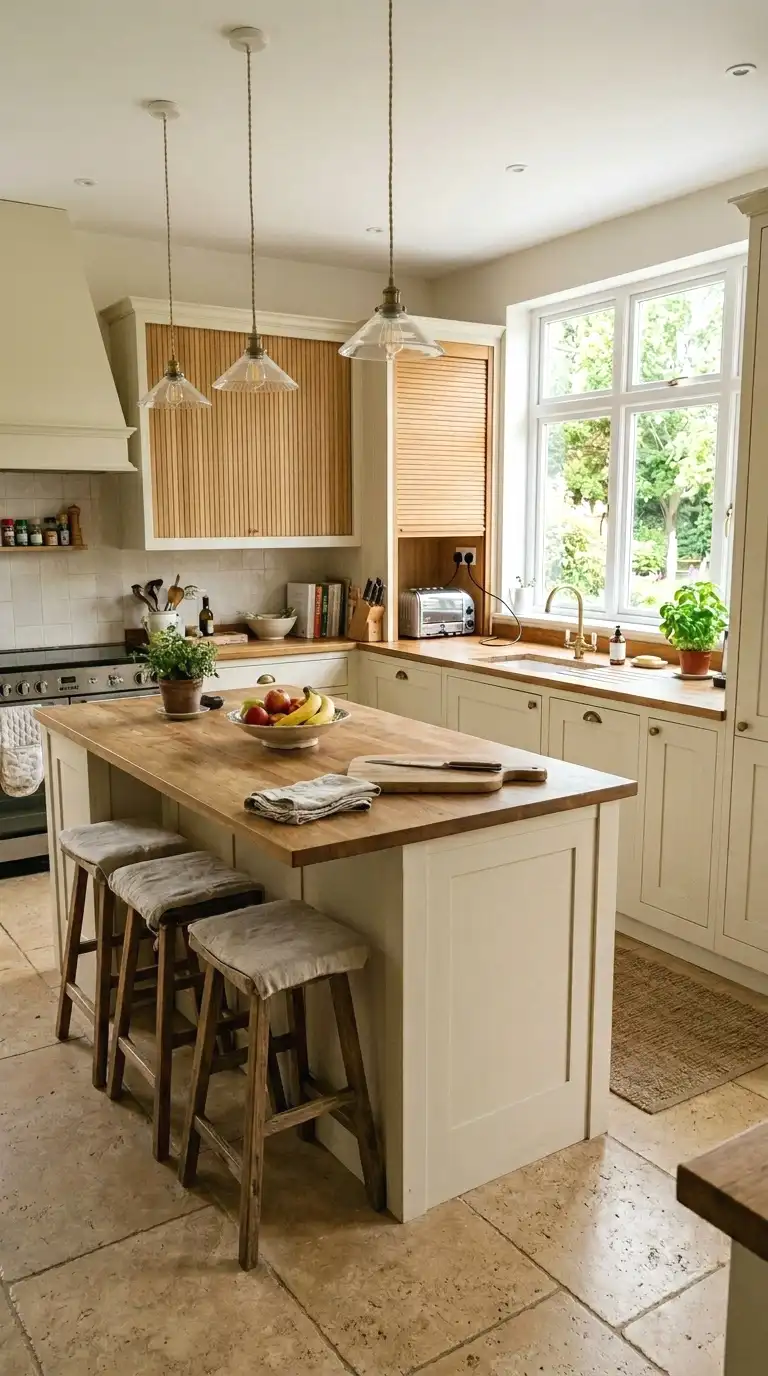
Appliance garages are those little door or roll-up compartments at counter height, usually built into the back edge of the island counter or into an upper section of the cabinet face. They hide small appliances like a toaster, blender, or air fryer when you’re not using them.
A basic tambour-door (roll-up style) appliance garage kit runs about $80 to $120 for the door alone. You’ll want to frame it into a section that’s at least 18 inches wide and 15 inches tall to fit most countertop appliances. Make sure there’s an outlet inside or nearby, because a garage with no power access is just a box with a door. Plan the electrical before the carpentry.
6. Reserve a Full Cabinet Bay for a Trash and Recycling Pullout
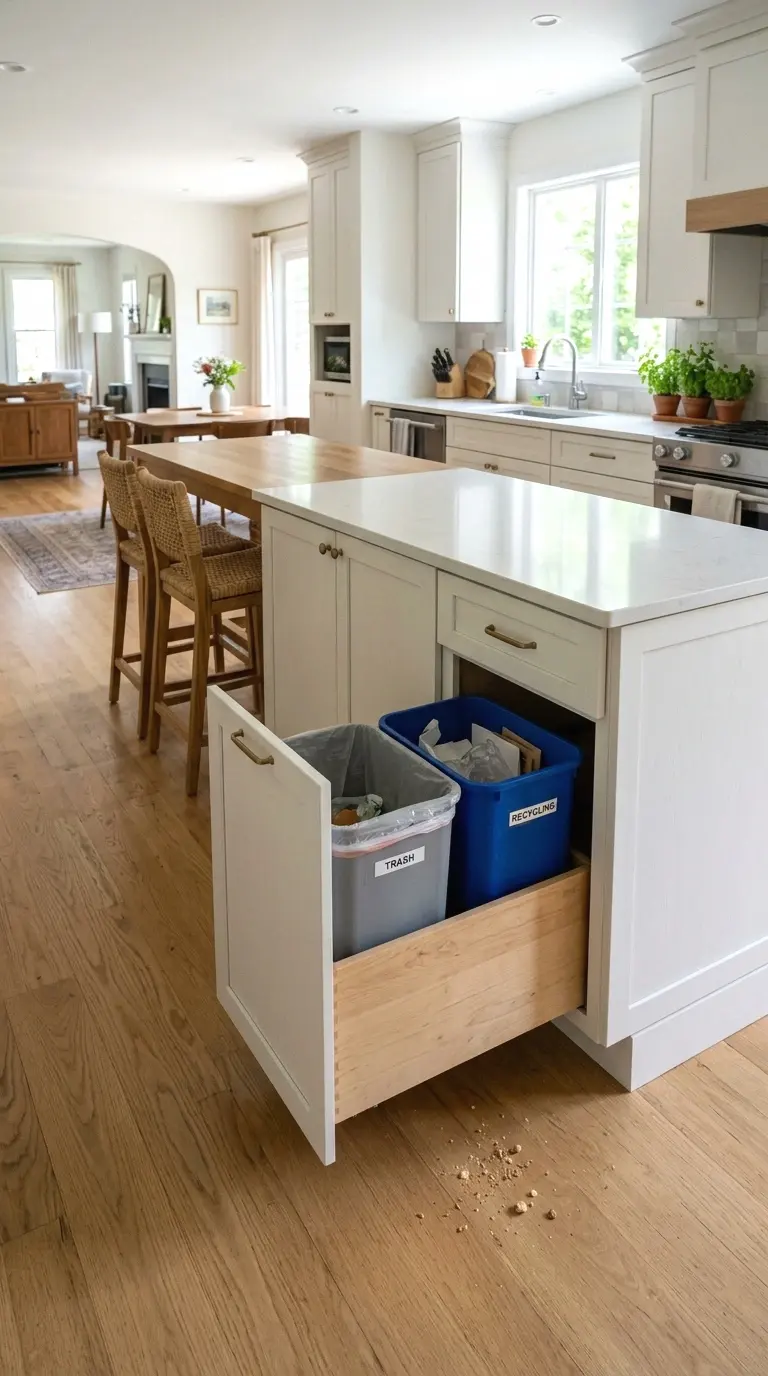
The island is often the first place people grab to throw something away. A built-in trash and recycling pullout makes that work. A double-bin pullout, one side trash and one side recycling, fits in a 15 to 18-inch cabinet bay and runs about $50 to $120 depending on the brand and size.
Mount it on full-extension soft-close slides so it opens with one hand and doesn’t bang shut. The one thing most people miss is putting this bay on the side of the island closest to where meals get cleared, not just wherever space is leftover. That 2-foot difference in placement matters more than people think when you’re doing dishes every night.
If clearing meals is a daily friction point, some people solve it by adding a table on the other end of the island so the transition from prep to dining is built right in.
More Ideas:
7. Use Open Shelving on One End Panel for Cookbooks or Display
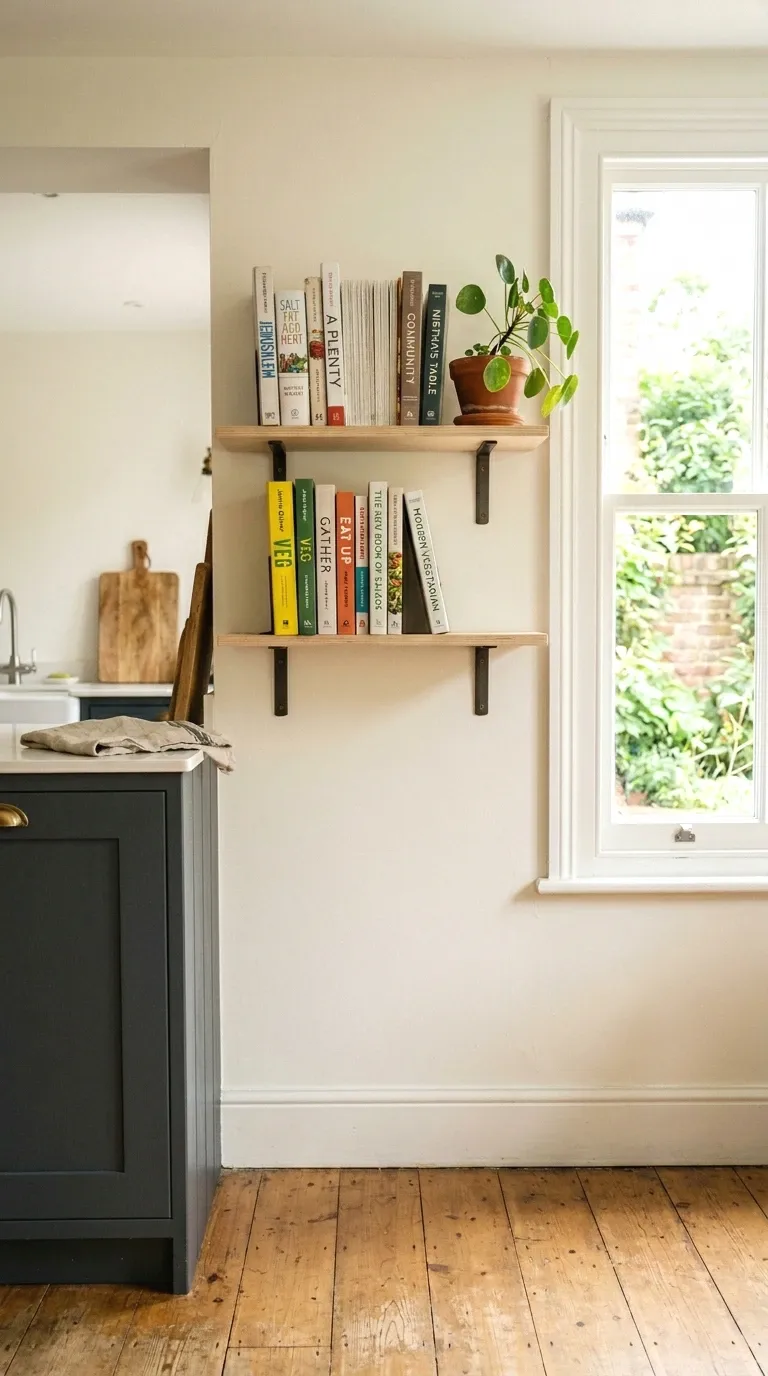
The end of a kitchen island is almost always wasted. It’s just a flat panel or a decorative toe-kick area. Open floating shelves mounted to that end panel turn dead space into real storage or a display moment.
Two shelves, each about 10 inches deep and 18 inches wide, can hold four to six cookbooks, a few small plants, or a basket with frequently used items. A simple pine shelf with a bracket runs about $15 to $25 for the pair. Paint it the same color as the island or go a shade darker for contrast. It reads as built-in without needing to be.
If you’re already thinking about contrast and visual detail in the kitchen, there are some display ideas that actually look intentional rather than decorative afterthoughts.
8. Add a Spice Drawer Insert on the Prep Side
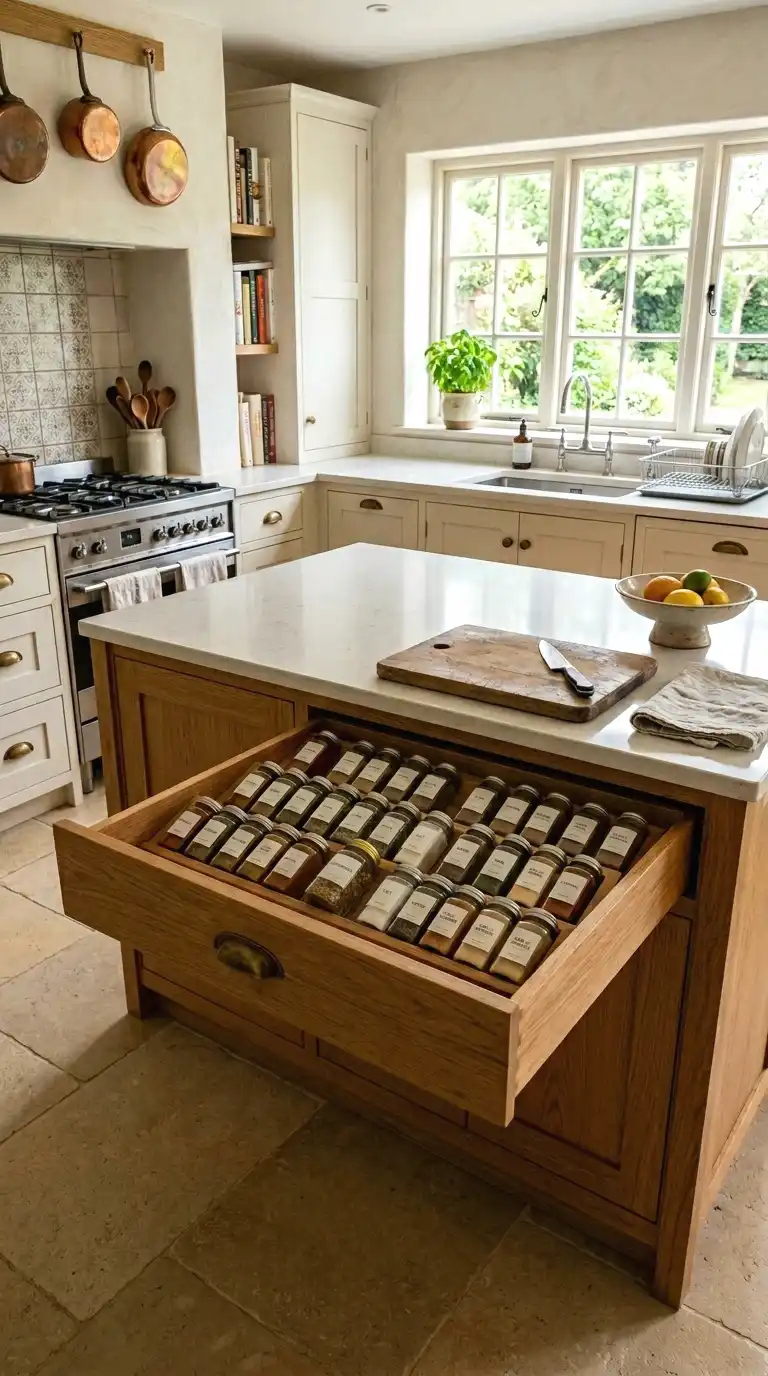
Here’s what nobody tells you about spice storage in an island: a shallow drawer with a angled insert is way more useful than a rack or a cabinet shelf. The angled insert, sometimes called a spice tray, holds bottles at a slight angle so you can read every label without picking anything up.
These inserts are available in wood or plastic for about $20 to $40 and fit in any drawer that’s at least 3 inches deep. Measure your drawer depth before ordering. Most come in 20-inch and 24-inch widths to match standard cabinet sizing. Once every spice is in the same drawer, angled and labeled up, you’ll wonder how you cooked before this.
9. Put Pot and Pan Storage in Deep Lower Drawers
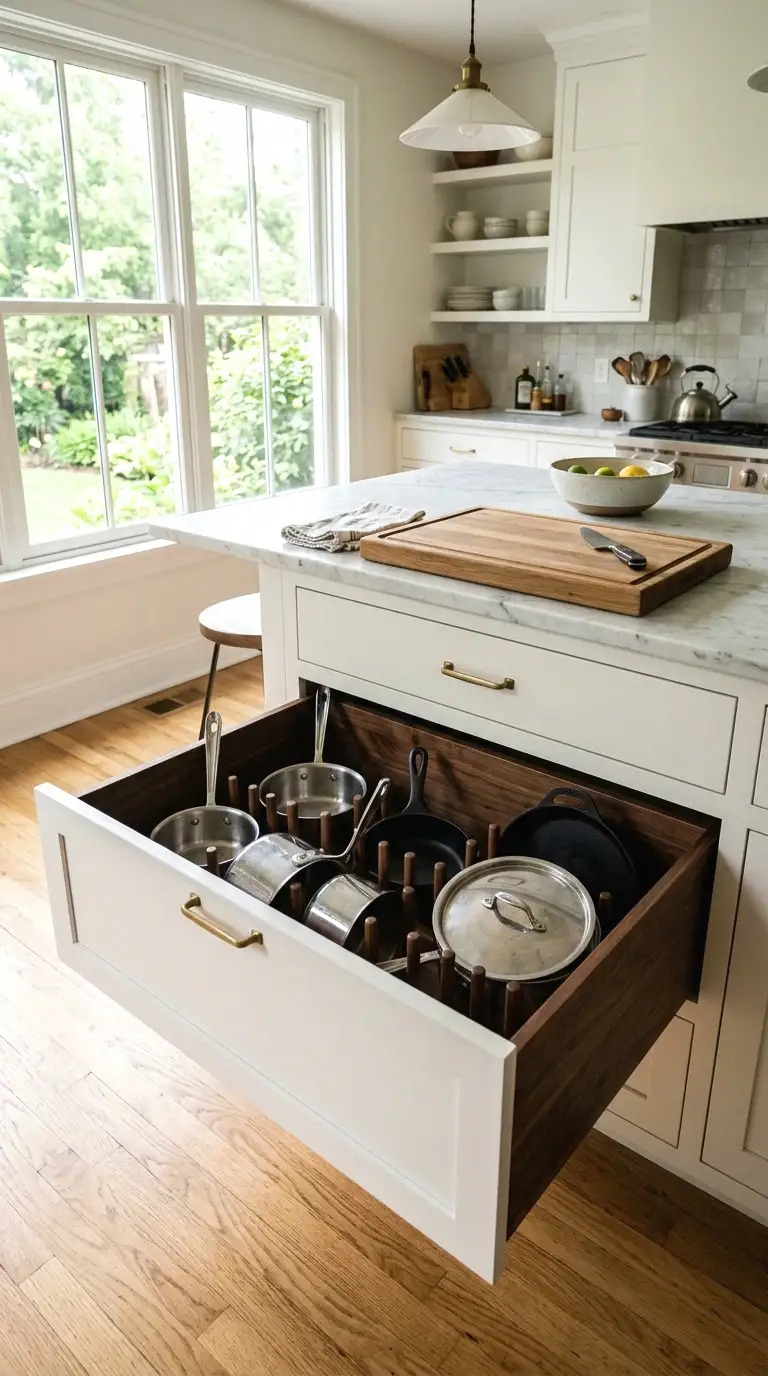
Cabinets with doors for pots and pans are frustrating. Everything stacks, nothing is reachable, and you always grab the one on the bottom. Deep lower drawers, at least 6 to 8 inches deep, fix this by letting each pot sit in its own space.
Two deep drawers in a 24-inch wide base cabinet, one for pots and one for lids, handle most people’s full cookware set. Some drawer systems include a lid organizer insert that costs $15 to $30 extra and stands lids upright. This is the layout upgrade that gets the most consistent positive feedback in real homeowner discussions. No more avalanche when you open the cabinet door.
While you’re sorting out the cabinets below, it’s also a good time to look at countertop pairings that pull a kitchen together rather than working against the cabinet color.
10. Create a Bar or Beverage Station on One Side
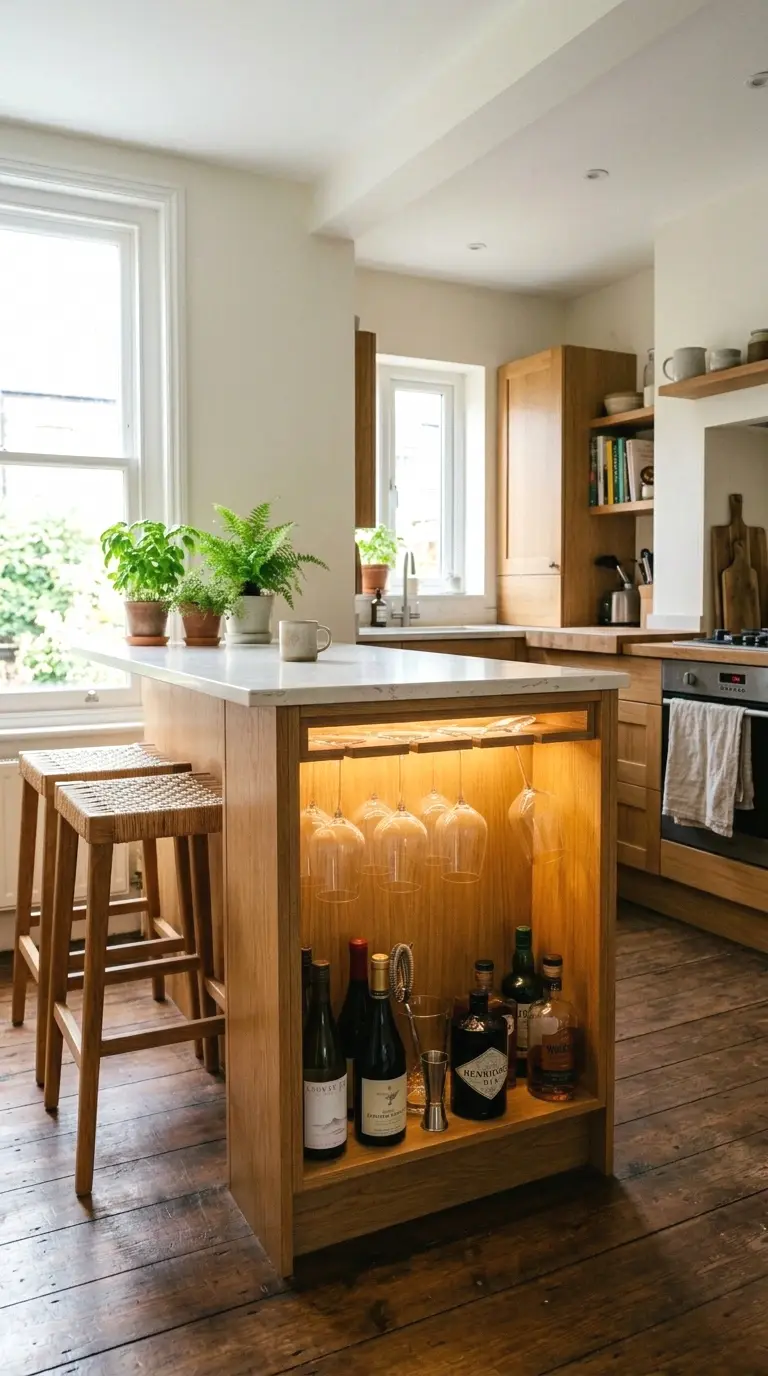
I was skeptical about this one at first, but putting all bar or drink supplies in one section of the island genuinely frees up a ton of space elsewhere. One 24-inch bay with one upper shelf and one lower shelf handles wine glasses, a wine opener, cocktail tools, and a few bottles without any special cabinetry.
If you want it to look polished, add a small LED strip light on the underside of the shelf above. Warm white LED tape runs about $12 to $18 for a short run and plugs into any outlet. It lights up the bottles and glasses without any electrical work beyond a plug. Guests always notice it.
If lighting is something you’re already experimenting with, it’s worth exploring broader lighting choices that change how a kitchen feels from morning prep to evening entertaining.
More Ideas:
11. Use a Pull-Out Cutting Board Above a Base Cabinet
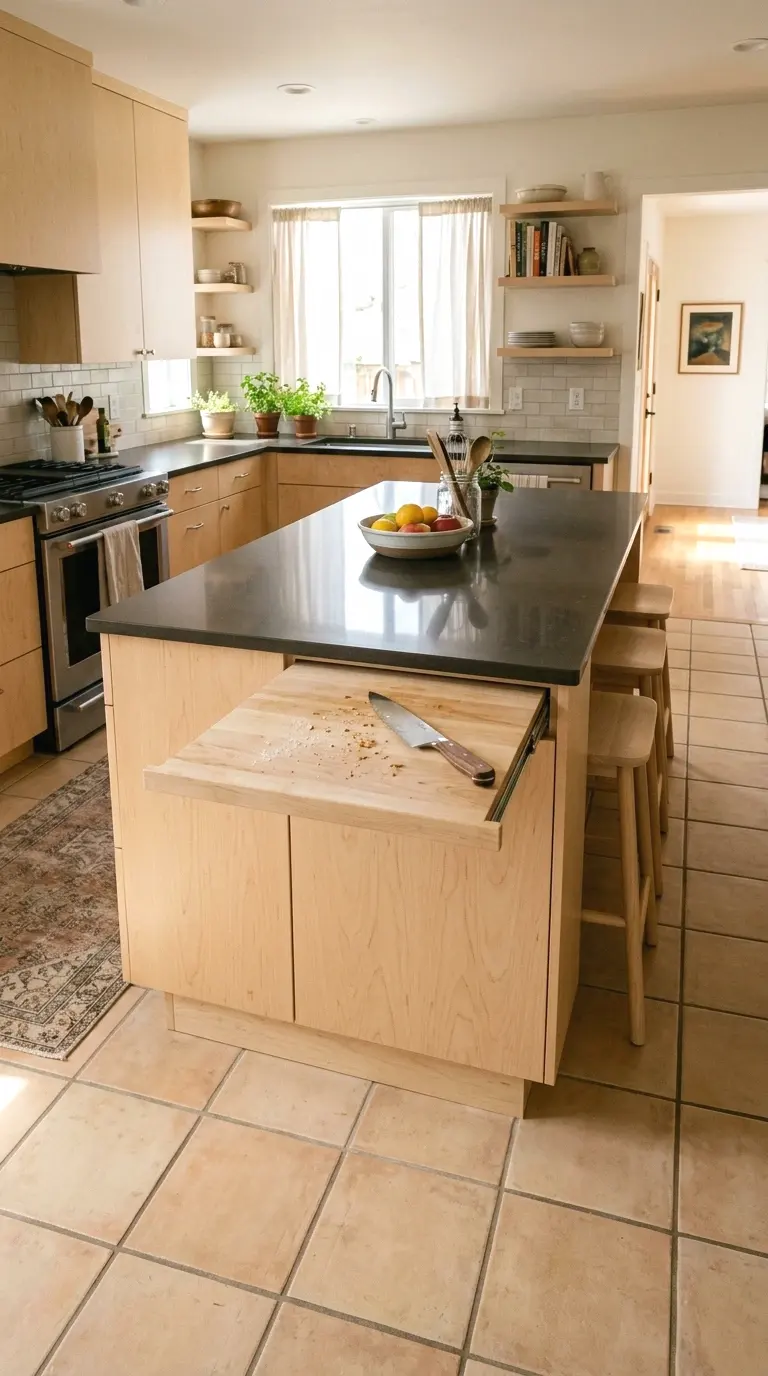
A pull-out cutting board is a thin wooden or composite board on slides that stores flush with the cabinet face and pulls out to create instant extra prep surface. It’s one of those features that seems like a minor upgrade until you actually have one.
Most pull-out cutting board kits cost $35 to $65 and mount in the upper section of a base cabinet, just below counter height. The board sits about 2 inches lower than the countertop, which is actually ideal for chopping because the slight drop takes pressure off your wrists. Took me ages to figure this out, but that height difference is intentional in professional kitchen design.
If you find yourself needing even more prep surface beyond what the pull-out board provides, there are clever ways of extending prep space without a full remodel.
12. Install Dividers in Deep Drawers for Baking Pans
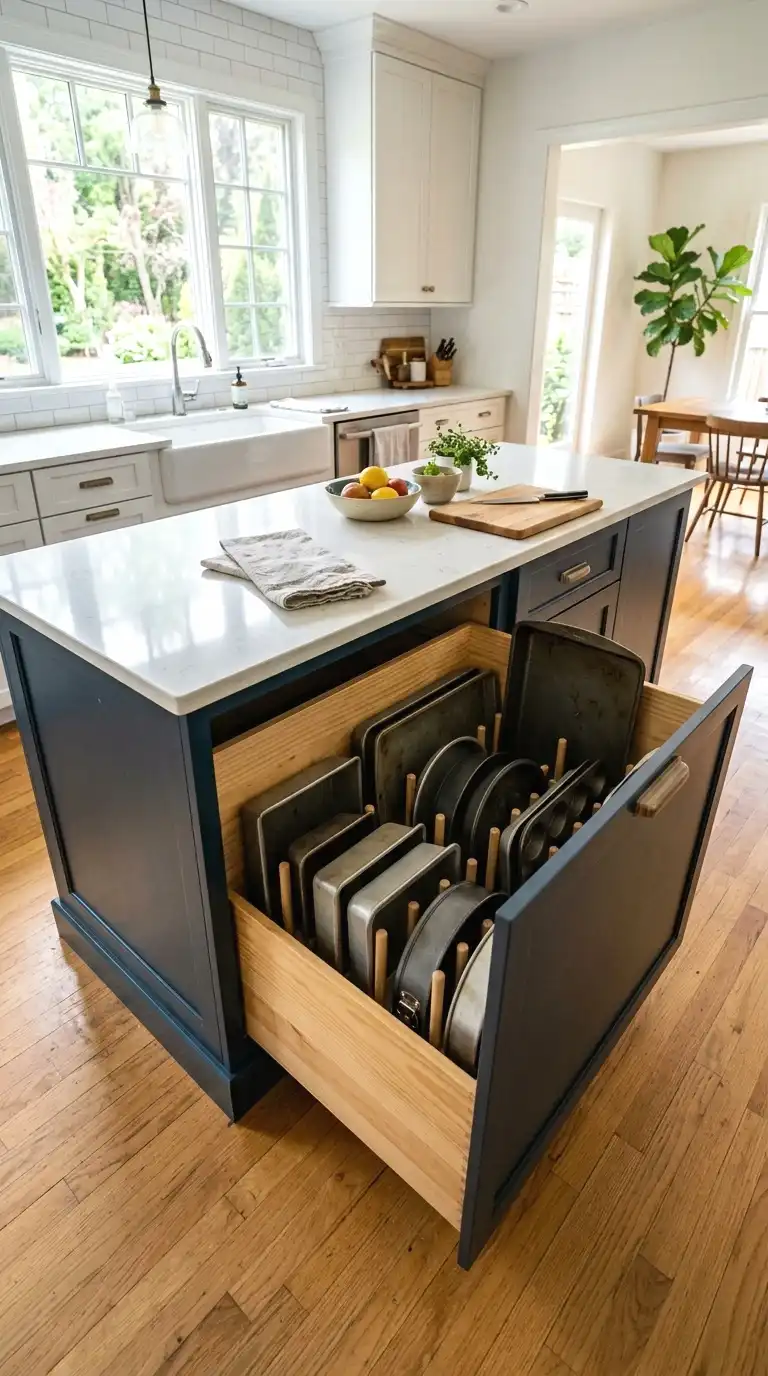
Cookie sheets, cutting boards, and baking pans are almost impossible to store flat without sliding everywhere. Vertical dividers in a deep drawer fix this by letting each pan stand upright like books on a shelf.
Peg-style dividers are the most flexible option because you can reposition them as your collection changes. A set of adjustable drawer pegs runs about $15 to $25. The drawer needs to be at least 8 inches deep for this to work with standard half-sheet pans. A 24-inch wide drawer can typically hold six to eight vertical pans with space to spare.
13. Dedicate a Cabinet to Wraps, Foils, and Bags
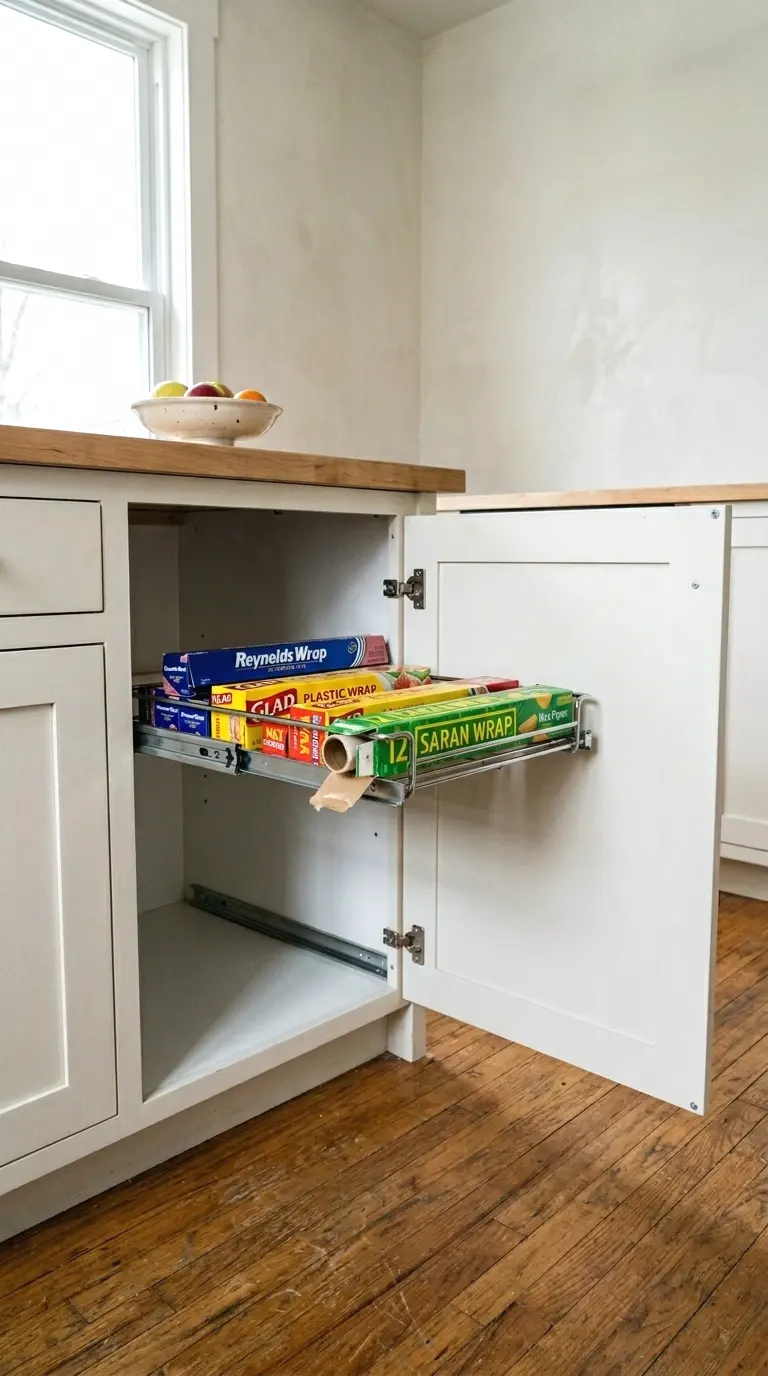
These skinny boxes and rolls are a nightmare to store. They fall over, they slide, they jam. A single cabinet with a horizontal pull-out insert designed for wrap boxes turns this mess into a clean one-pull system. The inserts, sometimes called lid and wrap organizers, hold the boxes on their sides so they don’t tip.
A good insert for a standard 24-inch cabinet runs about $25 to $40. Most are adjustable so you can fit boxes of different widths. Put this cabinet right next to wherever you do your food packing or meal prep. It’s one of those things you’ll use every single day and never think about again once it’s organized.
14. Add Under-Cabinet Lighting Inside the Island Cabinets
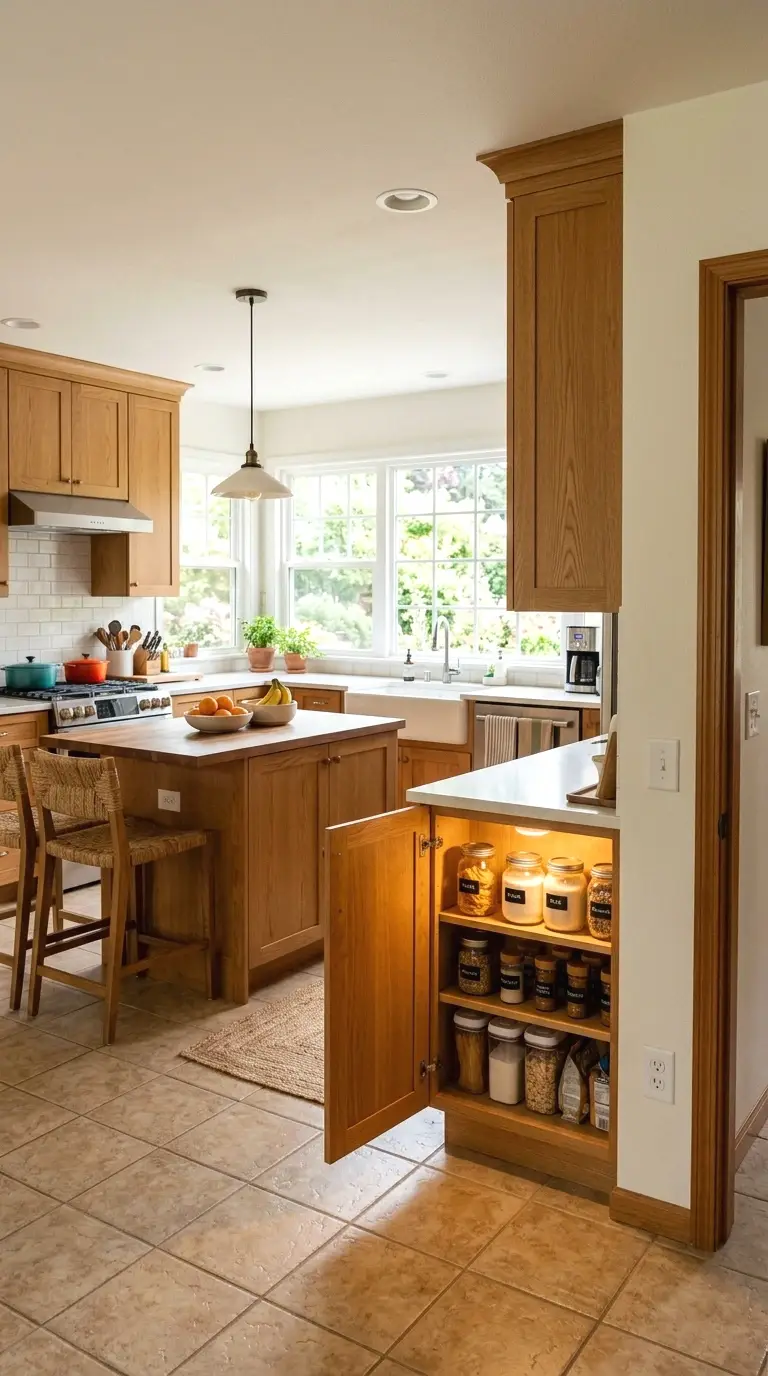
This sounds like a design choice but it’s actually a function upgrade. Small LED puck lights or LED strips inside open cabinet sections make it possible to actually see what’s in the back of a shelf without bending down and squinting.
Plug-in LED puck lights cost about $15 to $25 for a pack of four. They stick to the interior top of the cabinet with adhesive and last for years. If your cabinet is near an outlet or has a pull-out section, a short plug-in cord handles it without any wiring. This small detail makes dark lower cabinets usable, especially in kitchens with limited overhead lighting.
More Ideas:
15. Use a Seating Side Knee-Space Cabinet for Personal Storage
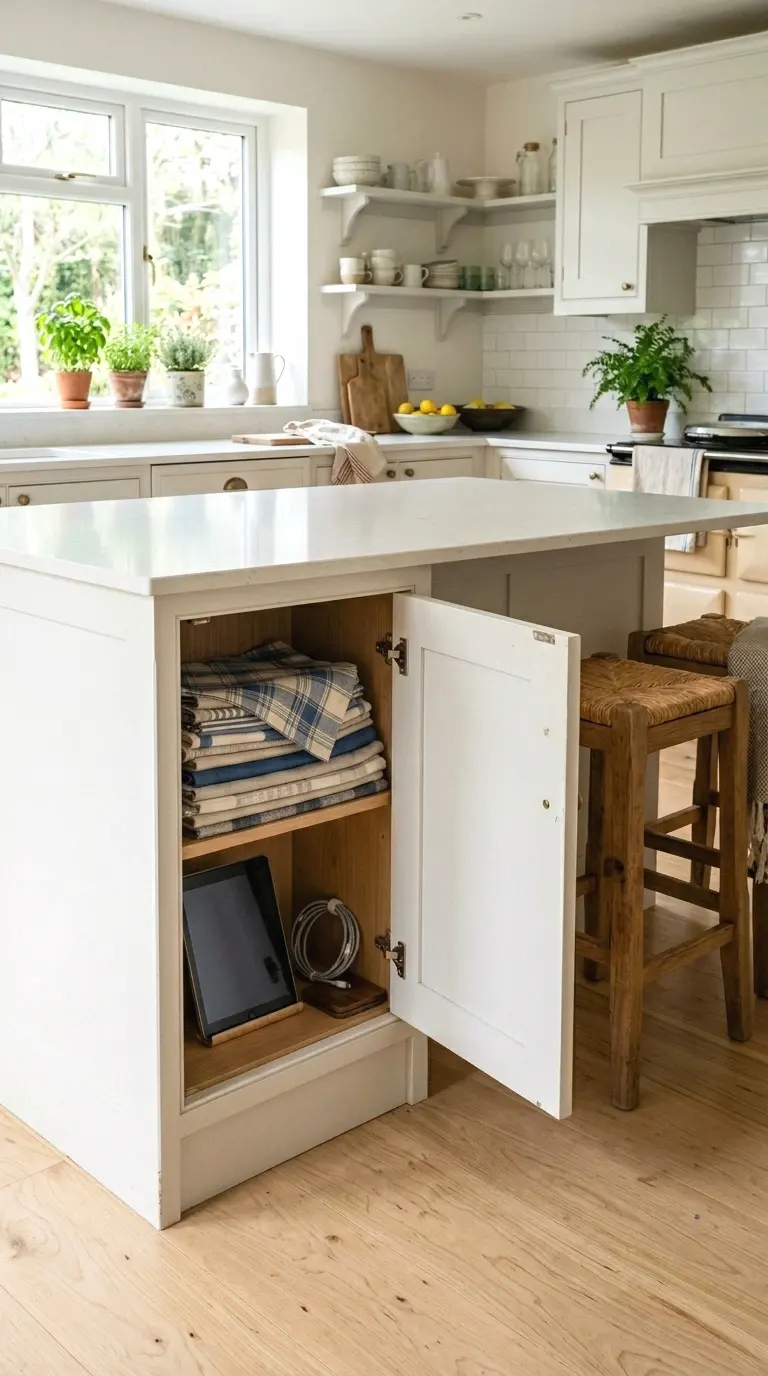
If one side of your island has bar stools or seating, the cabinet space on that side often goes to waste because people need leg room. But a shallow 6 to 8-inch deep cabinet with a door on the seating-side end panel works without blocking knees.
It’s just deep enough for flat items: a few placemats, a tablet or cookbook stand, a pack of napkins. A small single-door base cabinet in that range runs about $60 to $100 if you’re adding it as a custom piece. For renters, a freestanding mini cabinet or a set of stacked baskets with a face panel achieves the same look without any drilling.
16. Mount Pegboard on the Inside of Cabinet Doors
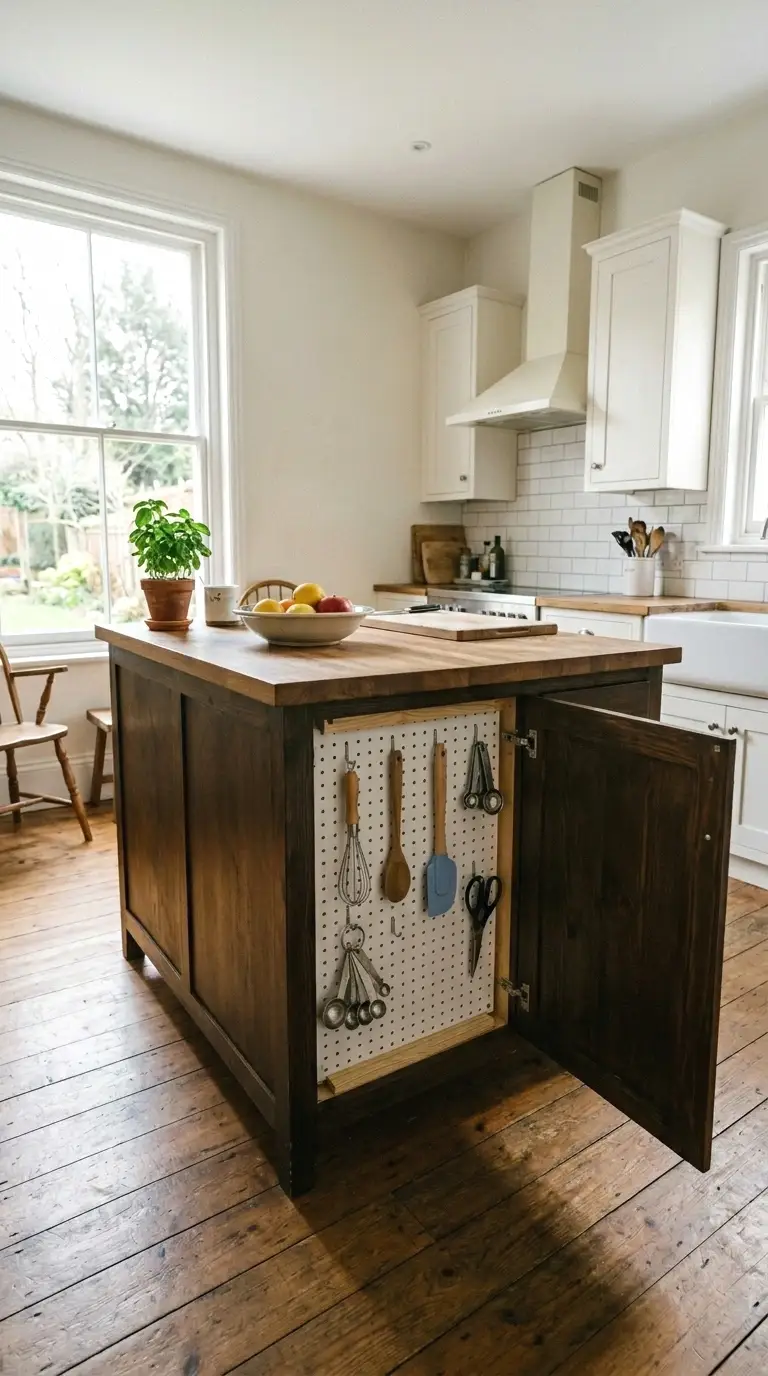
The inside of a cabinet door is empty flat space in most kitchens. Mounting a piece of pegboard cut to fit on the inside of a large island cabinet door turns it into a hanging storage spot for small tools, lids, measuring cups, or cleaning supplies.
A 12-inch by 18-inch piece of pegboard costs about $5 to $8 at most hardware stores. You’ll need a small strip of wood at the top and bottom to hold it away from the door surface so the pegs actually have clearance. Total cost for materials is usually under $20. Paint it to match the cabinet interior and it looks intentional, not improvised.
17. Create a Charging and Gadget Drawer in the Island
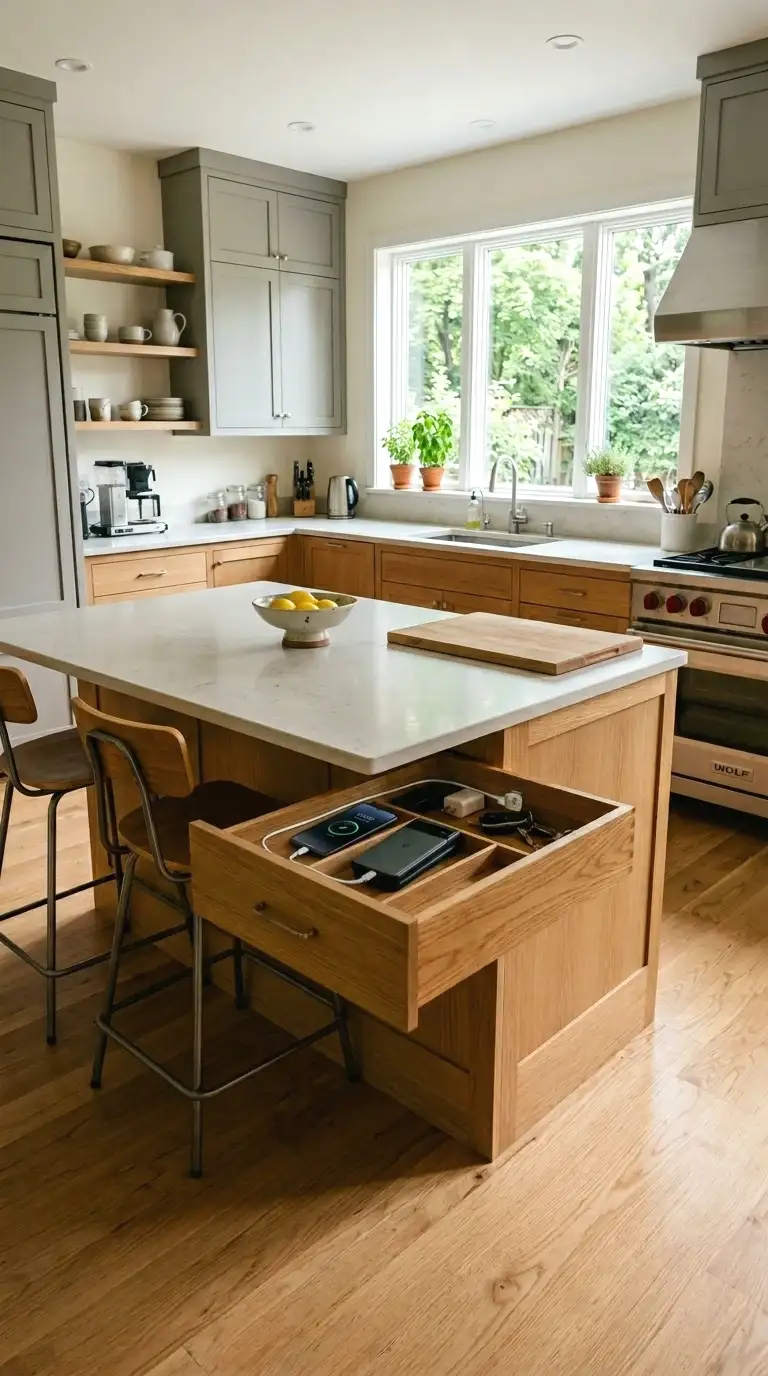
A lot of people put this in the kitchen but don’t think to put it in the island. A drawer with a built-in charging strip or a small power bar tucked inside means phones, tablets, and wireless earbuds all charge in one out-of-sight spot.
A drawer organizer with a cutout for cords costs about $15 to $30. You’ll need an outlet accessible inside or under the island for this to work. If the island has power to it already, this is a 20-minute setup. If it doesn’t, it’s worth having an electrician add one outlet during any kitchen update. It keeps countertops clear of cord clutter for good.
18. Use Baskets on Lower Open Shelves for a Warm Look
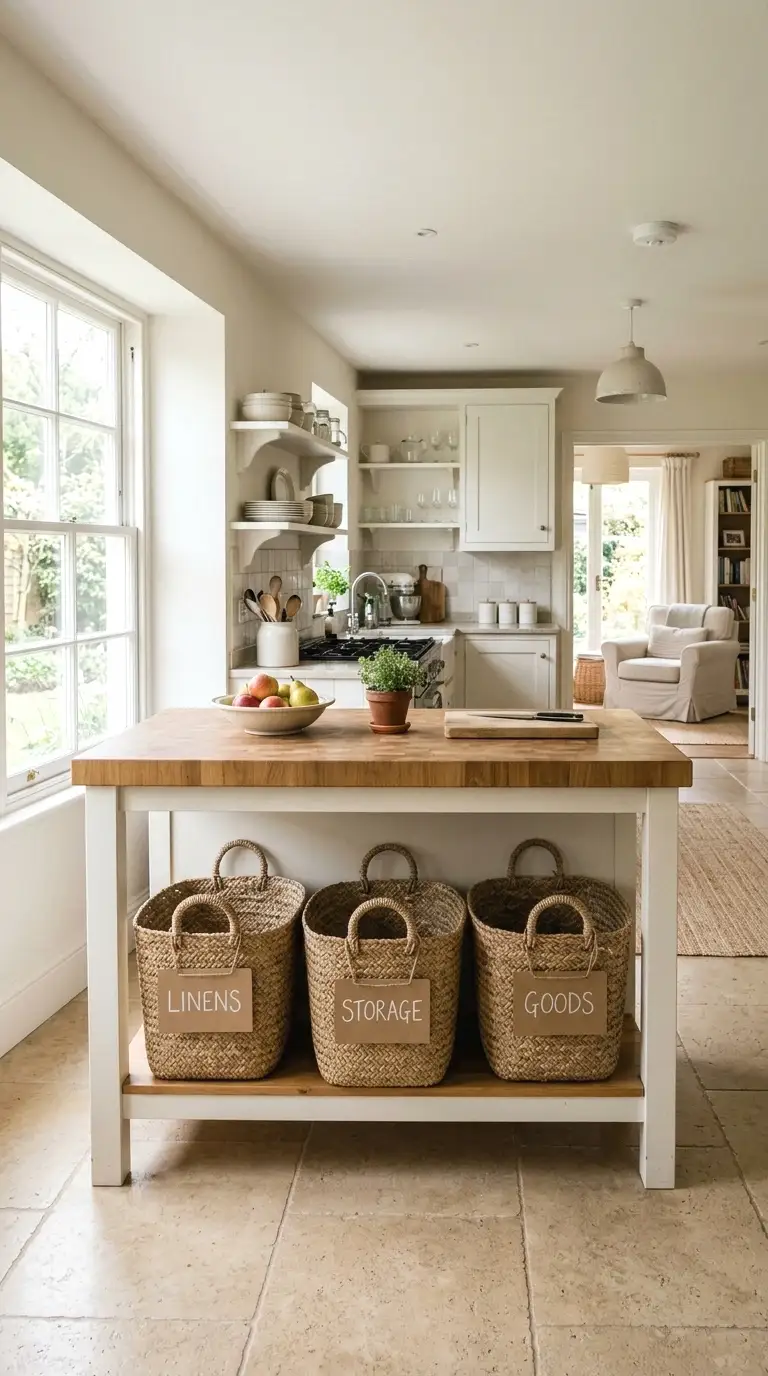
Open lower shelves on a kitchen island look great in photos but collect mess fast in real life. Baskets solve this by containing the mess while still keeping things accessible. Woven seagrass or rattan baskets in a consistent size give the shelves a put-together look even when the insides are chaotic.
A set of three matching baskets in a 12-inch by 14-inch size runs about $30 to $50 depending on material. Label the front of each basket so every family member knows what goes where. Baskets also work well for renters who can’t add permanent cabinet inserts. It’s a zero-tool solution that still looks like a planned layout choice.
More Ideas:
19. Add a Wine Rack Insert to an Unused Upper Cabinet Bay
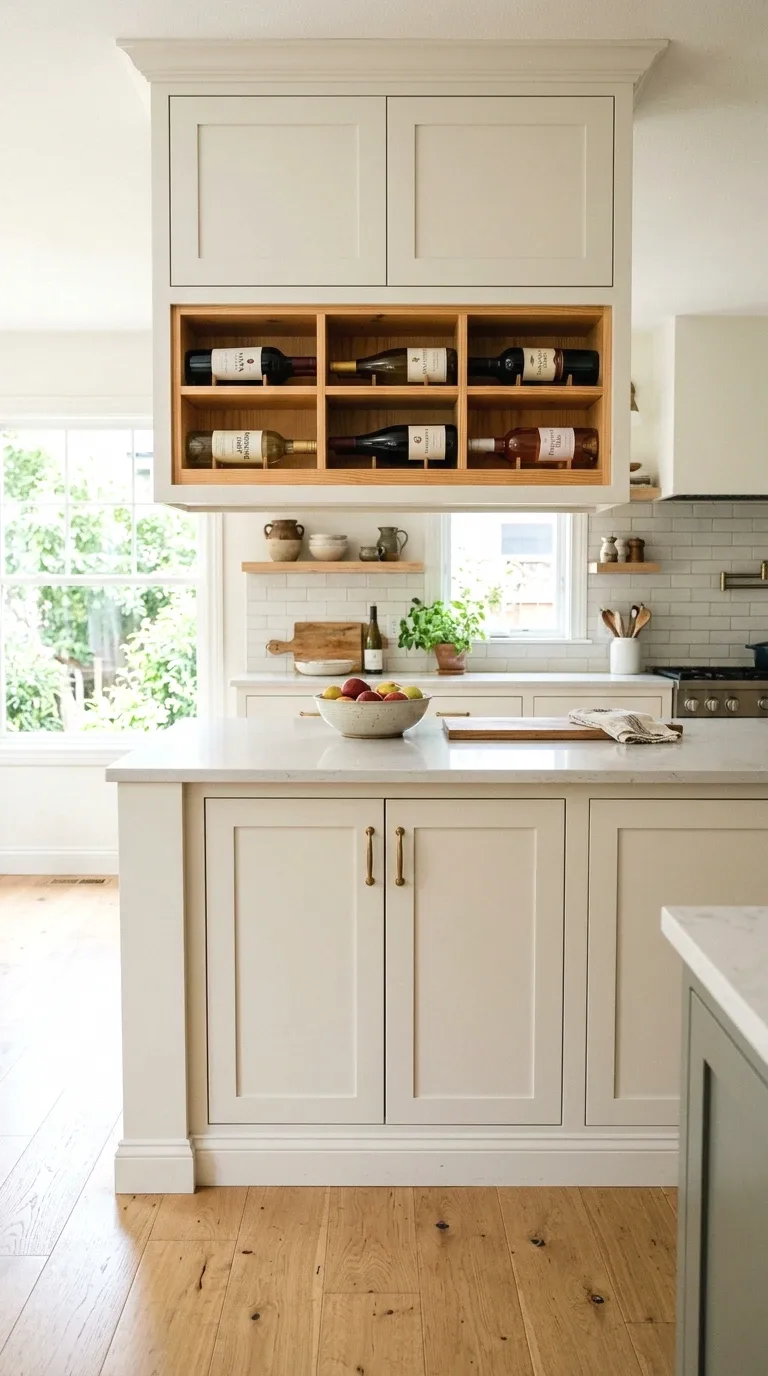
If you have a section of island cabinetry that sits above counter height, a built-in wine rack insert uses that vertical space well. An insert with six to twelve angled bottle slots fits in an opening that’s about 12 to 16 inches wide and at least 12 inches tall.
Wood wine rack inserts designed to fit inside cabinet openings run about $25 to $60 depending on capacity. They sit inside the cabinet like a shelf unit. The bottles stay horizontal, which is correct for wine storage. This works best near a beverage or entertaining zone rather than next to a hot stove side, since heat isn’t good for wine even if it’s just on the island.
20. Label Every Cabinet Zone with Simple Interior Tags
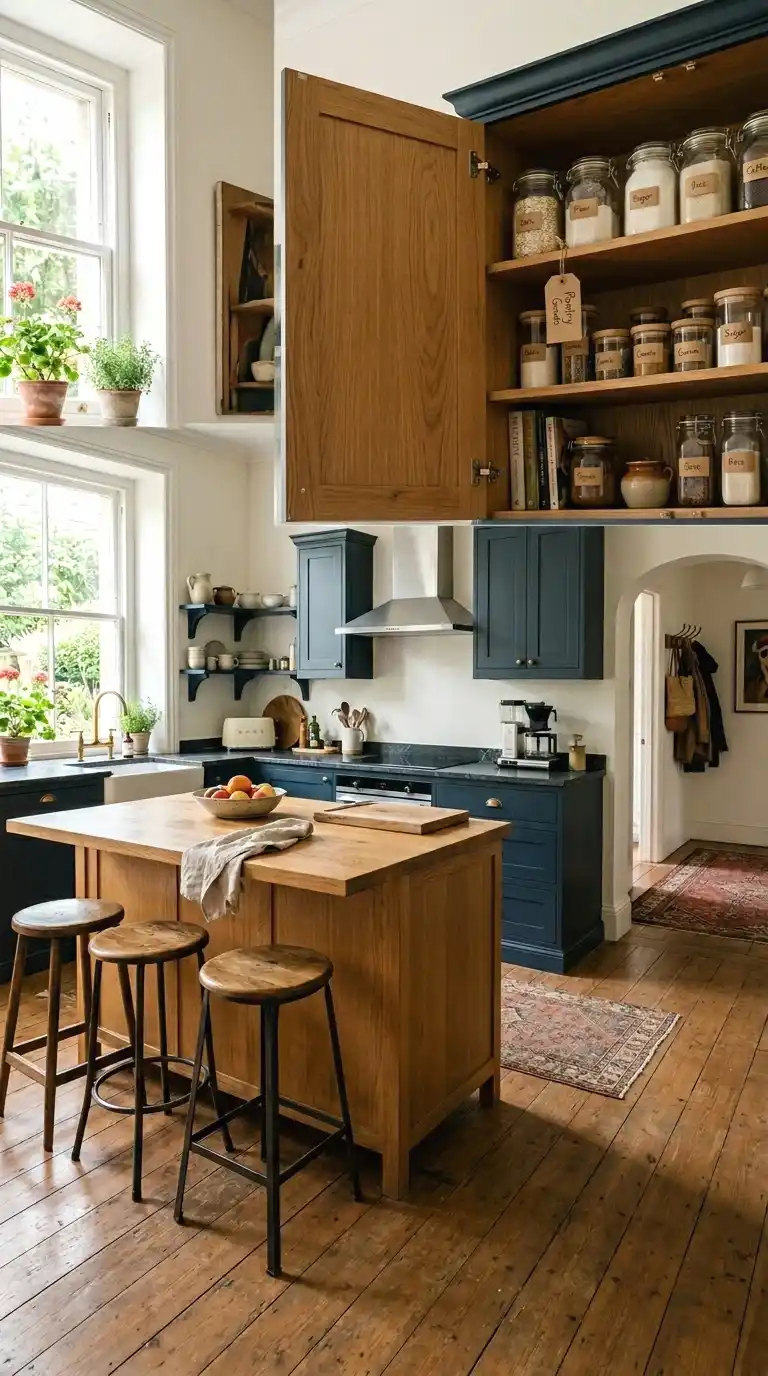
This seems like a finishing touch but it’s actually a system. Without labels, organization slowly breaks down as everyone puts things back in the wrong spot. Simple tags on the inside of cabinet doors, or on shelf edges, tell every person in the household exactly what belongs where.
A label maker costs $15 to $25 for a basic model. Plain kraft card tags tied with twine work just as well and cost almost nothing. Put the label on the interior door rather than the outside face to keep the outside of the island clean. This is the part of a kitchen organization project that actually makes it stick for more than three months.
21. Finish the Toe Kick Area with a Shallow Pull-Out Drawer
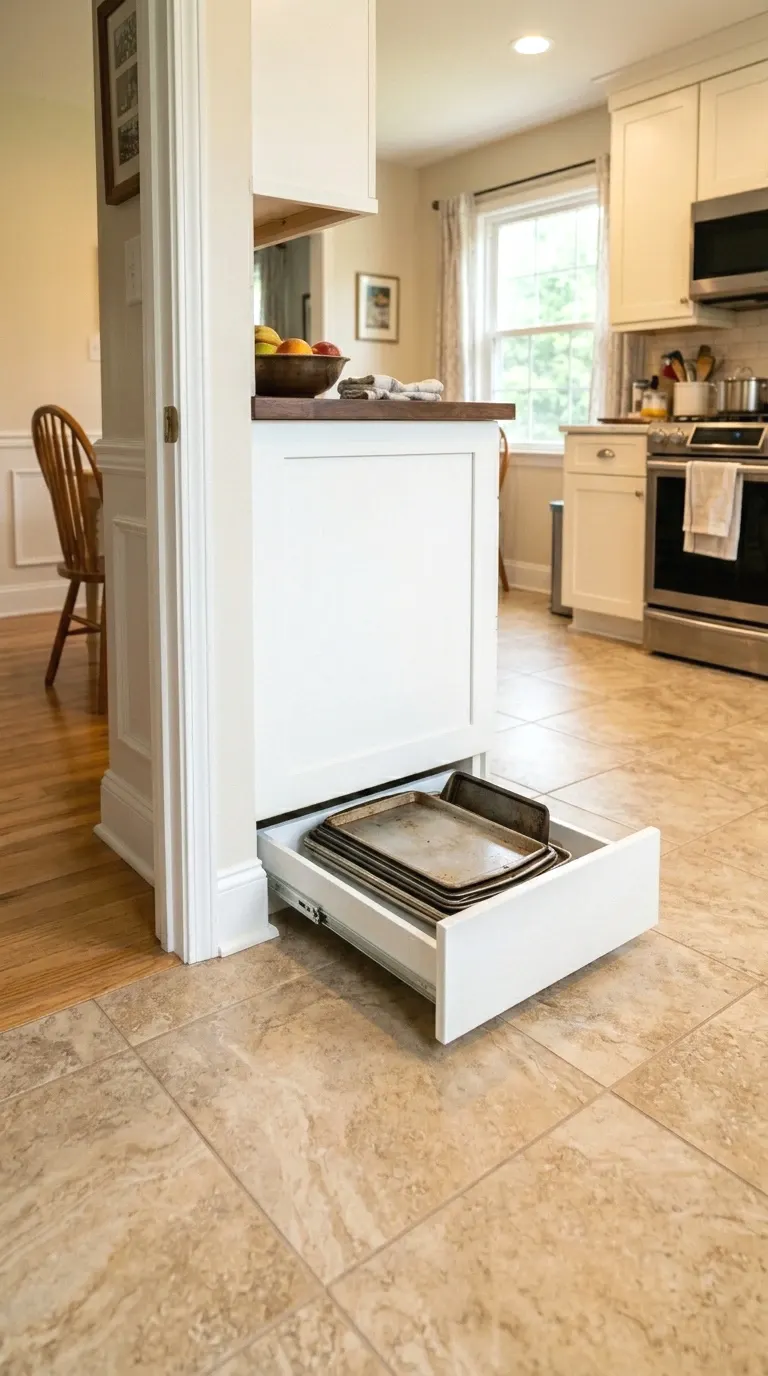
The toe kick is that recessed strip at the very bottom of the island cabinets, right at floor level. Most people don’t know it can hold a pull-out drawer. It’s only about 3 to 4 inches tall, but it’s often 24 to 30 inches wide and runs the full length of the island.
A toe kick drawer kit runs about $30 to $60 and mounts on low-profile slides. It’s deep enough to hold baking sheets, extra placemats, a cutting board, or a flat pizza stone. This is genuinely one of the most overlooked storage upgrades in any kitchen. Most kitchens have at least four linear feet of toe kick space that’s completely empty. That’s free storage that’s already there.
Final Thoughts on Large Kitchen Island Cabinet Layout
You’ve got a real plan now. The big themes here are zoning, pull-outs, and using every inch including the spaces most people ignore like door interiors, end panels, and toe kicks. None of these ideas require a full kitchen remodel. Most of them are weekend projects or even afternoon installs. The island you already have can do a lot more work.
Start with the zone layout. Before you buy a single insert or shelf, spend 20 minutes drawing out which section handles which task. That one step makes every other decision easier. It costs nothing and it’s the difference between a layout that holds for years and one that falls apart in a month.
If you want more ideas like these for kitchens and every other room in the house, homelypop.com has a lot more where this came from.
The island and dining connection is one worth exploring too, with room-by-room storage ideas that actually work when your kitchen and eating area share the same footprint.