21 Basement Laundry Room Makeover Ideas That Work on Any Budget
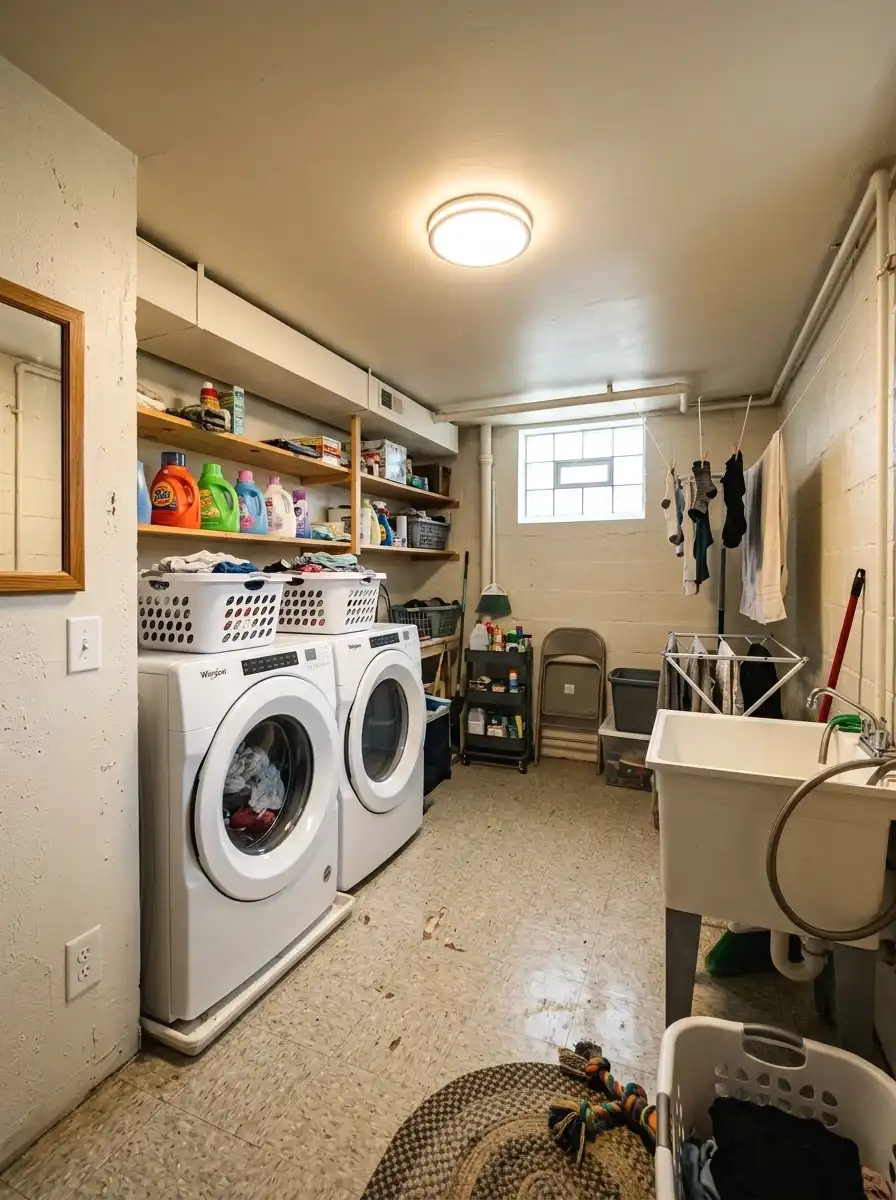
Your basement laundry room is a space you dread going into. The bare concrete, the flickering bulb, the piles of stuff that live there because nowhere else wants them. It’s not inspiring. It’s just depressing.
These 21 ideas come from digging through real homeowner posts on Reddit, Houzz threads, and hundreds of Pinterest saves from people who actually live in houses with basement laundry rooms. Each idea was picked because it solves a real problem, costs real money you might actually have ($100 to $300 range for most), and works whether you’re renting or own the place.
This list is for people with a basement laundry room that functions but feels like a punishment. It’s not for full gut renovations with a contractor on speed dial. If you’re looking to spend $5,000, this isn’t your list.
By the end, you’ll have a clear picture of which changes will do the most for your specific space and where to start first.
If your basement setup is especially tight, you might also want to browse some small space storage that actually works before you commit to a layout.
What to Know Before You Start Your Basement Laundry Room Makeover
- Moisture is the main enemy down there. Even small leaks can ruin new flooring or paint within months.
- Test your walls before painting. Concrete needs a specific primer or paint will peel within a year.
- Budget roughly $50 to $80 just for storage hardware before you buy any decor items.
- Bad lighting is the number one complaint homeowners mention after finishing their laundry room makeover.
- Most people forget to plan for a sorting system before buying a washer/dryer shelf, then run out of room.
- A simple dehumidifier ($30 to $60) can make the whole space feel less damp and smell better year-round.
- Peel-and-stick tiles over concrete need a flat surface. Fill cracks with floor leveler first or they’ll lift.
- Hooks on the back of a door last longer with heavy-duty anchors. The cheap screw-in kind pull out fast.
1. Swap Out the Light Fixture
The lighting down there is probably doing 70% of the damage. One bare bulb or a yellowed plastic fixture makes everything look worse than it is. Replacing it with a flush-mount LED fixture takes under an hour if you’re comfortable with basic wiring, and the difference is immediate. Not just brighter. The whole room reads differently.
A good flush-mount fixture runs $30 to $60 at any home improvement store. Go for daylight bulbs in the 5000K range. They make whites look white and colors look real. I put one in my basement and stood there for a minute just looking around. It felt like a completely different room. No exaggeration.
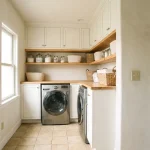
2. Add a Folding Shelf Above the Machines
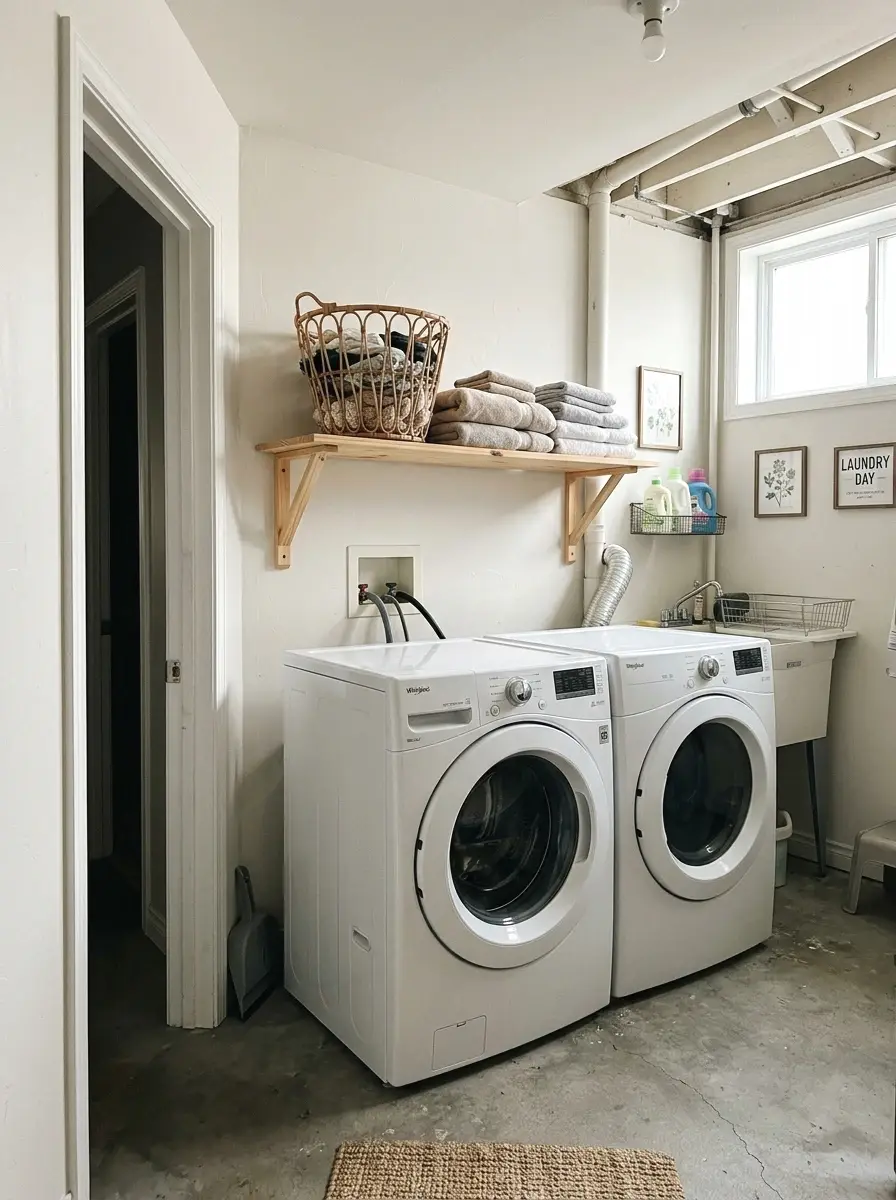
Here’s something most people skip until they’re desperate: a wall-mounted folding shelf right above or next to the washer and dryer. When you need it, it’s there. When you don’t, it folds flat against the wall and takes up zero space. It’s one of those things that sounds minor until you’ve been balancing a laundry basket on top of the dryer for three years.
These shelves run about $25 to $45 and come in wood or metal finishes. Mount it at around 40 to 44 inches off the ground so it clears the machines with the lid open. Make sure you’re hitting a stud or using drywall anchors rated for at least 30 pounds. The wall bracket matters more than the shelf itself.
If you want something more permanent than a fold-down shelf, there are some folding counter options worth considering that give you a lot more surface area.
More Ideas:

3. Paint the Walls a Real Color
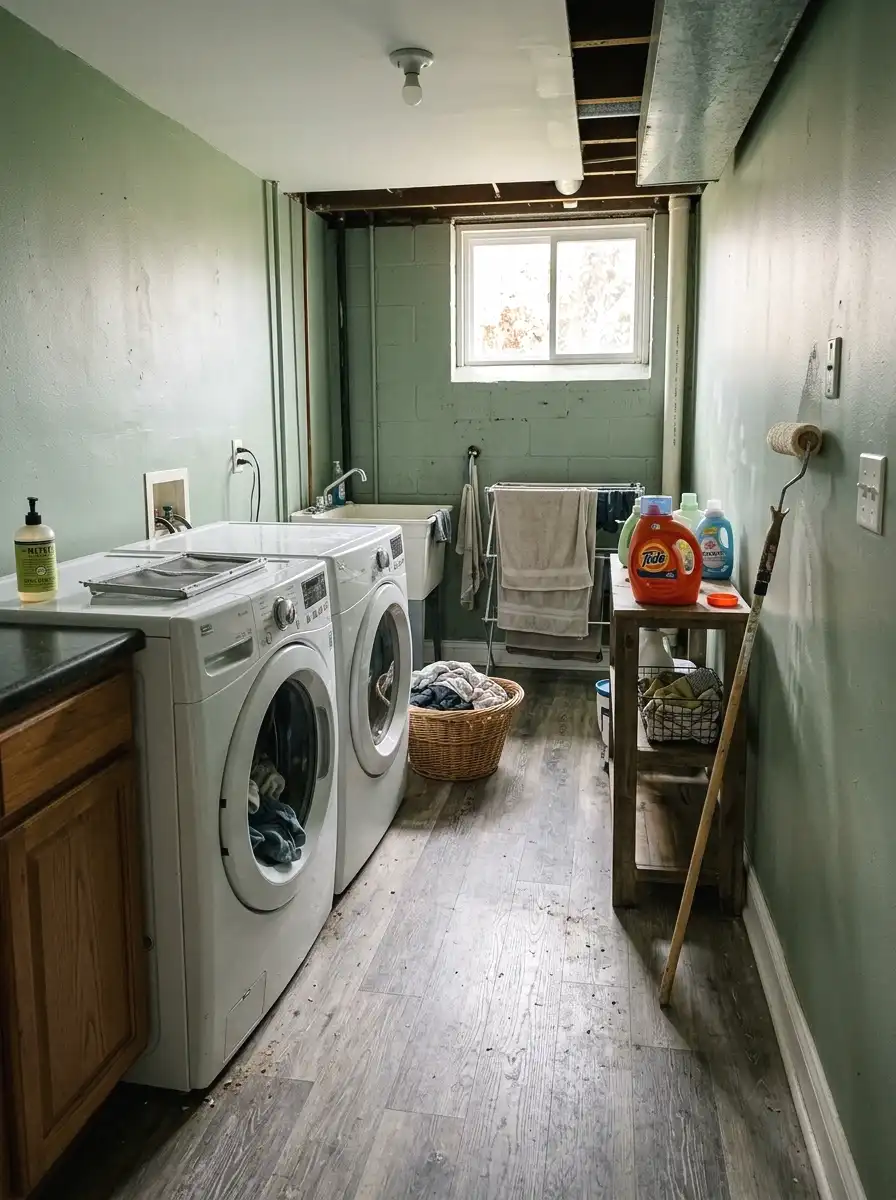
So many basement laundry rooms stay that weird gray or off-white forever because it feels risky to paint down there. I get it. But a real color, even just one accent wall, changes the energy completely. Think a muted sage, a warm cream, or even a deep navy if the space is small and you want it to feel intentional rather than unfinished.
Use a masonry paint or add a concrete primer first if you’re working with bare block walls. This step alone costs $20 to $40 and is probably the highest-impact thing on this list per dollar spent. Go for flat or matte finish. It hides imperfections better and looks more like a real room.
If you’re not sure which direction to go, there’s a solid guide to wall paint colors that transform a room worth looking at before you buy a single sample.
4. Install Peel-and-Stick Floor Tiles
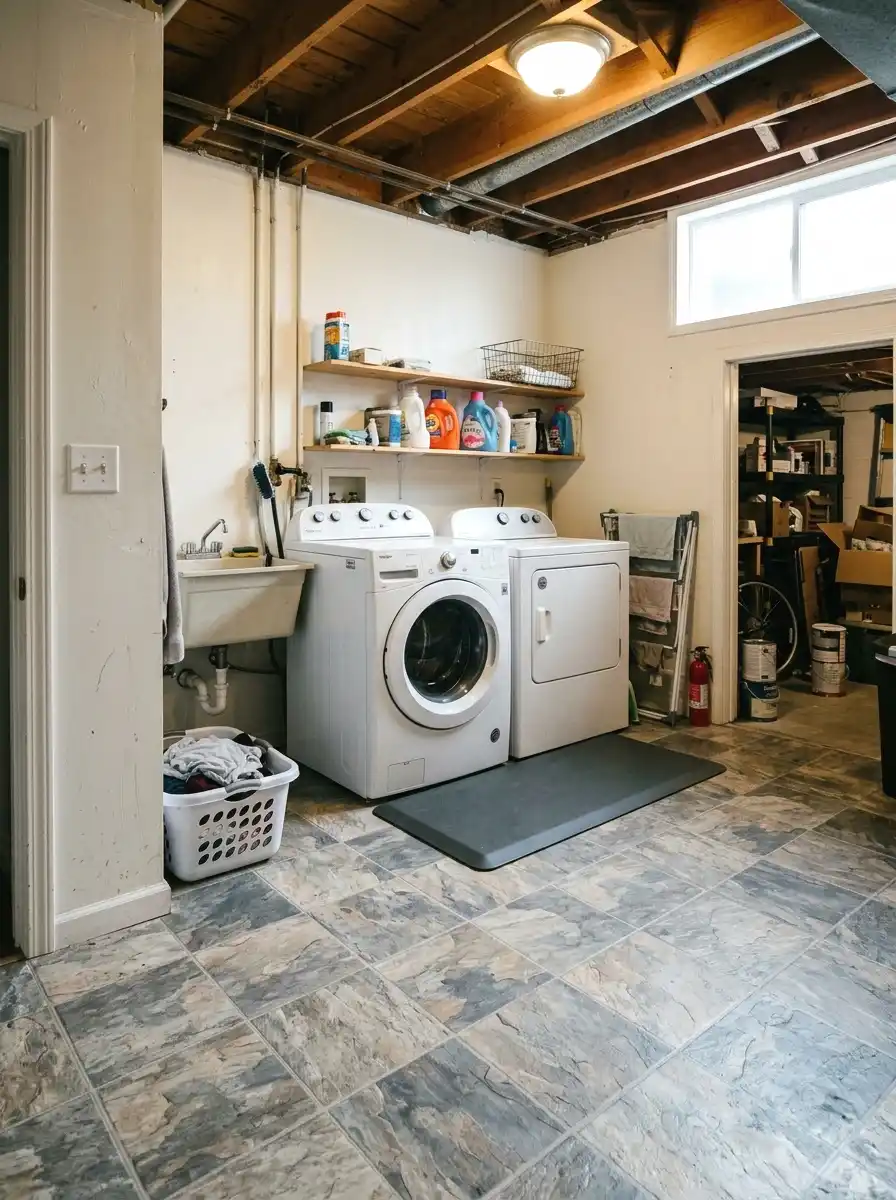
Cold concrete floors are a baseline misery. Peel-and-stick vinyl tiles fix that without a contractor, a major budget, or tearing anything out. The ones that look like stone or wood grain are everywhere right now and some of them are genuinely hard to tell apart from the real thing at a glance. They also add a little warmth underfoot which matters more than you’d think.
A pack covering 20 square feet runs about $25 to $40. For a standard 8×10 basement laundry room, budget $80 to $120 total for materials. The key prep step is cleaning the floor completely and filling any cracks with self-leveling compound. Skip that part and they’ll start lifting at the edges within a few months. (Took me ages to figure this out.)
5. Hang a Clothes Rod for Air Drying
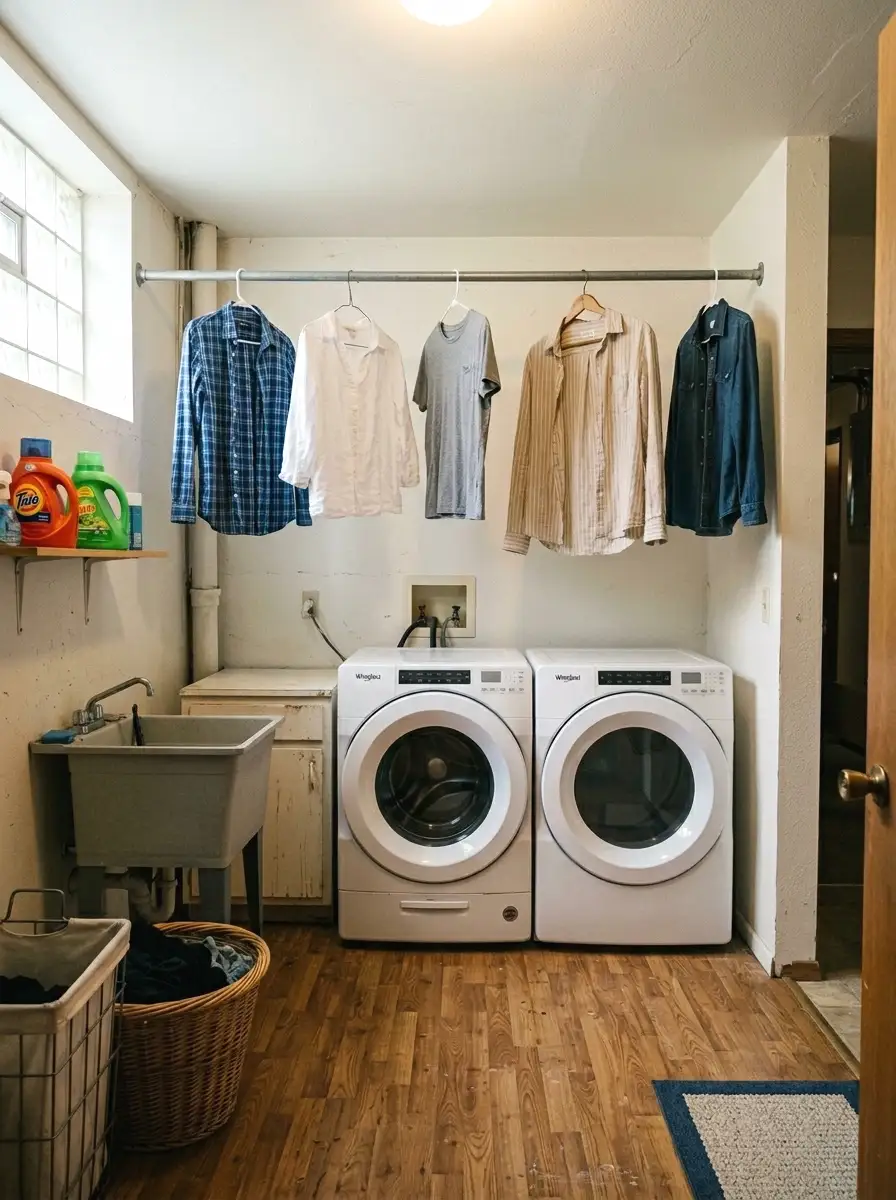
The amount of money that goes to the dryer for things that should just air dry is genuinely wild. A simple clothes rod installed between two walls or on brackets from a single wall gives you a spot for delicates, button-downs, workout gear, and anything with a “lay flat to dry” tag you always ignore because there’s nowhere to lay it flat.
A basic rod and bracket set costs about $15 to $25. Install it at 6 feet high if ceiling allows, so full-length items clear the floor. Closet rod hardware from the storage aisle works perfectly. If you have low ceilings, angled bracket sets let you mount at 5 feet 6 inches and still hang most things without them dragging.
For more hanging and drying setups that save space, especially in rooms with awkward ceiling heights, there are a few more approaches that work well in tight layouts.
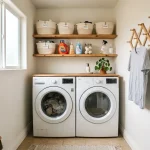
6. Add Open Shelving for Supplies
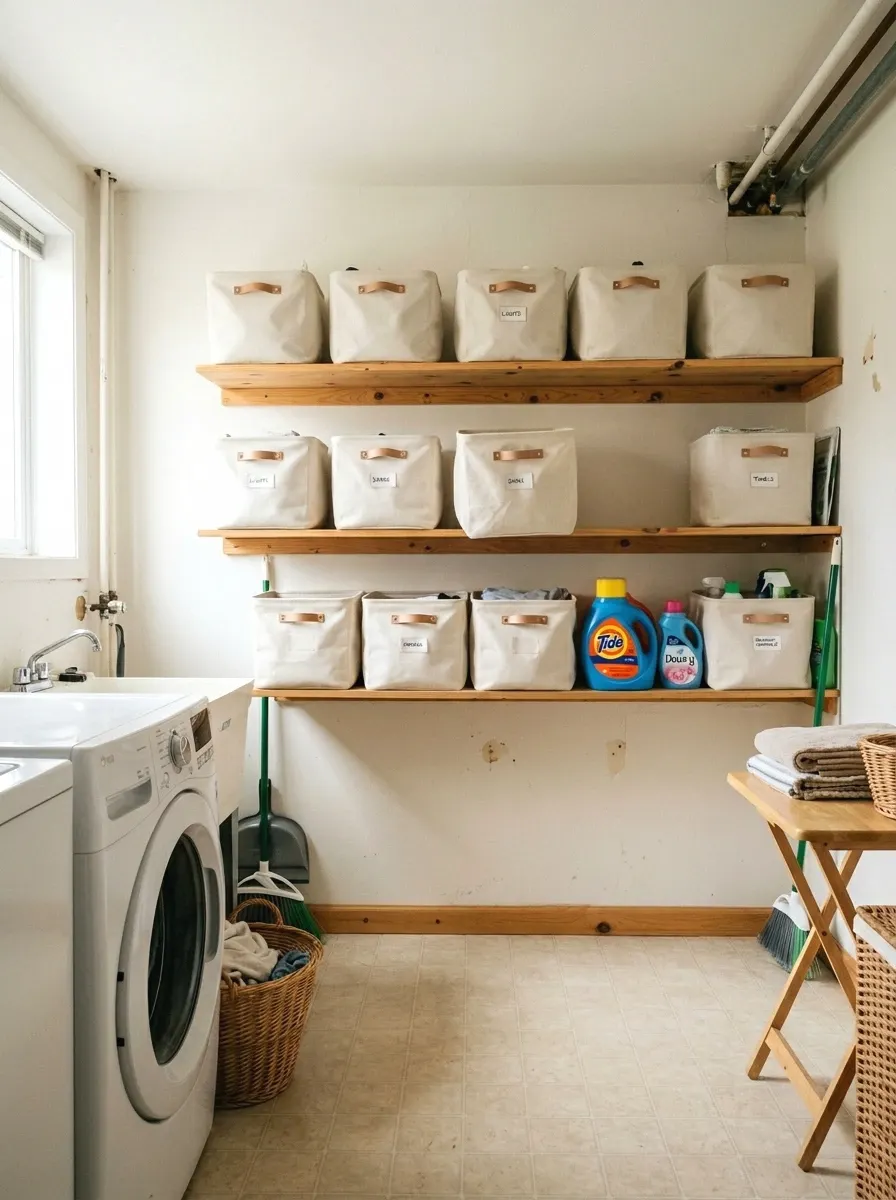
Cabinet doors are not necessary down here. Open shelving on a utility wall keeps supplies visible, accessible, and honestly looks more organized once you put things in matching containers. A set of three wire shelves or a floating wood shelf runs $20 to $50 and goes up with four screws. That’s the whole project.
Use matching baskets or bins to hold detergent, dryer sheets, and stain removers. They don’t need to be expensive. A set of four fabric bins from a discount store runs about $12 to $16 total. The matching part is what makes it look intentional. One shelf of random bottles looks messy. One shelf of matching bins looks like a plan.
If you want to go further with open storage, there are plenty of shelving ideas that keep things visible without making the room feel cluttered.
More Ideas:
7. Mount a Drying Rack on the Wall
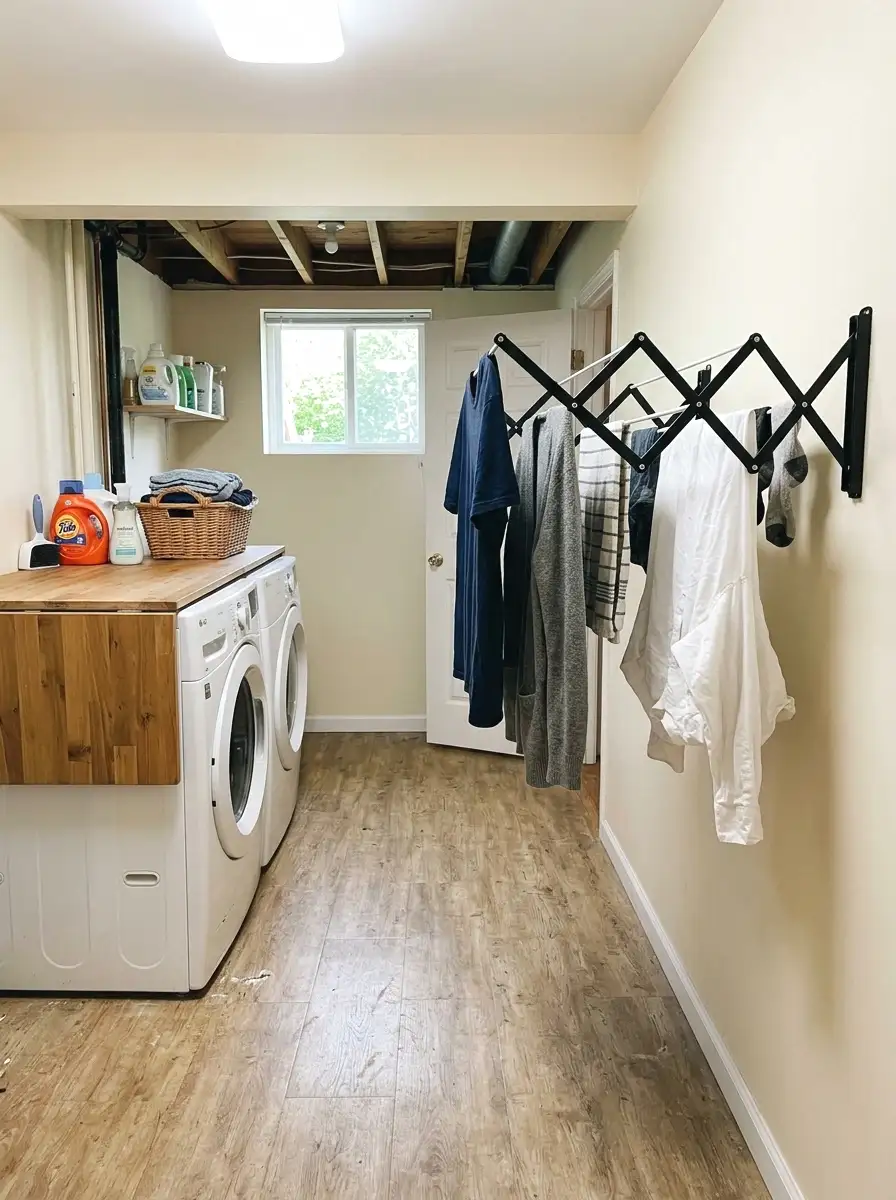
A wall-mounted folding drying rack is different from a clothes rod. It folds out accordion-style and gives you multiple horizontal bars to lay or hang things flat. Great for sweaters, delicate fabrics, and anything that needs real airflow. The collapsible kind takes up almost no space when closed.
These run $30 to $55 and mount directly to studs or with heavy anchors. Most hold 30 to 40 pounds when extended. I was skeptical about this one but after using it for two weeks I stopped reaching for the dryer for half my laundry. It mounts at eye level on a side wall and folds completely flat when not in use. Stud-mounted is the only way to go here.
8. Use a Tension Rod Under the Sink
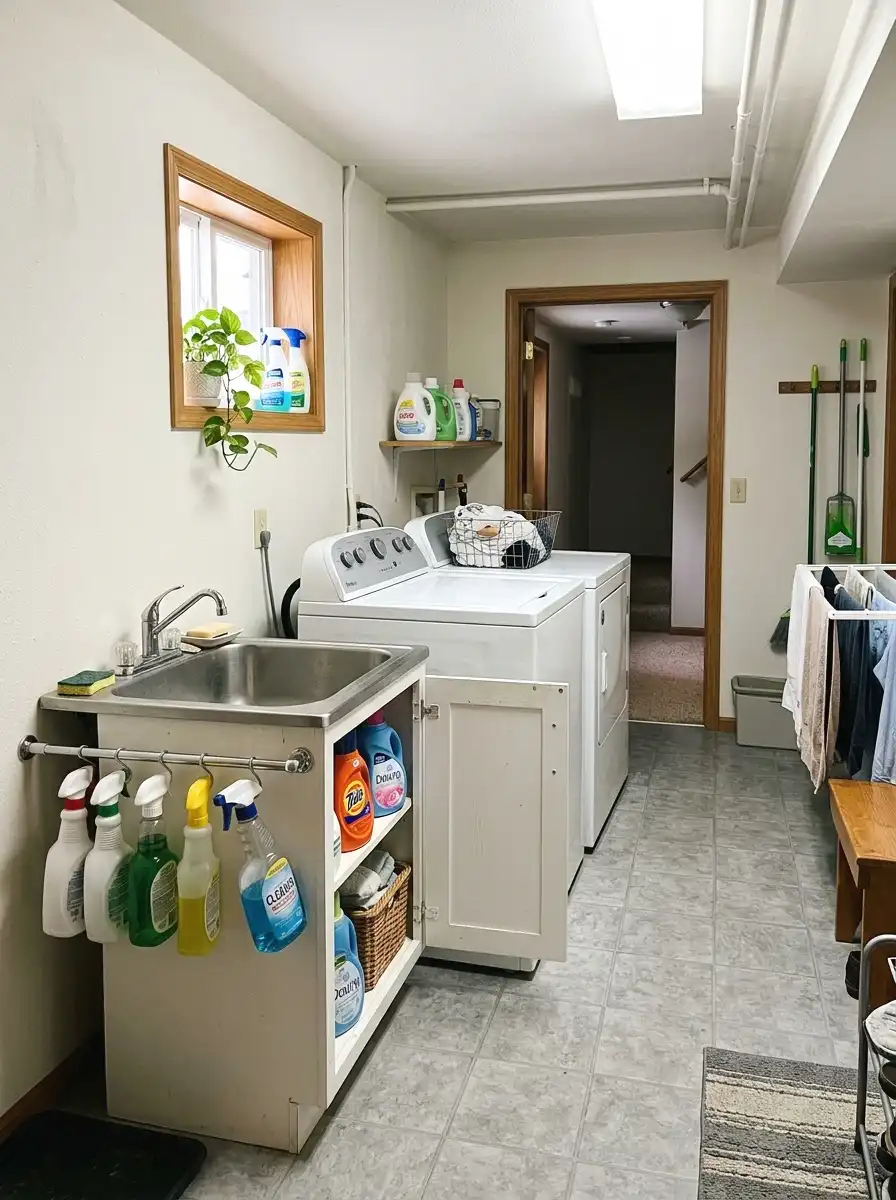
If your basement laundry room has a utility sink with open space underneath, a tension rod across the cabinet opening turns it into instant spray bottle and cleaning supply storage. Hang bottles by their trigger handles and the whole space under there opens up. Zero drilling. Zero damage. Zero cost if you already have an extra tension rod around.
If you don’t, they cost $8 to $12. The pressure-mounted kind works fine here since you’re not hanging anything heavy. This is one of those ideas that sounds almost too simple, but it genuinely clears out a shelf or two by moving things you almost never need to grab to a lower, more out-of-the-way spot.
9. Label Everything
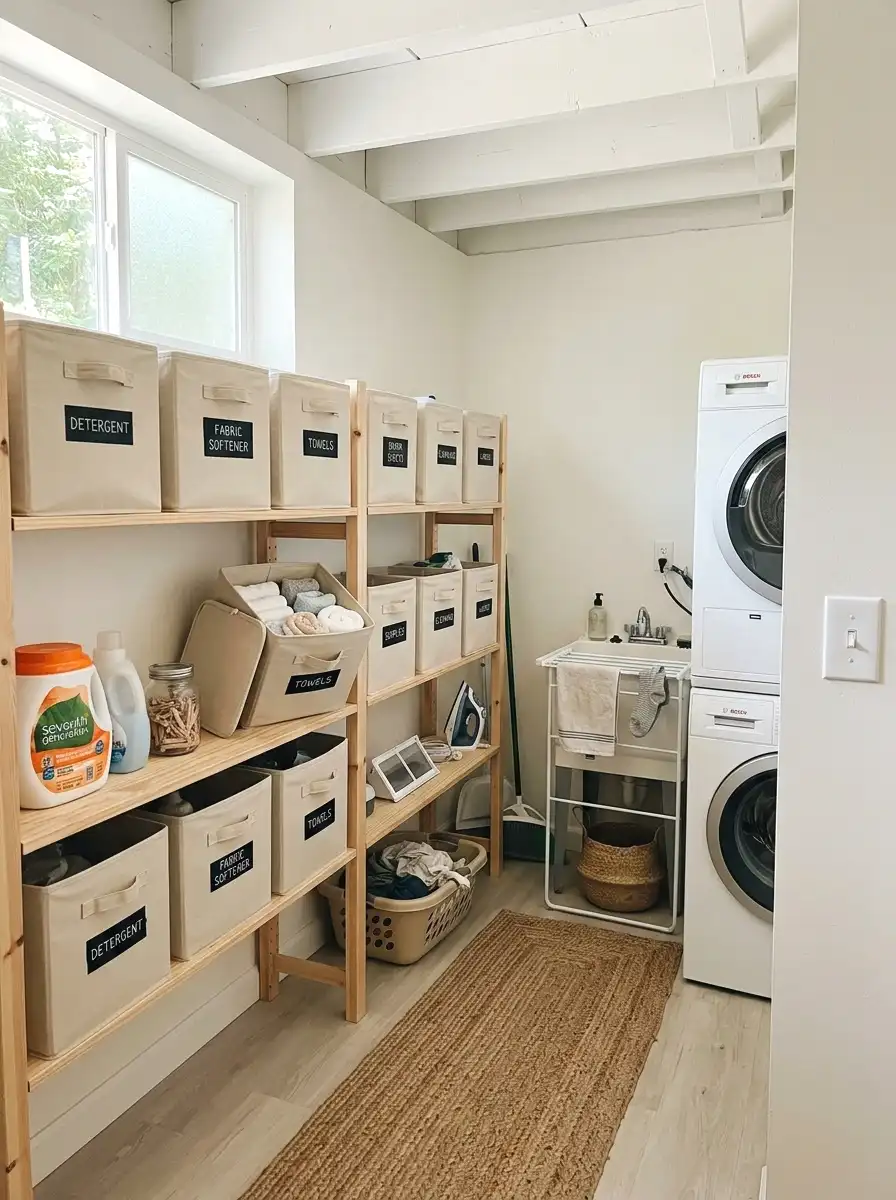
This one is so underrated. Labels on bins, shelves, and storage containers make it easier for everyone in the house to put things away correctly. Which means things actually get put away. Clear acrylic labels or even just a label maker on some matte black tape looks clean and purposeful.
A label maker runs $15 to $25. If you don’t want to buy one, print-and-stick labels from a template cost basically nothing. The important part is consistency. Same font, same placement, same style throughout. That’s what makes it feel like a real room instead of a storage closet someone painted once.
10. Add a Pegboard Panel
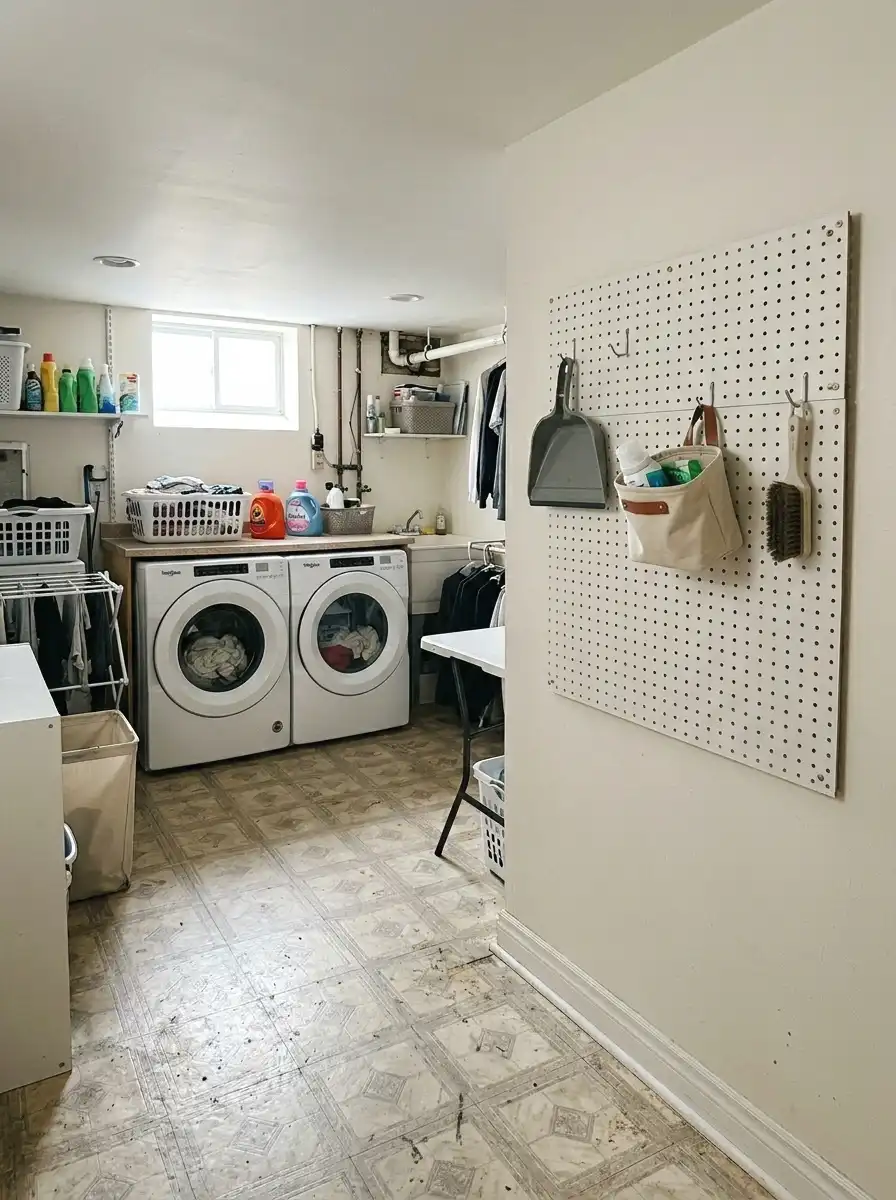
A pegboard section on one wall gives you flexible, rearrangeable storage for anything with a hook or a basket. Brooms, brushes, extension cords, small bins for clothespins or lost socks, all of it gets off the floor and off the shelf. And the nice part is you can completely rearrange it whenever something stops working.
A 2×4 foot pegboard panel costs $10 to $20. Paint it before mounting if you want it to look less “hardware store.” A coat of matte white or whatever wall color you used reads way better than raw brown. Mount it with 1-inch standoffs so hooks can actually slide in from behind. Flush-mounted pegboard is a common mistake that makes the hooks useless.
If pegboard isn’t quite the right fit for your wall layout, there are other wall-mounted storage approaches that stay completely out of the way when you don’t need them.
More Ideas:
11. Install a Utility Sink Shelf
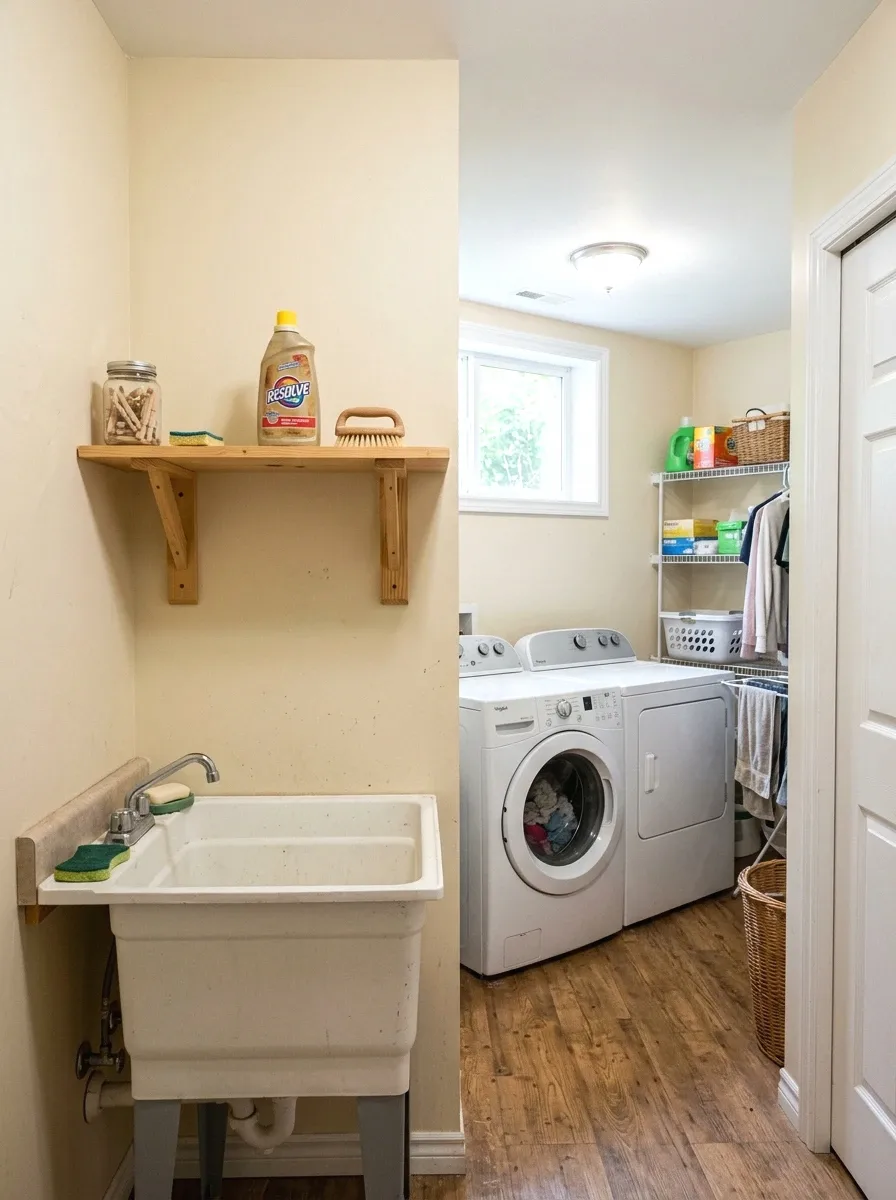
Most utility sinks have that dead space on the side or above where nothing useful lives. A small shelf bracket set mounted at the corner of the sink area gives you a spot for the things you reach for constantly: stain remover, the brush, the fabric softener. No more leaning across the machine to grab things.
A basic bracket-and-shelf setup costs $15 to $30. Go with a sealed wood shelf or a wire shelf rated for wet areas since the sink splashes. Dimensions matter here. A 10-inch deep shelf at about 48 inches off the floor clears most sink sides without blocking access. Measure twice before buying brackets.
If you’re thinking about adding real cabinet storage nearby rather than just a utility shelf, it’s worth looking at cabinet layouts that make the most of the space around the machines.
12. Put Down an Anti-Fatigue Mat
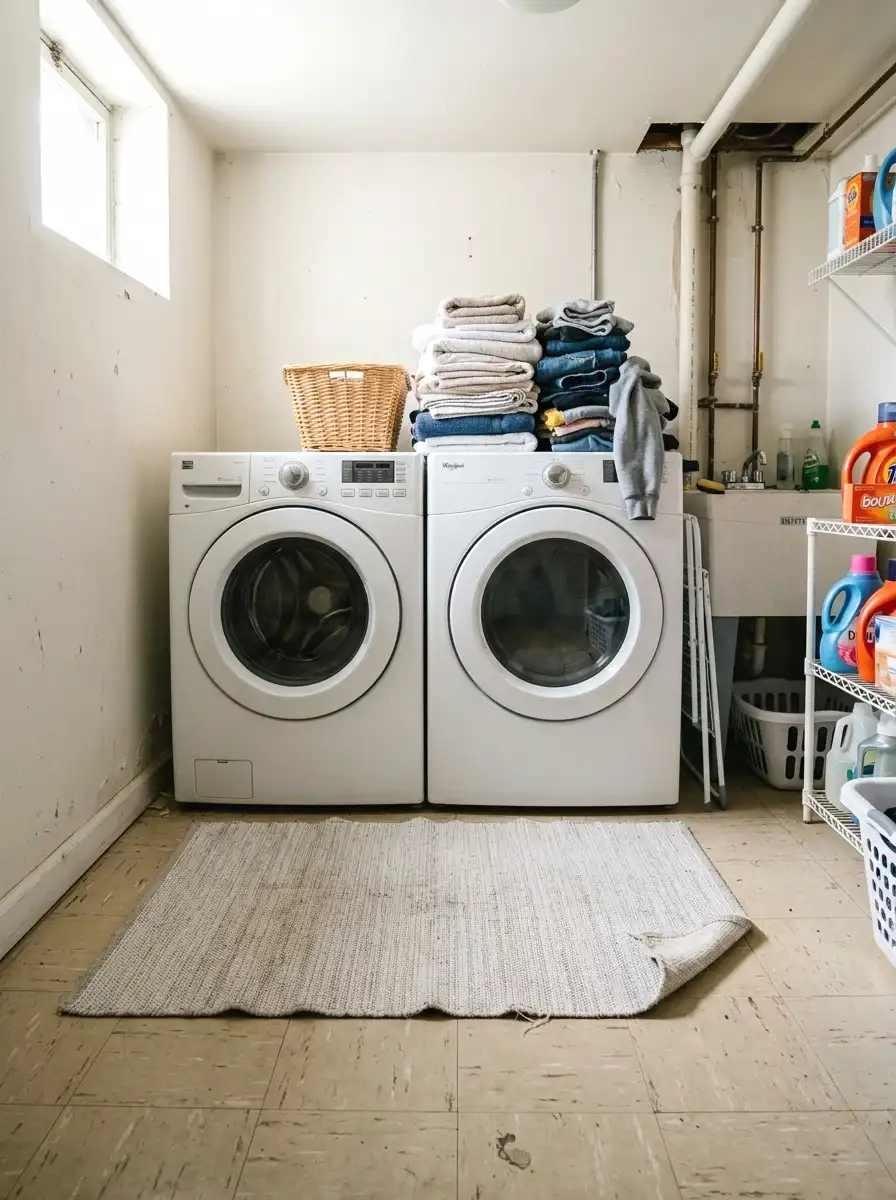
Standing on concrete for 20 minutes sorting laundry is not great for your feet or your back. An anti-fatigue mat in front of the machines makes a real physical difference and also instantly makes the floor look more finished. It’s one of those small things that changes how long you’re willing to spend down there, which means you actually stay and get it done.
These run $20 to $50 for a good one in the 20×36 inch size, which fits in front of most washer/dryer pairs. Look for ones with a beveled edge so they don’t curl and become a trip hazard. Rubber-backed versions stay put on concrete without any adhesive. Machine-washable ones are worth the extra $5 to $10.
If you want to explore more durable options beyond peel-and-stick, there’s a breakdown of flooring upgrades that work under pressure in damp, high-traffic laundry spaces.
13. Add a Small Trash Can
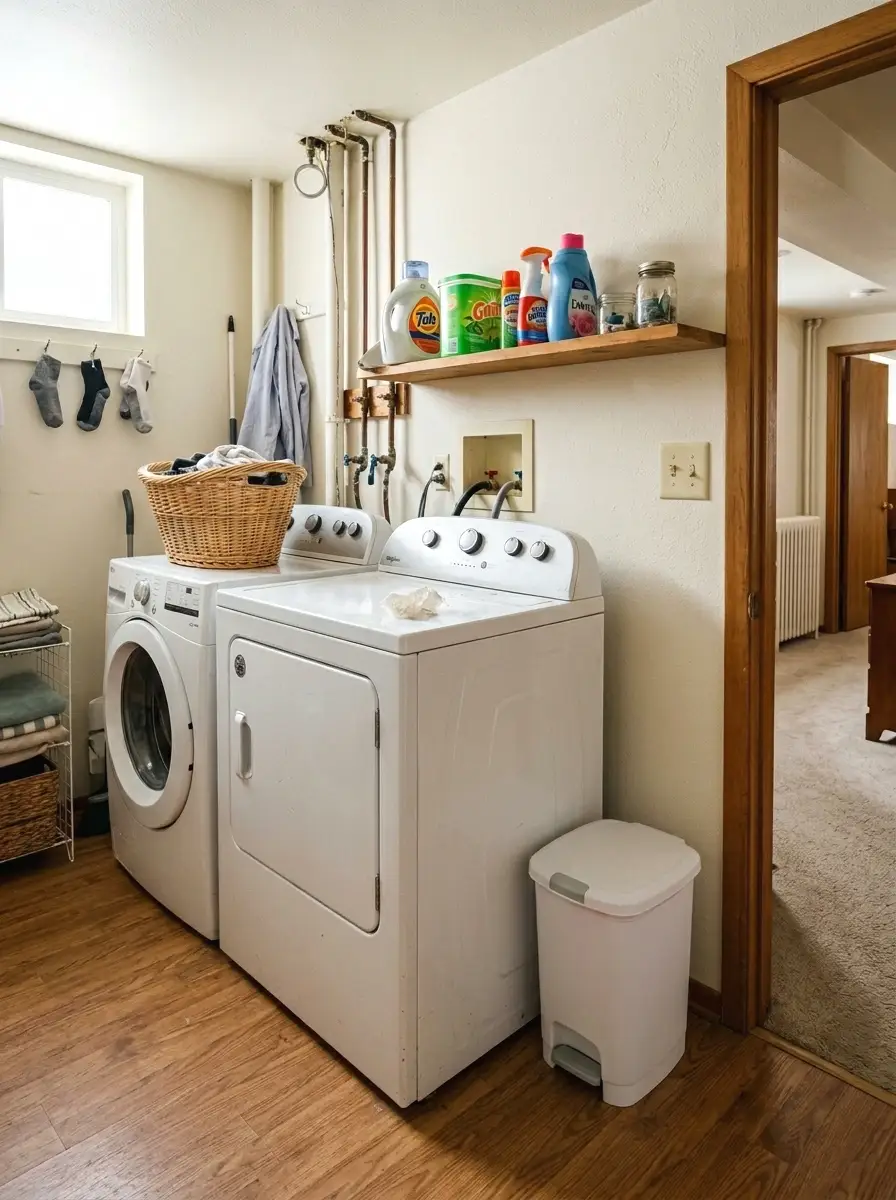
Lint, dryer sheets, empty detergent pods, tags cut off new clothes. All of that stuff ends up on top of the machines or the floor because there’s nowhere to put it. A small trash can right next to the dryer, the smallest size you can find, fixes that completely. It sounds obvious and yet almost nobody has one down there.
A 2.5 gallon bin runs about $8 to $15. The kind with a foot pedal is worth a few extra dollars because your hands are usually full of laundry when you’re down there. Mount a small roll of bags inside the cabinet or on a hook nearby so restocking takes five seconds.
14. Use a Rolling Laundry Cart
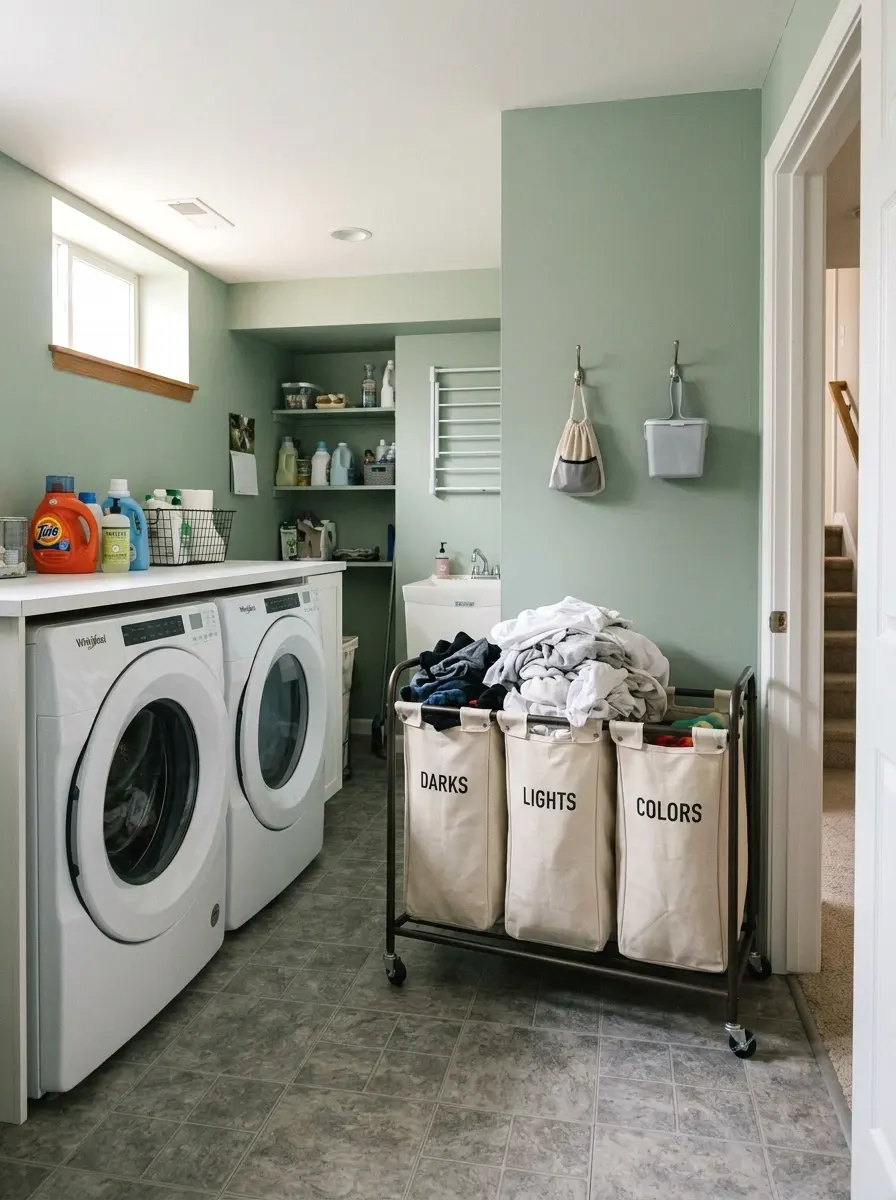
A rolling laundry sorter on wheels means you sort upstairs, roll it down, and load straight from the cart. No more carrying overflowing baskets down the stairs while trying not to fall. The three-section versions let you sort lights, darks, and delicates all in one spot and it rolls right back up when the laundry’s done.
These run $35 to $65. Look for ones with a metal frame and canvas or fabric bags. The all-plastic versions crack within a year. The 24-inch wide models fit through most basement doorways. If stairs are the issue, a collapsible hamper you can carry down flat and then open at the bottom is a good alternative for tighter spaces.
More Ideas:
15. Paint or Tile the Utility Sink
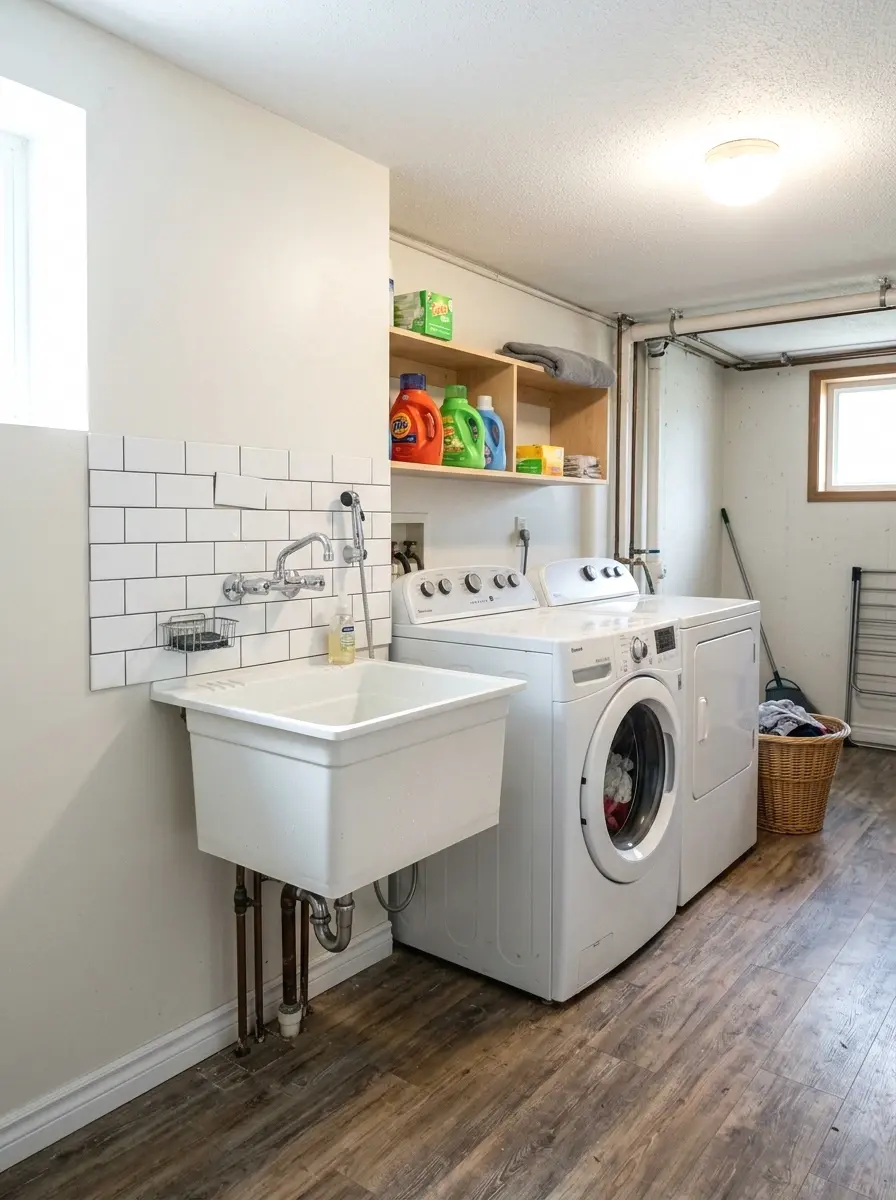
The white plastic utility sink that came with the house is doing nobody any favors visually. You can’t replace it cheaply, but you can work around it. A white ceramic spray paint meant for surfaces runs $10 to $15 and refreshes a stained or yellowed sink in under an hour. Or tile the sides of a utility cabinet with peel-and-stick backsplash tile to make the whole area feel more intentional.
Peel-and-stick backsplash tiles for one sink surround run $20 to $40 for a sheet pack. The subway tile look in off-white or soft gray reads really clean in a laundry space. Apply them to the wall directly behind the sink. Even just 6 to 8 inches of tile behind the faucet area changes how the whole sink corner reads.
16. Hang a Small Mirror
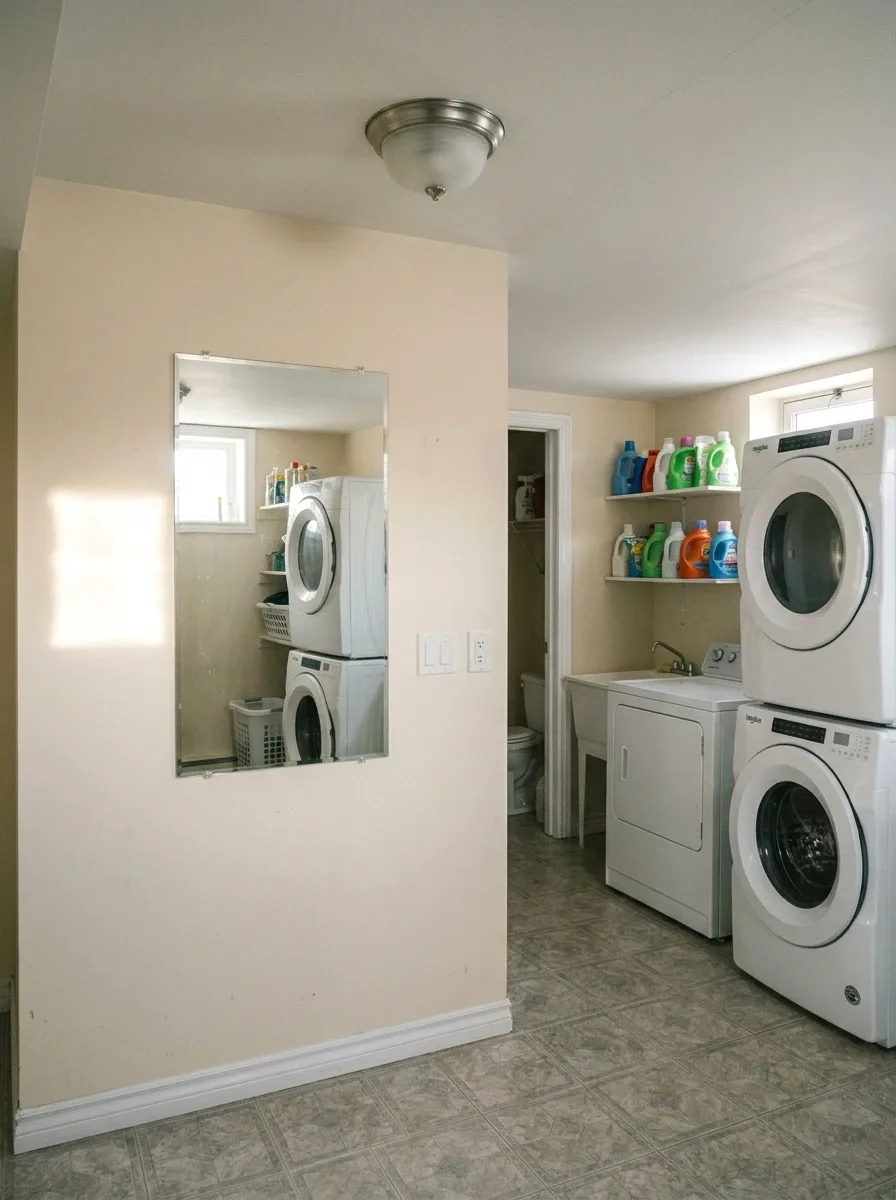
A mirror in a basement laundry room sounds unnecessary until you realize it does two things: it bounces light around a space that usually doesn’t have enough of it, and it makes the room feel twice as large visually. This is especially true in narrow laundry rooms where the walls feel like they’re closing in after five minutes.
An 18×24 inch wall mirror from a discount home store runs $25 to $45. You don’t need anything fancy. A simple frameless or thin-framed mirror mounted on the wall across from the light source does the job. Frameless versions look cleaner in a utility space. Make sure it’s rated for wall mounting at that size. The picture-hanging kind shifts over time.
17. Add a Chalkboard or Dry Erase Board
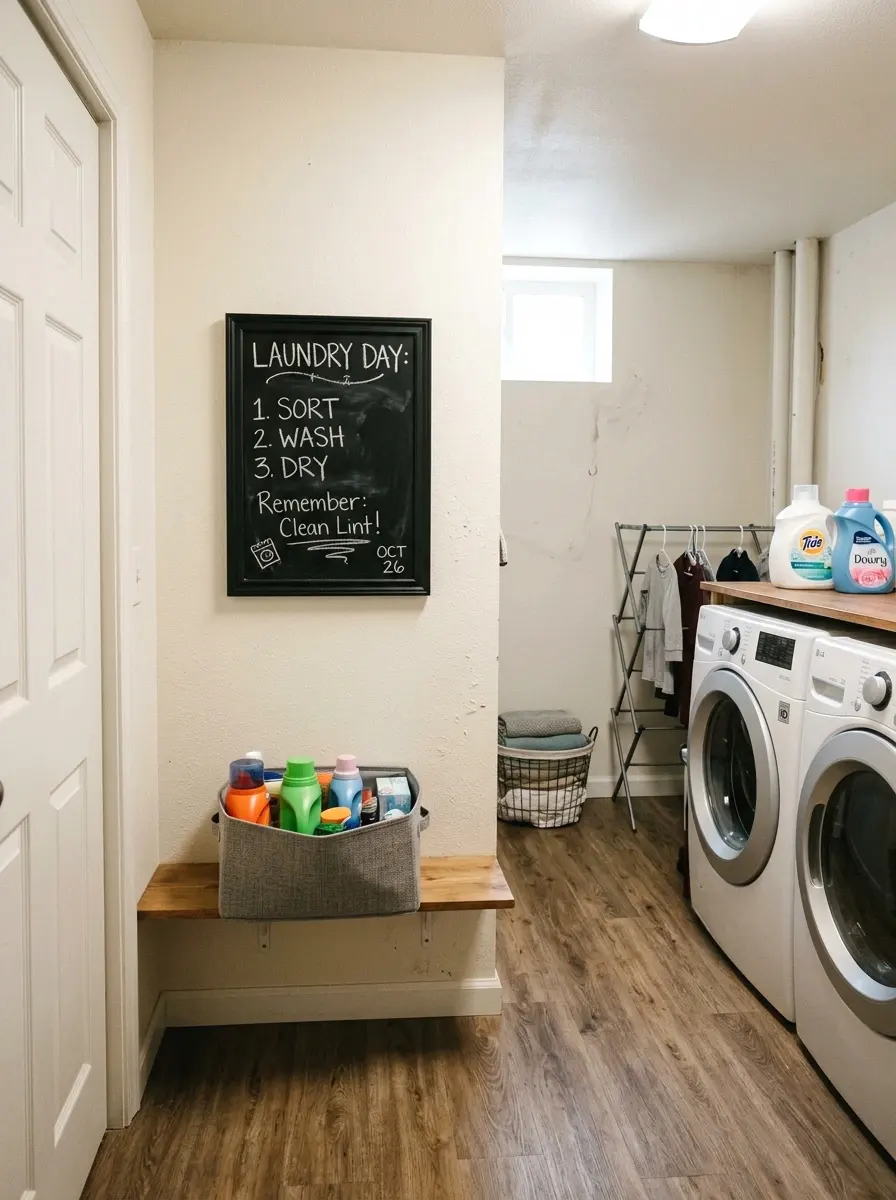
When I tried this in my own space, I expected it to feel gimmicky. It didn’t. A small chalkboard or dry erase board mounted near the machines is actually useful. Write the cycle timing for a delicate load. Leave a note about what needs to come out of the dryer immediately. Write a running list of what you’re out of. It’s practical in a way that a decorative sign is not.
A 12×16 inch chalkboard runs $15 to $25. Mount it at eye level on a side wall. Chalk markers instead of regular chalk are cleaner and easier to read. The kind that wipe clean with a damp cloth are better for this space since laundry rooms tend to get humid and regular chalk can smear from just the air.
18. String Up Simple Overhead Lighting
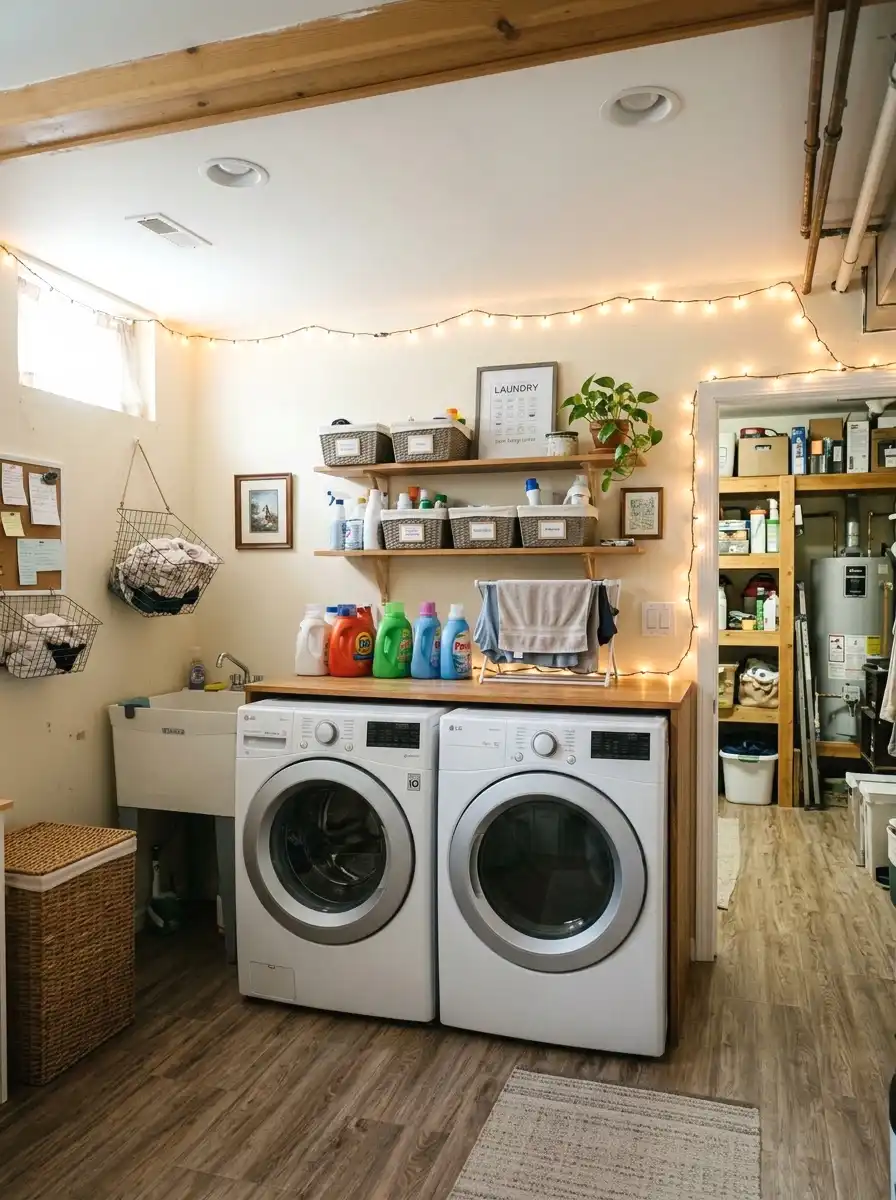
Beyond the main overhead fixture, a plug-in LED string light along the top of the wall or wrapped around exposed pipes adds ambient warmth that makes the whole space feel less clinical. It’s not task lighting. It’s mood. And in a basement laundry room, mood matters a lot because the room already has one working against it.
A 15-foot plug-in LED string runs $12 to $20. The warm white versions (2700K to 3000K) work best down here because they counteract the cool tone of the overhead LED. No wiring needed. Just plug into an existing outlet and tack the cord along the wall with small cable clips. Takes about 20 minutes total.
If you want to think through your full lighting plan before buying anything, there’s a dedicated look at lighting choices that change the whole mood of a laundry room.
More Ideas:
19. Use Matching Containers for Supplies
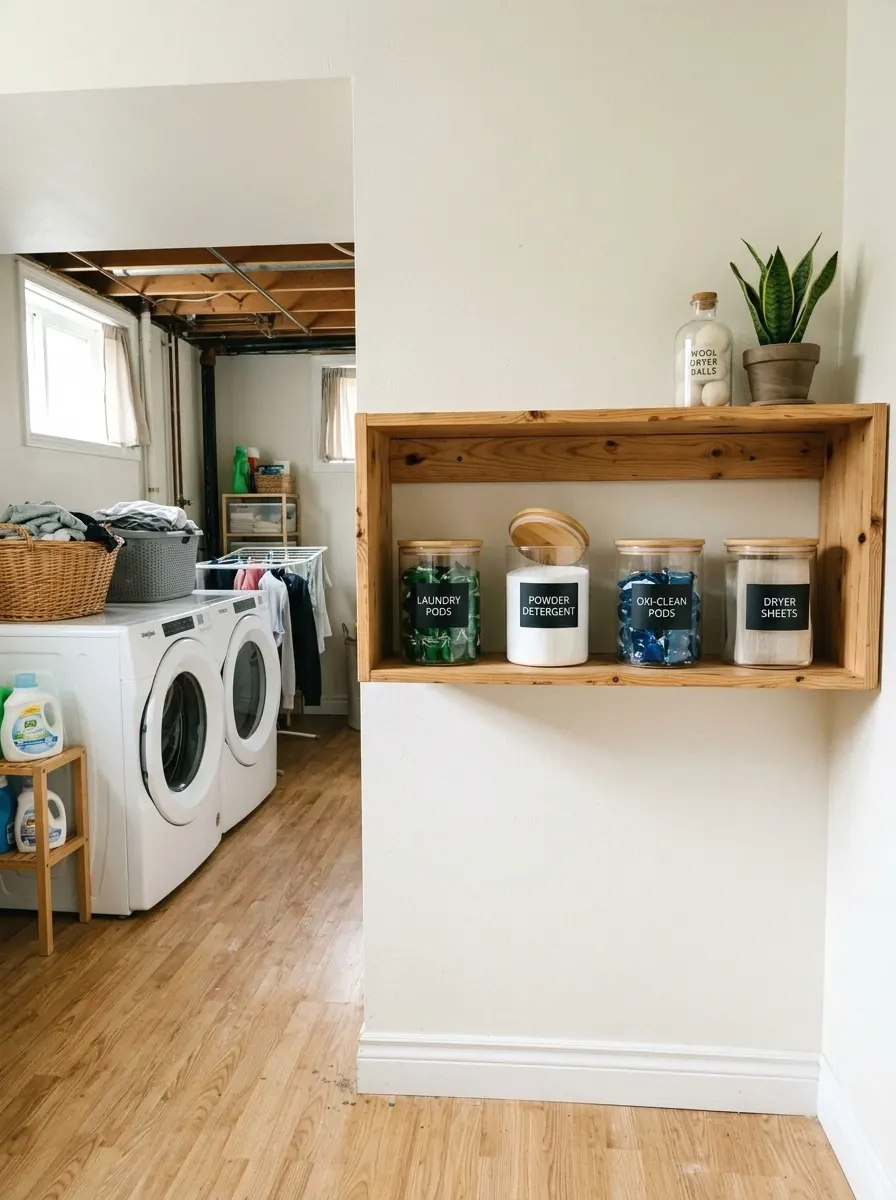
The random collection of detergent bottles, the half-empty box of dryer sheets, the pods bag with the top ripped off. That cluster of stuff makes even a well-organized space look chaotic. Decanting supplies into matching containers takes about 30 minutes and costs almost nothing if you already have some glass or plastic containers around.
A set of four clear containers with labels runs $15 to $30. Laundry pod dispensers with lids are around $12 to $18 each. You don’t need to do everything, just the things that are always visible. Detergent and pods make the biggest visual difference because they’re the largest items on the shelf. Matching matters more than fancy.
20. Mount a Broom and Mop Holder
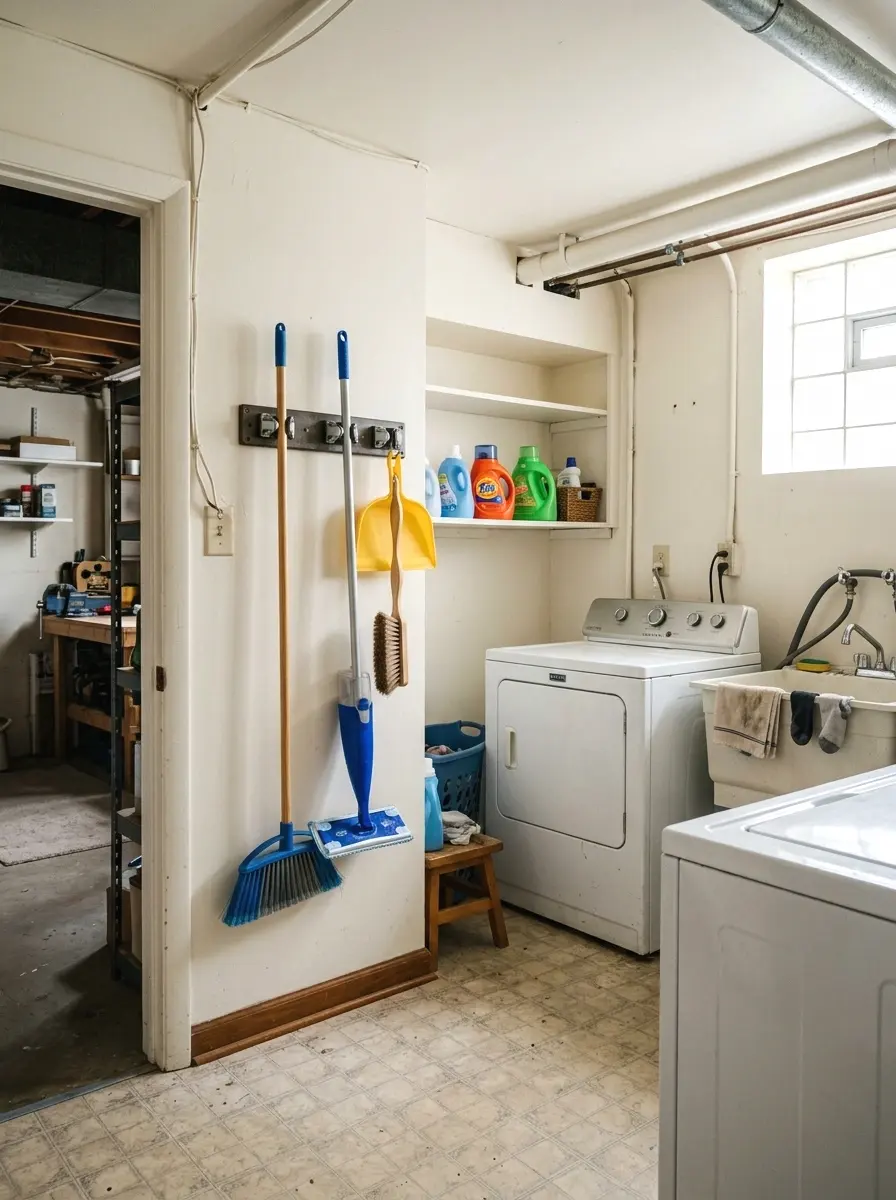
The brooms and mops leaning in the corner are a problem in basically every basement laundry room ever. They fall over, they take up floor space, and they look like nobody cares. A wall-mounted broom and mop holder with spring clips runs $10 to $20 and holds four to six tools on a single wall bracket, all off the floor.
Mount it on the utility wall, not behind the door, because doors shift and things fall. Stud-mounted holds the weight better long term. The models with five or six clips can also hold dusters, scrub brushes, and extension cords with a hook clip. Anything that gets it off the floor and onto the wall is a win in a small basement space.
21. Add a Small Plant or Two
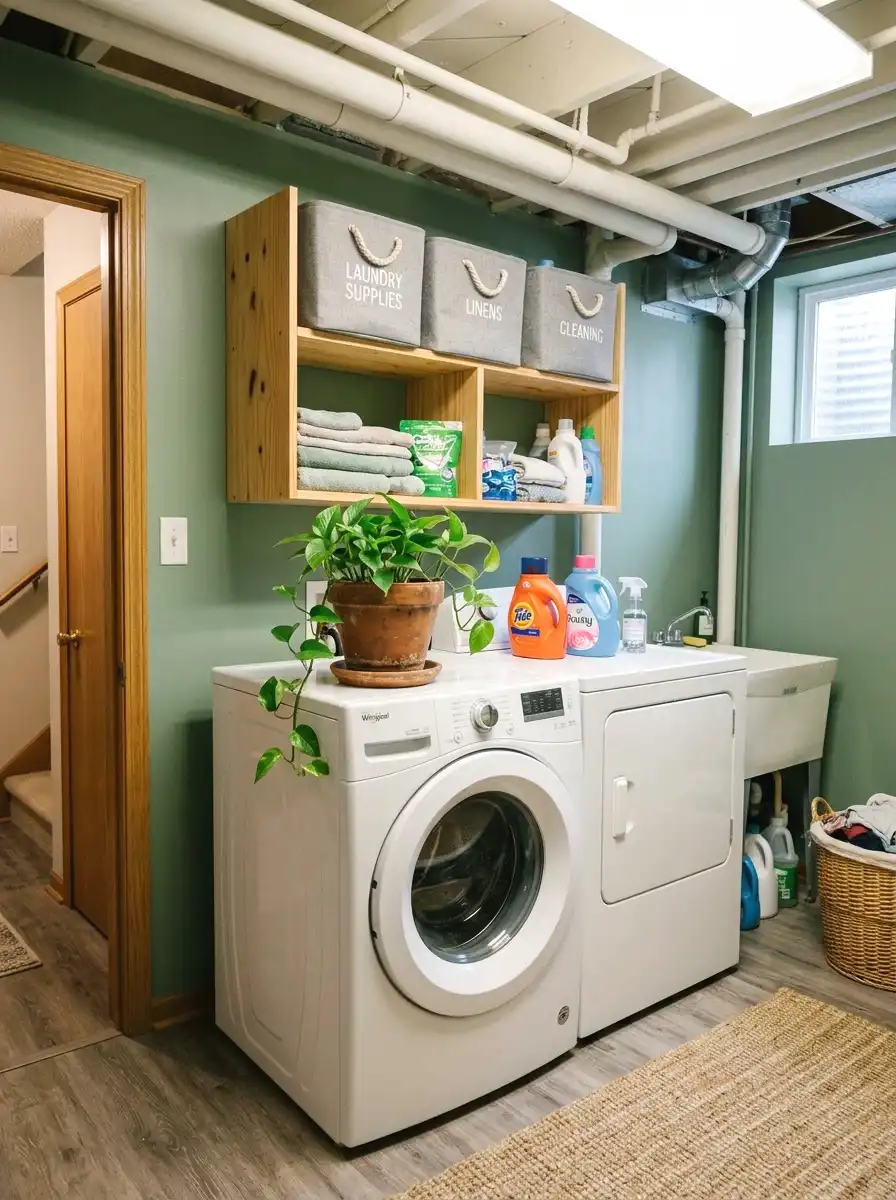
And honestly, this is the one people argue with until they try it. A single plant in a basement laundry room sounds like a bad idea because of the light situation, but pothos, snake plants, and ZZ plants all survive in low light and actually do better with indirect fluorescent light than most people expect. One plant on the shelf or on top of the dryer adds life in a way that nothing else does.
A small pothos or snake plant from a garden center runs $5 to $15. Put it on the highest shelf where it gets whatever ambient light filters down. Water it once a week and mostly ignore it. The green against a painted wall reads completely differently than the same wall without it. It signals that someone actually cares about the space. That signal changes how you feel about being down there.
Final Thoughts on Your Basement Laundry Room Makeover
You’ve got 21 real ideas here, and most of them cost under $50 each. The big picture is this: lighting, storage, and one visual anchor like wall color or floor tiles do most of the heavy lifting. Everything else builds on top of those three. You don’t have to do all 21. Even five or six done well will change how the room feels.
Pick one thing this weekend. The light fixture is the best first move because it affects everything else visually. Once the lighting is better, you’ll see the space differently and the next step will be obvious.
When you’re ready to go beyond function and make the room feel genuinely finished, there are decor ideas that make it feel intentional without requiring a full renovation.
If you want more ideas like this for real rooms with real budgets, homelypop.com has a lot more where this came from. No staging, no contractors required.