
21 Cabinets Over Washer and Dryer Ideas to Maximize Your Laundry Storage

Your laundry room is probably the most ignored room in your house. You squeeze past the machines, stuff detergent on top of the dryer, and pretend the mess of lint rollers and dryer sheets doesn’t exist. That space above the washer and dryer? It’s just sitting there, wasting vertical feet you desperately need.
I put together 21 cabinets over washer and dryer ideas based on what’s actually worked for real homeowners. These aren’t just pretty pictures. Each idea was picked because it solved a real problem, fits a real budget, and works in real laundry rooms, including tight ones. Budget ranges run from about $50 to $300, so there’s something here whether you’re renting or fully renovating.
This list is for you if you’ve got a standard washer and dryer setup and want to stop losing things on top of the machines. It’s not for people doing a full custom laundry room build with a designer. You don’t need to spend a fortune for these results.
By the end, you’ll know exactly which cabinet setup fits your space, your budget, and how much you want to DIY.
If your laundry room is one of those small utility rooms that work harder when storage is thoughtful, this guide will help you figure out exactly where to start.
What to Know Before You Start Installing Cabinets Over Your Washer and Dryer
- Most standard washers and dryers sit 36 inches tall, leaving 30 to 48 inches of usable wall space above them.
- Front-load machines allow lower cabinet placement since you don’t need top-access clearance.
- Budget for installation hardware: anchoring into studs adds $20 to $40 in screws, brackets, and a stud finder.
- Many renters skip this because they assume it’s not allowed, but most landlords approve floating shelves and freestanding cabinets.
- The most common mistake is mounting cabinets too low, where doors hit the machines when you open them. Leave at least 18 inches of clearance.
- Moisture from dryer steam can warp particleboard cabinets over time. Solid wood or MDF with a sealed finish holds up far better.
- Install a small hook strip inside cabinet doors to double your storage without taking up shelf space.
- If your machines are side by side, a single 48-inch wide cabinet covers both cleanly with no awkward gap.
1. Simple White Floating Cabinet Pair

The most common setup for a reason. Two white 24-inch cabinets mounted side by side above a standard washer and dryer setup look clean, hold a ton, and cost $80 to $150 total from IKEA or Home Depot. The key is mounting them at the same height so the bottom line is perfectly level. Even a half-inch off looks messy once the doors are on.
I’ve seen people skip the level and regret it immediately. Use a long level and mark your stud locations before you even touch a drill. These cabinets work best in white laundry rooms but look just as good painted a soft sage or navy if you want something with more personality. Two doors, two shelves, done.
If you’re leaning toward color, there are some really good soft sage or navy color ideas worth browsing before you commit to a can of paint.
2. Open Shelving With a Cabinet Base
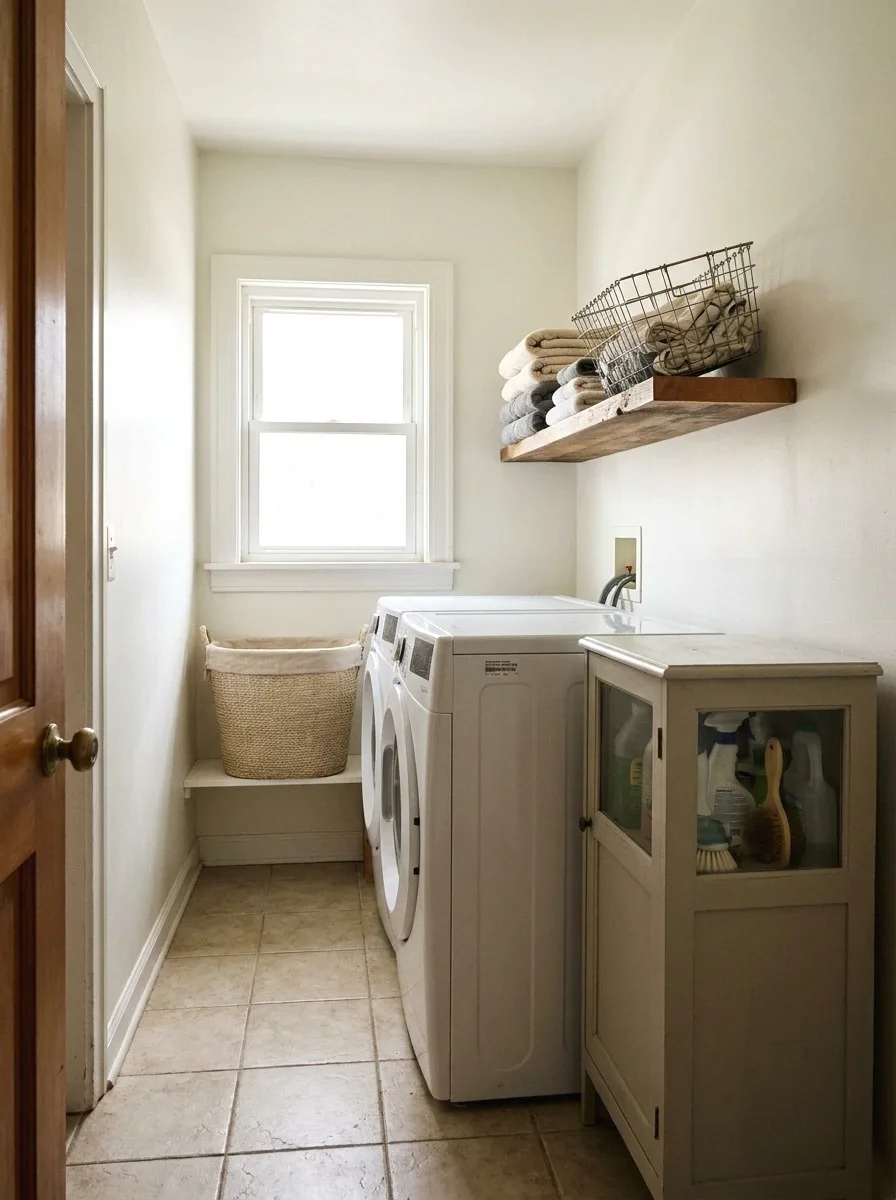
So here’s the thing about open shelving: it only works if you keep it tidy. But when you do, it looks really nice and costs half as much as closed cabinets. A lower cabinet for cleaning supplies and an open shelf above for folded towels or baskets runs about $60 to $120 depending on materials. You get visual breathing room up top and hidden storage below.
The open shelf above the cabinet is perfect for larger items like laundry baskets or big detergent containers that don’t fit inside standard cabinet doors. Mount the shelf with heavy-duty floating shelf brackets rated for at least 50 lbs. Pair it with two or three matching bins and it looks pulled together even without doors.
More Ideas:

3. IKEA SEKTION Cabinets Hacked for Laundry
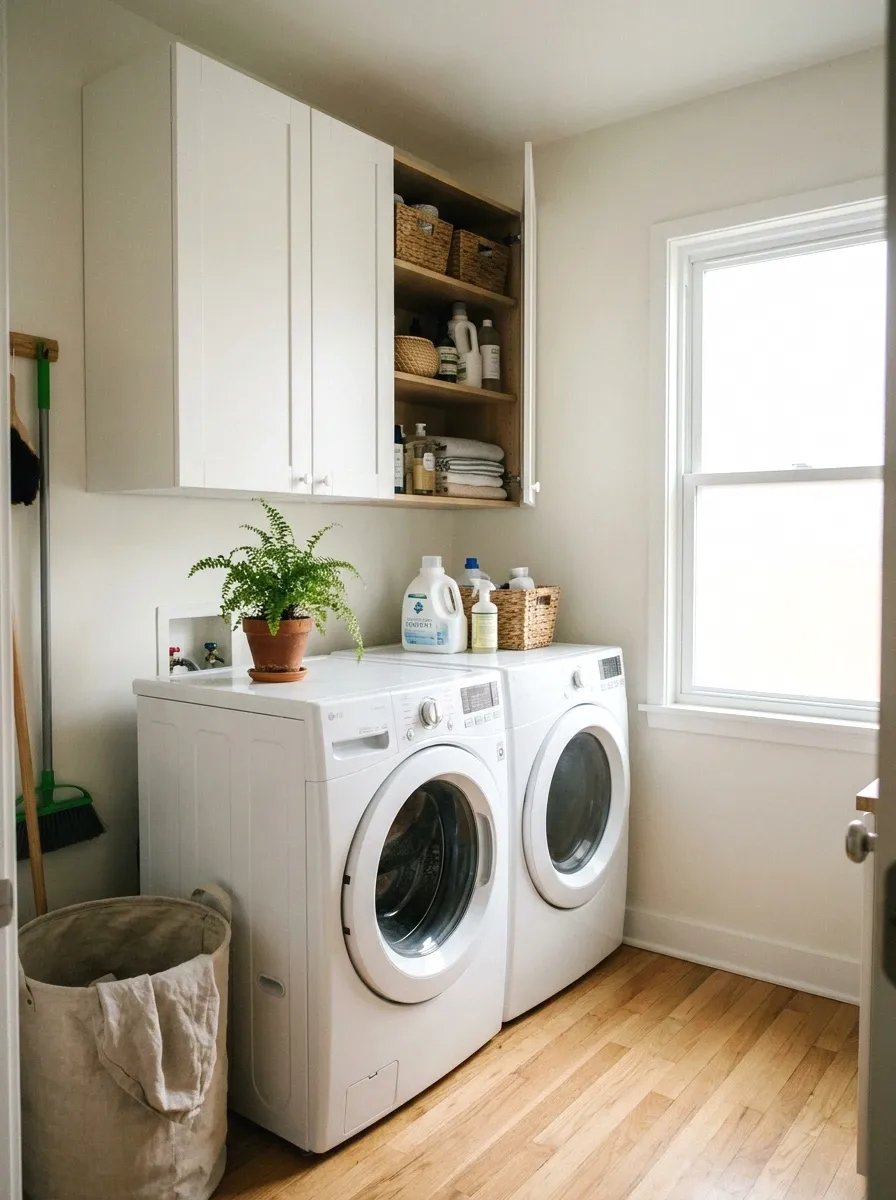
IKEA SEKTION wall cabinets are designed for kitchens but they work perfectly over washers and dryers. The 30×15-inch size fits the space without overwhelming it, and the hidden hinges make the whole setup look really polished. A single SEKTION cabinet with two doors runs about $90 to $130, and you can get them in white, gray, or dark finishes.
The trick is the mounting rail. IKEA uses a suspension rail system that lets you adjust the cabinet position slightly after hanging it. This is really helpful in laundry rooms where walls aren’t always perfectly flat or plumb. (Took me ages to figure this out.) Add IKEA drawer inserts inside if you want to organize small items like clothespins or stain remover pens.
4. Stackable Storage Tower on One Side
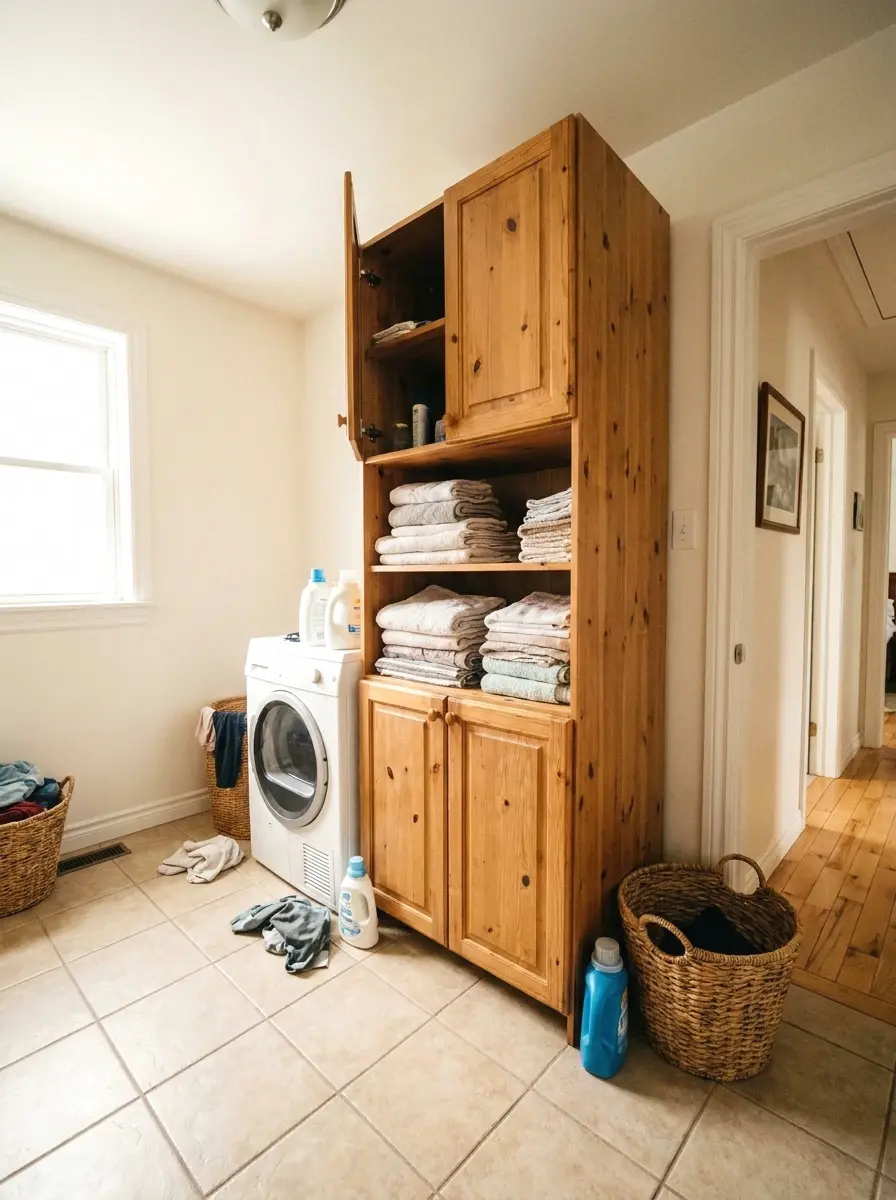
You don’t need to cover the whole wall. A vertical stackable storage tower placed on one side of the machines gives you a full column of cabinets without any wall drilling. These freestanding towers run $60 to $150 and typically sit 70 to 72 inches tall, reaching the ceiling in most laundry rooms. They’re great for renters.
Renters especially benefit from freestanding storage that needs no drilling, and there are more configurations out there than most people realize.
Look for ones with adjustable shelves and at least two enclosed cabinets with doors. The open shelves at the top are good for things you grab constantly. The cabinets at the bottom keep the messier stuff hidden. Position it right next to the dryer so the door doesn’t block access to the machine controls or the lint trap.
5. Custom Built-In Look With Stock Cabinets

Here’s what most people miss: you can get a completely built-in look using stock cabinets from Home Depot or Lowe’s without paying custom prices. Buy two 12-inch deep wall cabinets, add crown molding to the top, and paint them the same color as the walls. The total cost runs $150 to $250 and it looks like something that cost four times more.
The crown molding is the secret. It fills the gap between the top of the cabinet and the ceiling and makes everything look intentional. Cut the molding at 45-degree angles and use construction adhesive plus a nail gun. Paint everything the same color, including the walls, and it reads as fully built-in. This one is worth the extra Saturday morning it takes.
Before you head to the hardware store, there are some cabinet styles worth pulling from if you want the built-in look without guessing at door profiles.
6. Wire Shelf Cabinet Frame Combo

A wire shelf mounted above the machines paired with a small enclosed cabinet on one side is a budget setup that actually works hard. The wire shelf costs $20 to $35 and lets air circulate, which helps with moisture. The small cabinet on one side holds your messiest supplies. Total setup costs about $60 to $90 and installs in under two hours.
The wire shelf is good for things that don’t mind some dust, like laundry bags, spare hangers, or a steam iron. Keep the closed cabinet for detergent, dryer sheets, and anything that needs to stay dry and clean. The mix of open and closed looks casual but organized. And honestly, sometimes casual is exactly right for a laundry room.
More Ideas:
7. Over-Washer Cabinet With Pull-Down Rod
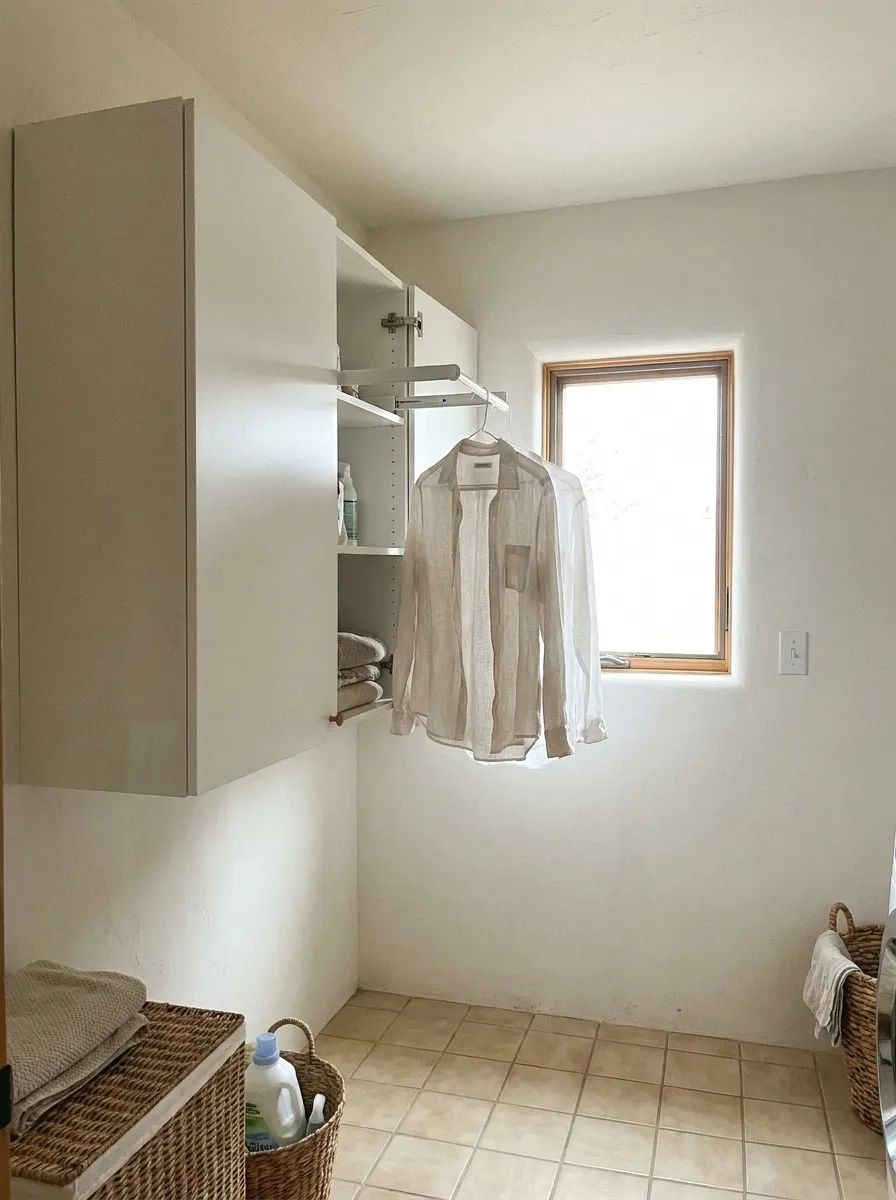
This is so underrated. A cabinet with a built-in pull-down clothes rod inside gives you hanging space without taking up floor space. These run $120 to $200 and mount directly to the wall above the dryer. Open the cabinet door, pull down the rod, hang your delicates or anything that needs to air dry, then push it back up when you’re done.
The rod system is usually spring-loaded and holds 20 to 30 pounds easily. It’s perfect for laundry rooms that double as drying stations. Measure your ceiling height first. You need at least 78 inches from floor to ceiling for the rod to pull down far enough to hang clothes comfortably. Most standard laundry rooms clear this with room to spare.
8. Floating Shelves With Labeled Baskets

Sometimes you don’t need cabinets at all. Two or three floating shelves mounted above the machines, each loaded with matching labeled baskets, gives you the same function as cabinets at a fraction of the cost. A set of three shelves runs $40 to $70. Add wire baskets or fabric bins for another $30 to $50 and you have a complete storage system for around $100.
The labeling is what makes this feel organized rather than just piled up. Use a label maker or hand-written tags on kraft paper. Common categories: detergent, dryer sheets, stain stuff, and misc. The baskets hide the visual noise but let you grab things quickly. When I tried this in my own space, I was surprised how much it changed the feel of the whole room.
9. Two-Tone Cabinet and Wall Color
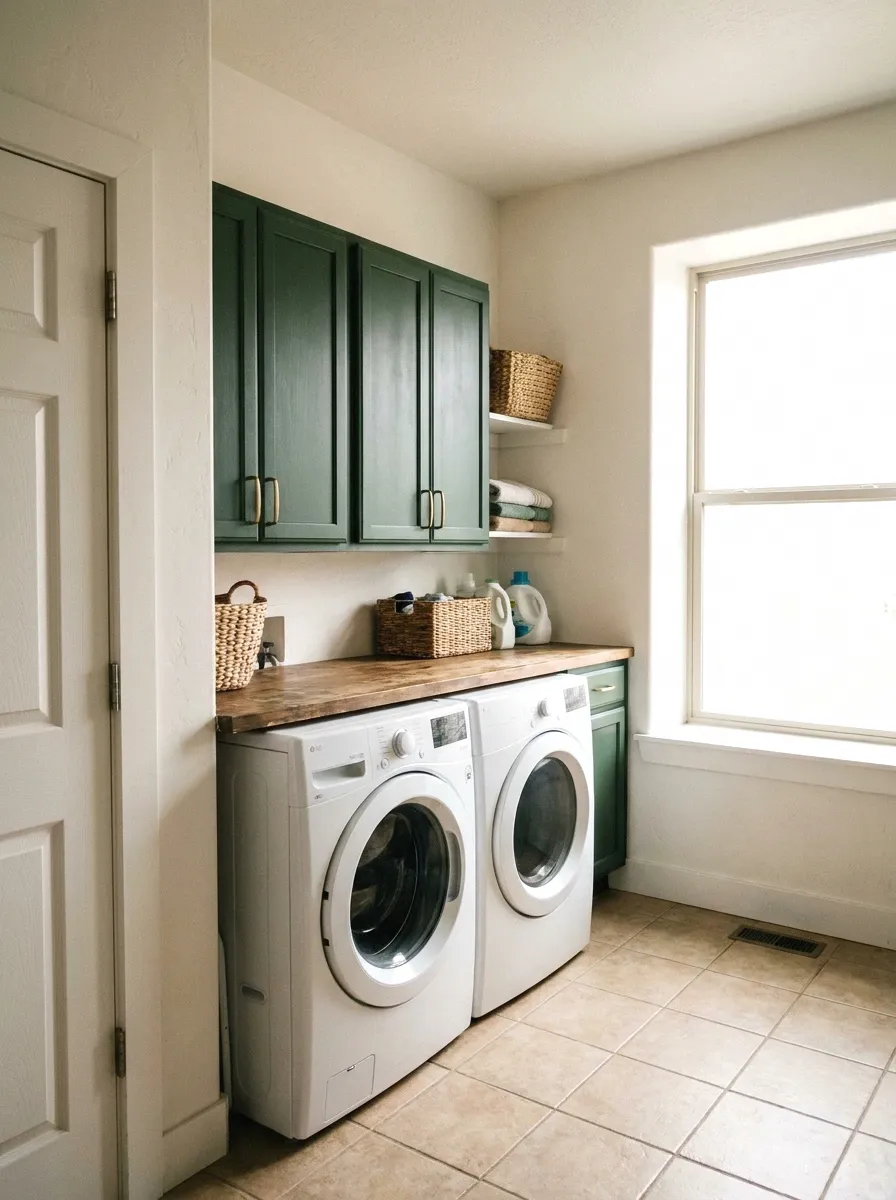
Most people paint cabinets white and move on. But painting your cabinets a dark color like navy, forest green, or charcoal while keeping the walls light creates a really nice contrast that makes the laundry room feel more finished. Cabinet paint costs $25 to $45 for a quart and you can do two coats in one afternoon.
This works especially well in small laundry rooms because the dark cabinets draw the eye upward and make the space feel taller. Use a satin or semi-gloss finish so it’s wipeable. A small foam roller gives you a smooth finish without brush marks. The base cabinets you use can be anything, IKEA, Home Depot, even old kitchen cabinets repurposed. The paint does all the work.
10. Corner Cabinet Shelf Solution

If your washer and dryer are tucked into a corner, a corner cabinet shelf makes use of dead wall space that’s otherwise just wasted. L-shaped corner shelf units designed for walls cost $45 to $90 and give you two directions of storage from a single mount point. Install one in the upper corner above the machines and you gain a surprising amount of usable shelf.
The corner placement also keeps your main wall clear, which is good if you have a front-loader that needs the door to swing open on one side. Corner shelves are also more stable than you’d think when properly anchored to studs. Load them with medium-weight items: detergent, fabric softener, a small basket of clothespins.
More Ideas:
11. Pegboard Panel With Cabinet Above

Mount a pegboard panel directly to the wall between the machines and one cabinet above it. The pegboard costs $15 to $25 for a 2×4 foot section and holds hooks for brooms, mops, lint brushes, and spray bottles. The cabinet above stores the heavier or messier supplies. Together, the combo runs $80 to $160 total and handles nearly every laundry room storage need.
Paint the pegboard the same color as the wall so it blends in rather than looking like a garage setup. Use matching hooks and keep the spacing consistent. The cabinet above anchors the whole look. This setup works really well in narrow laundry rooms where floor space is limited because everything goes vertical and stays off the floor.
12. Glass-Door Cabinet for Clean Items

A cabinet with glass doors above the washer is worth it if you keep nice towels or folded linens in the laundry room. Glass fronts make the cabinet look more like a display than a storage unit. Stock glass-front cabinets from IKEA run $100 to $160 and look genuinely polished.
The glass door cabinet works best when the contents are neat and consistent. Roll your towels, use matching baskets, or fold everything the same way. It sounds fussy but takes about 30 seconds of extra effort per load. The payoff is a laundry room that actually looks like you care about it. And honestly, it makes you more likely to keep everything tidy because you can see it.
13. Sliding Barn Door Cabinet
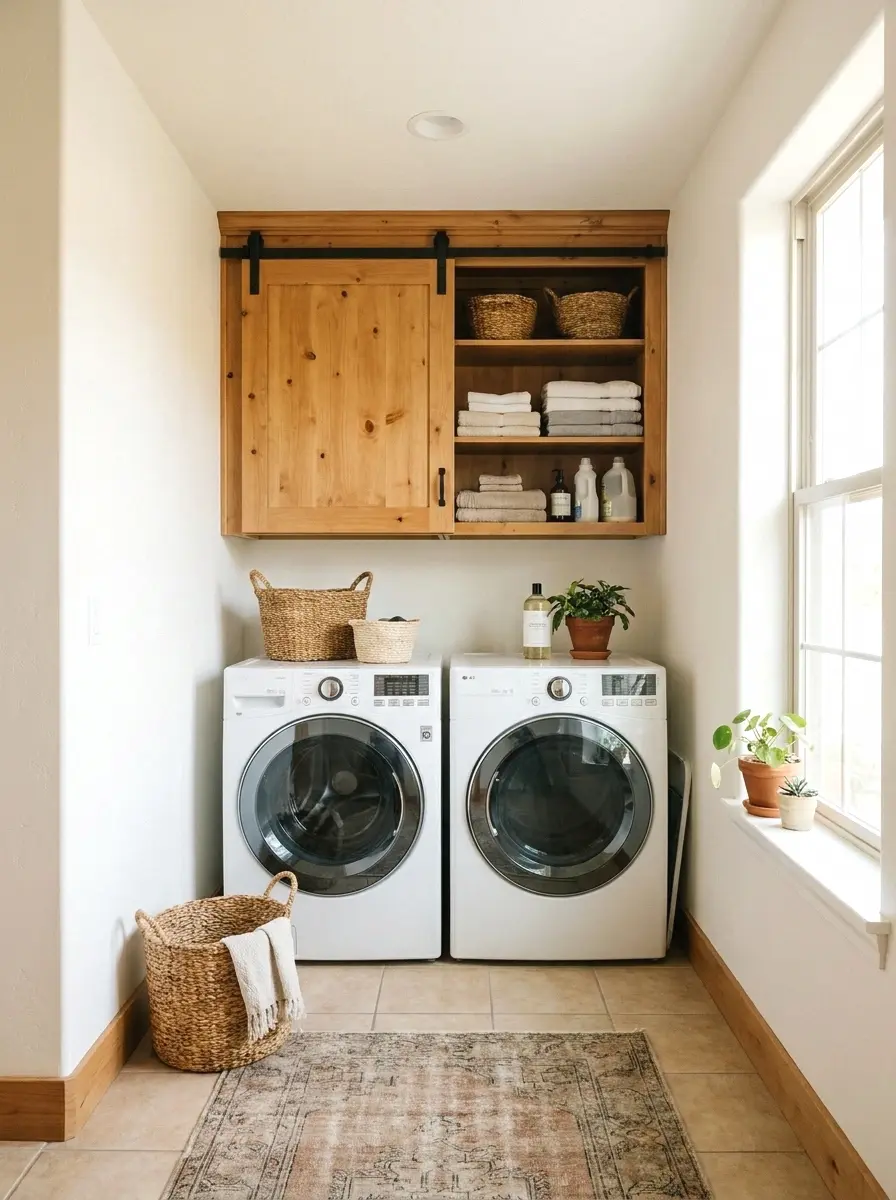
A single wide cabinet with a sliding barn door instead of traditional swing-out doors solves a real problem in tight laundry rooms. Standard cabinet doors need clearance to open. In a narrow laundry room that’s 5 feet wide or less, that clearance often doesn’t exist. A sliding door moves sideways and needs no swing clearance at all.
You can buy these pre-made or build your own with a basic cabinet box, a barn door kit ($30 to $60), and a wooden panel. Total cost runs $100 to $220. The barn door adds a farmhouse look that’s warm and current for 2025. Choose a door that matches your floor or wall color rather than contrasting, and the whole thing reads as thoughtful rather than tacked on.
If you like that aesthetic, there are a lot of barn door details done right in farmhouse-style laundry rooms that translate well to this kind of cabinet setup.
14. Washer-Dryer Surround With Built-In Cabinets
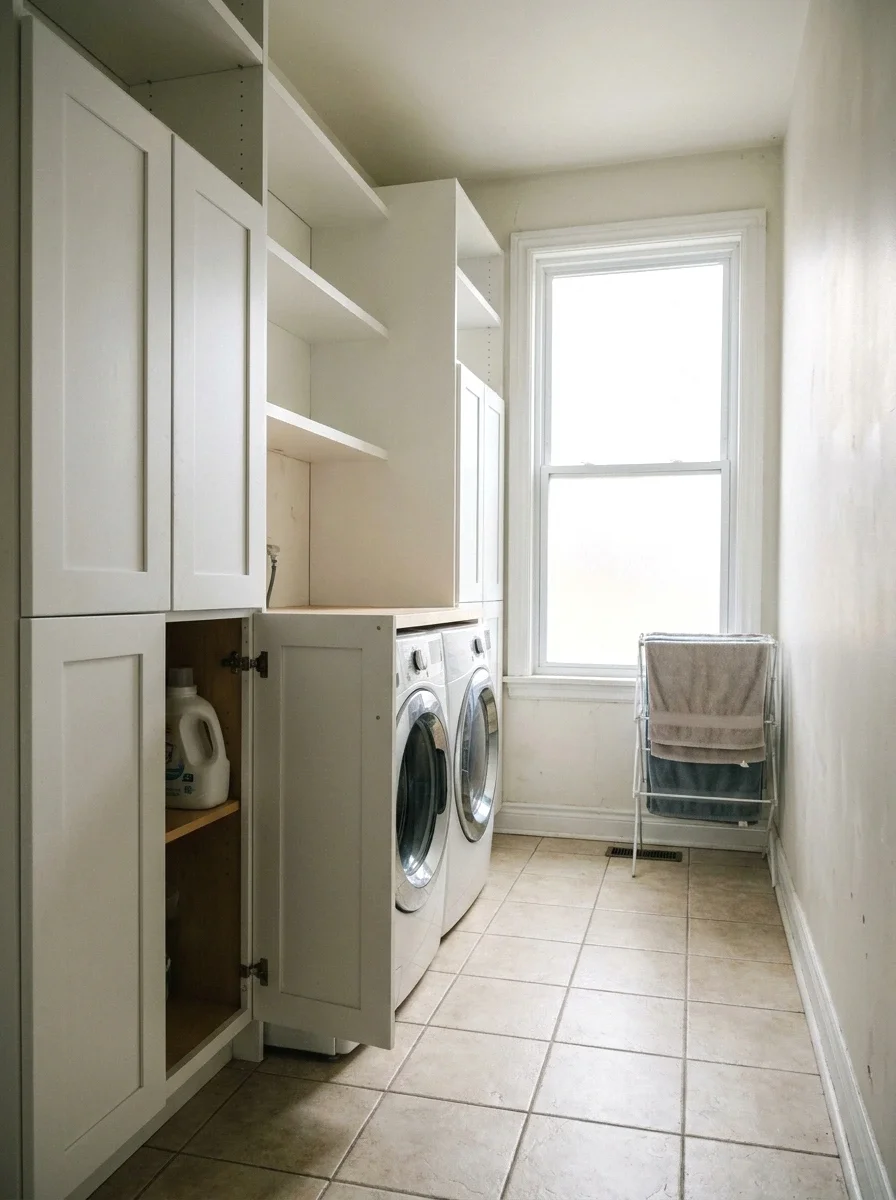
A full surround cabinet system frames the washer and dryer on both sides and above, creating a built-in nook. This is the higher-investment option, running $200 to $400 in materials for a DIY version, but the result looks like a professionally designed laundry room. The machines sit inside a cabinet frame with storage on both sides and above the top.
The side cabinets are usually 12 inches deep to match the wall cabinet depth. The top section connects across as one continuous shelf or enclosed cabinet. Use a consistent finish throughout. The key measurement is your dryer vent clearance. Most dryers need 4 to 6 inches of space behind them, so your surround can’t push the machines completely flush to the back wall.
More Ideas:
15. Tension Rod Storage Shelf Hack
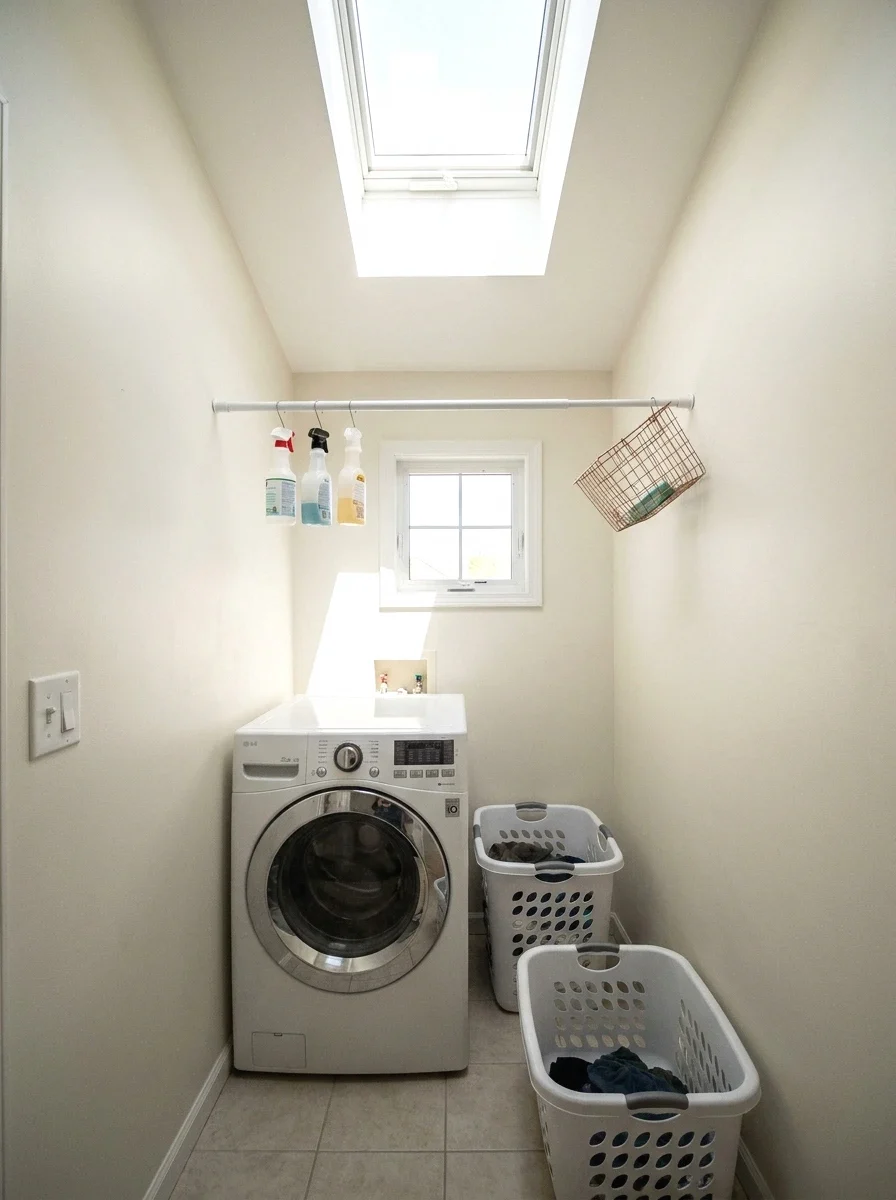
Before you drill a single hole, try this. A heavy-duty tension rod mounted horizontally between two walls or between a cabinet and the wall creates an instant hanging rod for spray bottles, cleaning caddies with hooks, and small baskets. This costs $12 to $20 and takes three minutes to install. It’s not a replacement for full cabinets, but it’s a starter step.
The tension rod works best as a companion to other storage, not as the whole solution. Hang a few spray bottles, add a basket or two, and you’ve cleared your dryer top in one move. If you’re renting and can’t drill, this is one of the few options that truly leaves no marks. Pair it with the stackable freestanding tower from idea 4 and you’ve got a complete no-drill setup.
16. Deep Shelf With Lip for Folding Area

A single deep floating shelf, at least 16 inches deep, mounted about 60 inches from the floor above the machines gives you a true folding station at the right height. A plywood shelf with a small front lip to keep items from sliding off costs $30 to $60 to build and install. It doubles as both a work surface and storage shelf.
The lip at the front is key. Without it, anything you set on the shelf slides forward when the machines vibrate. A 1.5-inch strip of wood glued and nailed along the front edge does the job. Sand it smooth and paint it to match. Add a cabinet above the folding shelf for full layered storage. The folding shelf at waist height, cabinet above it, is the most functional combo in a small laundry room.
17. Cabinet With Interior Lighting

Add a battery-powered LED light strip inside your cabinet and it changes how usable the whole thing is. Laundry room cabinets are usually dark inside, especially deeper ones. A $10 to $20 battery-powered strip mounted to the underside of the top shelf lights up everything without any wiring. This is an easy upgrade that most people never bother with but immediately notice.
Motion-activated strips are even better. Open the door and they turn on automatically. They run about $15 to $25 and last six to twelve months on a set of batteries with normal use. Apply the strip to a white or light-colored interior for maximum light reflection. This upgrade works on any cabinet, new or existing, and makes a real difference in a room with no windows.
If you’re already thinking about light inside cabinets, it’s worth looking at lighting ideas that change the whole room feel, not just the cabinet interior.
18. Repurposed Kitchen Cabinets

Old upper kitchen cabinets from a renovation, a Habitat for Humanity ReStore, or Facebook Marketplace run $20 to $60 for a solid set. They’re the same size as laundry room wall cabinets, already have mounting hardware, and just need a paint refresh to look right. This is the best budget option on this entire list. No joke.
If cost is your main constraint, there’s a full roundup of budget laundry upgrades that actually work beyond just the cabinet swap.
The ReStore in most mid-sized cities carries used kitchen cabinets for $15 to $40 per door. Bring measurements and a tape measure. You want 30 to 36-inch wide cabinets, 12 to 15 inches deep, and 24 to 30 inches tall for a standard laundry room wall. Sand, prime, paint, and install. The process takes a weekend but the cost is unbeatable. I was skeptical about this one but the result looks better than new in most cases.
More Ideas:
19. Overhead Cabinet With Fold-Down Table

A cabinet with a fold-down shelf or table on the bottom is a two-in-one setup that works especially well in small laundry rooms. The cabinet stores supplies. The fold-down surface drops down when you need to fold clothes and lifts back up flush with the cabinet when you don’t. These units cost $150 to $280 and are available online or at IKEA in the utility furniture section.
Measure your clearance carefully before buying. When the table is folded down, you need enough space to stand comfortably between it and the machines. In a standard 5-foot-wide laundry room, a 24-inch-deep fold-down table works well without blocking access. Anything deeper will feel cramped. This option is worth every dollar in a laundry room that doubles as a craft space or mud room.
20. Matching Cabinet and Countertop Combo

This is the upgrade that makes a laundry room look like it belongs in a magazine. A countertop running across the top of both machines, connected to a cabinet above, creates a complete work and storage station. The countertop can be a piece of butcher block ($40 to $90 cut to size), laminate, or even a painted plywood panel.
The countertop sits on a simple bracket system or on side supports. The cabinet above it mounts to the wall as normal. Together they frame the washer and dryer without boxing them in completely. Keep the depth of the countertop at 24 to 26 inches to cover the machines cleanly. This combo runs $150 to $300 depending on countertop material and cabinet choice, and it genuinely makes laundry feel less like a chore.
Once the cabinets and countertop are in place, adding some wall decor that ties the space together is what takes it from functional to finished.
21. Full Wall Cabinet Bank With Tall Pantry Column

The biggest storage upgrade on this list. A bank of wall cabinets spanning the entire wall above the machines, plus one tall pantry-height cabinet column on one side, gives you more storage than most people know what to do with. This is the full build. It runs $250 to $500 in materials and takes a full weekend to install, but the result is a laundry room that functions like a real utility space.
The tall pantry column, usually 84 inches high, goes on the open side of the machines and holds brooms, mops, a step stool, and anything too tall for standard cabinets. The wall cabinets above the machines store everything smaller. Use a consistent door style and color throughout. This setup works best in dedicated laundry rooms at least 6 feet wide. It’s the only setup on this list that fully uses every square inch.
Final Thoughts on Cabinets Over Washer and Dryer
You’ve got 21 real options here, ranging from a $20 tension rod hack to a full wall cabinet build. The core idea running through all of them is the same: the wall space above your machines is valuable, and right now it’s probably empty. Whether you go with floating shelves and labeled baskets, a repurposed kitchen cabinet, or a full surround build, the space above those machines can hold everything that’s currently cluttering your dryer top.
Start small if you’re not sure. Pick one idea this weekend, just one. Mount a set of floating shelves, hang a single wall cabinet, or set up a freestanding tower. See how much it changes the way the room feels. You don’t have to do the whole project at once.
If you want more ways to use vertical wall space beyond the ideas here, there’s plenty more to explore depending on your room’s layout.
If you want more ideas for making small utility rooms work harder, homelypop.com has a lot more where this came from.