

23 Space-Saving Laundry Room Cabinet Ideas to Maximize Your Storage

Your laundry room cabinets are hung too high. You stretch on tiptoes just to reach the detergent, or you leave everything piled on the counter because that’s honestly easier. The space feels cramped, stuff spills out, and nothing has a proper spot. You’re tired of fighting the room instead of actually using it.
I’ve put together 23 laundry room cabinet ideas built for small or awkward spaces, tight budgets, and real life and if you’ve been struggling with getting laundry room storage actually right, this is where to start. Things like stacking machines to free up wall space, shallow floor-to-ceiling units, simple behind-the-appliance shelves, and IKEA or ready-to-assemble cabinets that real people actually installed.
Every idea comes from real homeowner posts, Reddit threads, and budget makeovers tested in actual homes, including 64″ x 66″ rooms. Most stay under $400, like a full paint-and-shelf refresh or a single $200 IKEA unit.
This list is for everyday homeowners and renters dealing with small laundry closets, narrow hallways, or apartment setups. It’s not for $10,000 remodels or huge open spaces. If you’re working with what you’ve got and want fixes that don’t require starting over, this is for you.
By the end, you’ll know which cabinet changes actually fix your storage problems and which ones you can try this month without turning it into a big project.
Before You Install Laundry Room Cabinets: Key Things to Know
- Laundry rooms are humid by nature, and that humidity causes warping faster than most people expect. Always go with moisture-resistant finishes or you’ll be paying replacement costs way sooner than you planned.
- Check your door swing paths before anything gets mounted. Cabinets can block appliance access completely if you don’t think through that early, and it’s a frustrating fix after the fact.
- Budget around $500 to $800 per cabinet unit for quality installs including labor. It’s not cheap, but it’s the real number most people wish someone had told them upfront.
- Most people overlook wall stud locations. Always secure into studs, especially with heavy loads. Filled cabinets can exceed 500 lbs per linear foot, so this isn’t a step to skip.
- Sketch out your dirty-to-clean workflow before you buy anything. Skipping that step leads to a layout that has you backtracking across the room every single time you do laundry.
- Keep cabinets shallower than 14 inches deep. Anything deeper and you’re constantly reaching past stuff to get to what you actually need. Shallower is almost always more practical.
- And leave at least 18 inches of clearance above your machines. That space isn’t wasted. It’s what keeps venting safe and appliances running the way they should.
1. Go Floor-to-Ceiling for Maximum Storage

Small laundry rooms feel cramped for one main reason: all that dead space above the machines just sits there doing nothing. Floor-to-ceiling cabinets fix that. They run straight up to the ceiling so you’re not wasting a single inch. Real people swear by thin cabinets with flip-up doors and adjustable shelves inside, pre-finished maple plywood specifically, because it holds up really well over time.
Pull-out baskets make grabbing things fast. And honestly, in tight spots like 64″ x 66″ rooms, this setup doesn’t just hide clutter. It makes the whole space feel noticeably bigger.
2. Stack Your Washer and Dryer First

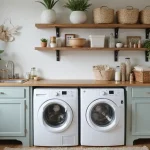
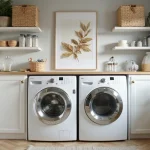
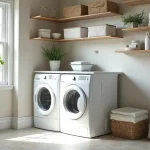
So here’s the thing about tiny laundry spaces: stacking your machines is the move most people put off too long. Took me way too long to try this. Stack the washer and dryer, free up the wall, then add integrated upper cabinets right above. You get a full countertop below the window for folding, which is great for quick tasks.
Mix closed cabinets for supplies with a few labeled baskets on open shelves so things stay easy to reach but not visually messy. People who did this say it turned a wasted corner into a real workspace. No squeezing around. No chaos.
More Ideas:
3. Add a Simple Behind-the-Machines Shelf

Here’s what nobody tells you about laundry room storage: the space behind the machines is almost always ignored. I tried a simple shelf back there and it genuinely helped. Cut some stained plywood, edge-band it, mount it with brackets right behind the washer and dryer. Detergent and softener sit right there at eye level instead of up too high on some cabinet you can barely reach. No more stepping on stools.
If you want more options beyond just this one spot, here are some shelf placements that solve everyday reach problems worth looking at before you start cutting anything. For around $60 in materials, you solve a frustrating everyday problem. Add a few hooks nearby and you’ve got extra hanging spots too. Simple as that.
4. Choose Warm White Cabinets for a Spa Feel

The cabinets you pick really do set the whole tone of the room. Warm white with soft neutrals and natural stone surfaces is what’s working right now, and honestly it makes sense. It feels calm, almost spa-like, without trying too hard. Warm white also brightens small rooms and hides moisture better than a stark plain white does.
Throw in some mixed-metal hardware for a little pop of contrast. Real homeowners love how this carries kitchen styles into the laundry room so everything flows from one space to the next. Makes the whole chore feel less like a drag.
5. Mix Closed and Limited Open Shelving

And honestly, so many people regret going all open shelves. It looks cluttered fast, no matter how organized you start out. The smarter move is mostly closed cabinets for a clean look, then add selective open spots with woven baskets or glass jars.
Label everything clearly so kids or anyone else can find stuff quickly. This keeps detergents out of little hands while still showing off the nicely organized bits. It stops visual mess before it starts while keeping things totally practical day to day.
6. Try IKEA Units Like NYSJON for Budget Wins

I know the budget cabinet options can feel hit or miss, but hear me out on this one. IKEA’s NYSJON units are about 15 3/4″ wide by 74 3/4″ high and run around $200 each. Pair them with hanging rods above side-by-side machines or sliding baskets under counters and you’ve got a really solid setup. People grab these ready-to-assemble options and save up to 50% compared to big-box prices.
They’re solid, customizable, and work really well in small spaces. Worth every cent if you ask me. And if you want to see what the full budget approach looks like from start to finish, this guide on pulling off a budget laundry room that looks great is worth a look before you shop.
More Ideas:
7. Install Shallow Cabinets in Tight Spots

Narrow room got you stuck? Shallow cabinets on the opposite or side wall are the fix most people overlook. They don’t stick out much, so you still move around easily without bumping into everything. Throw tension rods or pull-down drying racks inside for hanging delicates. This uses corners and awkward wall areas that usually just sit there wasted. Real people say it adds a surprising amount of storage without making the room feel any smaller.
If your room is really pushing the limits on size, this deeper look at making the most of a genuinely tight laundry space covers a few more angles that shallow cabinets alone won’t fix. And that’s exactly why it works so well in spaces where every inch actually matters.
What I Learned About Laundry Room Cabinets the Hard Way
The Day My Own Cabinets Betrayed Me
The first laundry room I set up in our old house, I went straight for tall stock cabinets from the big-box store. Mounted them high above the side-by-side machines because that’s what the showroom looked like. Two weeks in, the detergent sat untouched on the top shelf and everything else ended up on the dryer top. I was basically storing air. That’s when I figured out that high cabinets don’t save space. They just hide it somewhere you’ll never actually use.
Where I Finally Got It Right
After that mess, I ripped them down and started over with lower, shallower units I could actually reach without dragging out a step stool. Switched to 12-inch deep cabinets and added one simple plywood shelf behind the machines at 54 inches high. Cost me under $80 in materials. And honestly, the weird part was how much calmer the whole room felt once supplies weren’t out of sight and out of mind. Reachability beats square footage every single time. I wish someone had just told me that from the start.
The Part Most People Never See Coming
Here’s what nobody talks about: laundry rooms aren’t just storage spaces. They’re high-humidity zones that quietly destroy cheap materials over time. I’ve watched reader photos come in year after year showing swollen particleboard doors and peeling melamine just six months after install. People skip moisture-rated plywood or urethane finishes thinking it’ll be fine. It never is. That one shortcut turns a $300 fix into a $1,200 redo. Budget for the right core materials first or you will absolutely pay for it twice.
What You Should Take From This
So when you’re staring at your own cramped laundry space, don’t chase the tallest cabinets or the most shelves. Ask yourself first: can I reach everything without strain, and will this hold up to steam and splashes next summer? Get those two things right and the rest falls into place naturally.
Start small, test it, adjust as you go. The room will start working with you instead of against you. Once the storage is sorted, here are some ideas on turning a functional space into one you don’t dread that build nicely on everything covered above.
8. Paint Your Existing Cabinets for Under $400

Okay but seriously, a basic paint job changes more than you’d expect. For $300 to $400 total, you’re looking at about $50 in supplies, $60 for a new shelf and hooks, around $155 for a rug and updated lighting, plus shiplap if you want to go further. Use something like Sherwin-Williams Emerald Urethane Trim Enamel in satin finish.
It holds up really well against humidity. One makeover turned dated high cabinets into a taller, modern coastal look. Everyone said skip the fancy molding. Turns out they were wrong. Simple fix, really good result.
9. Skip Open Shelving Altogether If Clutter Bugs You
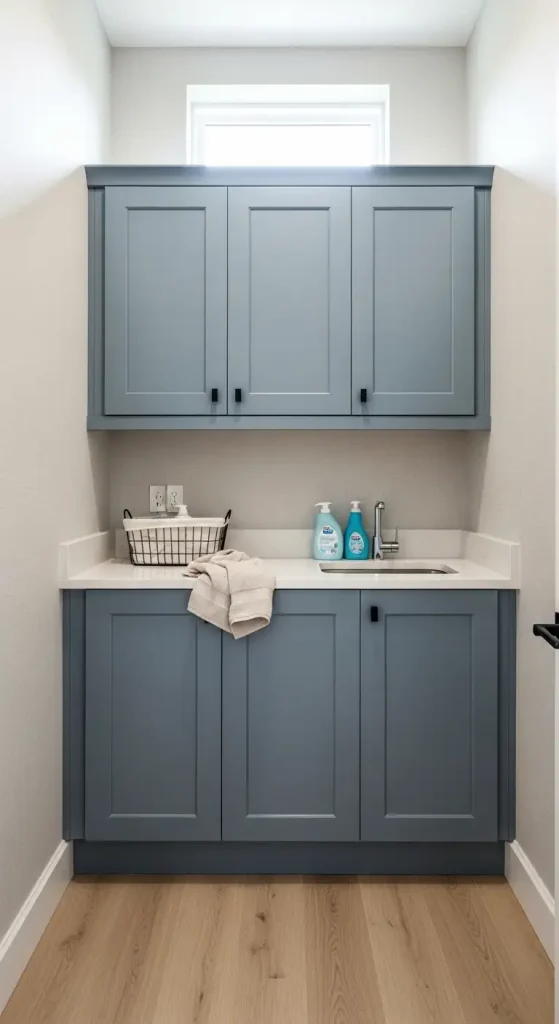
Relying only on open shelving is one of the more common mistakes people make in laundry rooms. It turns into visual chaos fast, no matter how tidy you start out. Go for closed cabinets instead. Hide the cleaners, extra linens, even the random non-laundry stuff that always sneaks in.
Add pull-outs or baskets inside so nothing gets buried and lost in the back. The weird part is how much calmer the whole room feels once everything has a door in front of it. Laundry doesn’t feel as overwhelming when the space isn’t screaming at you.
10. Add Pull-Down Racks and Fold-Out Features
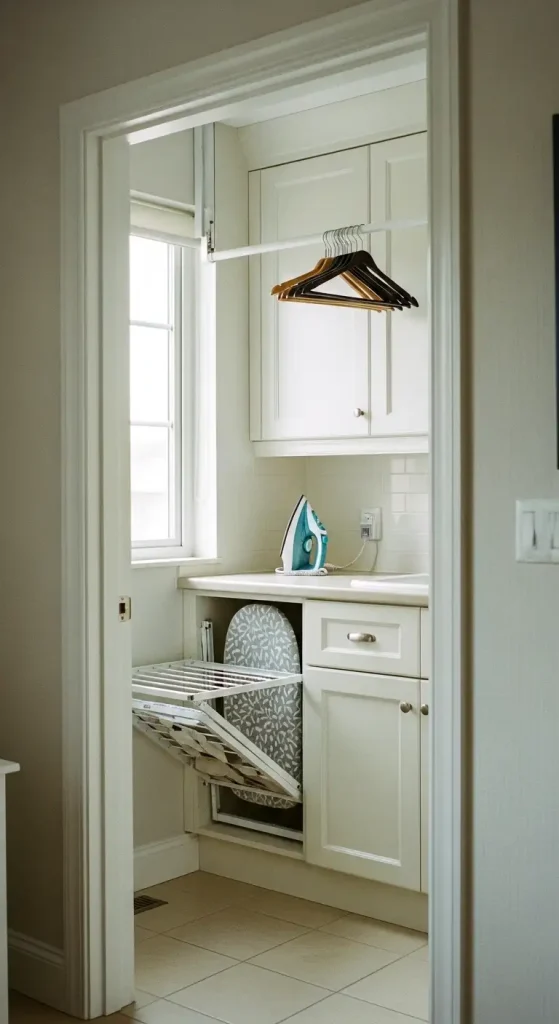
Multifunctional hidden features are genuinely smart. Pull-down drying racks or fold-out ironing boards tuck completely away when you’re not using them, but they turn otherwise wasted space into something actually useful. People get surprised by how much these small additions help without making the room feel any more cramped.
In a small laundry room, having a spot to hang delicates or iron a shirt without dragging out a bulky board makes everything so much easier. Try this first if your current setup feels limited. Seriously. You’ll wonder why you waited.
11. Pick Quartz Countertops That Handle Spills

Quartz countertops are a really smart pick for laundry rooms, and here’s why. They resist moisture way better than wood or laminate, so no warping from wet clothes or random splashes. People love the natural stone look with soft veining that ties into warm white or wood cabinets really well. It gives that calm, spa-like feel without any extra upkeep.
While you’re thinking through surfaces, this guide on flooring and surface choices that hold up long term pairs well with the countertop decision and covers what works below your feet too. If you’re adding a long folding surface under a window, quartz is the material that actually holds up for years and keeps looking fresh without much effort on your part.
12. Use Warm Wood Tones for Cozy Vibes
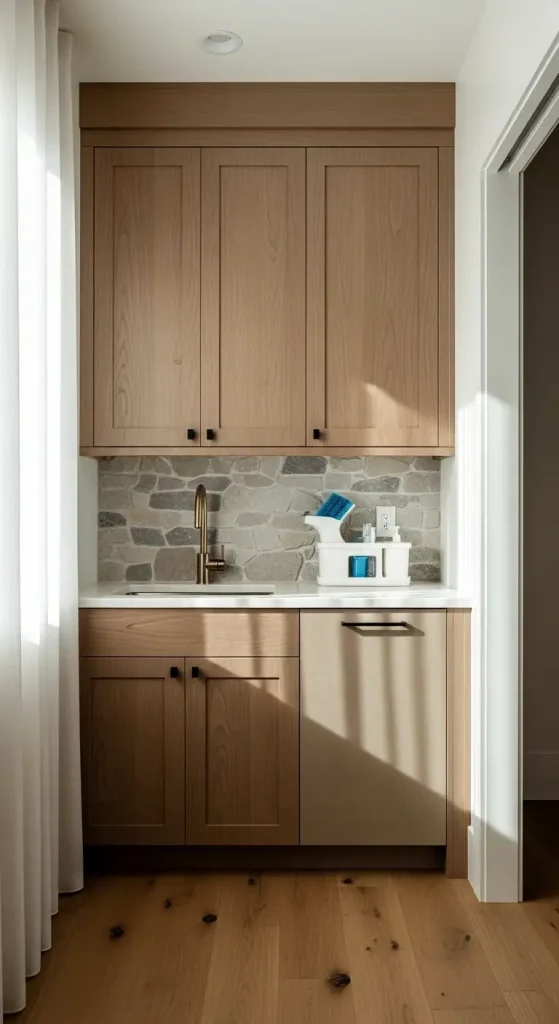
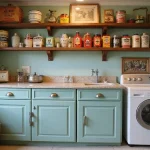
Warm wood tones are everywhere right now, and for good reason. They soften a laundry room and make it feel less cold and clinical, which is more important than people realize. Pair them with beige walls or try a two-tone setup like blue lower cabinets with wood uppers.
Real homeowners say it carries the kitchen style right into the laundry room for a more connected feel throughout the home. Add mixed-metal hardware and you get that polished, welcoming look without spending a fortune. Not my favorite pairing in every home, but it works really well in most.
More Ideas:
13. Add Pull-Out Baskets Under Counters

Don’t leave the cabinets under your counter empty. Sliding pull-out baskets make grabbing cleaners or extra towels so much easier than digging around in a dark cabinet. IKEA’s JONAXEL combos work really well here, affordable and easy to customize for whatever you need.
People who added these say it stops that “catch-all” mess where random stuff like paint cans just ends up shoved in and forgotten. Everything stays sorted and out of sight. It took me way too long to figure this out personally, but once I did, I couldn’t believe I’d skipped it so long.
14. Hang Tension Rods for Extra Drying Space
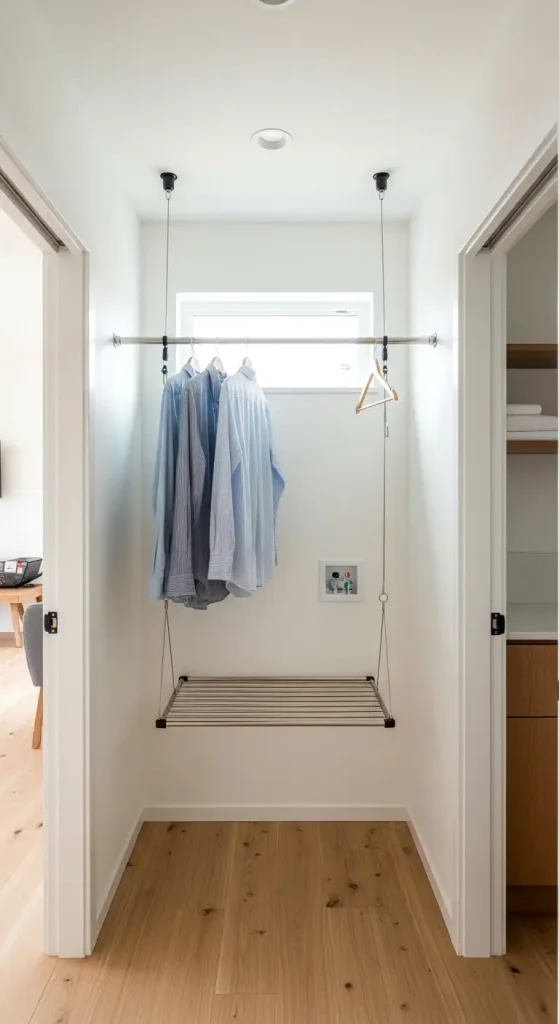
Need more hanging room? A simple tension rod between cabinets or above the machines fixes that fast. Extendable ones run 58″ to 76″ so they fit most setups without any drilling or hardware. Use them for delicates or shirts right after washing so things don’t sit in a pile. In narrow rooms, this uses vertical space that people almost always skip over.
If your machines are stacked and wall space is limited, here are some vertical space solutions for stacked setups that work really well alongside a tension rod. Homeowners rave about how it frees up counter space and keeps clothes wrinkle-free without buying fancy racks. Costs almost nothing. Really does work.
15. Avoid Non-Humidity-Resistant Materials

Here’s what nobody talks about enough: cheap melamine or particleboard warps fast in a laundry room. All that steam adds up. Stick to kiln-dried wood, pre-finished maple plywood, or edge-banded plywood instead. These actually hold up in humid environments without swelling or falling apart.
One person shared how their old cabinets started warping after just a year. Total headache and a real waste of money. Spend a little more upfront on the right materials and you skip the replacement drama entirely. I was wrong to cheap out the first time. Learn from that.
16. Measure Your Baskets Before Building
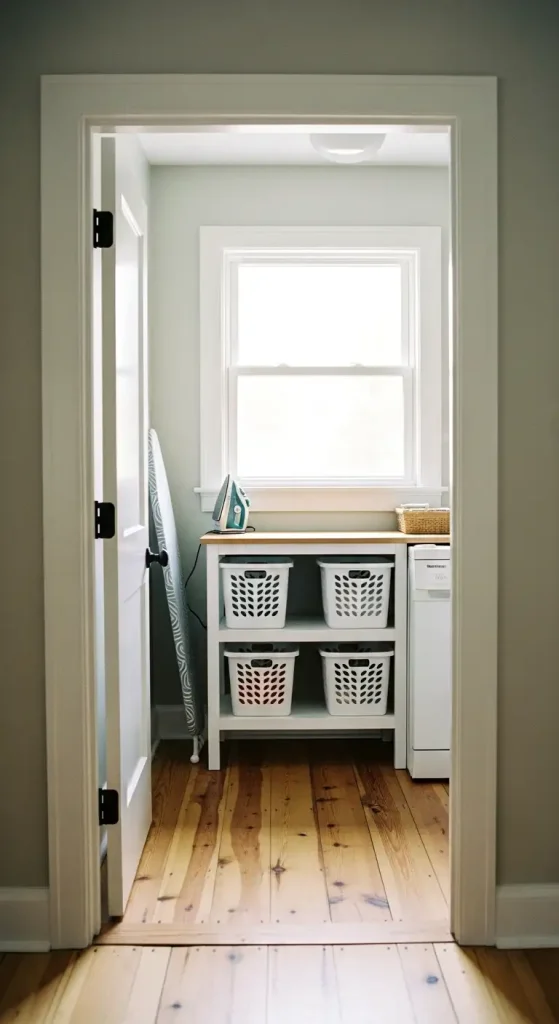
Before you build or buy anything, grab a tape measure and measure your laundry baskets and ironing board first. So many people skip this step and end up with shelves too shallow or cabinet doors that won’t close over bulky items.
Real rooms like 64″ x 66″ need exact planning to get everything right. It sounds too simple, but it’s one of those things that saves you from a really frustrating redo later. Measure twice, build once. Everything fits right and nothing ends up shoved awkwardly into corners.
17. Create a Two-Tone Look with Blue and Wood
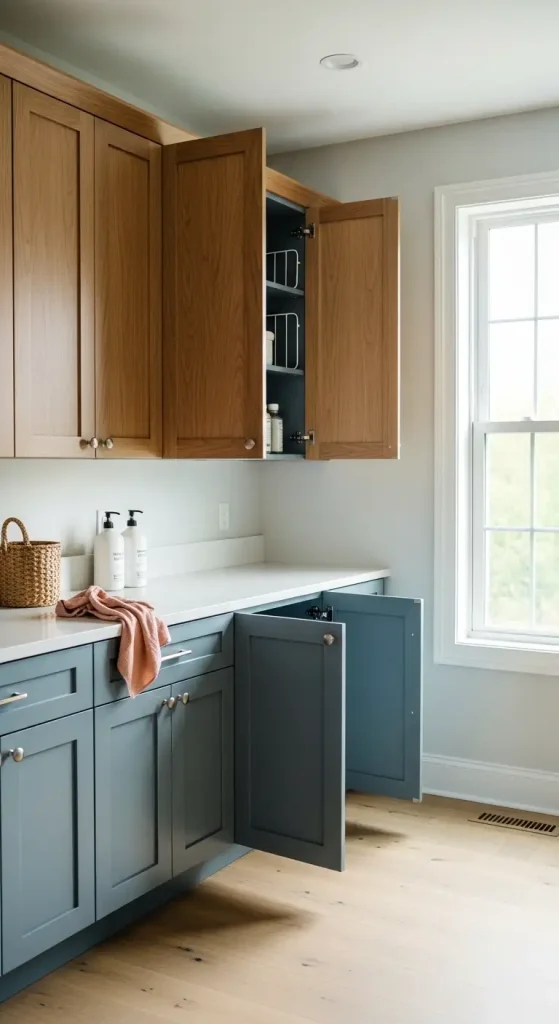
Two-tone cabinets are having a real moment right now. Try Storm Cloud, that pretty blue-gray with warm undertones, on the lower cabinets and warm wood uppers. Or flip it if you prefer. It adds real personality without overwhelming a small space.
Accent tile peeking out inside open cabinets ties the whole thing together nicely. People who went this route say it makes the room feel custom and way less boring than a single all-over color. And honestly, it’s one of those changes that looks like it cost more than it did.
18. Add Dedicated Bins for Everything

So here’s the thing about keeping a laundry room calm: give every single item its own labeled bin. Cleaners in one, batteries in another, linens in a third. Use clear glass jars on the open shelves for the stuff that actually looks nice out in the open. This stops clutter from slowly creeping back in and keeps random non-laundry junk from taking over.
Folks who did this say their laundry time got quicker and way less stressful. When everything has a place, the whole chore actually feels manageable.
19. Turn Your Laundry Room into a Multi-Use Space
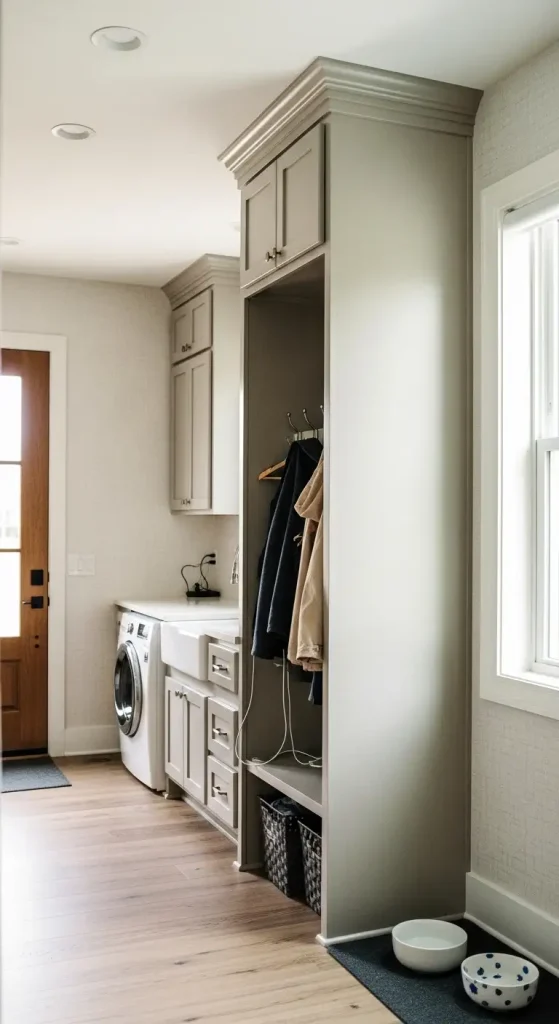
It’s surprising how many people double their laundry room as a mudroom or pet area, and honestly it makes so much sense. If that’s the direction you’re heading, this full guide on combining a mudroom and laundry room the right way will save you a lot of planning time. Add a small sink, a charging station, or hooks for coats and bags.
Floor-to-ceiling cabinets hide all the extras while keeping everything organized and out of view. Integrated features like this make the whole zone feel calmer and more deliberate. One homeowner said it completely changed how they felt walking in every day. No more dread. Just a room that actually works for real life.
20. Go for Snowbound White If You Want Bright
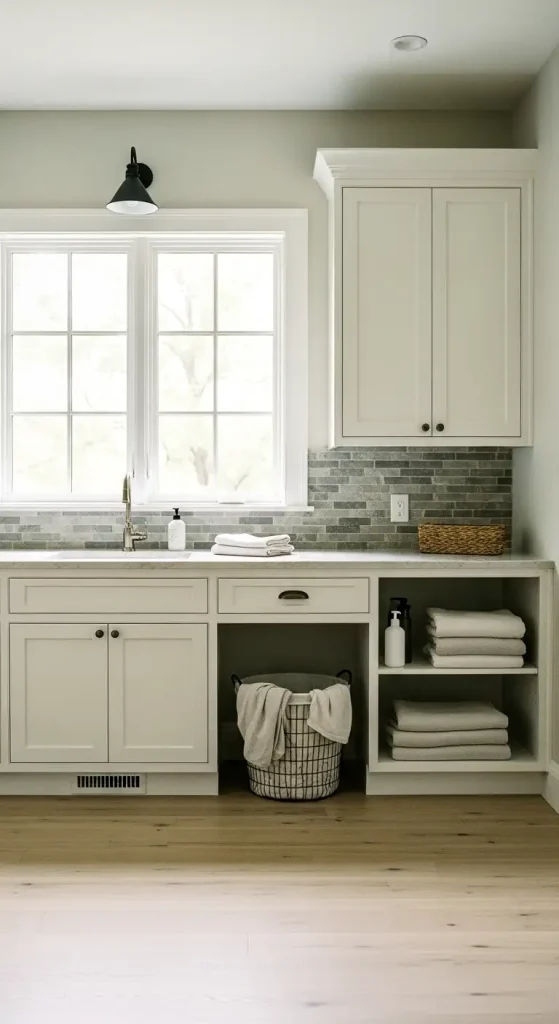
Snowbound white is one of those paint choices that just works in small laundry rooms. It stays crisp, reflects light well, and feels warmer than a stark bright white so the room doesn’t end up feeling sterile or cold. Pair it with a natural stone backsplash and matching flooring for a look that’s really popular right now.
Adjustable shelving inside the cabinets lets you tweak things as your needs change over time. People love how it brightens up dark corners and somehow makes folding clothes feel a little less like a chore.
21. Bring Kitchen Cabinet Style Into the Laundry

The laundry room doesn’t have to feel like an afterthought tacked onto the back of the house. Carry your kitchen cabinet colors and styles right in, same warm white shaker doors, same hardware, same finish. It creates a natural flow through the home and makes the space feel like it was planned that way from the start.
People who matched their laundry to their kitchen say it tricks the eye into making the whole home feel bigger and more put together. Cohesive design really does make a difference.
22. Use Accent Tile Inside Cabinets for a Pop
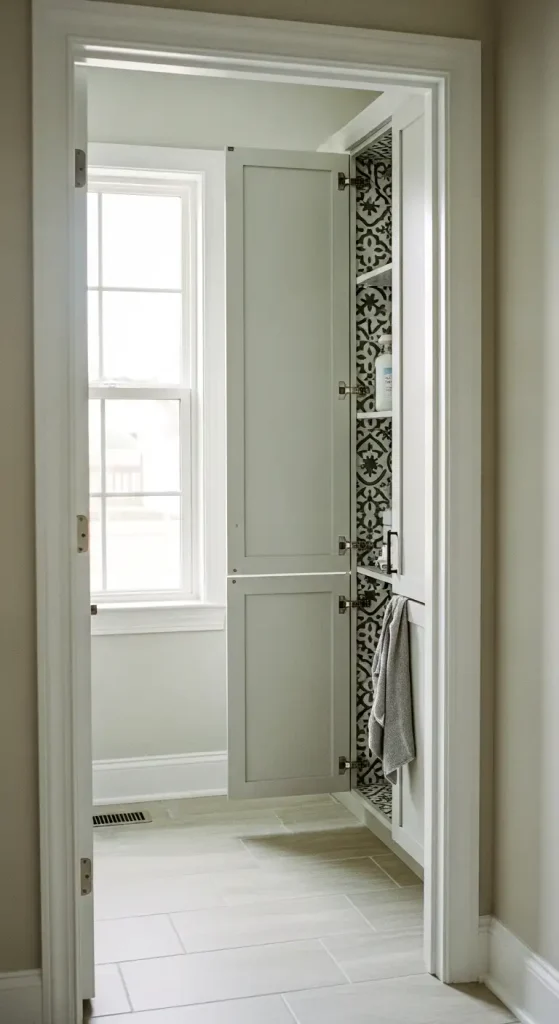
Want a little surprise when you open a cabinet door? Add accent tile on the back wall inside, maybe a fun pattern or a soft color that you wouldn’t expect. It adds real personality without overwhelming the rest of the room. Keep the cabinet fronts closed so the tile stays a hidden detail that only shows when you need something.
Homeowners love this touch because it feels custom and considered without costing a ton. And honestly, it’s one of those small things that makes the whole room feel like it was put together with actual care.
23. Add Fold-Down Surfaces for Extra Folding Space

If you’ve ever stood there holding a clean pile of laundry with nowhere to put it, this one’s for you. Fold-down countertops or ironing boards give you instant workspace exactly when you need it, then tuck completely away so the room stays open and usable. In small setups, this turns “there’s no room to fold anything” into a non-issue. Real people say they get surprised by how much calmer laundry day feels once they have a proper surface to work on.
If you want to build this yourself and keep costs low, these DIY upgrades that add real folding workspace walk through exactly how to do it without over complicating anything. It makes the most of every inch without adding any permanent bulk to the room.


