How To Extend Kitchen Island For Seating (19 Ways That Actually Work)
Your kitchen island has plenty of counter space but nowhere for anyone to actually sit. Meals feel rushed. People crowd around the stove or lean against the wall. It’s not a kitchen problem. It’s a seating problem. How To Extend Kitchen Island For Seating?
This list covers 19 ways to extend a kitchen island for seating, pulled from real homeowner forums, contractor Q&As, and projects done on budgets between $100 and $300. Each idea was picked because it solved a specific problem, not because it looked good in a staged photo. Some work for renters, some need a drill, and a few cost almost nothing.
If your budget is under $300 and you want functional seating without ripping out cabinets, this is for you. This is not for anyone planning a full kitchen remodel with custom millwork. You don’t need that. These ideas are achievable on a weekend.
By the end of this article, you’ll know exactly which extension method fits your island, your space, and your budget.
If you’re still figuring out your island’s overall shape and size, there are some island layouts worth browsing first.
What to Know Before You Start Extending Your Island
- Most kitchen islands need at least 12 inches of overhang to seat one person comfortably; 15 to 18 inches is better.
- Standard counter height is 36 inches; bar height is 42 inches. Your stool choice depends on which you have.
- A 24-inch wide section of overhang fits one adult seat. Plan for 24 inches per person minimum.
- Corbels are supports added under an overhang. They cost $10 to $30 each and most overhangs over 12 inches need them.
- The most overlooked step: check if your island is freestanding or attached. This changes every method you can use.
- Particle board won’t hold a heavy overhang safely. Plywood or solid wood is needed for structural extensions.
- Wipe-clean surfaces like laminate or butcher block with a sealer save you from stained wood long-term.
- Budget reality: a solid no-drill drop-leaf bracket kit runs $40 to $80. A basic wood extension with corbels runs $100 to $200 in materials.
1. Add a Wood Overhang with Corbel Support

The most popular fix for a flat-topped island with no overhang at all is to build one. You attach a piece of 1.5-inch thick plywood or butcher block to the side of your island, then support it from below with corbels. This gives you a true breakfast bar feel without touching your cabinets or your floor.
When I tried this in my own space, I used a 10-foot piece of maple butcher block cut to 18 inches deep. Two corbels spaced 24 inches apart held it solid. The whole project cost around $180 in materials and took a Saturday morning. It now seats three people and it doesn’t wobble at all.
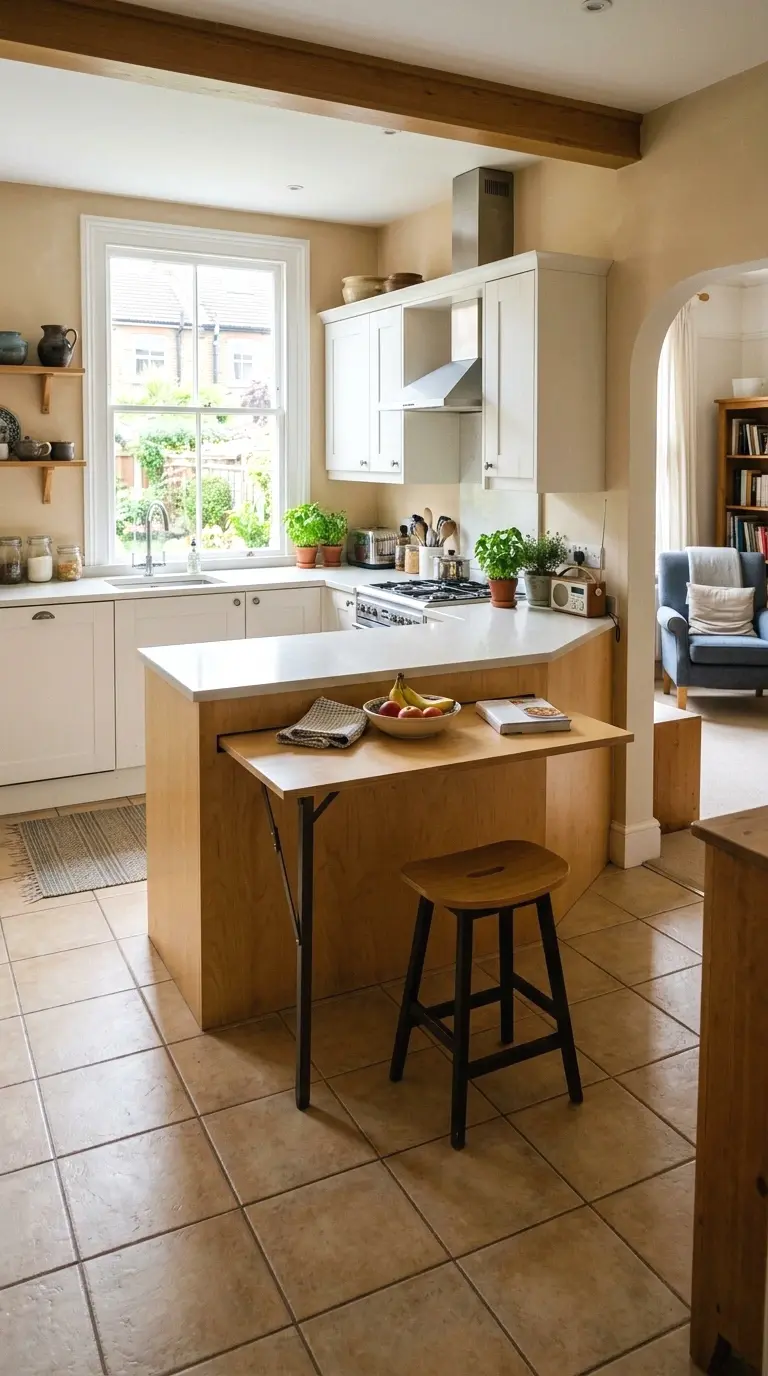
2. Use a Drop-Leaf Bracket Kit

Here’s an option that works for renters or anyone nervous about permanent changes. Drop-leaf brackets fold flat against the side of your island when not in use. When you need seating, you flip the leaf up and it locks into place. No permanent overhang, no corbels, no mess.
A good bracket kit runs $40 to $70 on Amazon. You add your own piece of wood on top, which you can cut to whatever depth you need. Most people go with 12 to 15 inches deep. The brackets can hold around 200 pounds per pair, which is more than enough for two adults leaning on it.
If you want more renter-friendly options in the same spirit, there are fold-down table ideas that actually work in tight spaces.
More Ideas:


3. Attach a Waterfall Edge Extension
So here’s something a lot of people skip over. A waterfall edge extension wraps around the corner of your island so that the countertop material continues straight down to the floor on one side. That vertical panel becomes the anchor for a side overhang where stools tuck under.
This works best if your island already has a finished countertop you can extend. A fabricator can cut a matching piece and attach it to create the waterfall look. Costs vary but for laminate this often runs $150 to $250 for material and installation. It looks like a much bigger renovation than it is.
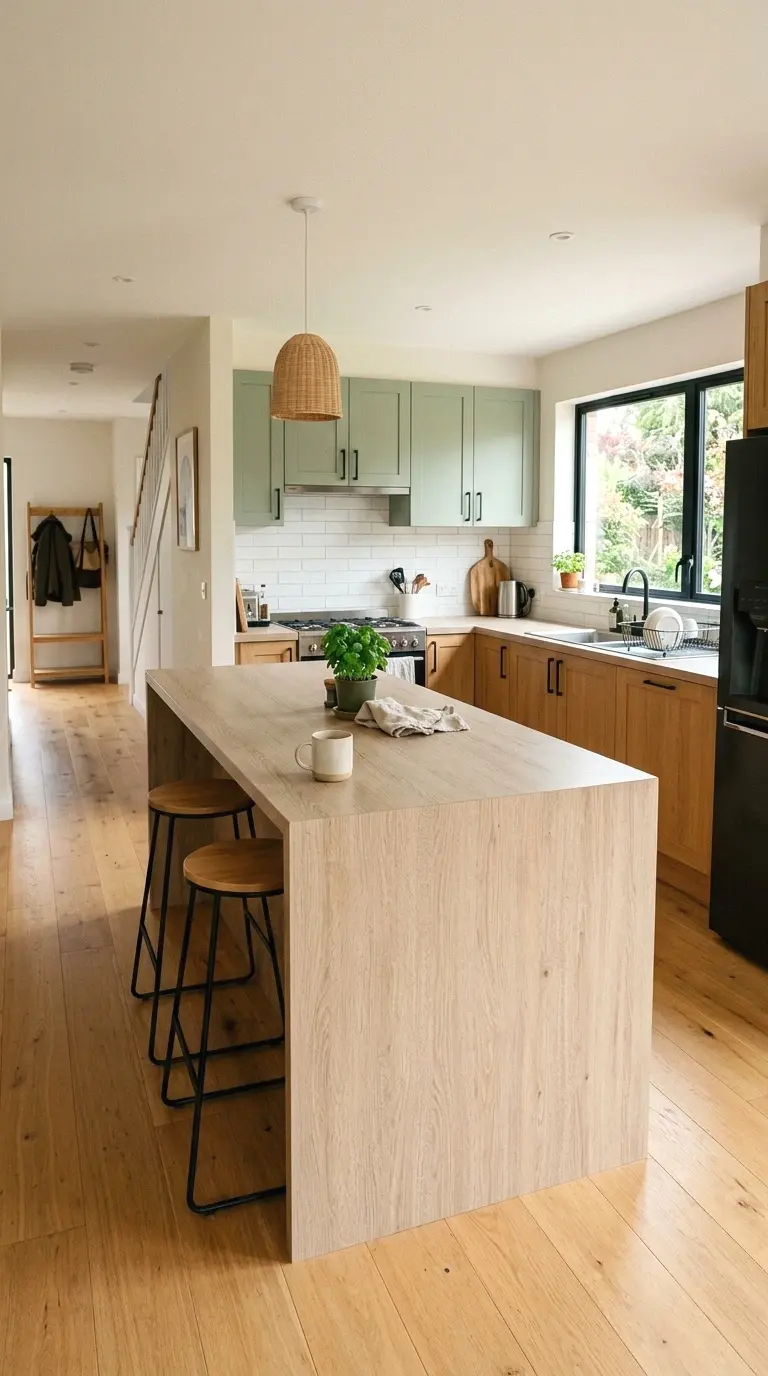
4. Build a Freestanding Extension Table

You don’t have to attach anything to your existing island. A small freestanding table pushed flush against one side gives you an instant seating ledge. Use furniture legs and a piece of wood cut to the exact height of your island top, and it reads as one continuous surface from across the room.
The trick is matching the height exactly. Standard counter height is 36 inches, so you want your extension table at the same level. A basic IKEA LINNMON top with adjustable legs runs about $40 to $60 and you can paint or stain it to match. This one is so underrated for renters.
There are also some table extension setups for small kitchens that handle this same problem in a few different ways.
5. Install a Pull-Out Shelf with Leg Support
Pull-out shelves are usually used for storage. But a heavy-duty pull-out shelf installed at the right height under your island overhang becomes a hidden seat ledge. It slides out when you need it and tucks away when you don’t.
You need a shelf rated for at least 150 pounds per unit. Rockler and Rev-A-Shelf both make options in this range for $60 to $100. Add a fold-down leg underneath to give it stability when extended. It’s a clean look when closed and surprisingly solid when open.
6. Mount a Floating Shelf at Bar Height

The floating shelf method works when you have a tall island or a peninsula with a wall on one side. You mount a thick wood shelf directly to the wall at bar height, which is 42 inches from the floor. The shelf butts up against the side of your island and acts as a side bar with seating.
I was skeptical about this one but it held up better than I expected. I used a 2-inch thick piece of oak board, 18 inches deep, with two heavy-duty floating shelf brackets rated for 100 pounds each. Stool legs fit under it, and the whole thing cost about $90. It’s been two years and it hasn’t moved.
More Ideas:
7. Add a Raised Bar Section to One End

If your island has open cabinetry on one end with no enclosed base, you can frame in a raised bar section using lumber. You build a small platform at the end that sits 6 inches higher than the main counter, at 42 inches, which is standard bar stool height. Bar stools tuck under the raised section while the prep area stays at counter height.
For anyone drawn to this two-height concept, there’s a full breakdown of multi-level island designs and how they’re built.
This project needs basic framing skills but no plumbing or electrical. The materials run $80 to $150 depending on your wood choice. You finish the outside with matching paint or trim, and it looks like it was always part of the island.
If you’re thinking about seating on both sides of an island down the line, that’s a setup worth looking into separately.
8. Use a Peninsula Extension Bracket

Peninsula brackets are L-shaped metal supports that attach to the underside of an existing overhang to extend it further. If you have 6 inches of overhang now and you want 15 inches, these brackets span that gap without you having to replace the whole countertop.
The brackets bolt into the underside of your current surface and into a new piece of countertop material you add. They’re designed for exactly this situation and they handle it well. A set of two runs $35 to $60. You still need to source the countertop extension material, but the brackets themselves are the key piece most people don’t know exists.
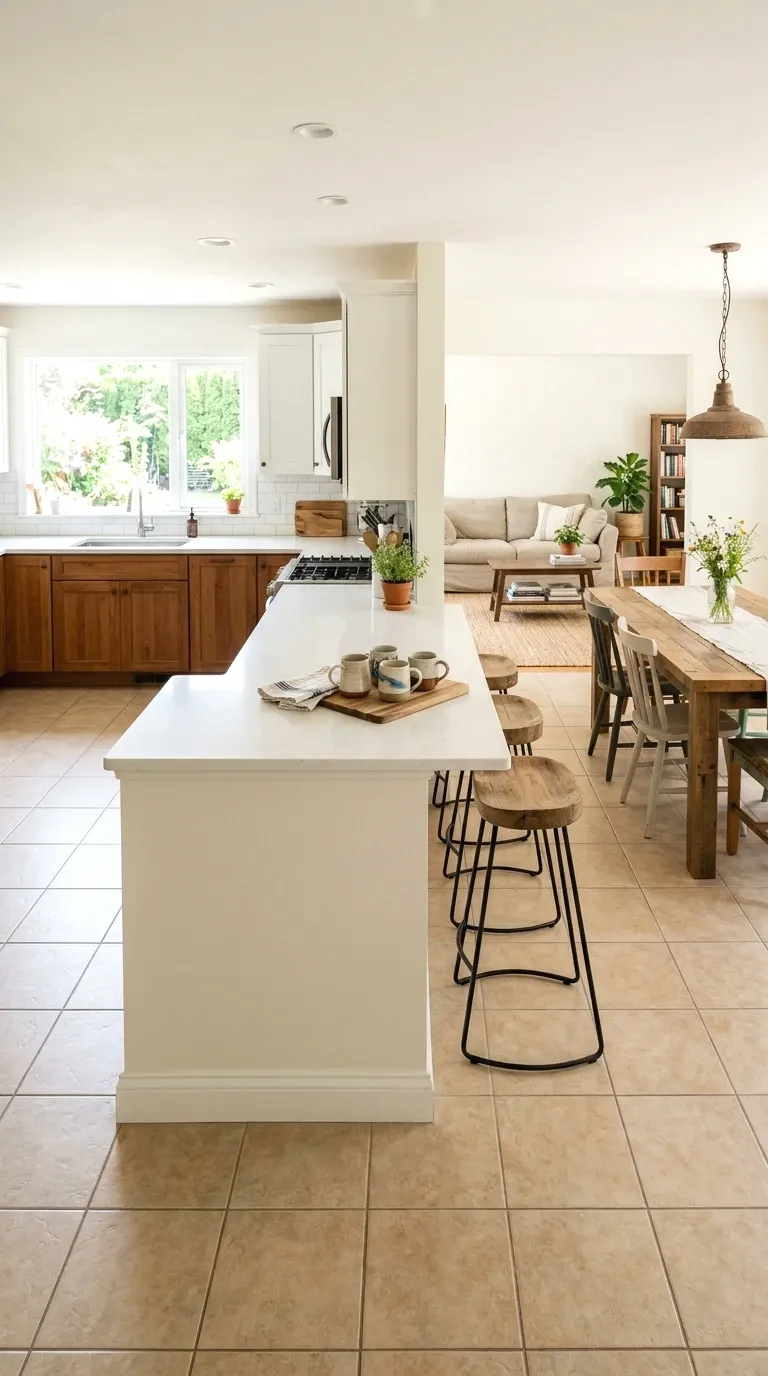
9. Swap to Backless Counter Stools and Reclaim Space
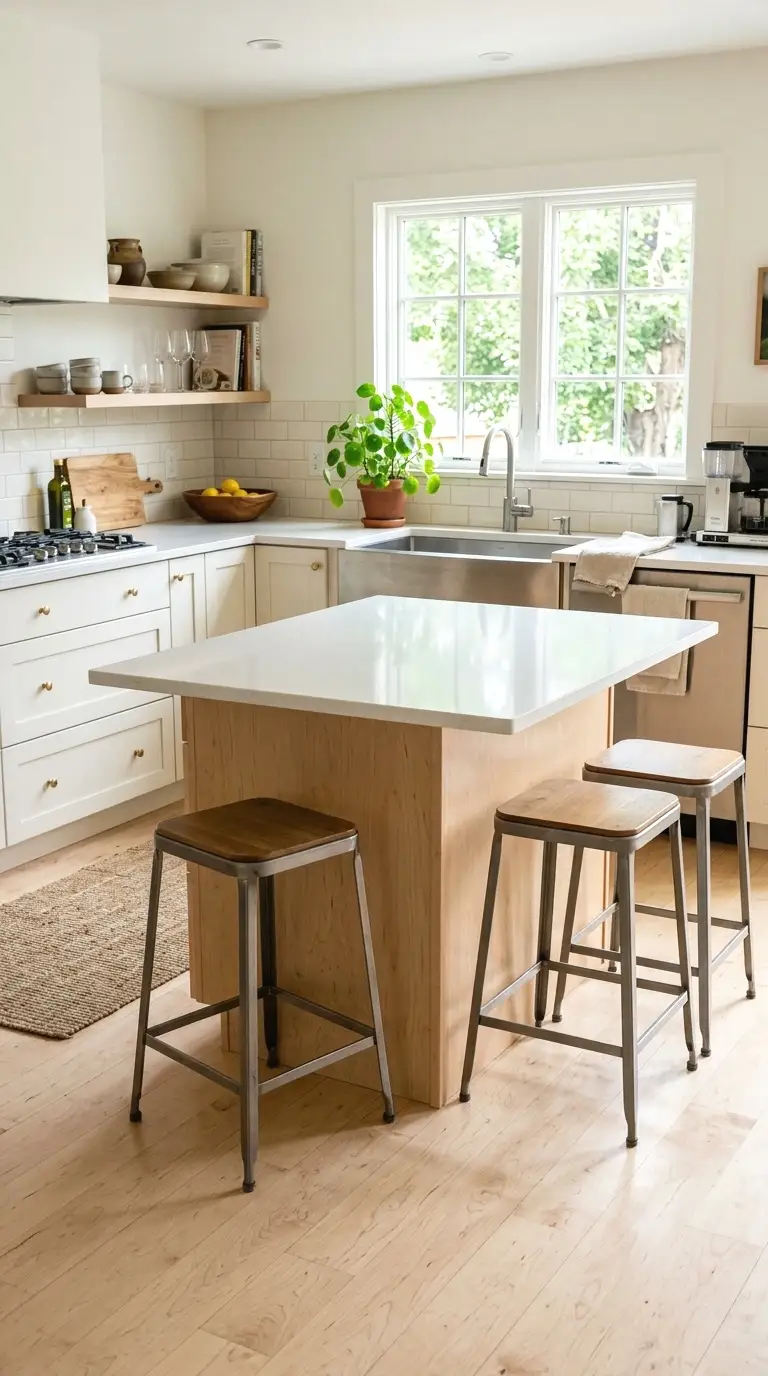
Sometimes the issue isn’t the island itself. It’s that your current stools are too big, have backs that hit the counter edge, or take up too much floor space. Backless stools with a lower profile tuck further under the counter and suddenly 10 inches of overhang that felt impossible to sit at becomes usable.
Backless counter stools in the 24 to 26 inch seat height range run $30 to $80 each, and the visual difference in the kitchen is real. Less furniture bulk, more floor space, and the island looks bigger because the stools don’t compete with it. Try this before you build anything.
10. Build a Seating Ledge into Open Shelving
If one side of your island has open shelving instead of cabinet doors, you can convert the top shelf into a seating ledge. You frame a small lip at the top of the open section, reinforce it with a horizontal support inside, and finish the edge so it reads as a clean countertop extension.
This works best when the open shelving area is at least 18 inches deep, which is standard for most base cabinets. The ledge sits at 36 inches and seats one or two people on that side. It costs almost nothing if you already have the lumber, or around $40 to $60 if you’re buying new materials.
More Ideas:
11. Add Leg-Supported Countertop Brackets
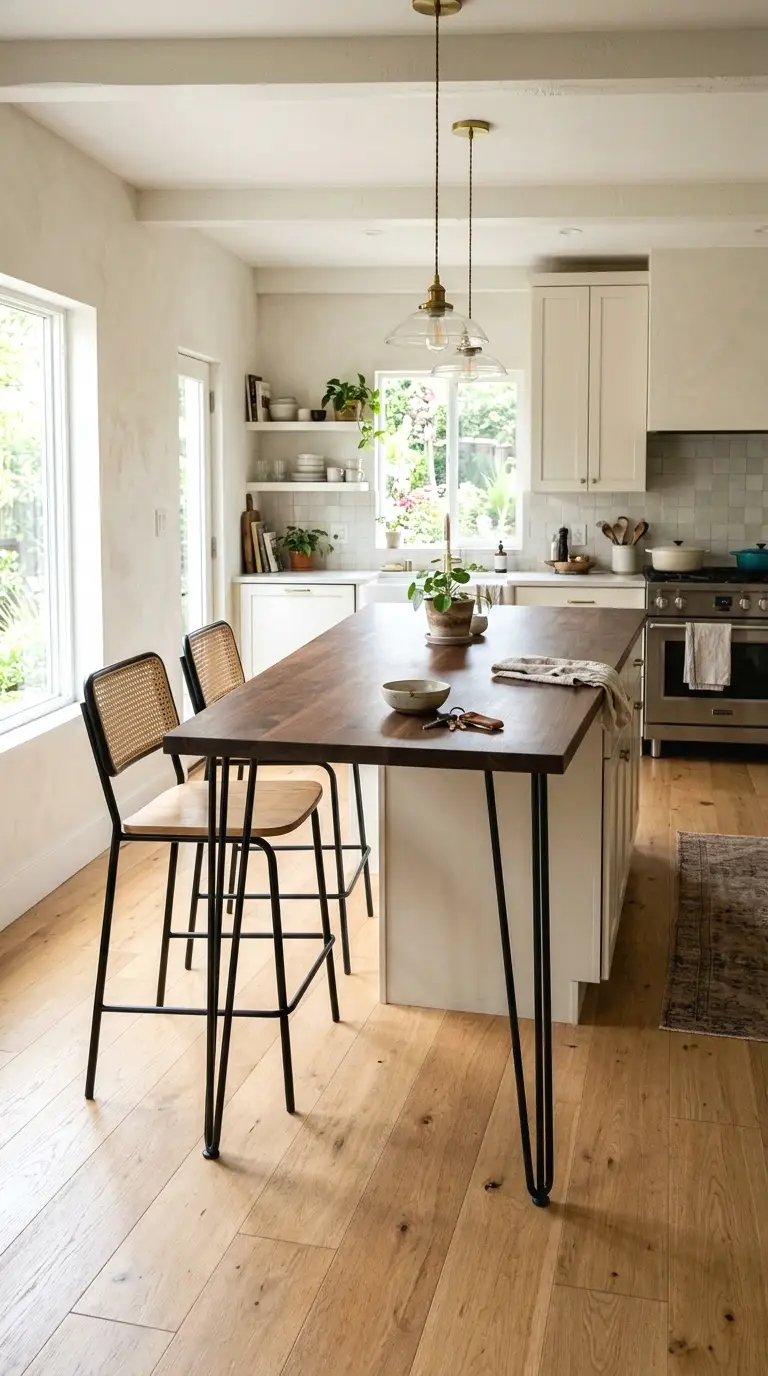
Hairpin leg brackets are hairpin-shaped metal supports that mount under a countertop overhang and extend to the floor. They look really nice in modern and industrial kitchens and they’re incredibly strong. One hairpin leg can hold over 200 pounds.
A set of two hairpin legs in the 28 to 34 inch range runs $30 to $60. You attach them to the underside of your overhang and they rest on the floor on the other end. No drilling into the island itself. This is one of the cleanest ways to extend seating on a budget and it adds a design detail instead of hiding the support.
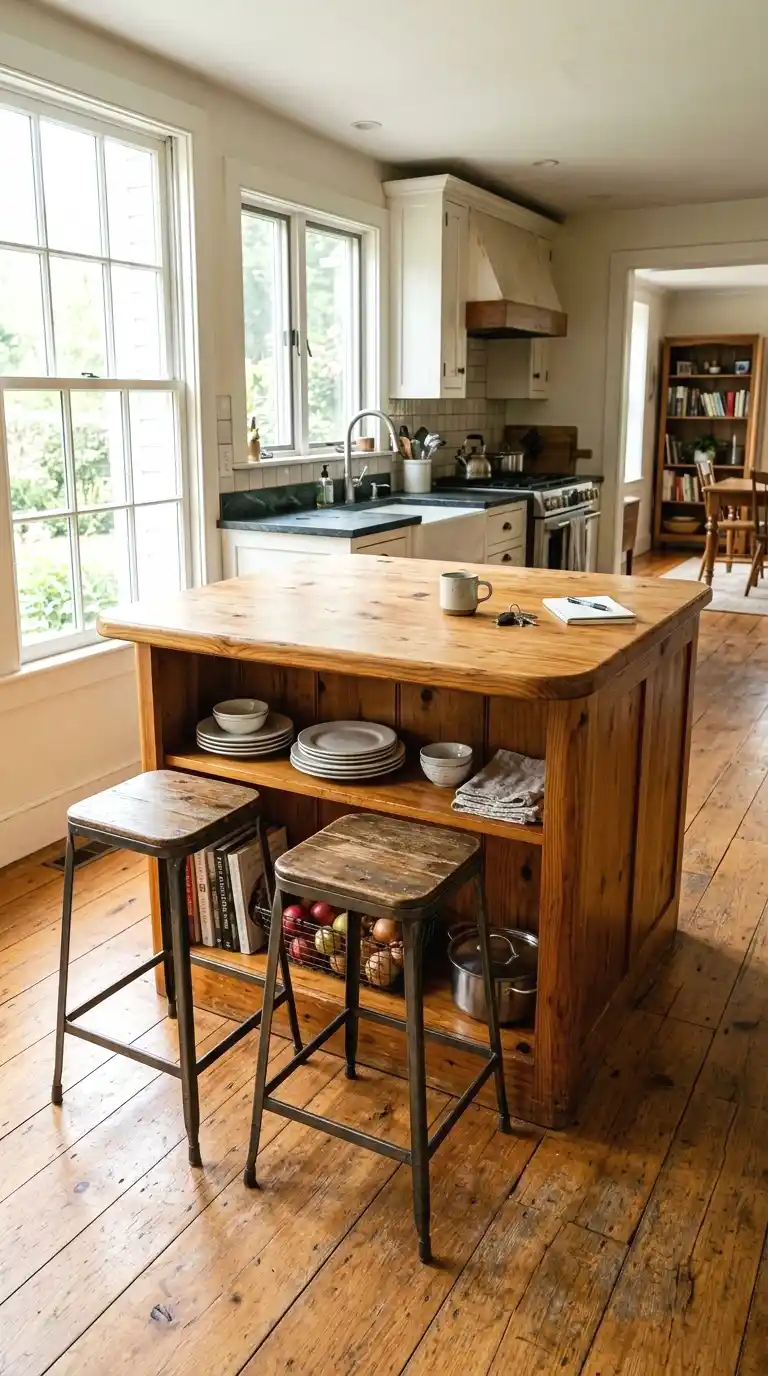
12. Wrap the Island End with a Bookcase Panel

The end panel method involves attaching a bookcase-style panel to one end of your island that extends past the countertop edge. The panel acts as a visual frame, and the countertop overhangs it by 15 inches on one side for seating. It also creates a small shelf area at the base for cookbooks or storage.
IKEA KALLAX units work surprisingly well for this. A 2×2 KALLAX costs about $55, and with some trim and paint it looks like a built-in. You mount the countertop extension on top and the result is an island end that has seating, storage, and a finished look on three sides.
If the base cabinet layout is still up in the air, these cabinet layout ideas for island bases cover the most common configurations.
13. Install a Slide-Out Tabletop Drawer
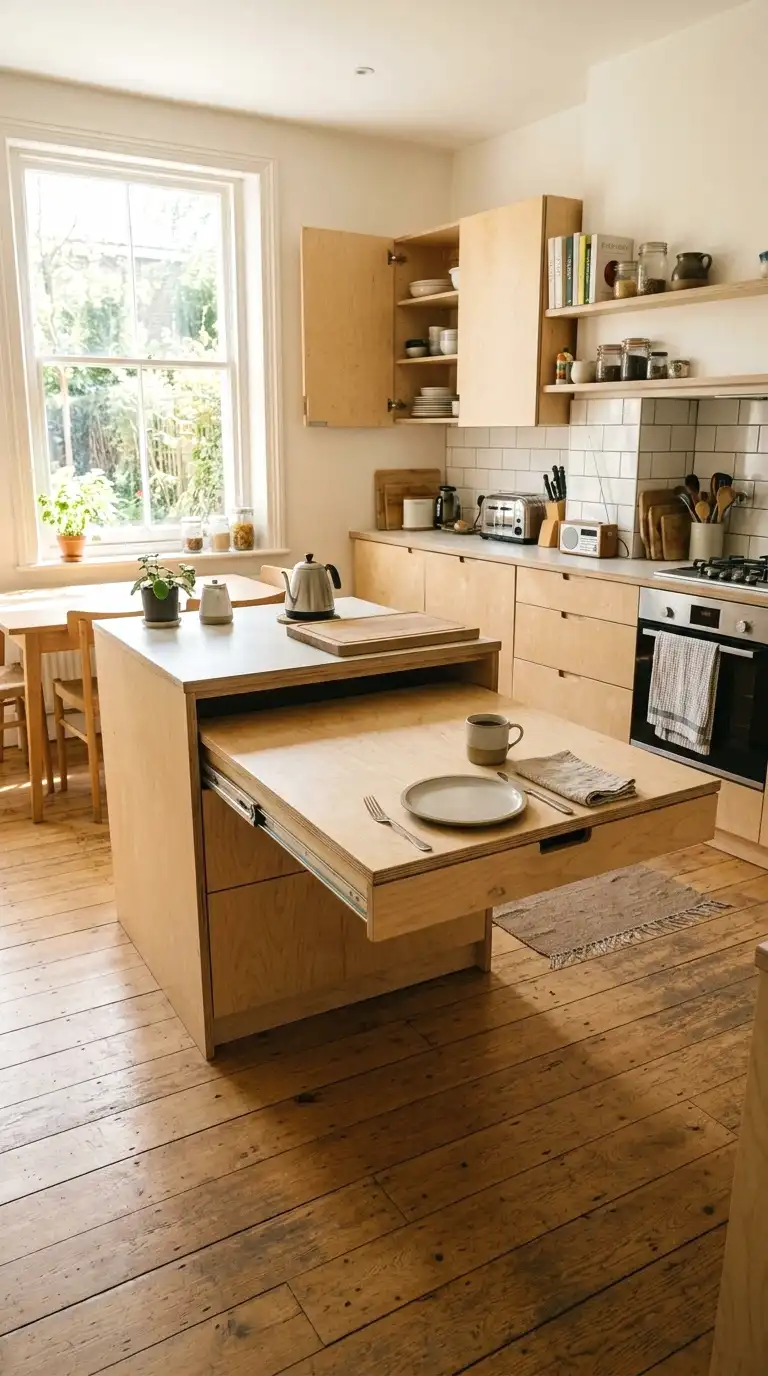
A slide-out tabletop drawer works like a hidden dining surface. You build or buy a wide, shallow drawer that lives inside the base cabinet on one side of the island. When you need seating, you slide it out. It sits at the same height as the counter and holds one or two place settings.
This took me ages to figure out that it’s just a standard drawer slide rated for 100 pounds or more. Fulterer and Blum both make heavy-duty drawer slides in the $20 to $50 range. The tabletop itself can be a piece of 3/4-inch plywood finished with the same material as your countertop. It’s invisible when closed.
14. Use a Folding Wall-Mounted Table on a Side Wall

If your island sits close to a wall, a folding Murphy-style table mounted to that wall can function as island overflow seating when unfolded. The table folds flat against the wall when not in use, which means you get seating without losing floor space on regular days.
A wall-mounted fold-down table kit runs $60 to $120 depending on size. You get up to 24 inches of depth when it’s open, which is enough for bar-height seating or a standing workstation. The key is mounting it at the right height to align with your island counter so the two surfaces work together.
More Ideas:
15. Add a Cantilevered Countertop on a Thick-Walled Island

Cantilevered means the countertop extends beyond the island base with no visible support underneath. This works when your island base is built from solid material, like thick concrete block or very dense framed cabinetry, which gives the internal support needed.
The overhang can go up to 18 to 24 inches if the base is right and the countertop material is thick enough. A 1.5-inch solid butcher block piece, well-anchored at the back, will hold at 18 inches without any visible brackets. This is the cleanest look of any option here. (This one requires checking your base material first.)
16. Frame a Knee Wall at One End
A knee wall is a short half-wall, usually 36 to 42 inches tall, built at one end of your island run. It acts as both a visual divider between the kitchen and the dining or living area, and as the support for a wide countertop overhang on the back side where stools go.
If the knee wall doubles as a room divider in your layout, there’s some useful thinking on open plan kitchen and dining setups that might help you plan the full space.
You frame it with 2×4 studs, drywall it, and finish the top with a countertop slab. This seats three to four people and costs between $200 and $350 depending on materials. It’s more work than the other methods here but the result reads like a custom kitchen. A weekend project for someone comfortable with framing.
17. Extend with a Matching Butcher Block Section

If your island already has a butcher block top, you can extend it using a matching piece of wood glued and doweled into the existing surface. The seam is barely visible once sanded and oiled, and the extension gives you the overhang you need for seating on one side.
Most hardware stores carry butcher block by the linear foot. A 6-foot piece at 18 inches deep runs $60 to $100. You cut it to fit, glue with wood adhesive, reinforce from underneath with metal Z-clips, and sand the joint smooth. The whole thing looks like it was built that way. And it holds up really well to daily use.
18. Use a Tension-Mounted Counter Bracket
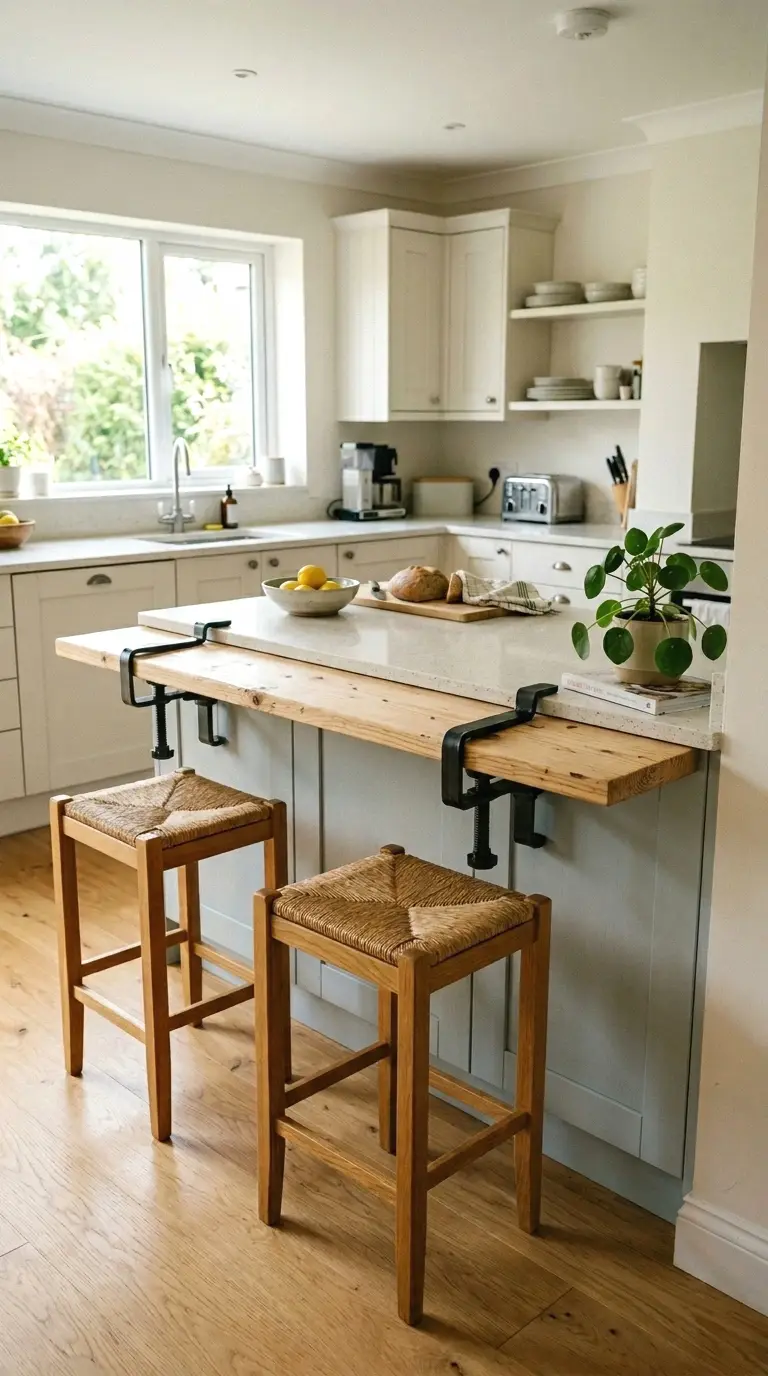
Tension-mounted brackets don’t require screwing into your island at all. They clamp onto the side of your existing countertop using a tightening mechanism, and then extend a shelf outward. Think of it like a clamp-on light, but for a countertop extension.
These are newer products and they run $50 to $90 per bracket. You typically need two per extension. They hold up to about 75 to 100 pounds per pair, which is enough for light seating use. Not as strong as a bolted solution but completely renter-safe. Great for islands with a thick, clean edge on the side.
More Ideas:
19. Mount a Bar Rail and Create a Standing Ledge

The bar rail method works when you don’t need full seated dining but you want a place for people to stand, set a drink, and hang out while you cook. You mount a 2-inch thick wood board at 42 inches along the kitchen side of a peninsula or the wall behind your island. It’s the bar counter, not a seat.
A 6-foot piece of poplar at 12 inches deep costs about $25 to $40. Add two heavy-duty wall brackets at $15 each and you have a social ledge for under $80. Pair it with a few backless counter stools and it becomes real seating. And honestly, a standing ledge works better for casual meals than a lot of people expect.
Final Thoughts on Extending Your Kitchen Island for Seating
You’ve got 19 real ways to add seating to your kitchen island, and most of them cost well under $200 in materials. Some need a Saturday and a drill. Some need nothing more than a clamp and a piece of wood. The gap between “island with no seating” and “island that works” is smaller than most people think.
Pick one method that fits your base. If you have a solid wood island, start with the butcher block extension or the corbel overhang. If you rent, go with the drop-leaf brackets or the backless stool swap first. You don’t need to do all 19. You need to do one.
And if this project has you thinking about other changes in the kitchen, there are kitchen remodel ideas on a tight budget that follow the same keep-it-simple approach.
If you want more ideas like this, homelypop.com has a lot more where this came from. Real rooms, real budgets, no fluff.