
22 Large Kitchen Island Design Ideas That Actually Work

Your large kitchen island has all that counter space and you’re still not using it right. It feels like wasted potential every single time you walk in. That’s a frustrating spot to be in.
This list pulls together 22 large kitchen island design ideas that I actually researched across real homeowner forums, Pinterest saves, and Houzz Q&As. I looked at what works across different budgets, from $100 weekend fixes to $300 upgrades that look like you spent way more. Each idea had to earn its spot. No filler. No “just add plants” advice.
This is for you if your budget sits somewhere between $100 and $300 and you want real results without hiring a designer. It’s not for someone doing a full kitchen renovation. But if you’re working with what you’ve got, every idea here is doable.
By the end of this list, you’ll know exactly which changes will make your island feel intentional, functional, and put together.
If you’re also thinking about how seating fits into the bigger picture, there are some great ways to rethink your whole island layout before you start.
What to Know Before You Start Large Kitchen Island Design
- Islands under 4 feet long rarely benefit from seating. You need at least 48 inches for one comfortable stool.
- Counter overhang for seating should be 12 to 15 inches minimum. Less than that and knees hit the cabinet face.
- Budget reality: a full island refresh including lighting, seating, and storage runs $150 to $300 on average.
- Most people forget to plan for outlets. A waterproof outlet strip costs $25 to $40 and changes how you use the island.
- The biggest overlooked mistake is choosing bar stools that are too tall. Measure your counter height before buying anything.
- Prep sinks add serious function but require a plumber. Factor in $200 to $400 labor if you go that route.
- Butcher block surfaces need mineral oil every three months to stay in good shape long term.
- Painting island cabinets a different color from the rest of the kitchen is the fastest way to make it feel designed on purpose.
1. Paint the Island a Contrasting Color

Your walls and cabinets are probably the same color, and your island is disappearing into the background. A contrasting island color is one of the single most impactful things you can do without touching the structure.
Navy blue, forest green, and deep charcoal are the colors showing up everywhere right now in 2025 and 2026. A quart of cabinet paint runs about $30 to $45. You’ll want a bonding primer underneath so it sticks without peeling. Two coats, a foam roller, and a weekend is all it takes. This is the one I keep recommending to people first because the results genuinely surprise them.
Your countertop color plays into this decision more than you’d expect, and understanding how countertop color shapes the whole room helps you pick the right contrast.
2. Add Pendant Lights Above the Island
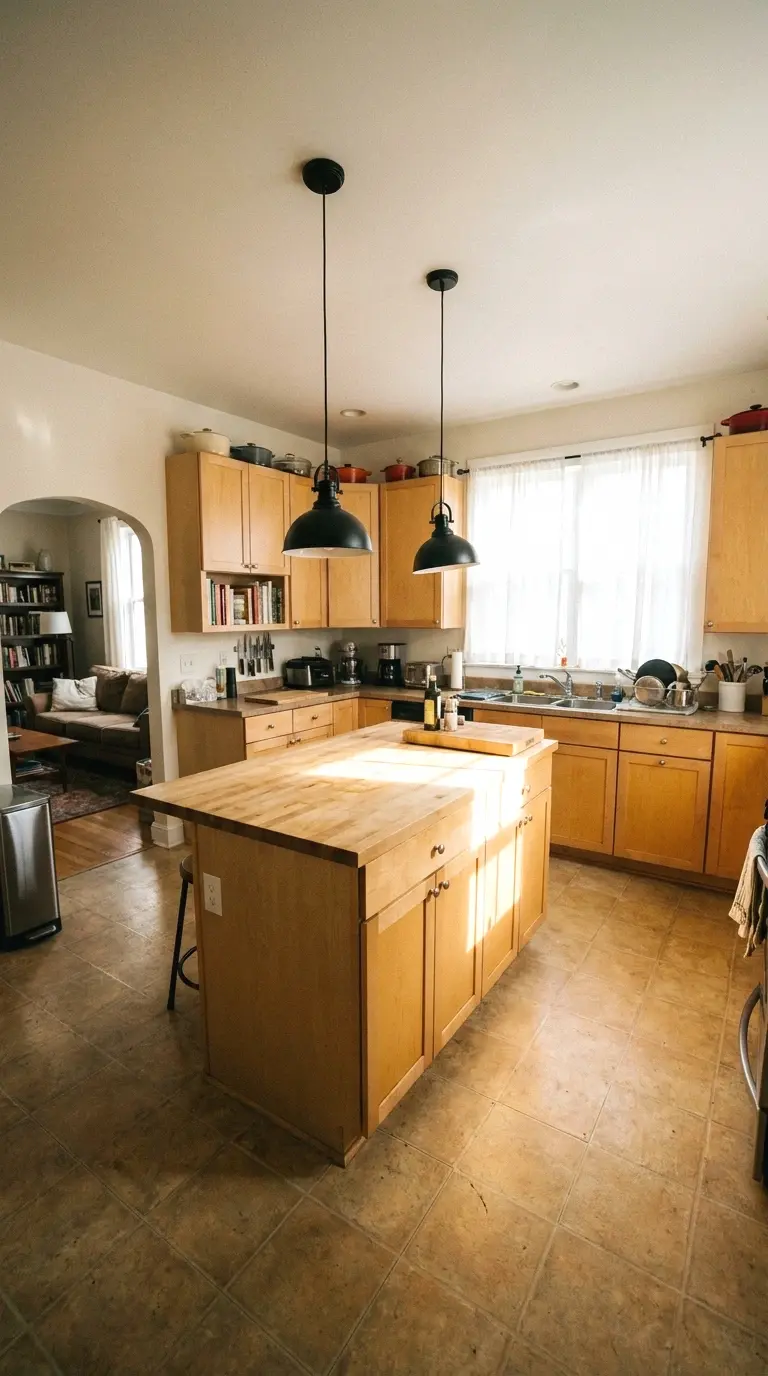
So here’s the thing about pendant lights: they do two jobs at once. They add task lighting where you actually need it and they give the island a finished, intentional look that no amount of decor can fake.
Standard rule is to hang pendants 30 to 36 inches above the countertop. For a large island, two or three pendants spaced evenly look much better than one centered light. Budget pendants from Amazon or IKEA run $25 to $60 each. Hardwired is better, but plug-in pendants with cord covers are a solid renter-friendly option and cost about the same.
If you want to see how lighting ties into a full kitchen aesthetic, there are some pendant styles worth considering overhead in a monochrome setup.
More Ideas:

3. Install Open Shelving on the Island End
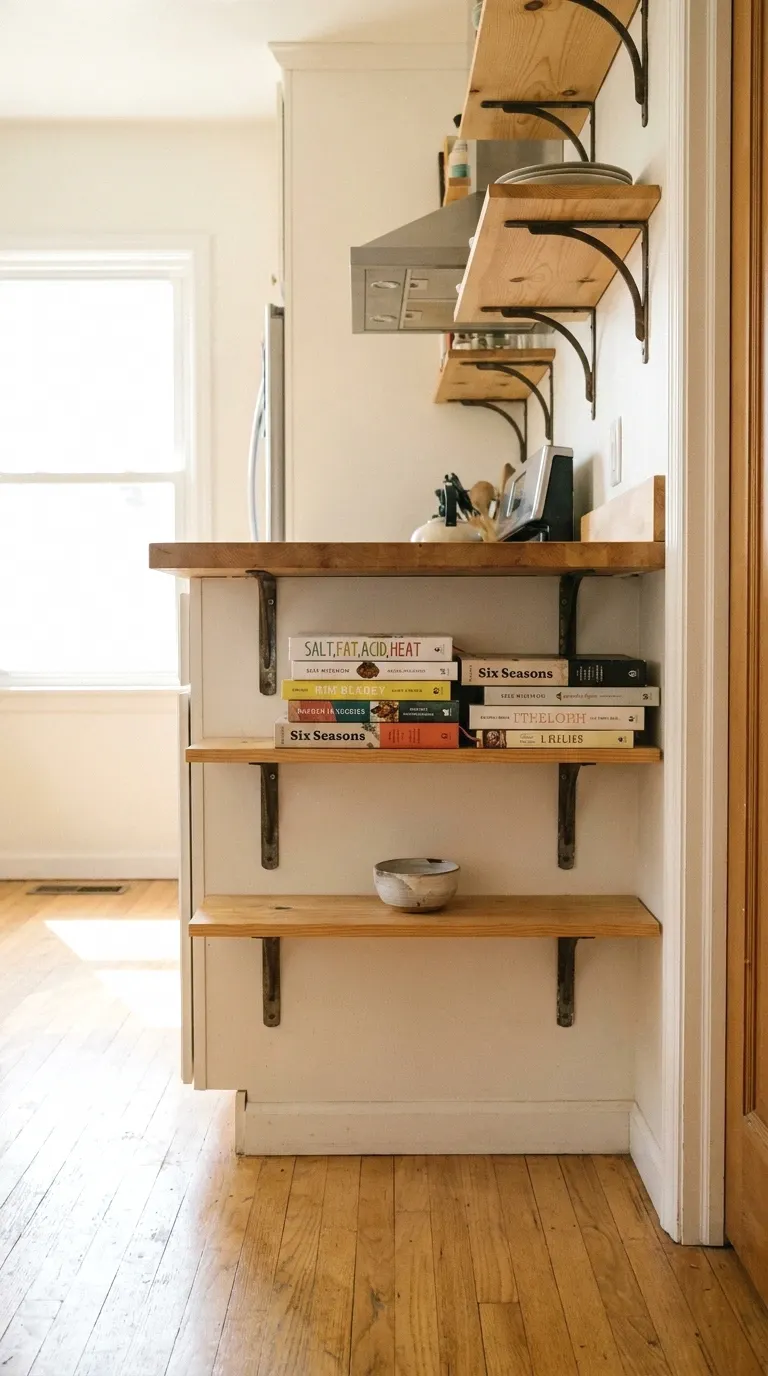
The end panel of your island is basically dead space right now. Open shelves there give you storage and a place to style things without any upper cabinet bulk getting in the way.
Two or three floating shelves on the island end cost around $20 to $50 depending on size and material. Pine boards with simple L-brackets work well and look clean when painted to match the island. Keep what goes on them useful, cookbooks, a few bowls, a small plant. Purely decorative shelving ends up annoying you within a month.
4. Swap Your Bar Stools for the Right Fit
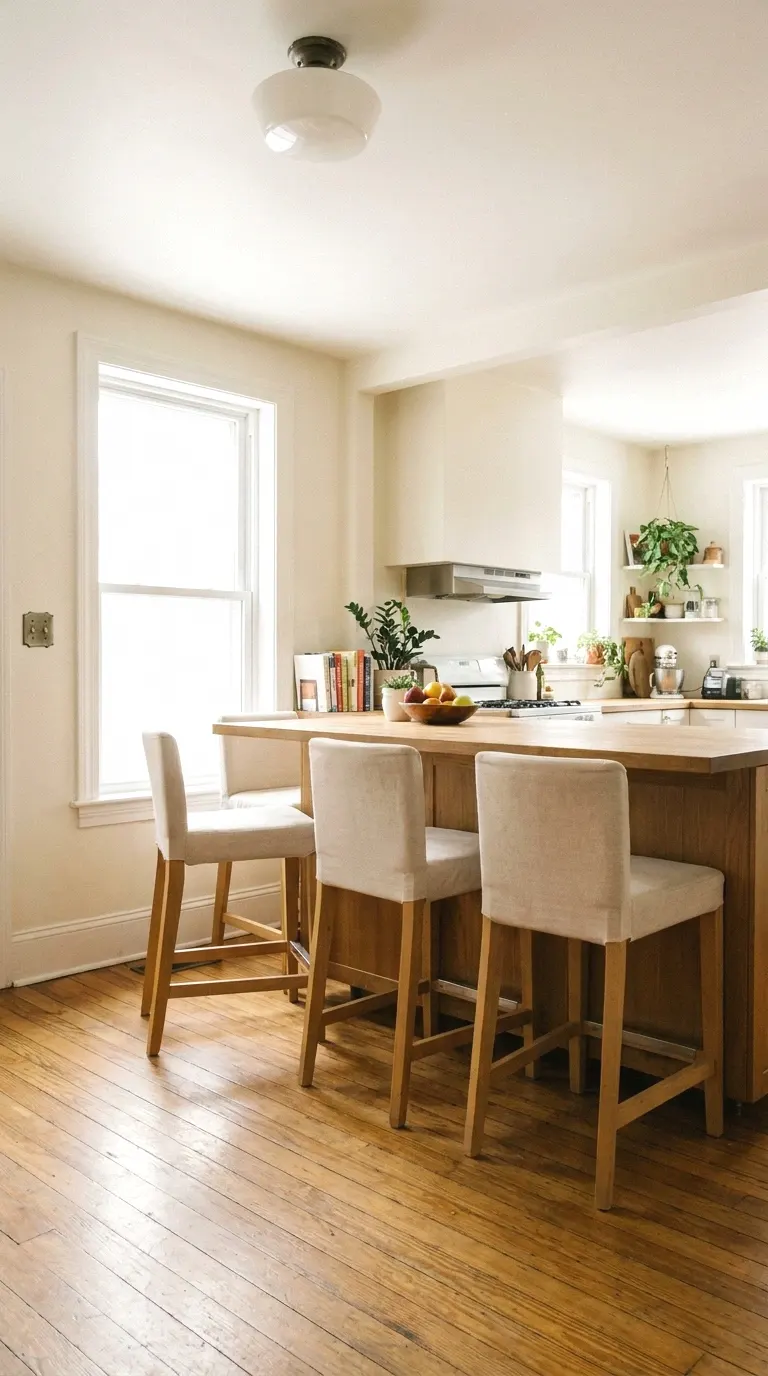
Here’s what nobody tells you: the wrong bar stool height makes your whole island look off, even if everything else is perfect. Counter height stools are for 34 to 36-inch counters. Bar height stools are for 40 to 42-inch counters. Most people mix them up.
When I tried this in my own space, replacing four mismatched stools with four matching counter-height ones made the island look like it had been professionally designed. Budget: $30 to $60 per stool. Look for sets of four from places like Wayfair or Amazon to keep the cost under $200 total. Backless stools tuck under cleanly and keep the space from feeling crowded.
5. Use the Island Base for Built-In Storage Baskets
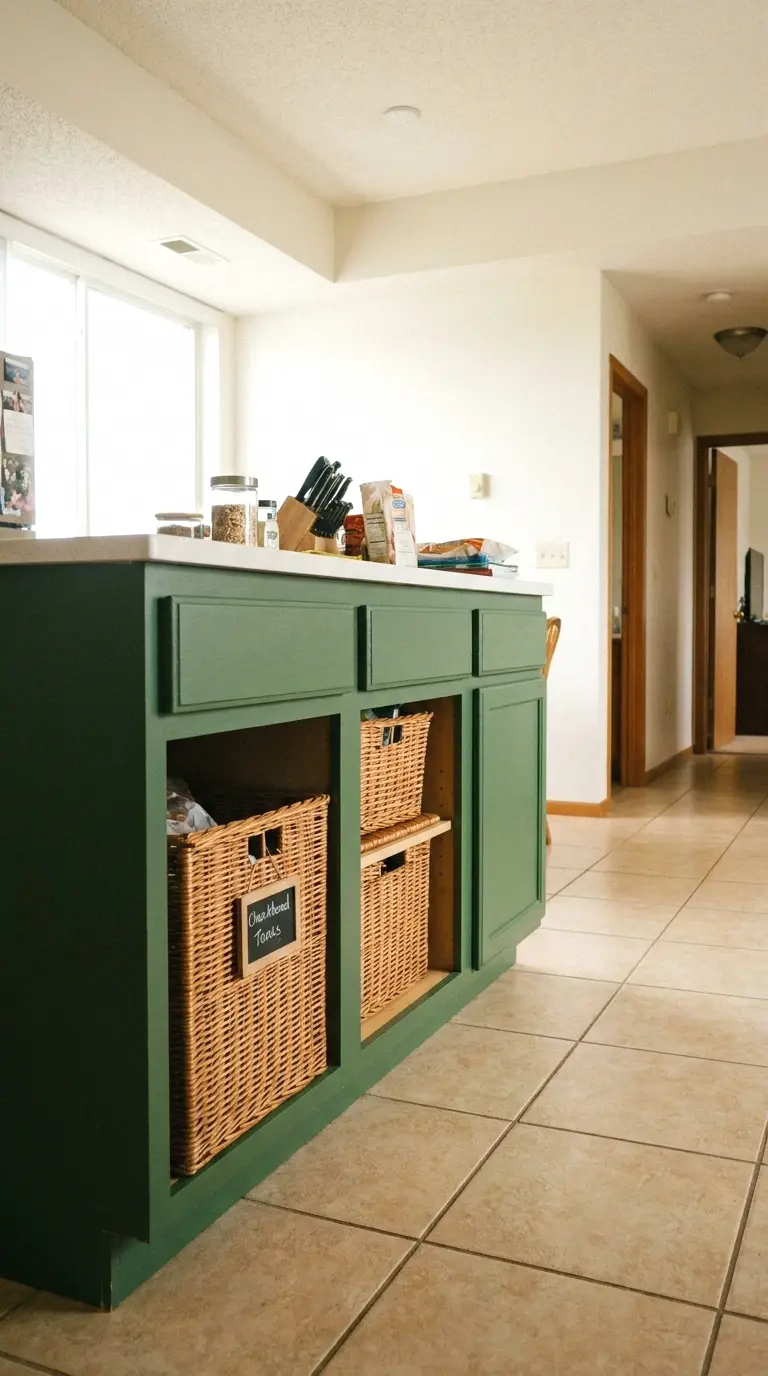
A large island base almost always has open space that goes unused. Slide-in wicker or wire baskets turn that gap into actual storage without any drilling or modification.
This one is so underrated. Baskets sized for 12-inch-deep cabinet openings run about $12 to $20 each and hold everything from potatoes and onions to kids’ snacks and extra dish towels. Label the front with a small chalk tag and it looks purposeful rather than chaotic. This is one of the easiest $40 fixes in the whole kitchen.
6. Add a Butcher Block Section for Prep

You don’t have to replace your entire countertop to get the warmth and function of butcher block. A freestanding butcher block insert or small butcher block board that sits flush over one section gives you a dedicated prep zone.
Butcher block cutting boards large enough to cover a 24-inch section run $40 to $80. Some people go further and get a 2-inch thick butcher block panel cut to size, which costs around $100 to $150 at most lumber yards. It sits directly on the counter and acts as a permanent prep station. Seal it with food-safe mineral oil every few months.
More Ideas:
7. Mount a Paper Towel Holder Under the Overhang
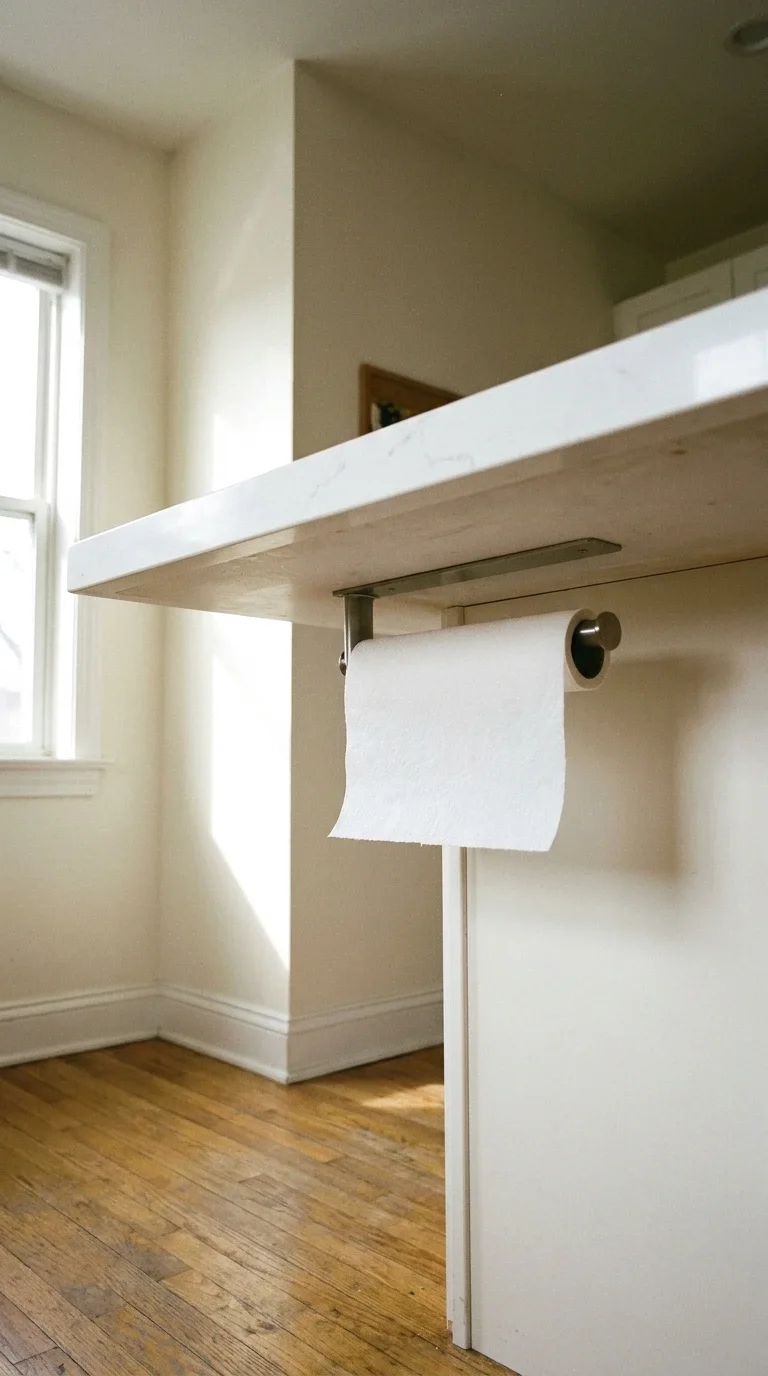
This sounds minor. It is not. Getting the paper towel off the counter and under the island overhang frees up 8 inches of prep space immediately and keeps the counter looking clear.
Under-cabinet paper towel holders mount with two screws and cost $10 to $20. A horizontal mount on the inside of the overhang is invisible from most angles and right where you need it when cooking. Took me ages to figure this out. Once I did, I couldn’t believe I’d wasted counter space on a freestanding holder for years.
8. Add Hooks Along the Island Side for Hanging Storage
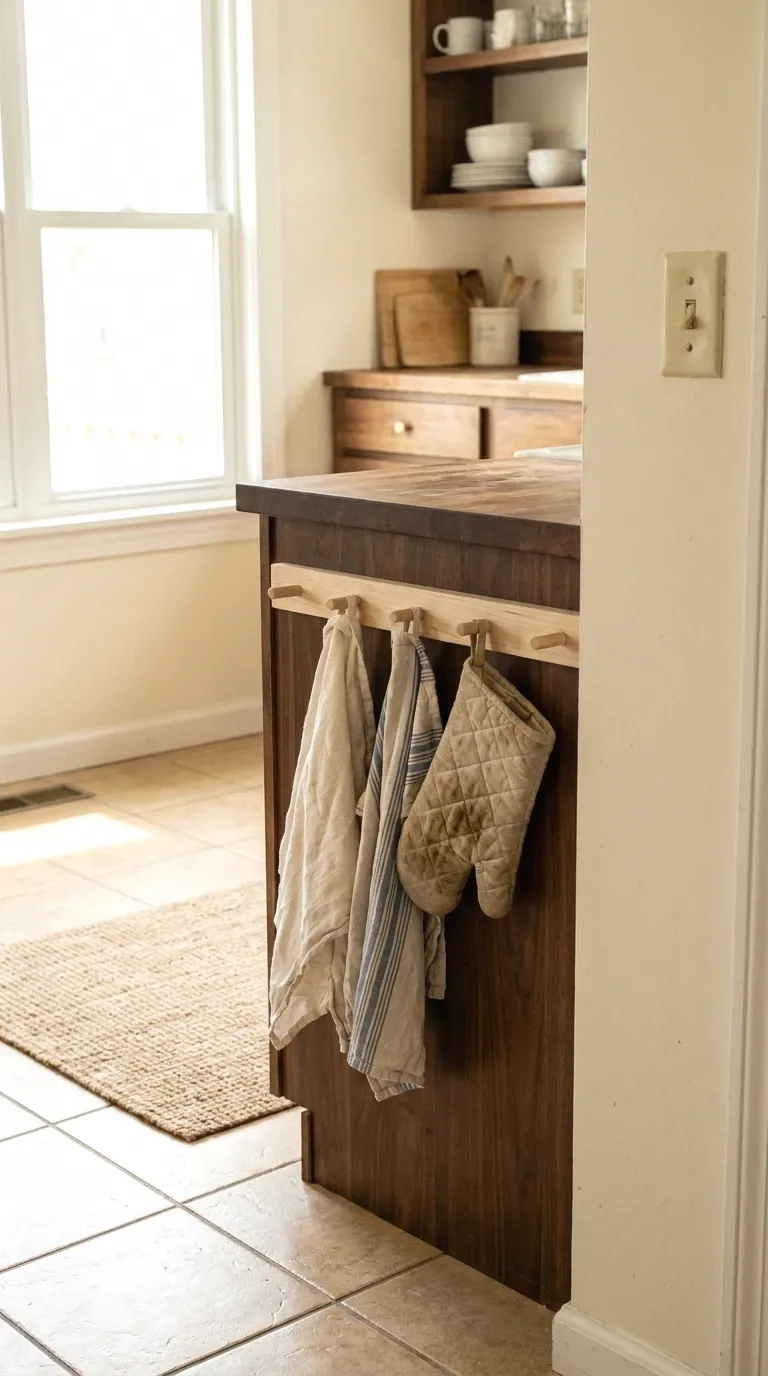
A strip of hooks along the kitchen-facing side of your island gives you a place to hang dish towels, oven mitts, small colanders, and even a utensil basket. It keeps things accessible without cluttering your drawers.
A simple shaker peg rail runs $15 to $30 and mounts with four screws. Paint it to match the island and it looks like it was always there. Stainless S-hooks work for a more industrial feel and cost almost nothing. Either way, you’re adding 6 to 10 hooks worth of functional hanging storage for under $35.
9. Tile the Island Base with Peel-and-Stick Panels
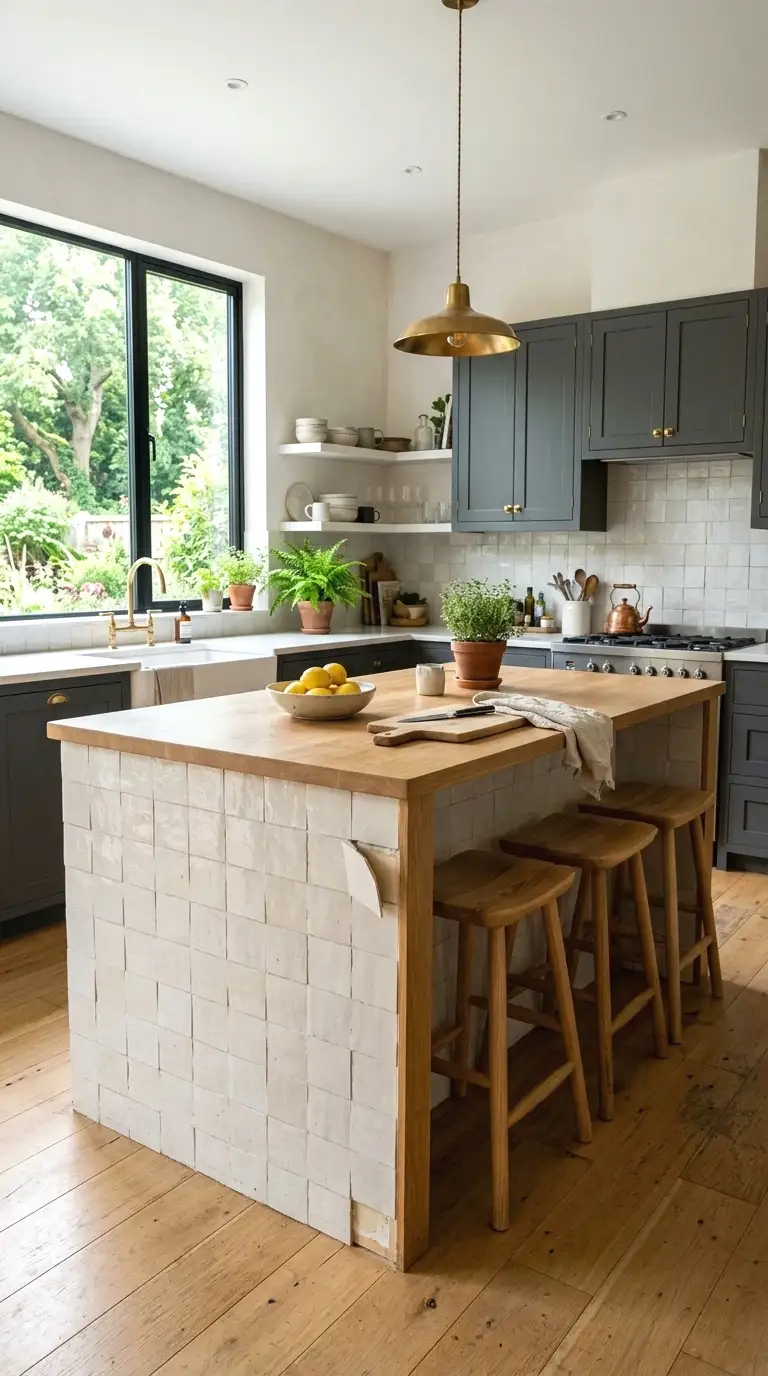
The side panels of your island base are usually just painted MDF or wood. Peel-and-stick tile or shiplap panels add texture and make the island look custom without any real construction.
Subway tile peel-and-stick panels cost about $25 to $40 for enough to cover one island side. Shiplap panels run slightly more at $40 to $70 per side. Both apply directly over painted surfaces and stay in place well if the surface is clean and primed. In 2025, the hexagon and zellige-look peel-and-stick tiles are getting a lot of attention on Pinterest and they genuinely look great up close.
If you want to go further with surface texture, there are tile patterns that hold up in real kitchens and translate well to island panels too.
10. Install a Towel Bar on the Island Side

A simple towel bar on the side of the island keeps dish towels off the oven handle and out of drawers. It’s one of those small details that makes a kitchen feel more organized than it actually is.
A single towel bar in brushed nickel or matte black runs $12 to $25 and mounts with two screws. Match the finish to your faucet or cabinet hardware for a pulled-together look. If you want to hang two or three towels, a double bar costs $20 to $35 and takes up the same wall space.
More Ideas:
11. Add Outlet Access to the Island Surface
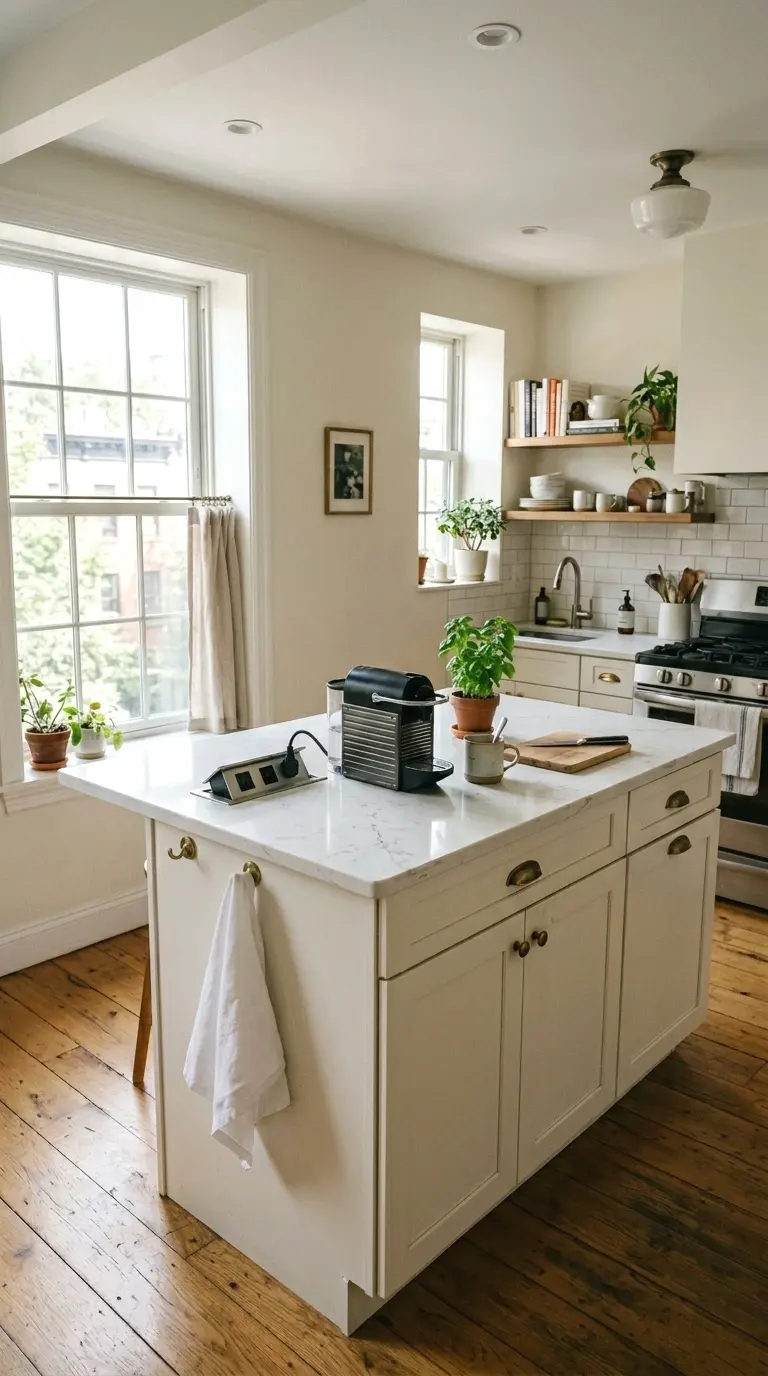
Most kitchen islands have no outlets. That means every small appliance needs a cord running back to the wall, which looks messy and is actually inconvenient when you’re working.
A pop-up outlet strip recessed into the countertop runs $60 to $100 and requires an electrician unless you’re comfortable with basic wiring. A simpler solution is a magnetic outlet cover that mounts flush and pops up when you press it. If you’re renting, a cord management box at the base of the island at least organizes what’s already there. It costs $15 to $25 and does a better job than you’d expect.
12. Use the Island as a Drink Station
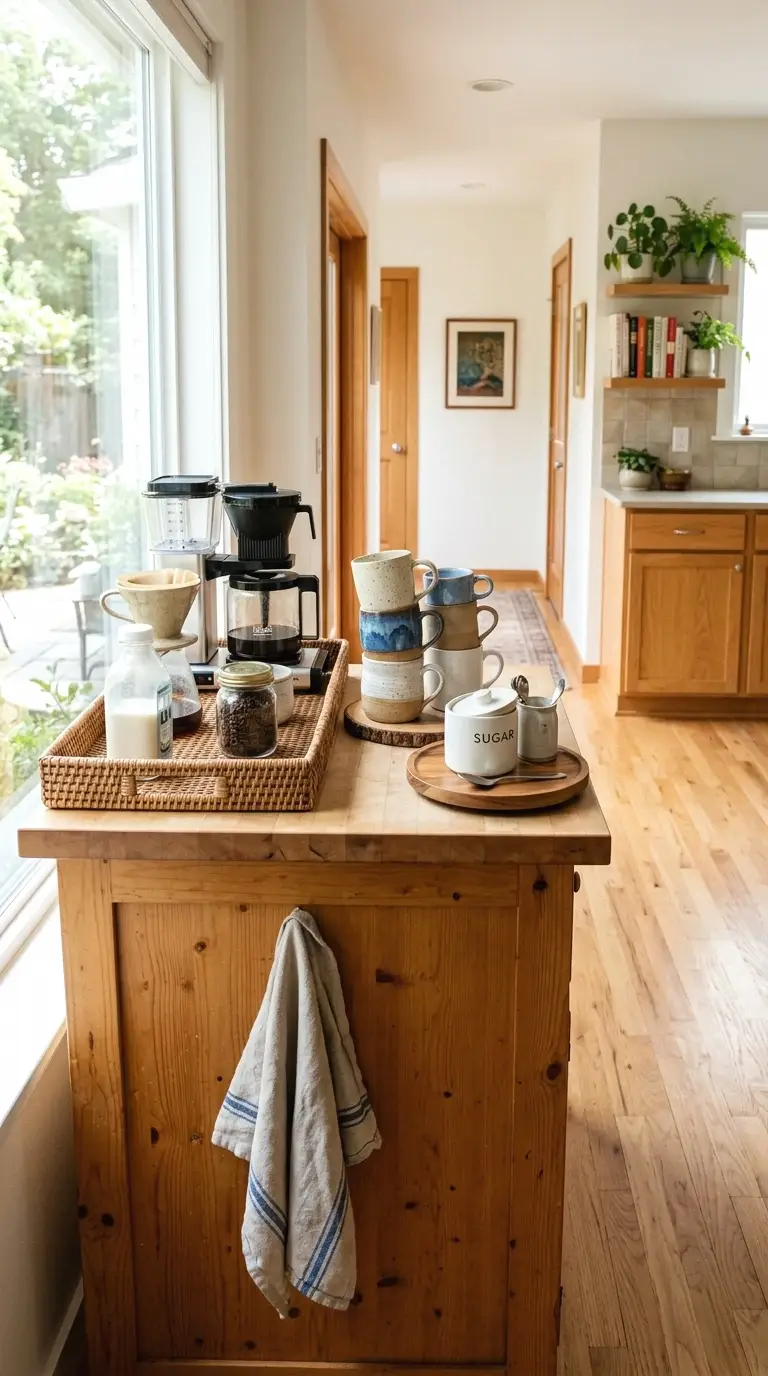
Designating one end of the island as a permanent drink station is one of the smartest ways to use large island space. It keeps the coffee maker, a small tray, mugs, and sugar off the perimeter counters and gives everyone a single spot to go to in the morning.
A small rattan or wood tray to anchor the station costs $15 to $30. Add a small lazy Susan for $12 to $20 and it becomes genuinely functional. The visual effect is that the island feels like it has zones, which makes the whole kitchen feel more organized even when it isn’t.
A dedicated coffee corner is one of the most popular ways to create kitchen zones that actually make sense without rearranging everything.
13. Paint the Island Hardware a Different Finish

If your island has the same hardware as the rest of your kitchen and it’s not working, new pulls and knobs are a fast and cheap fix. Swapping hardware on an island with 8 to 12 doors and drawers costs $30 to $80 total.
Matte black has been popular for several years but it’s holding up well into 2025 and 2026. Brushed gold is the move right now for kitchens with warm wood tones. Cabinet pulls in a 5-inch or 6-inch bar style look proportionate on large island drawer fronts in a way that small round knobs just don’t.
Wall color behind the island also changes how the hardware reads, and there are some cabinet color ideas that shift the whole mood depending on your finish choice.
14. Add a Waterfall Edge to One Side
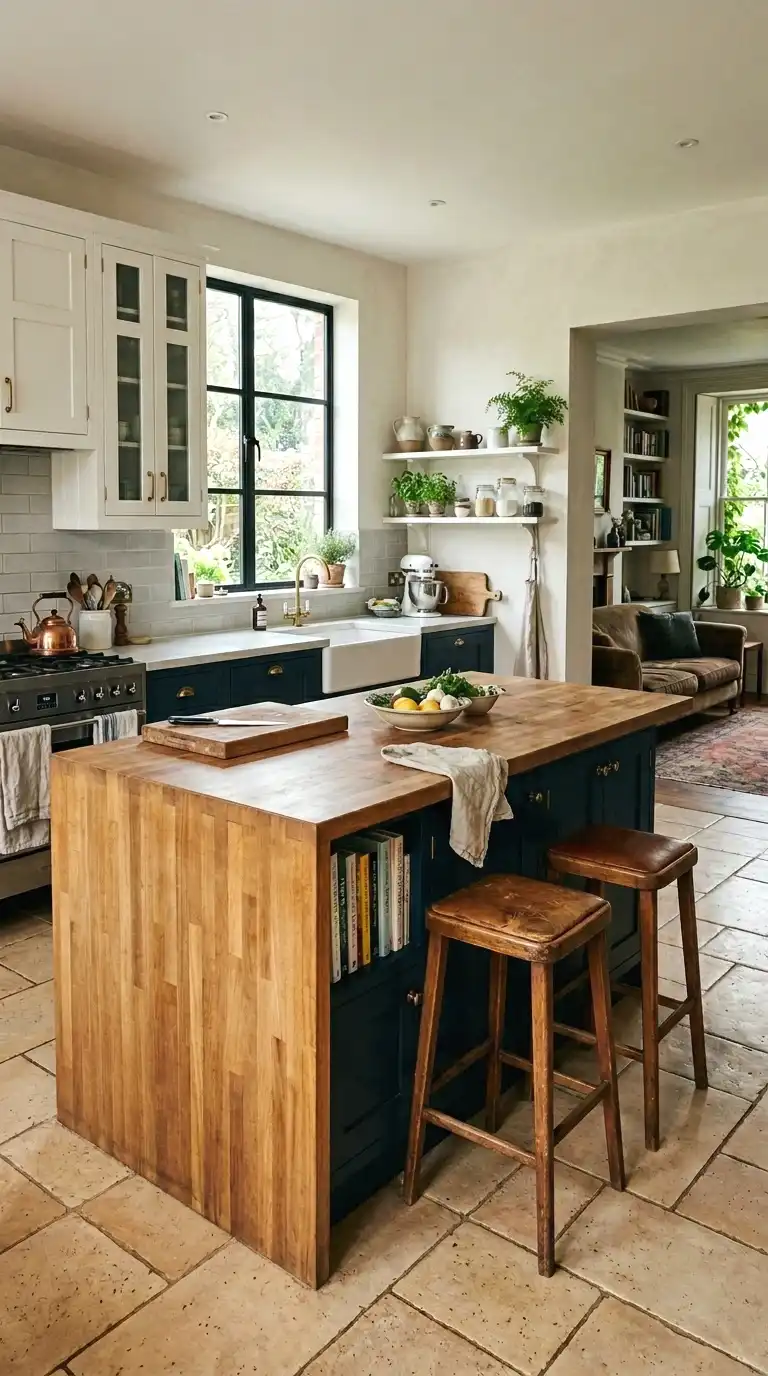
A waterfall edge is when the countertop material continues straight down the side of the island all the way to the floor. It looks like a high-end design detail but it’s actually achievable with butcher block or laminate at a reasonable cost.
A butcher block panel cut to match your existing countertop and attached to the island side runs $80 to $150 in materials. Laminate panels in the same finish as your counter are even cheaper at $40 to $80. It looks like you spent three times as much. The side you choose matters: pick the one most visible from the main entry into the kitchen.
More Ideas:
15. Style the Island with a Functional Centerpiece
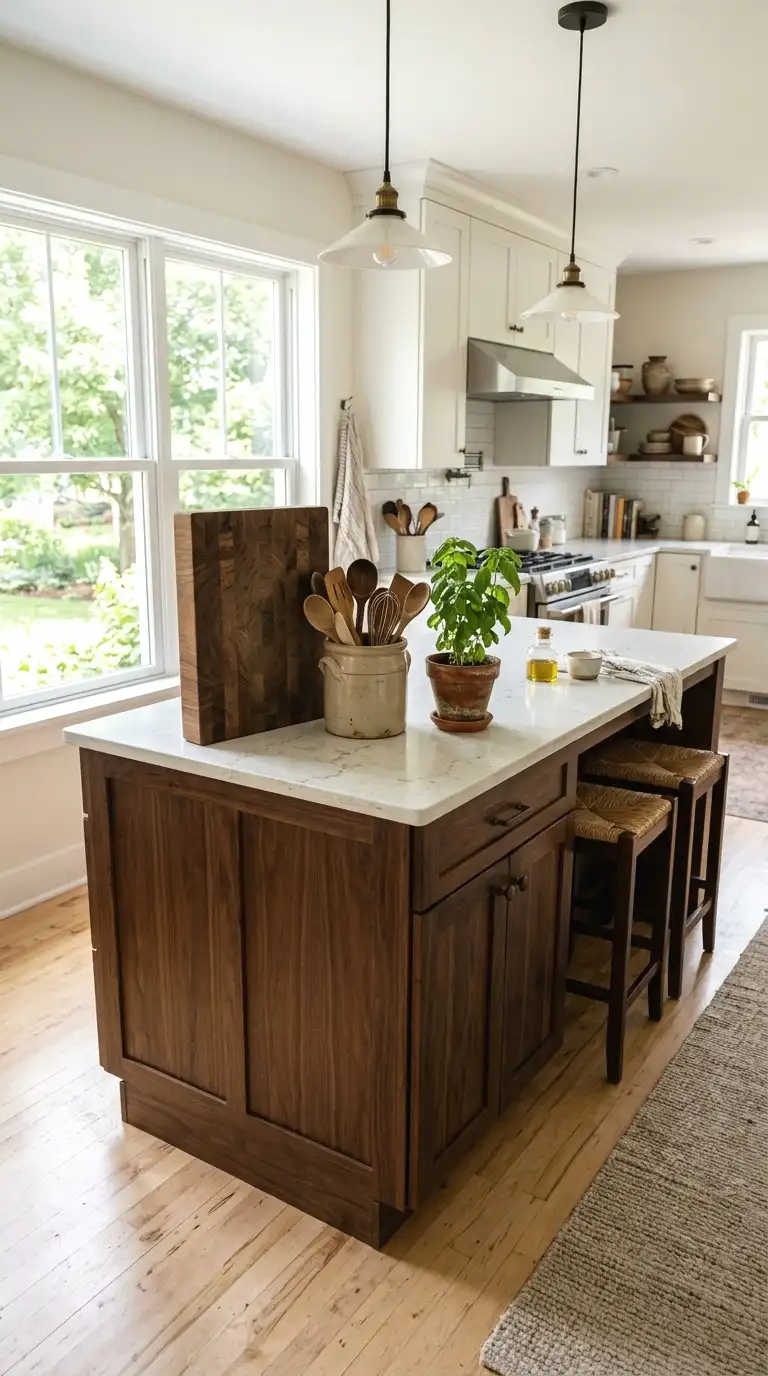
An island centerpiece that’s purely decorative gets moved every time you cook. A functional one stays put and still looks intentional. The difference is in what you choose.
A large wooden cutting board standing upright in a bread box holder, a ceramic crock of utensils, and a small potted herb in a matching pot takes up about 18 inches of counter space and looks like a styled vignette. Total cost: $25 to $50. I was skeptical about this one but the combination of something vertical, something useful, and something living makes the island look finished even when the rest of the kitchen is mid-chaos.
16. Add Undercabinet Lighting to the Island Base

Most people think about undercabinet lighting above the countertop, not below. But LED strip lights mounted underneath the island base at floor level give the island a floating look that’s genuinely impressive in the evening.
LED strip lights in a warm white (2700K to 3000K) run $15 to $30 for enough to wrap the island base. They plug in or hardwire. Warm white matters here. Cool white looks clinical and off under a wood or painted base. This one takes about 30 minutes to install and costs almost nothing compared to the effect it creates.
17. Use Chalk Paint for a Matte, No-Prep Finish

If you want to paint the island but don’t want to sand and prime, chalk paint is the answer. It adheres to most surfaces including laminate without stripping or sanding first.
A quart of chalk paint runs $18 to $30 and covers most island bases with two coats. You seal it with clear wax or a matte furniture topcoat for durability, which adds another $10 to $15. The finish is flat and soft looking, which fits well in farmhouse, transitional, and modern cottage kitchens. Annie Sloan and Rust-Oleum both make reliable versions at different price points.
18. Add a Second-Level Raised Counter for Seating
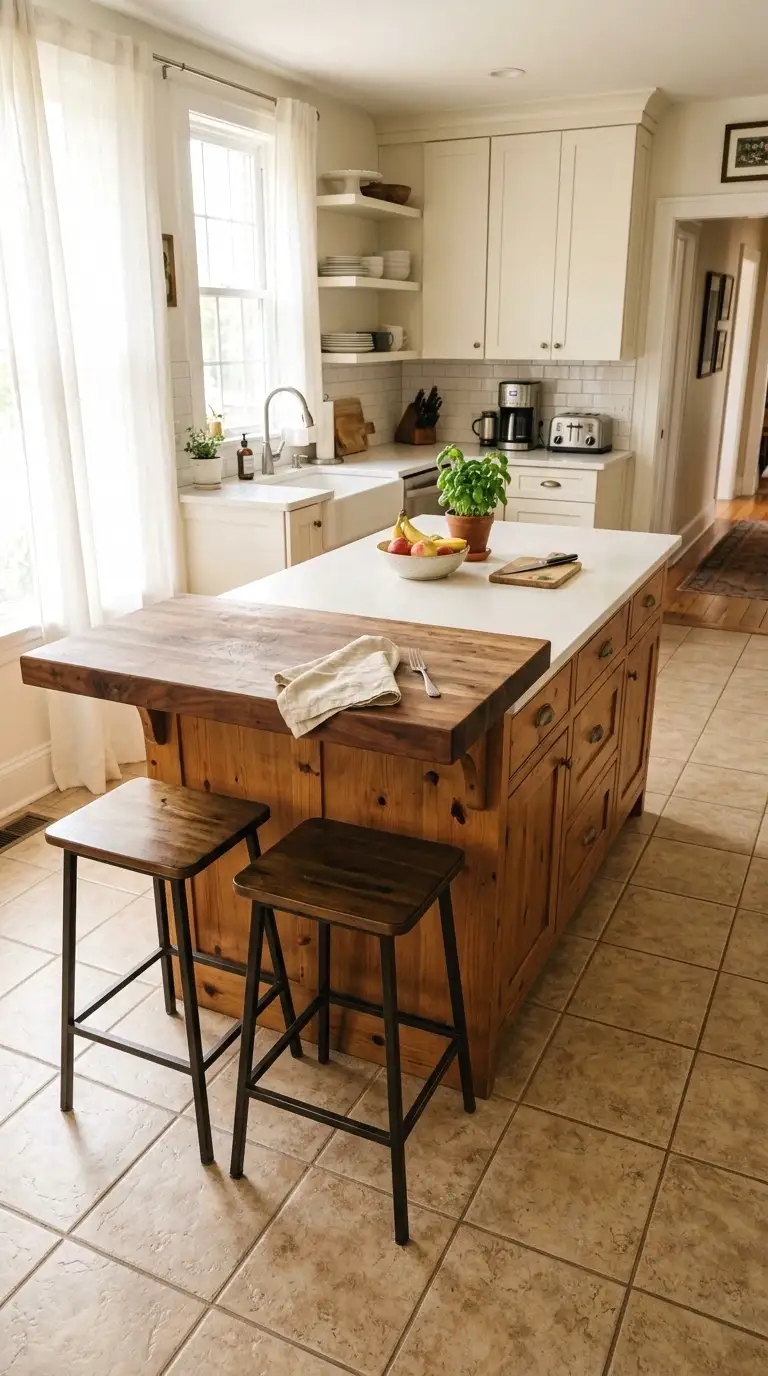
Some large islands have a flat counter all the way across with no separation between prep and eating. A raised bar section on the seating side creates a visual divider and gives diners a proper bar height without seeing the prep mess.
A raised platform built from a wood panel and mounted brackets runs $60 to $120 in materials. It sits on top of the existing counter and extends the overhang enough for proper seating. You’ll want a countertop material that matches or complements what’s already there. Butcher block is the most forgiving and affordable choice for a DIY version.
If your island doubles as your main eating surface, there are island and table combinations worth seeing before you commit to a raised bar height.
More Ideas:
19. Install Drawer Organizers in Every Island Drawer

The island usually ends up being the junk drawer zone of the kitchen because it has the most drawers and the least organization system. Proper drawer organizers fix this completely.
Bamboo or adjustable plastic dividers run $10 to $20 per drawer. A large island with four to six drawers costs $50 to $100 to outfit completely. The specific change is that you stop losing things, you stop opening the wrong drawer, and the whole kitchen runs faster because of it. That’s a real quality-of-life improvement for $60.
20. Use the Island Seating Side as a Chalkboard
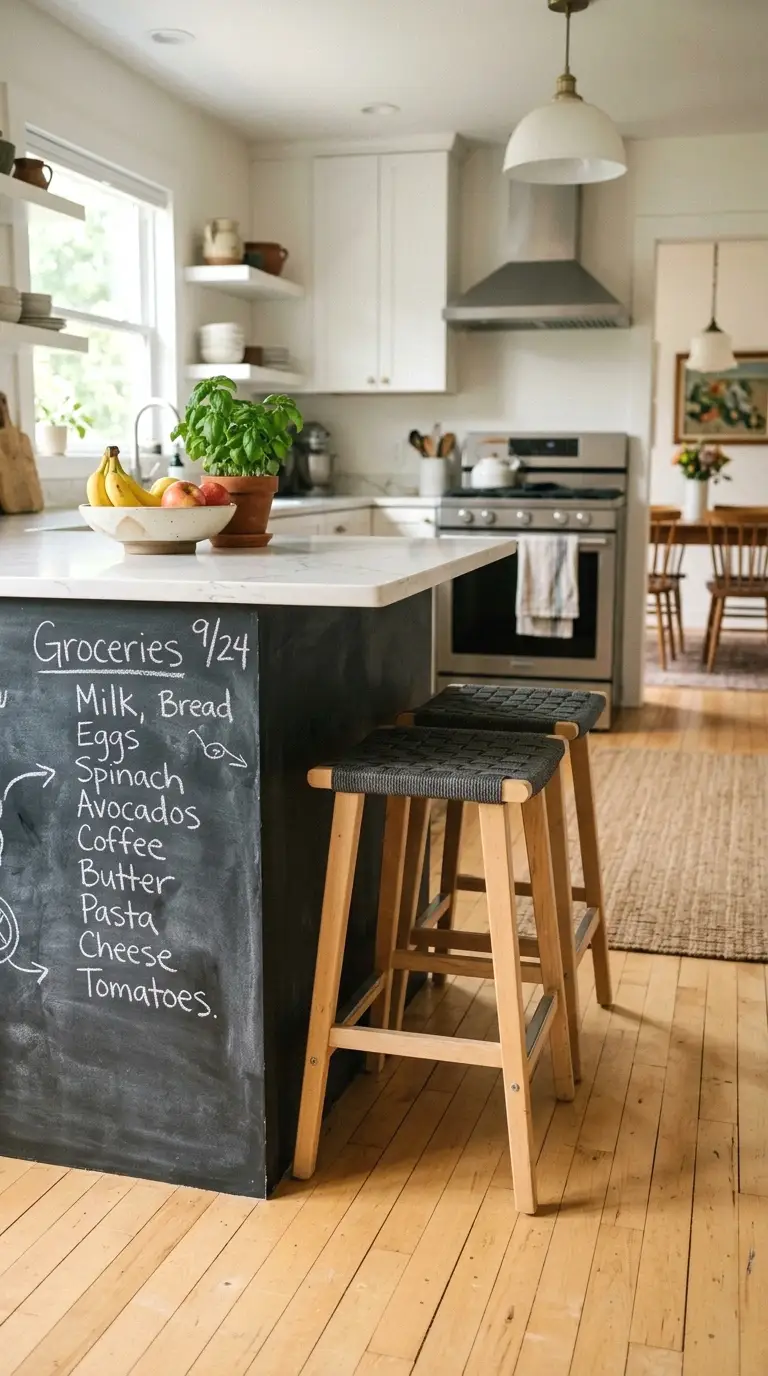
The seating-side panel of the island is basically a vertical surface that faces the dining area. Painting it with chalkboard paint turns it into a menu board, a grocery list spot, or a place for kids to draw while you cook.
Chalkboard paint runs $12 to $20 for a small can, which is more than enough for one island panel. You’ll want two coats and a light sanding between coats for a smooth finish. Season the surface by rubbing a piece of chalk over it and wiping it off before first use. It works surprisingly well and adds a casual, personal touch that no amount of decor can replicate.
21. Mount a Small Shelf Above the Island
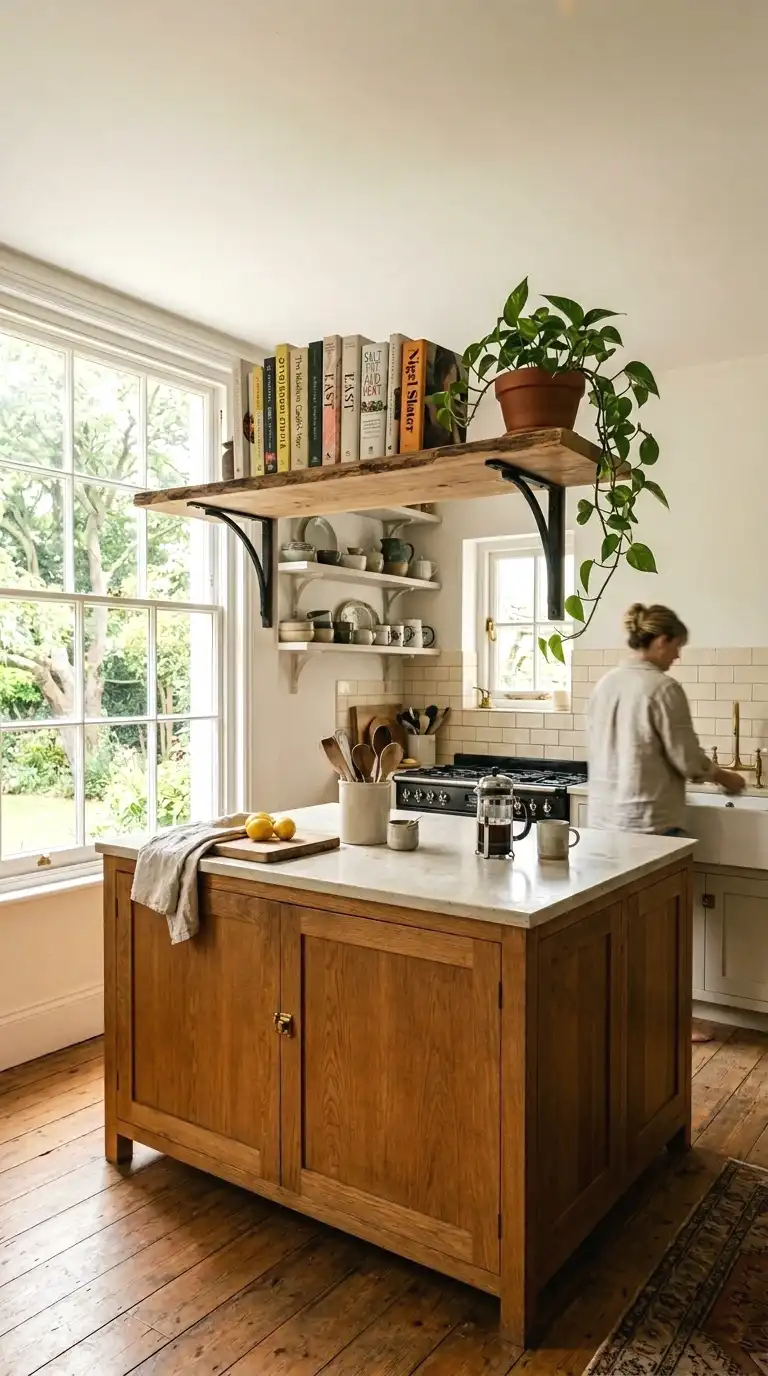
A single shelf mounted 18 to 24 inches above the island counter gives you display space without blocking sightlines or making the kitchen feel closed in. It works especially well in open-plan spaces where the island faces the living area.
Getting that shelf-to-room balance right is easier when you look at open plan layouts that balance both spaces without the island becoming a visual barrier.
A raw wood shelf on iron brackets costs $30 to $60 depending on length. Keep it under 36 inches so it doesn’t crowd the space visually. What you put on it matters: a few books, a plant, a bowl of fruit. The shelf is a frame for those things, not a storage solution. Keep it light and it adds to the room rather than competing with it.
22. Add Legs to the Island End for a Furniture Feel

Most stock kitchen islands look like cabinets because they are cabinets. Adding tapered wood legs to one end changes the whole profile and makes the island look like a piece of furniture that belongs in the room rather than something dropped in by a contractor.
Furniture legs in 4-inch height run $8 to $15 each. You’d need two for one end. Attach them to the base with a mounting plate and four screws. Paint or stain them to match the island. This small change at one end of the island shifts the entire visual from “generic kitchen” to “designed kitchen.” It costs under $40 and takes about 20 minutes.
More Ideas:
Final Thoughts on Large Kitchen Island Design
You’ve got 22 real directions to take your island, and the good news is you don’t have to do all of them. The ideas that make the biggest visual difference are paint, lighting, and seating. Get those three things right and the island starts to look like a feature of the kitchen rather than just a surface. Everything else builds from there.
Pick one thing this weekend. Just one. I’d start with paint or pendant lights if you want the most visible result for under $50. Make the change, live with it for a week, and then come back to this list for what’s next. That’s how a kitchen actually gets better, not all at once but steadily.
For anyone working through a tighter budget, there’s a solid breakdown of room-by-room upgrades that build on each other without requiring a full renovation.
If you want more ideas like this, homelypop.com covers every room and every budget. There’s a lot more where this came from.