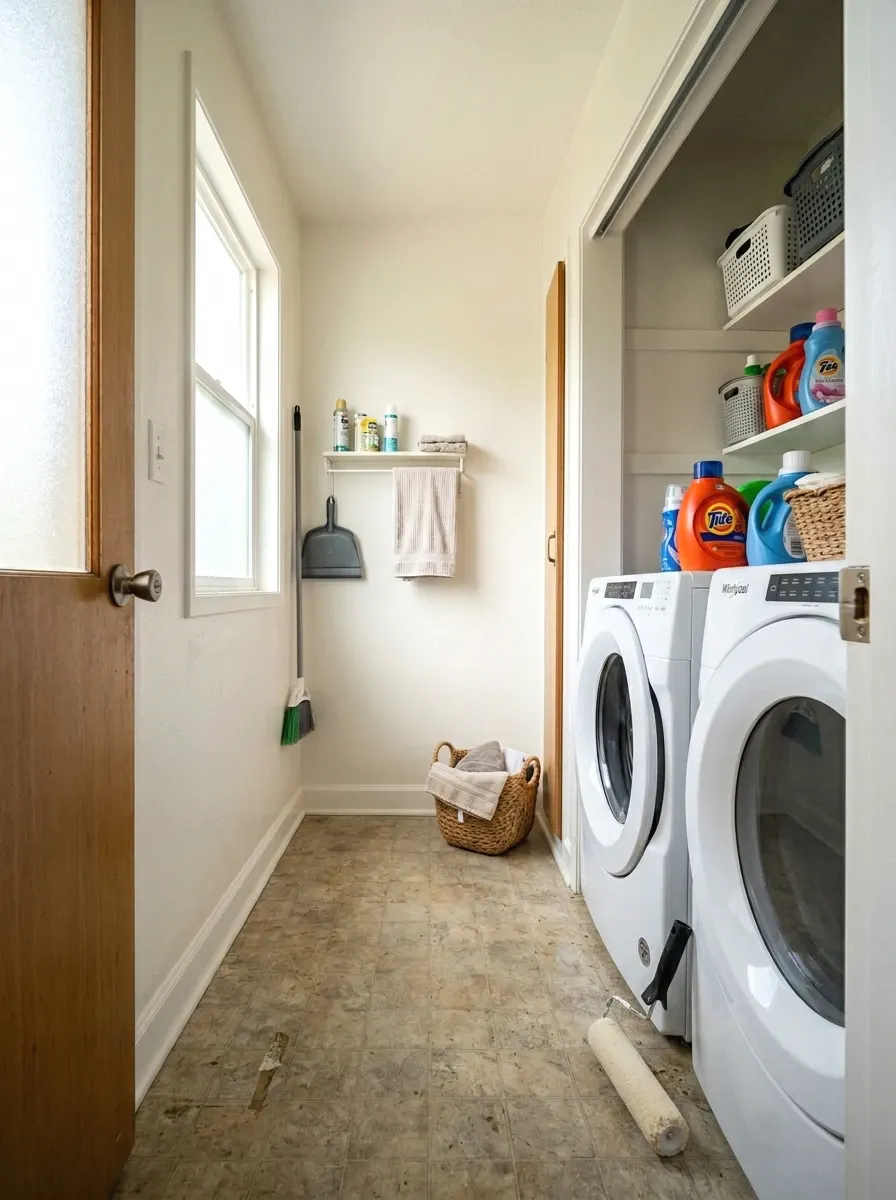
22 DIY Laundry Room Makeover Ideas That Actually Work on Any Budget
Your laundry room looks like an afterthought. Bare walls, a single flickering bulb, maybe a wobbly wire shelf that came with the house. You do laundry in there three times a week and you hate every second of it. You want to DIY Laundry Room Makeover
These 22 ideas were pulled from real homeowner discussions on Reddit, Houzz, and Pinterest boards people have been saving since 2024. Each one was picked because it solves a specific problem, not just looks good in photos. They cover storage, lighting, walls, and workflow. Budget ranges run from $10 DIY fixes to $250 full refreshes. Some are renter-safe. Some need a drill.
This list is for people spending $100 to $300 on the whole room, not just one shelf. It’s not for full renovations with custom cabinetry or tile work. If you’re working with a tight budget and a landlord who can’t know you painted, there’s still a lot here that works.
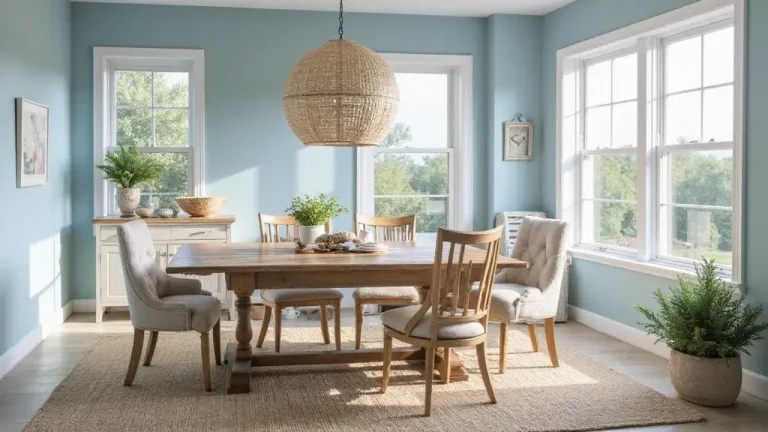
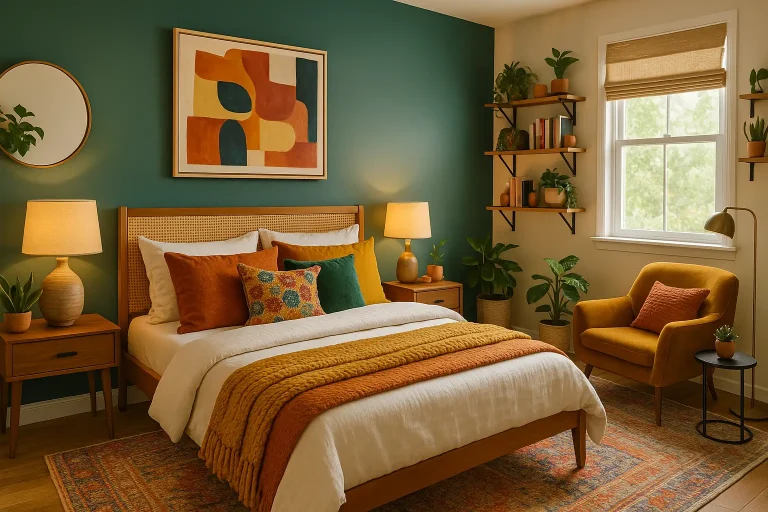
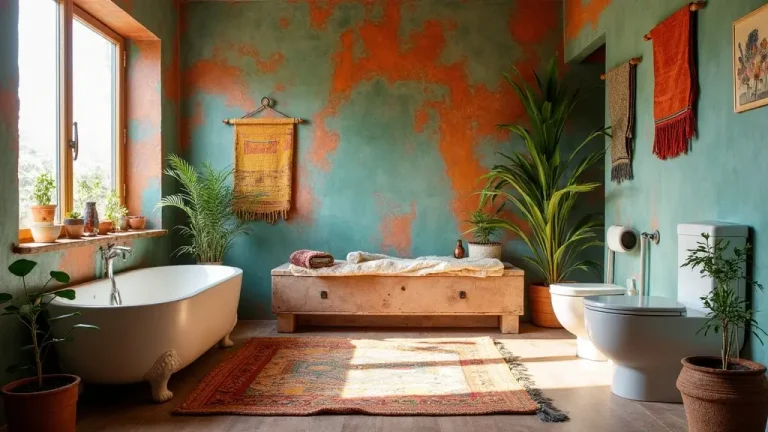
If you’re hunting for low-cost ways to refresh small spaces, there’s a lot of overlap between what works here and what works in other tight utility areas.
By the end, you’ll have a clear picture of which ideas fit your space, your budget, and your skill level.
What to Know Before You Start Your Laundry Room Makeover
- Most laundry rooms are 35 to 50 sq ft, so every inch of vertical space matters more than floor space.
- Measure your wall height before buying shelving. Standard open shelving sits best at 18 inches above the washer top.
- A full refresh with paint, lighting, and storage can run $150 to $250 if you shop discount and secondhand.
- Most people forget to account for the washer and dryer depth (usually 27 to 30 inches) when planning walkway space.
- Skipping a primer coat on glossy walls is one of the most common mistakes. It costs you $8 and saves a full repaint.
- Always turn off the circuit before swapping a light fixture. Takes two minutes, not optional.
- Peel-and-stick products last longer when applied to a clean, dry surface, especially in humid rooms. Wipe down with rubbing alcohol first.
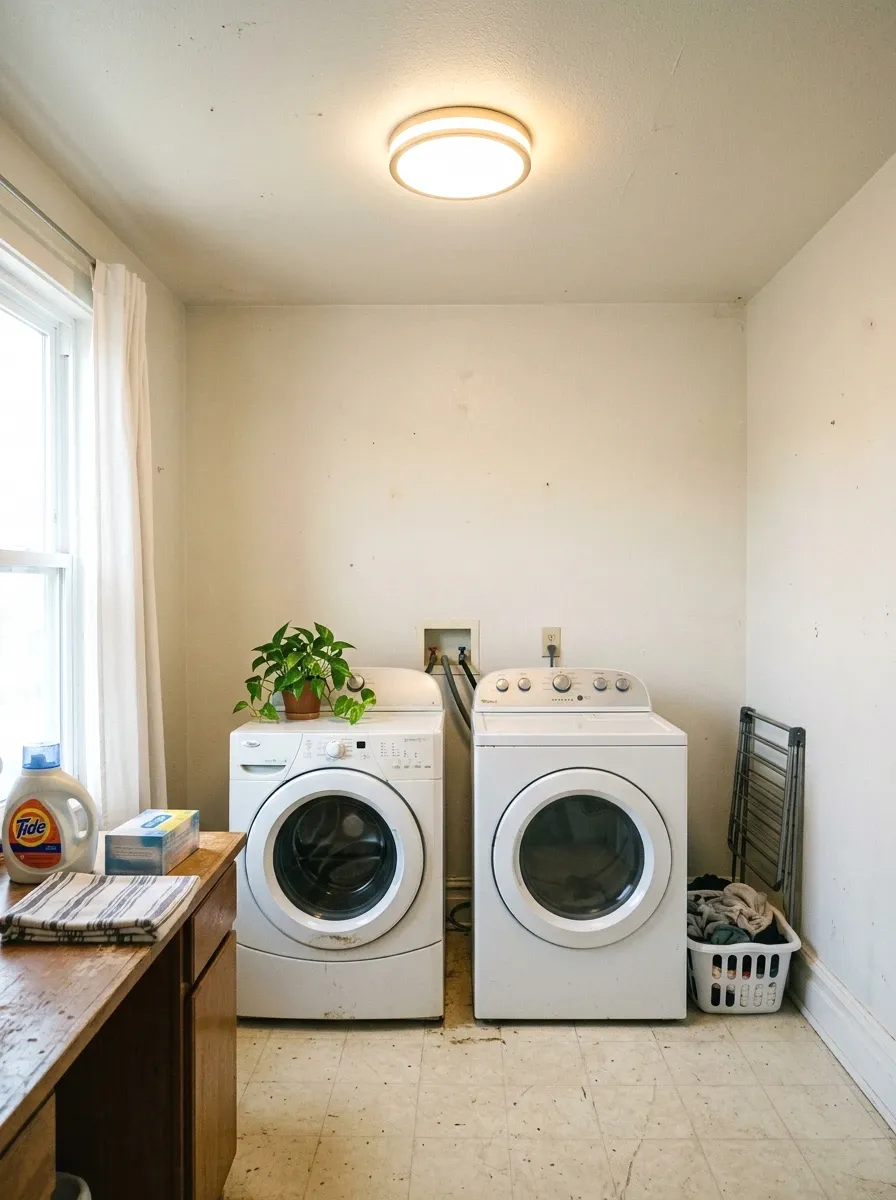
1. Paint the Walls a Warm White or Soft Sage
The single cheapest thing you can do to a laundry room is paint it. Most laundry rooms default to builder white, which reads more “hospital hallway” than “room you want to be in.” A warm white like Benjamin Moore White Dove or a soft sage green changes the whole feel without making a small room feel smaller.
A gallon of paint runs $35 to $55. You only need one gallon for most laundry rooms under 50 sq ft. Go with a satin or semi-gloss finish because laundry rooms get humidity and splashes. Matte looks nice in photos but bubbles and peels fast in damp spaces. I repainted my own laundry nook in sage and the room went from a place I avoided to a place I didn’t hate being. That alone was worth the Sunday afternoon.
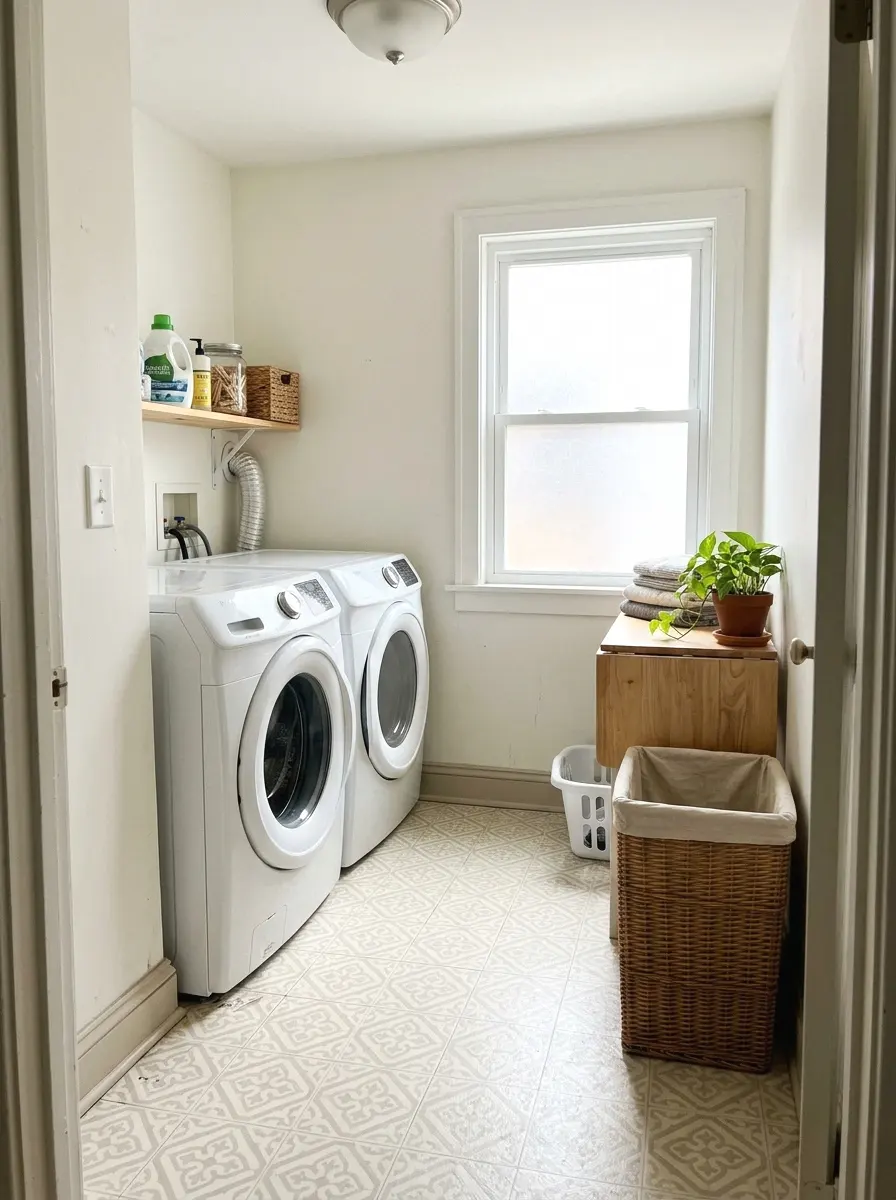
2. Add Open Shelving Above the Washer and Dryer
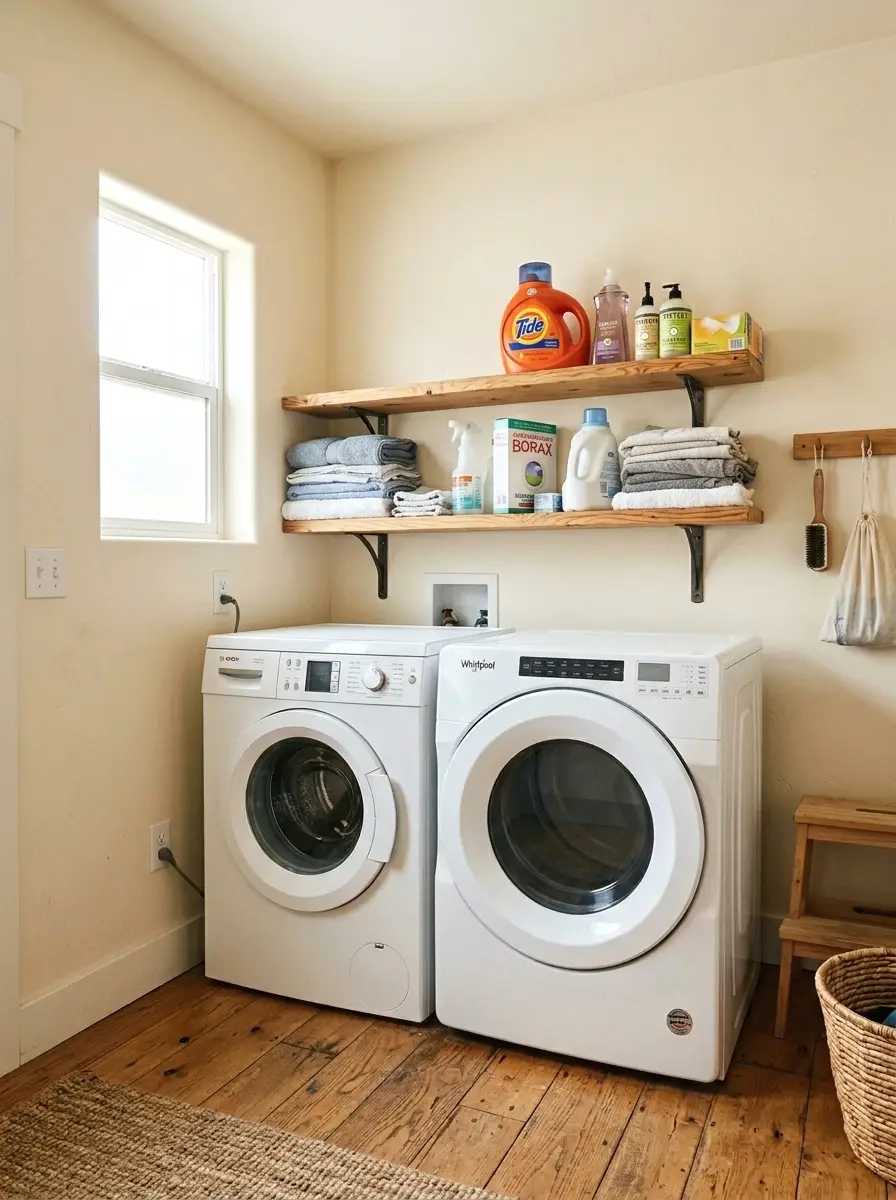
Here’s one of the most practical moves you can make. Floating shelves above the machines give you somewhere to put detergent, dryer sheets, and all the random stuff that ends up on the floor. A two-shelf setup using 10-inch deep brackets and pine boards costs about $40 to $60 at a hardware store.
Mount the first shelf at 18 to 20 inches above the washer lid so you can still open it without hitting anything. Space the second shelf 12 to 14 inches above the first. Pine boards can be sanded and sealed or stained in an afternoon. If you want a cleaner look, sand, prime, and paint them to match the wall. The result looks intentional instead of improvised.
For more ways to make open shelving above washer and dryer setups look polished, there are plenty of approaches worth considering depending on your wall depth and bracket style.
More Ideas:

3. Swap the Light Fixture for a Flush Mount
Bad lighting makes every room look worse. Most builder laundry rooms have a single ceiling light that either flickers, buzzes, or gives off that yellow “interrogation room” glow. A new flush mount fixture from Amazon or Home Depot runs $25 to $60 and takes about 20 minutes to swap out if you’re comfortable turning off the circuit breaker.
Look for a fixture rated at least 1600 lumens. Daylight bulbs at 5000K color temperature make a surprising difference. Warm white (2700K) is better for living rooms but in a utility space you actually want to see what you’re doing. (Took me ages to figure this out.) The room feels cleaner and bigger instantly, even before anything else changes.
4. Install a Pegboard for Hanging Storage
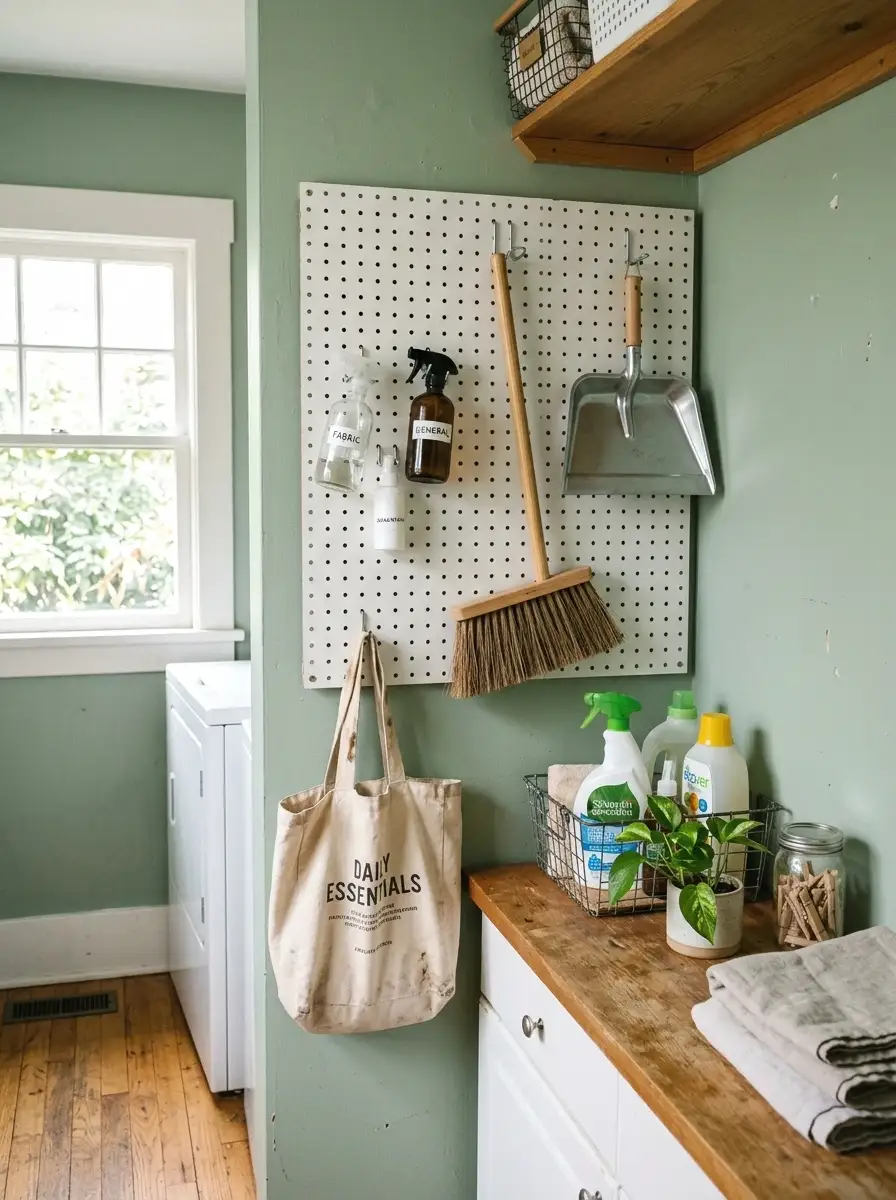
Pegboard is one of the most underrated storage solutions for small rooms. A 2×4 foot sheet of pegboard costs about $15 and a basic hook kit adds another $10. Mount it to the wall with 1-inch standoff spacers so the hooks can actually grab, and you’ve got a completely customizable storage wall.
Hang a broom, dustpan, a small shelf for spray bottles, or hooks for reusable bags. The whole system is renter-adjustable too since you can patch a few screw holes. I was skeptical about this one but after putting one up in a narrow utility area, it genuinely solved the “where does this stuff go” problem that had been bugging me for months.
5. Use a Rolling Cart Between or Beside the Machines
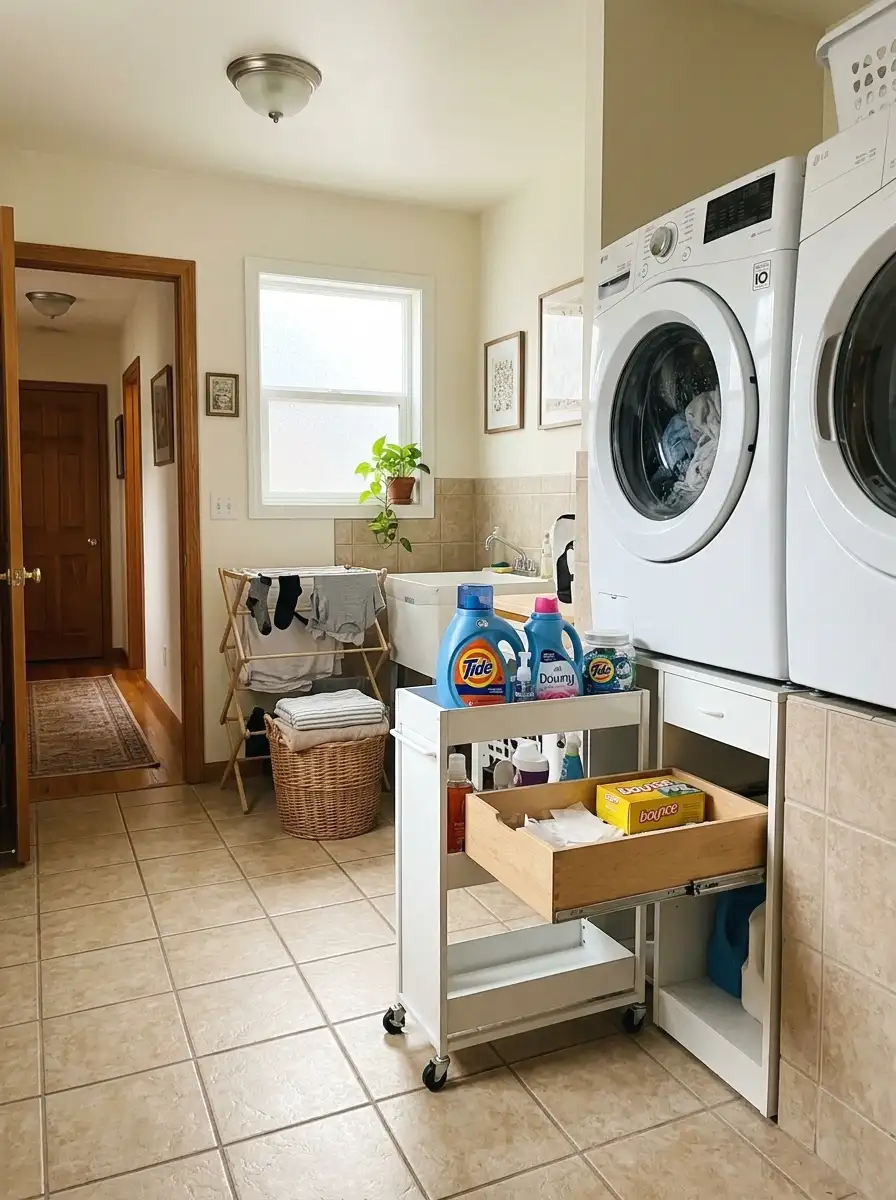
If there’s a gap between your washer and dryer or beside them along the wall, a slim rolling cart fits perfectly in spaces as narrow as 9 inches. These carts typically run $30 to $50 and come with three to five pull-out shelves. They’re made exactly for laundry spaces.
Store dryer sheets, stain remover sticks, mesh laundry bags, and coins in the pull-out trays. The cart slides out when you need it and tucks back in so it’s not in the way. This one especially works in stackable unit setups where you lose the space next to the machines. Check IKEA, Amazon, or even Target before buying. Prices vary a lot for essentially the same product.
There are plenty of storage solutions for narrow laundry areas that pair well with a slim cart if your floor plan is especially tight.
6. Hang Curtain Panels to Hide Open Storage
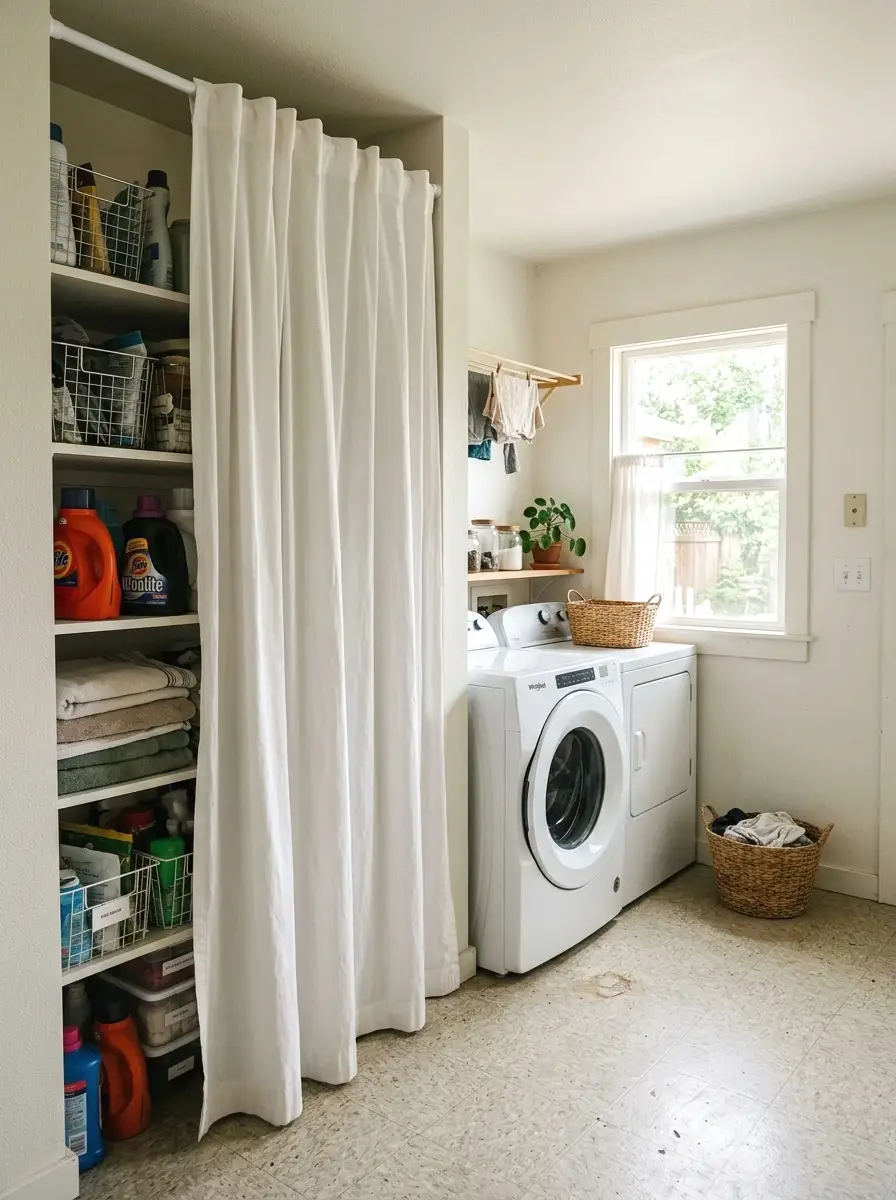
Open shelves and wire racks are practical but they look messy fast. A simple curtain rod hung at ceiling height with a panel that drops to the floor hides all of it. You see clean fabric, not a jumble of bottles and bins. Tension rods work for small spans and cost about $8. Curtain panels run $15 to $30 for a basic set.
Pick a fabric that won’t hold humidity. Polyester and cotton-poly blends wash easily and don’t go limp in a damp room. Linen looks nice but wrinkles a lot in humid spaces. If your room has open shelving under a counter or in a cubby, this hack turns it from cluttered to clean in about ten minutes.
More Ideas:
7. Add a Counter Over a Front-Load Washer and Dryer
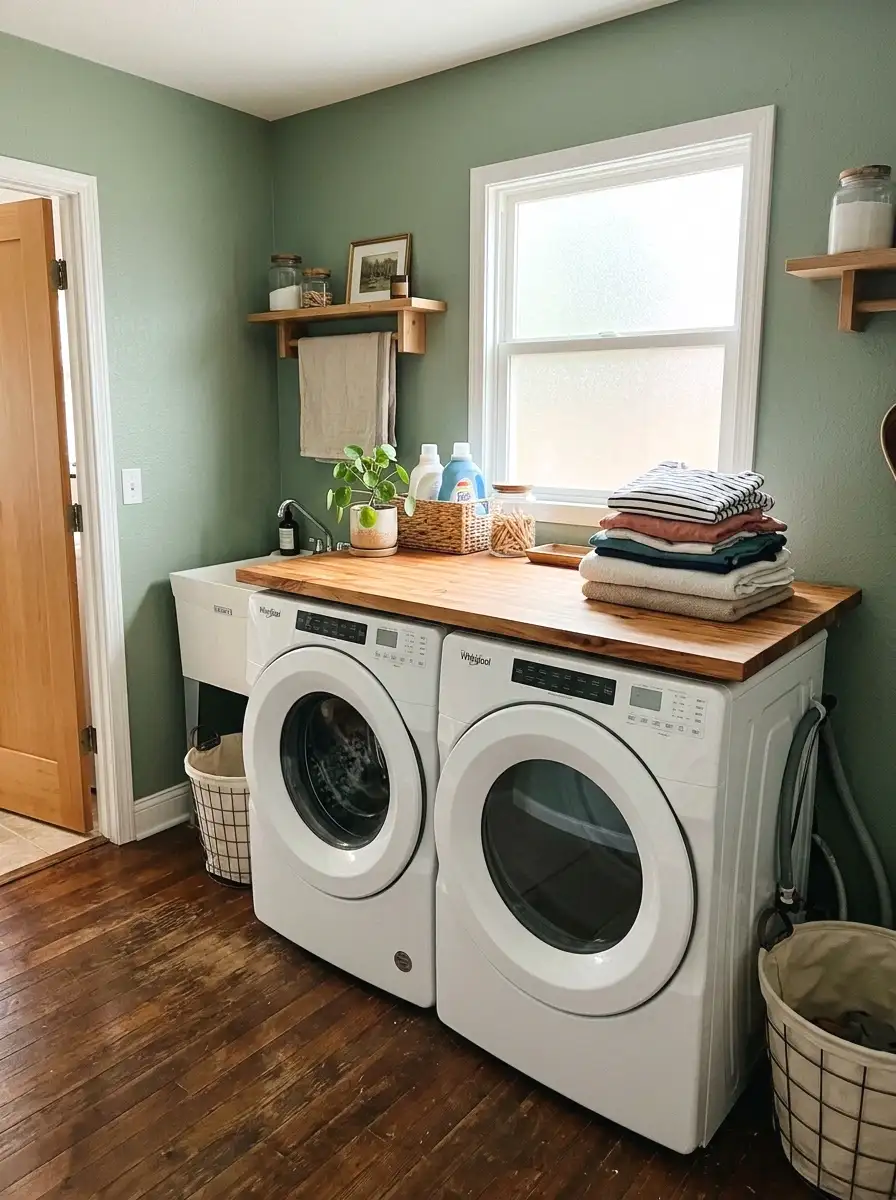
If you have front-load machines, the top of them is essentially a shelf waiting to happen. A piece of butcher block cut to 54 by 24 inches fits perfectly over a standard side-by-side pair. IKEA sells butcher block countertop pieces for around $80 to $100 that you can cut down yourself with a circular saw.
Sand the cut edges, seal with cutting board oil or polyurethane, and set it in place. No attachment needed if it’s sitting on the machine tops. You gain a full folding surface and a clean place to set baskets. This is one of those changes that looks expensive but isn’t. People genuinely don’t realize it’s just a slab of wood.
If you’re drawn to fold-down surfaces that save floor space, the same principle applies in other rooms where every square foot counts.
8. Mount a Fold-Down Wall Ironing Board
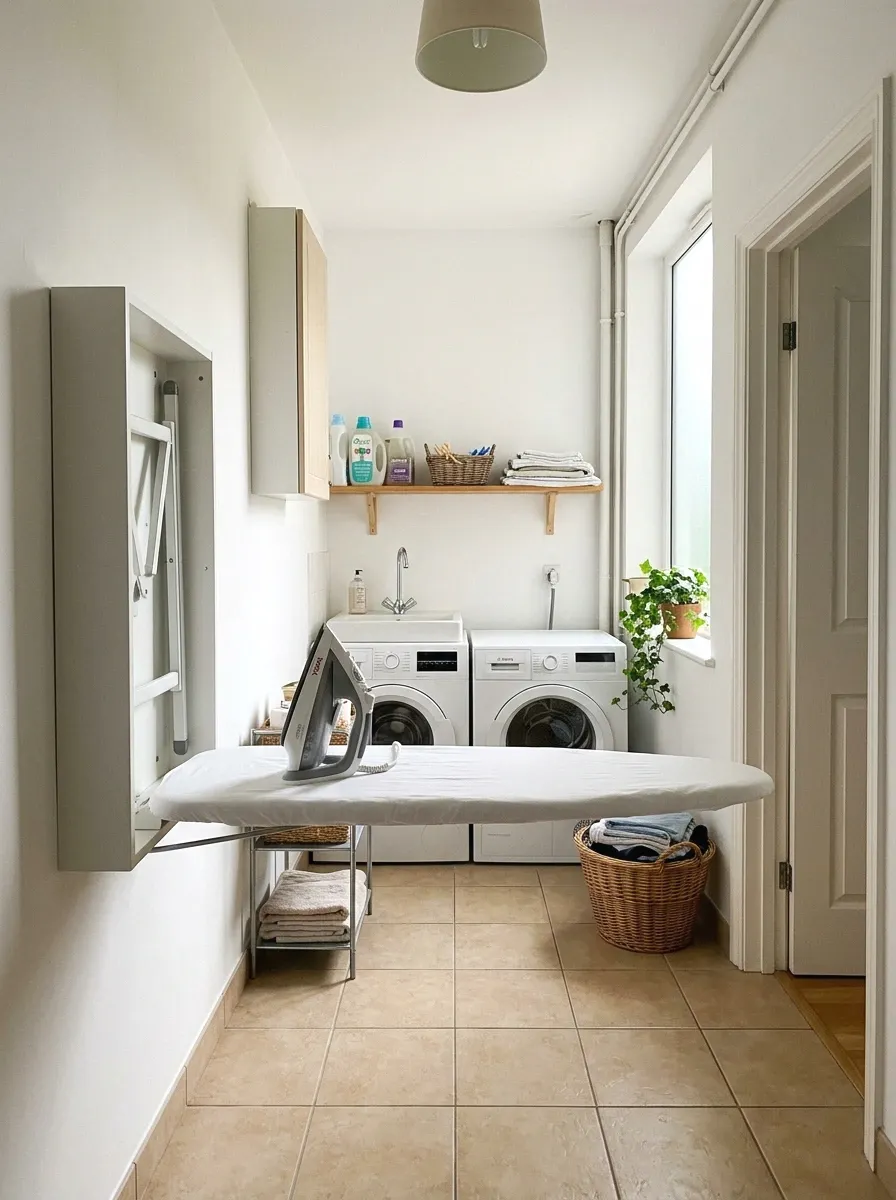
Wall-mounted fold-down ironing boards have been popular in European home design for years and they’re finally everywhere in the US. They fold flat against the wall and open when needed. Models run $60 to $120 and mount with four screws into studs.
The ironing board folds down to about 54 inches long and 14 inches wide when open. Folded up, it takes maybe 5 inches off the wall. Most models include storage for the iron too. In a small laundry room where a full-size ironing board takes up half the floor space, this trades that floor footprint for a few inches of wall. The math works out heavily in your favor.
9. Apply Peel-and-Stick Wallpaper as an Accent Wall
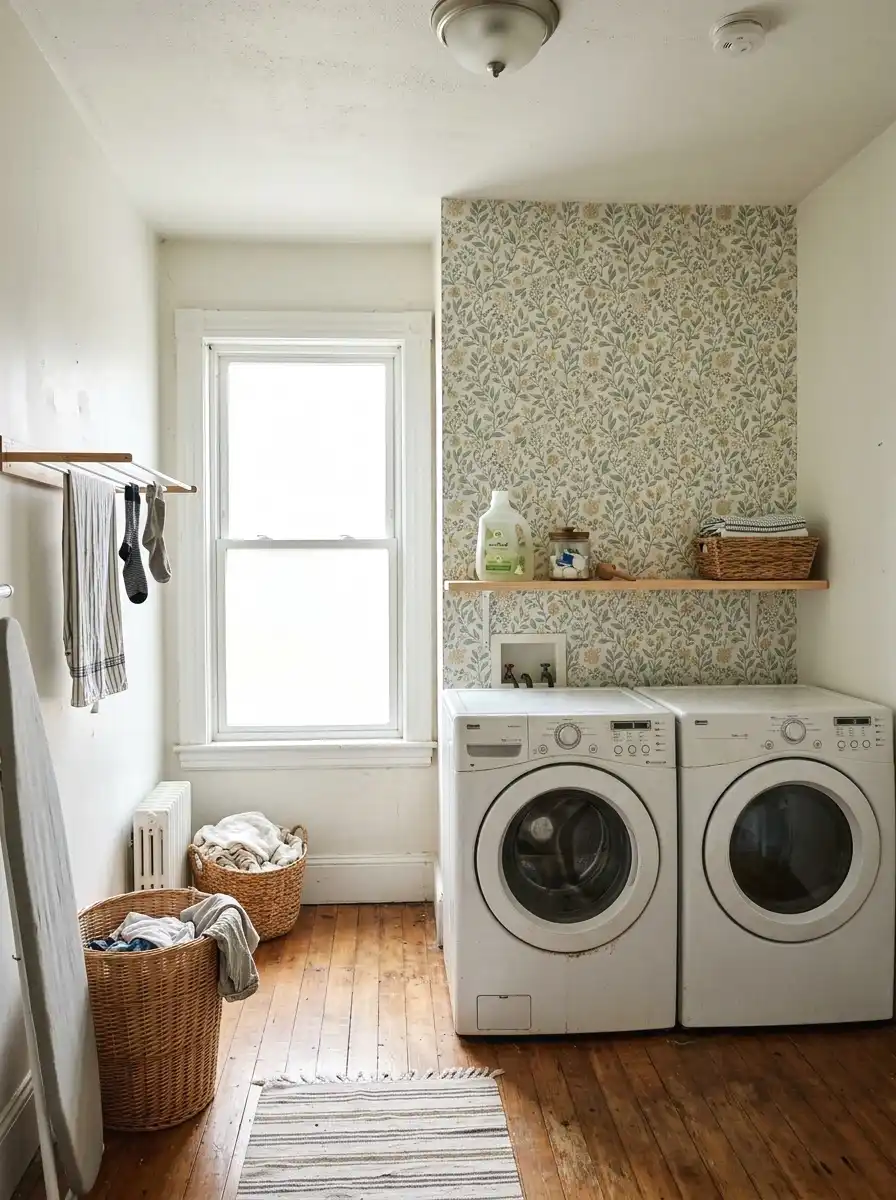
One wall of pattern changes the whole energy of a room. Peel-and-stick wallpaper in a small-scale print, like a classic tile pattern, a simple stripe, or a botanical print, turns a utility wall into something you’d actually post on Instagram. It runs about $30 to $60 for a single wall depending on the size.
Clean the wall thoroughly before applying. Wipe it down with rubbing alcohol, let it dry fully, and apply panels from top to bottom matching the pattern as you go. In a laundry room, the wall behind the machines or above a counter is the best accent spot since it’s visible but not in the way. Peel-and-stick removes cleanly from most painted surfaces, so it’s safe for renters too.
If you want to explore more peel-and-stick patterns for utility rooms before committing to one, it helps to see how different prints read in a real laundry context.
10. Replace Wire Shelving with Wood and Bracket Shelves

Wire closet shelving is the universal symbol of “nobody tried here.” It works but it looks terrible and small items fall through the gaps constantly. Swapping it out for a wood board on simple brackets takes about an hour and costs $30 to $50 per shelf depending on size.
Get a 1×10 pine board from any hardware store. Cut it to length (or ask the store to cut it for you, usually free). Sand, paint or stain, then mount iron shelf brackets every 16 inches for stability. The result holds more weight, looks cleaner, and keeps everything actually on the shelf. This is probably the most satisfying single swap on this list.
For anyone weighing cabinet and shelf combos worth trying alongside open boards, there are setups that blend both for a more finished look.
More Ideas:
11. Install Under-Shelf Basket Hooks
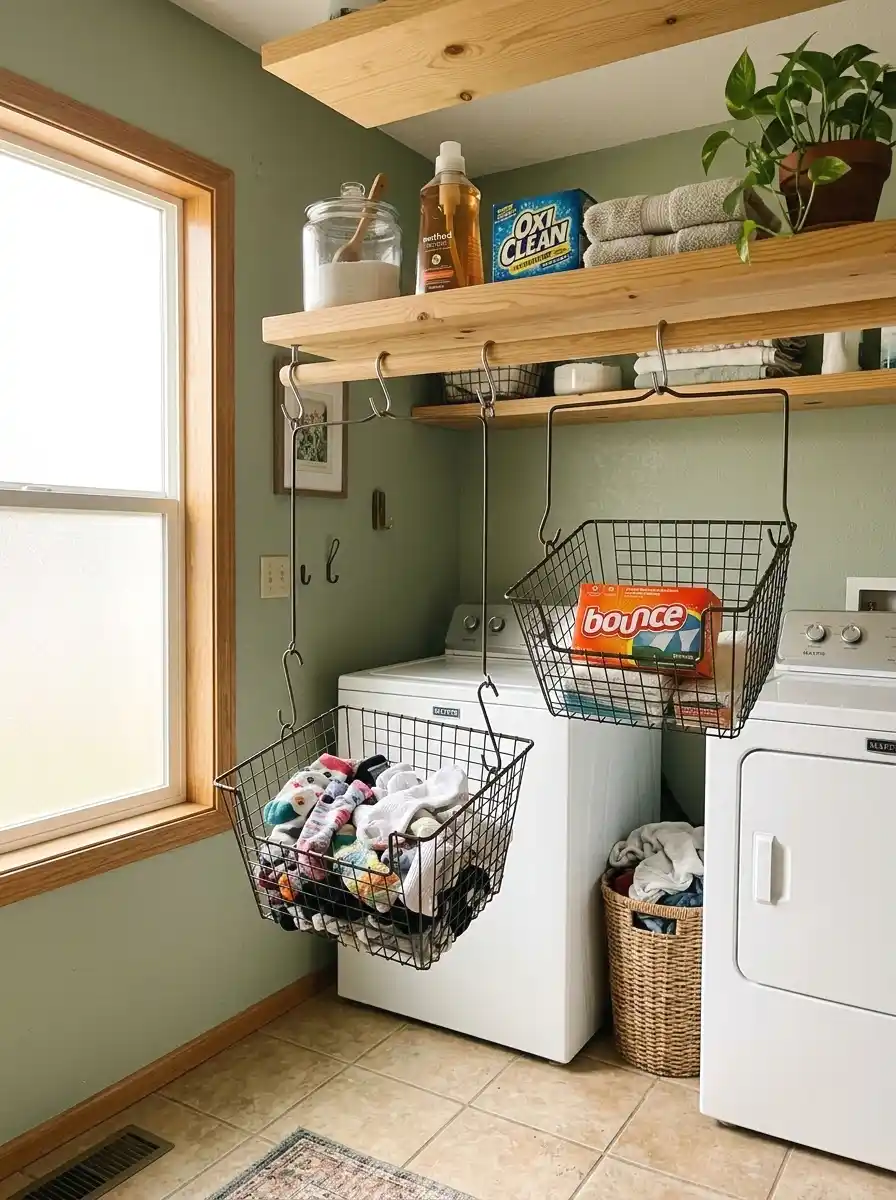
This one costs almost nothing. Wire baskets with S-hooks hang from the bottom of existing shelves and add an extra layer of storage without adding any new mounting hardware. A set of two to three baskets runs $15 to $25 at IKEA or Amazon.
Use them for single socks waiting for a match, dryer sheets, small spray bottles, or a scissors and a seam ripper (yes, you need those in there). The baskets are fully visible so you always know what’s in them. They swing slightly when you grab something but that’s honestly fine. It adds about 30 extra cubic inches of usable storage per hook, which in a small room actually matters.
12. Add a Magnetic Chore Chart to the Dryer Door
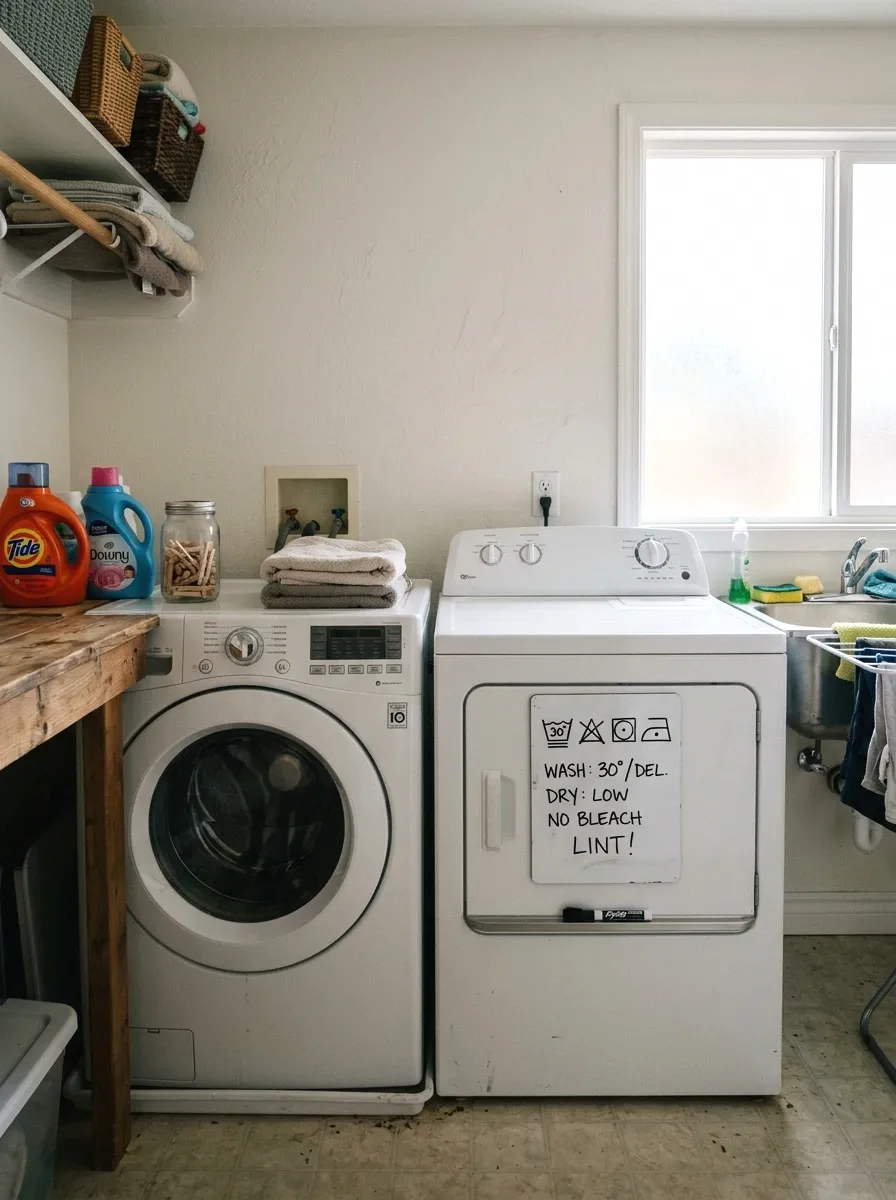
So this sounds small but it changes how the room functions day to day. A magnetic dry-erase board sticks right to the front of most dryers without any drilling. Sizes run from 8×11 to 11×14 and cost $8 to $20.
Write the washing symbols cheat sheet, a weekly laundry rotation schedule, or a running list of stains to treat. It keeps everyone in the house from running things through the dryer that should air dry. One ruined sweater costs more than the board. The front of the dryer is prime unused real estate that most people completely ignore.
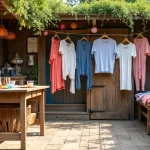
13. Hang a Retractable Clothesline
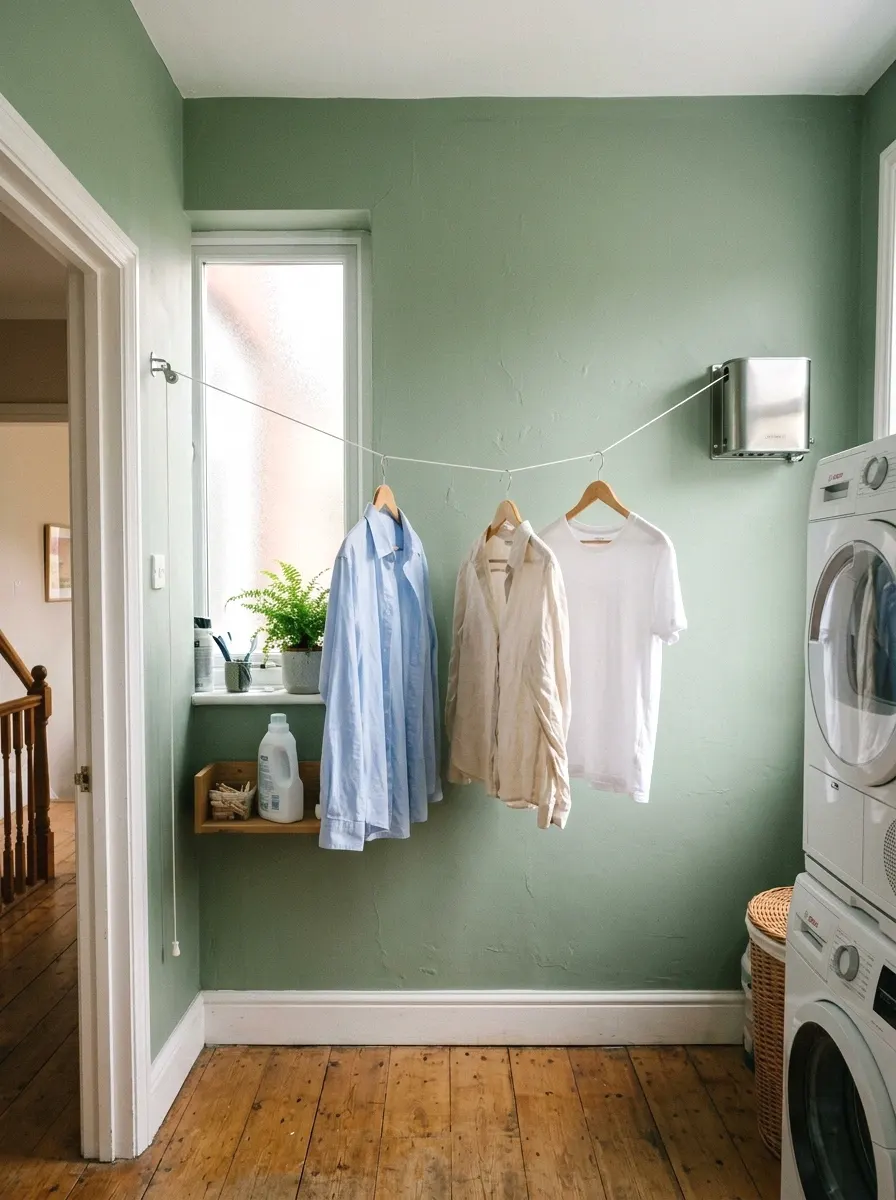
A retractable clothesline mounts to the wall and extends 10 to 15 feet when you need it, then retracts into a small housing when you don’t. Models run $20 to $50 depending on the tension capacity. They mount with two small screws on opposite walls or between two anchor points.
This is especially useful for delicates and workout clothes that can’t go in the dryer. A 12-foot retractable line holds about eight to ten shirts or a full set of towels. Fully retracted, the housing is about 3 by 5 inches. You genuinely forget it’s there when it’s not in use. Way better than a freestanding drying rack that takes up floor space every single day.
If you air-dry frequently, looking at other hanging and drying setup ideas can help you decide whether a retractable line or a fixed rod works better for your habits.
14. Use Matching Labeled Bins for Sorted Laundry
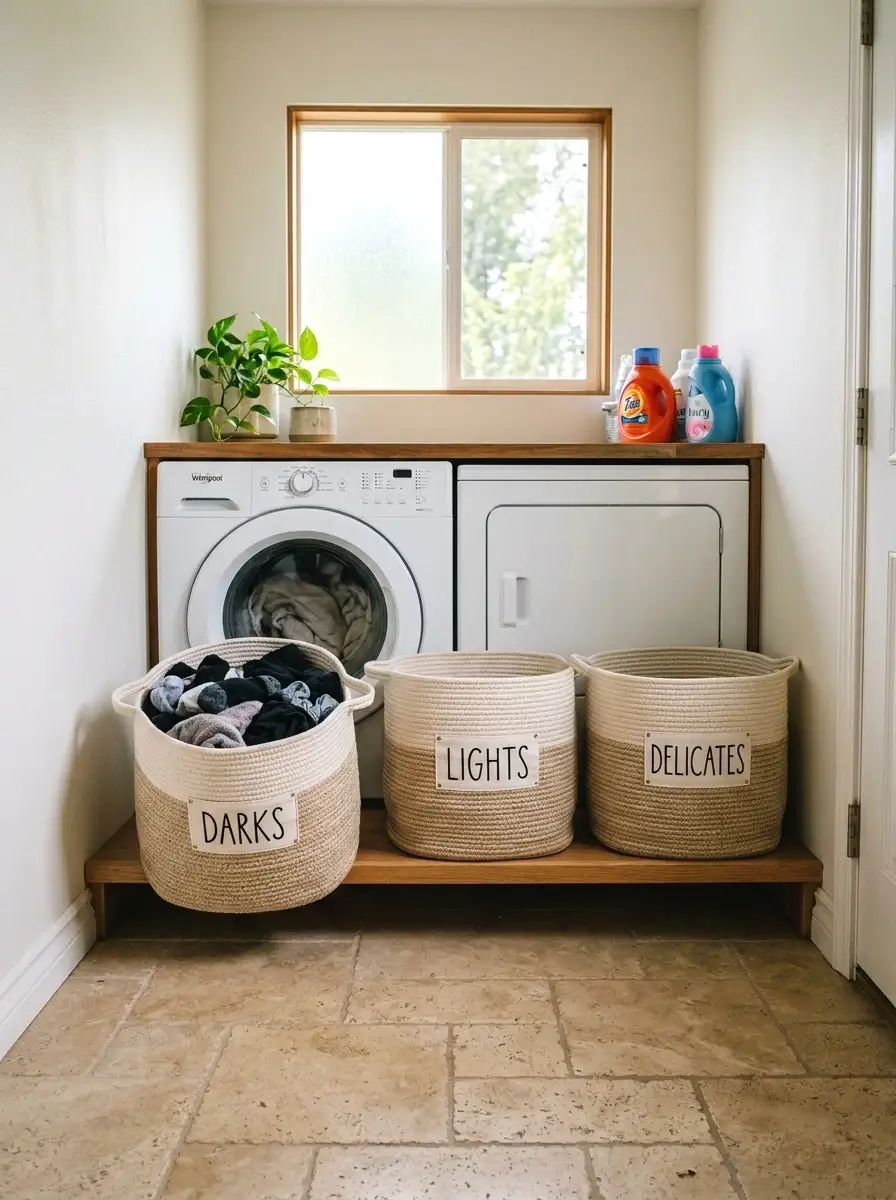
One labeled bin per category takes the thinking out of sorting. The bins themselves aren’t the magic. The labels are. A set of three woven bins on a lower shelf or in a cubby, labeled “Darks,” “Lights,” and “Delicates,” means laundry gets sorted at the hamper instead of on the floor.
Woven poly or cotton bins run $10 to $20 each. A label maker or printed tag holder completes the look for another $15. The matching part matters more than you’d think. Three bins in the same material and color look intentional. Three different random baskets look like a storage unit. Same product, completely different read.
Pairing labeled bins with a few other organized laundry room storage on a budget strategies can take the whole sorting system from functional to genuinely effortless.
More Ideas:
15. Mount a Broom and Mop Holder on the Back of the Door
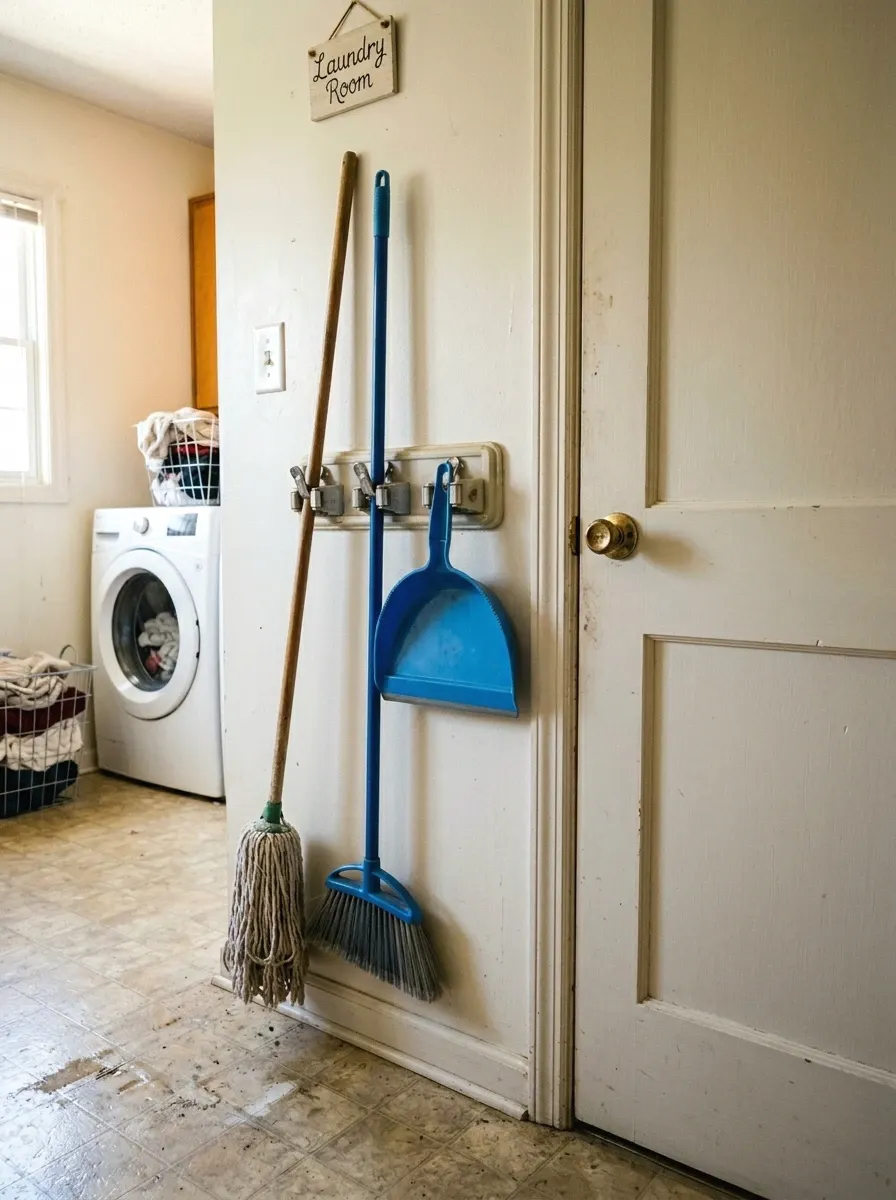
The back of the laundry room door is almost always empty. A wall-mounted broom holder, the kind with spring-clip grips, holds four to six items vertically and mounts with two screws. They run $15 to $25 and take about five minutes to install.
Hang the broom, mop, dust brush, and a spare lint roller. Everything stays vertical and off the floor. In a room where floor space is critical, getting four cleaning tools off the ground without adding any new furniture is a real win. You can also use adhesive Command strip versions if you need a no-drill option, though those hold lighter items only.
16. Add a Small Potted Plant or Two
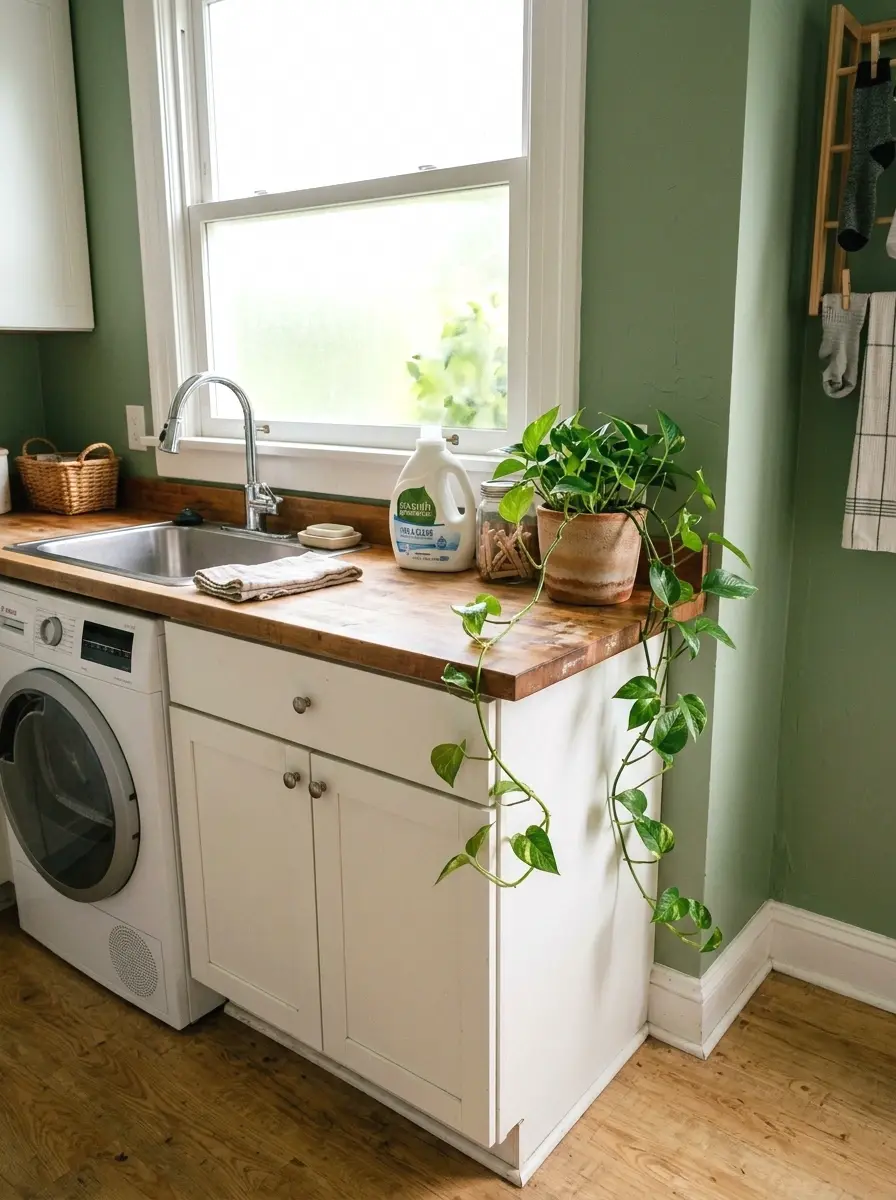
Plants in utility rooms feel weird until they don’t. A pothos or snake plant in a small pot on the counter or on a shelf adds something soft and alive to a room that’s usually all hard surfaces and machines. Pothos thrive in indirect light and low humidity fluctuations.
A 4-inch pothos from a garden center runs $5 to $10. A clean ceramic pot adds another $8. That’s it. The goal isn’t to turn the room into a greenhouse. One plant in a nice pot adds enough warmth to break up the visual monotony of detergent bottles and machine faces. It sounds small. The difference is noticeable.
17. Lay Peel-and-Stick Floor Tiles
If your laundry room has old vinyl, cracked tile, or just plain concrete, peel-and-stick floor tiles are a real option. They run $1 to $2.50 per square foot and a small laundry room (say, 40 sq ft) costs $40 to $100 for materials. A standard 10×10 tile installs in seconds without adhesive or grout.
Start from the center of the room and work outward for even edge cuts on all sides. Clean the subfloor thoroughly first, especially if there’s any wax or residue. The tiles are technically temporary and can be removed, though adhesion improves on clean flat surfaces. The effect on the overall room look is immediate. New floor = whole new room, no joke.
18. Hang Artwork or a Framed Print
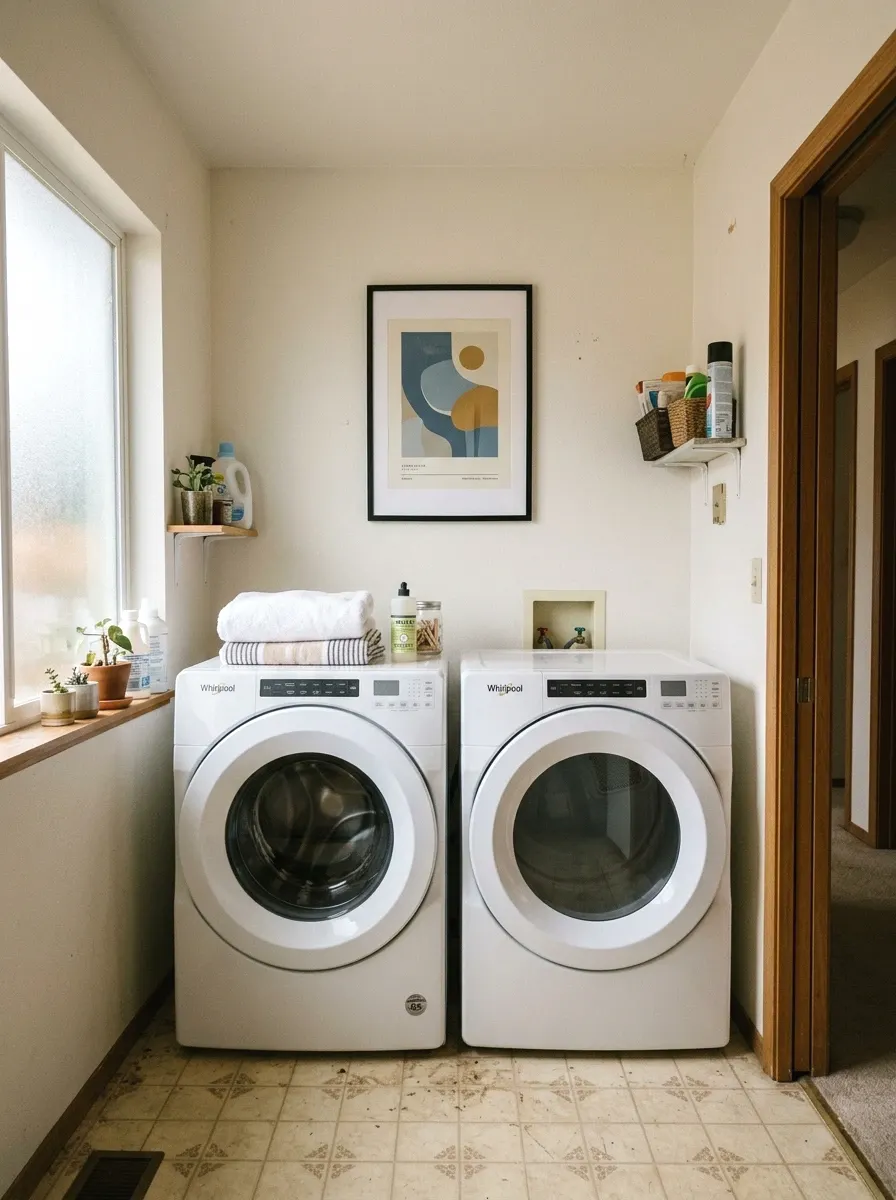
Nobody frames art in a laundry room, which is exactly why you should. A single framed print, something funny or graphic, hung above the machines or on the wall across from the door, changes how the room reads. It signals that someone actually cared about this space.
A print from Society6, Etsy, or even a free downloadable artwork runs $5 to $30. A simple frame from IKEA adds $10 to $20. The whole thing comes in under $50. Size-wise, an 18×24 or 16×20 print hits best in a small space. One good print beats three small ones scattered around. Keep it simple, keep it well-framed.
More Ideas:
19. Install a Ceiling-Mounted Drying Rack
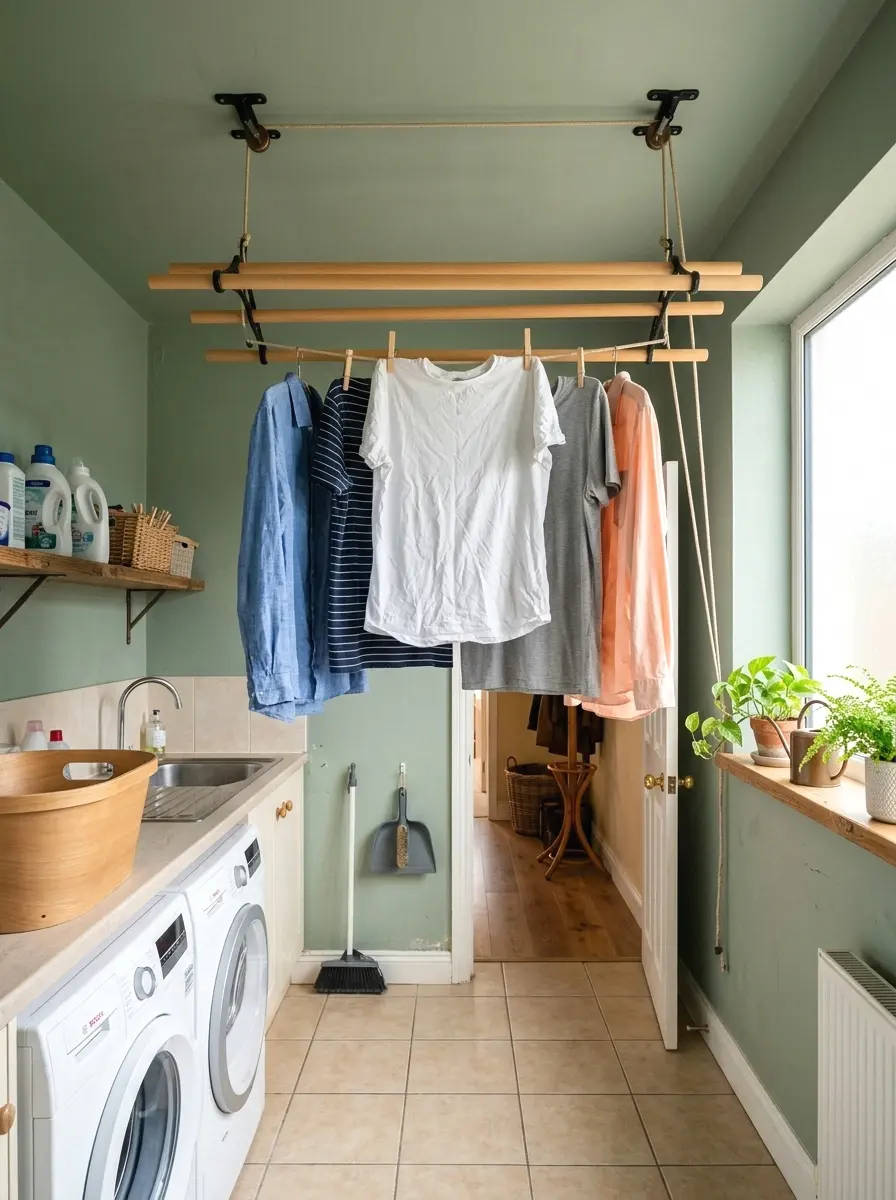
This is the upgrade version of the retractable clothesline. A ceiling-mounted pulley drying rack hangs at ceiling height when not in use and lowers down when you need it. Traditional in UK homes for over 150 years, they’re showing up in American laundry rooms more and more.
Models run $80 to $150 and mount into ceiling joists. When raised, the rack sits flush with the ceiling and you barely notice it. Lowered, it holds 15 to 20 kilograms of wet laundry. For anyone who air-dries regularly, it’s one of the most practical investments on this list. It removes the drying rack entirely from floor and wall space.
20. Add a Stainless Steel Utility Sink
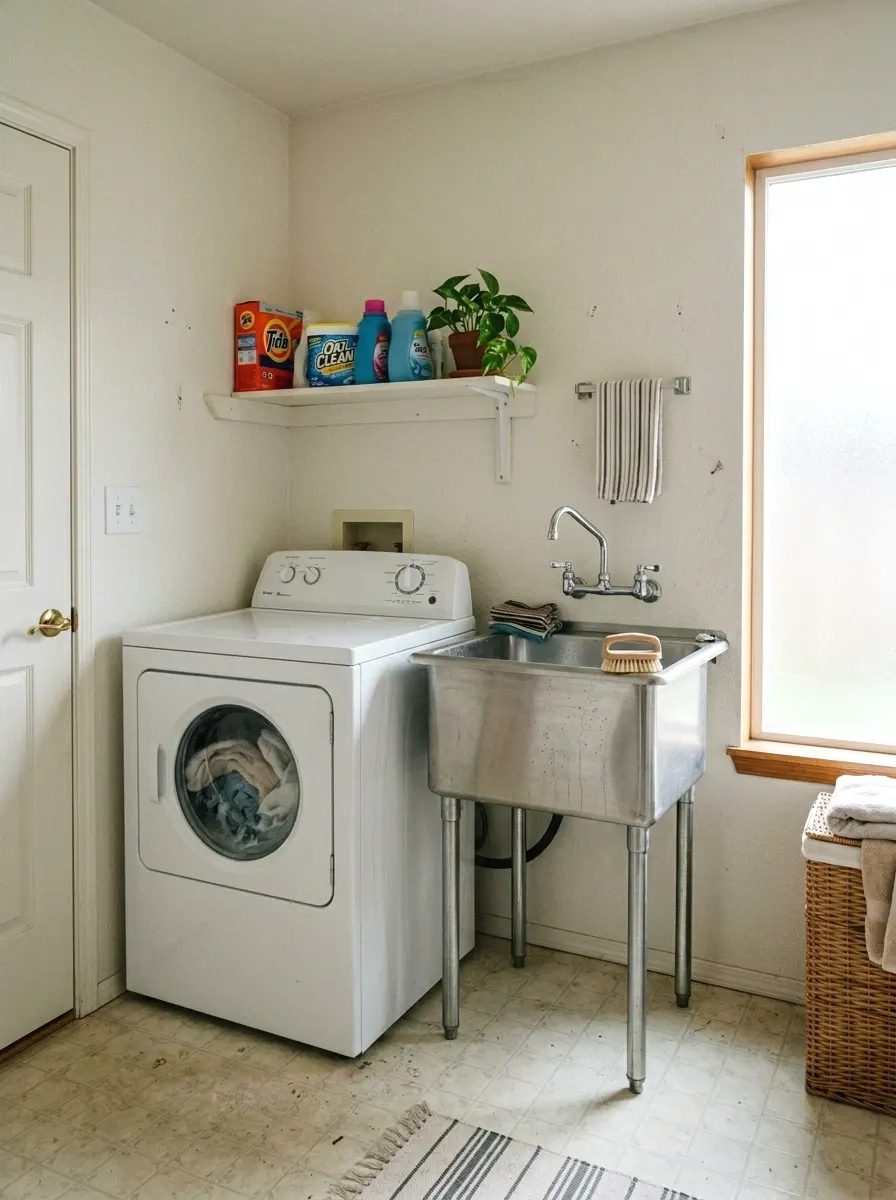
This one’s on the higher end at $150 to $250 for the sink plus basic plumbing supplies, but a utility sink in a laundry room changes what the room can do. Hand-washing, soaking, pre-treating stains, cleaning shoes. Standard mop sinks and utility sinks mount to the wall or stand on their own legs.
A freestanding stainless steel utility sink sits on four legs and connects to existing plumbing. If you already have a cold water line close by, the connection is straightforward for someone comfortable with basic plumbing. If plumbing work requires a call to someone, budget separately. The sink itself is just a box. The value is in what you stop doing in the kitchen sink.
21. Use Clear Containers for Detergent and Supplies
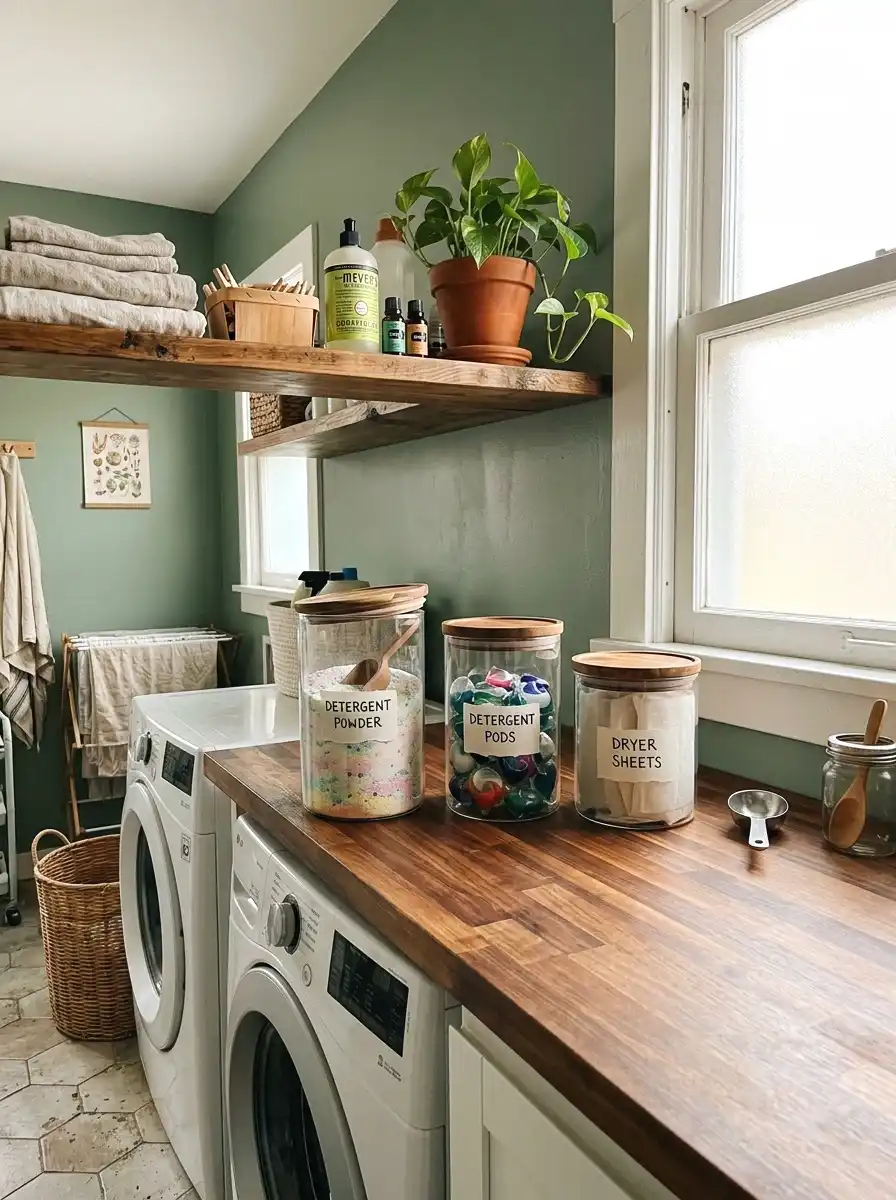
The row of random detergent bottles, fabric softener containers, and stain remover sprays in their original packaging looks messy even when it’s organized. Decanting into matching clear containers takes about 20 minutes and costs $20 to $40 for a set of three to five containers.
You don’t need fancy ones. Clear canisters from the kitchen section of any store work fine. Add a small label with the product name and wash instructions. Everything looks intentional and you can see at a glance when you’re running low. (This one is so underrated.) It’s the kind of change that makes you feel like you have a nicer home without spending much.
22. Paint or Wallpaper the Inside of a Cabinet
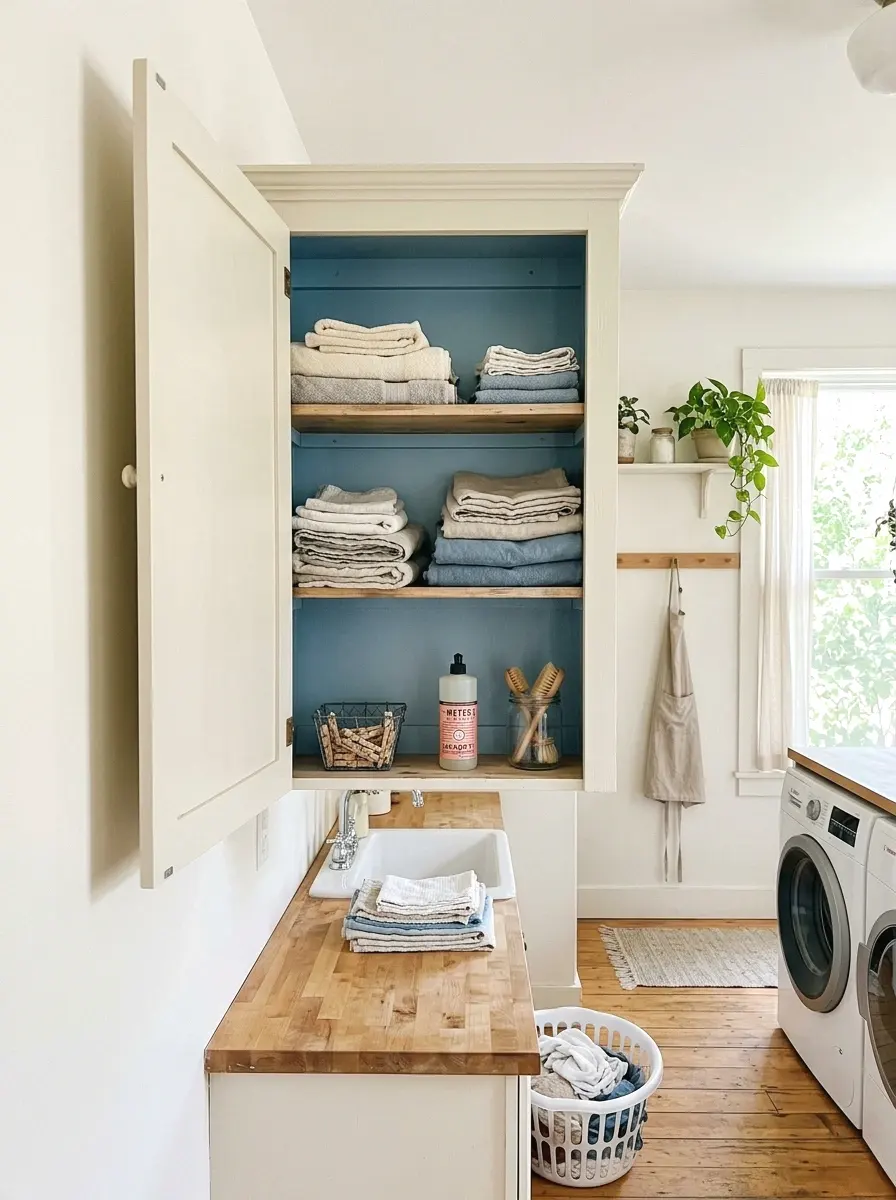
If your laundry room has any cabinet, closet, or built-in with a door, the inside back wall is a secret accent opportunity. Paint it a contrasting color or line it with a peel-and-stick wallpaper in a small pattern. When the door opens, there’s a little moment of something interesting.
This costs almost nothing if you’re already painting the room. A pint of paint runs $12 to $18. A half-sheet of peel-and-stick wallpaper for a small cabinet interior costs $15 to $25. It’s the kind of detail that makes people stop and say “wait, did you do something in here?” It’s not the whole room. It’s just one honest, well-placed detail that makes the whole space feel more deliberate.
More Ideas:
Final Thoughts on Your DIY Laundry Room Makeover
What you’ve got now is a real plan, not a mood board. These ideas cover the things that matter most: better light, smarter storage, and surfaces that don’t look like they were left behind by the previous owner. You don’t have to do all 22. Even four or five of them, done well, will completely change how the room feels to be in.
Start with one thing this weekend. Not the whole list. Just one. Paint the walls, or swap out the light fixture. Do it, live with it for a few days, and see if it gives you the momentum to keep going. That’s usually how it works.
If the fixture swap is your starting point, there are lighting upgrades that change the whole room worth browsing before you buy.
If you want more ideas like these, homelypop.com covers every room with the same approach: real budgets, real spaces, no fluff.