
18 Creative Farmhouse Kitchen Backsplash Ideas That Will Change the Way You Cook!

Your kitchen backsplash looks okay. That’s kind of the problem. It works, but it’s bland, and every time you cook, grease splatters show up on those plain tiles or the grout lines go dark fast. You’ve probably pinned dozens of farmhouse kitchen backsplash ideas, but most of them seem too expensive, too permanent for a rental, or just wrong for a small space that already feels a little cramped.
So I pulled together 18 ideas after going through real homeowner posts on Reddit, Houzz discussions, budget threads, and what people actually installed in their kitchens if you want a broader starting point first, here are backsplash options that work in real kitchens across different styles and budgets.
They cover renter-friendly swaps, small kitchen fixes, DIY options under $500, and a few bigger updates in the $1,200 to $3,000 range for tile plus install. Each one made the list because someone with a normal budget and an everyday kitchen proved it worked without regrets.
This is for homeowners and renters working with tight budgets, small or awkward layouts, and no interest in pro-level renovations. It’s not for people gutting high-end spaces or chasing luxury stone installs. If you want practical changes that fit real life and don’t need you to tear everything out, this is for you.
By the time you finish reading, you’ll know exactly which 3 to 5 options suit your kitchen right now and how to pull one off without wasting money or time.
Before You Begin: Key Things to Know About Farmhouse Kitchen Backsplashes
- A clean, flat wall cuts install time by about half and helps prevent tile failure later. It’s one of those prep steps most people skip and then regret.
- Order 10% extra material before you start, so cuts and breakage don’t send you back to the store mid-project.
- Professional labor usually adds $15 to $40 per square foot on top of materials, so factor that in before you lock in a budget.
- Most people overlook outlet placement until it’s too late. Plan your cuts early or you’ll end up with awkward gaps that are a pain to fix.
- Skipping a level first row throws off the entire backsplash pattern fast. There’s no easy fix once you’re halfway up the wall.
- Non-porous materials cut cleaning time down significantly over the long run. Worth considering before you fall in love with something porous.
- Seal your grout within 48 hours of installation to lock in the color and keep stains from setting in early.
- Check your electrical outlets before anything else. Moving them adds $200 to $500 easily, and knowing that upfront saves a real headache later.
1. White Subway Tiles with Dark Grout
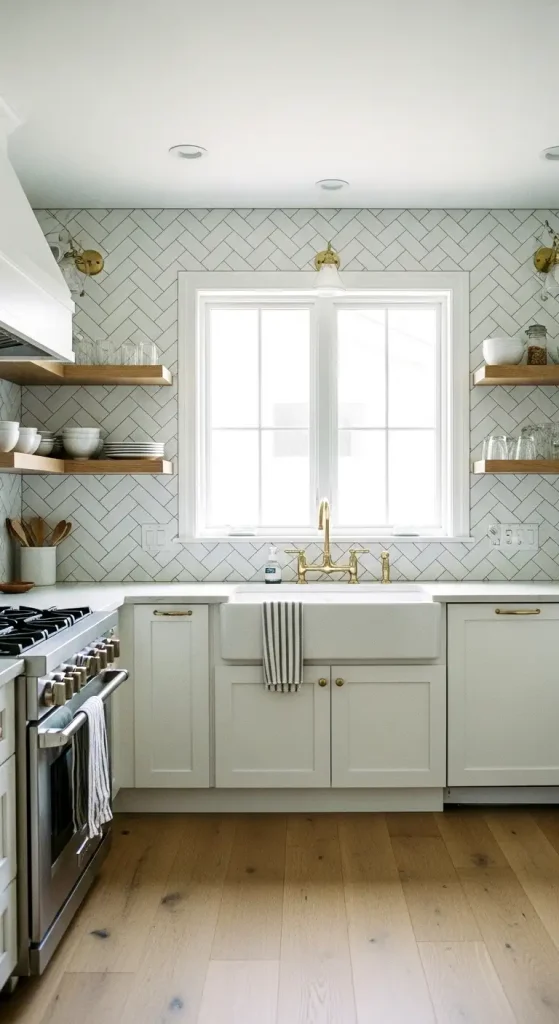
Classic white 3×6 subway tiles still rule farmhouse kitchens in 2026, and honestly, I don’t see that changing anytime soon. You get that clean, polished look without it feeling overdone. But here’s the part most people sleep on: pair them with dark grout. Real homeowners say the dark lines hide grease splatters and food marks way better than white grout ever could.
It gives a fresh modern-farmhouse edge that feels lived-in without looking dirty. Go herringbone or vertical for extra interest, keep the height around 18 inches from counter to cabinets. Easy to clean, and at about $2 per square foot for basic tiles, it won’t wreck your wallet. This combo just works.
2. Painted Shiplap for That Cozy Texture
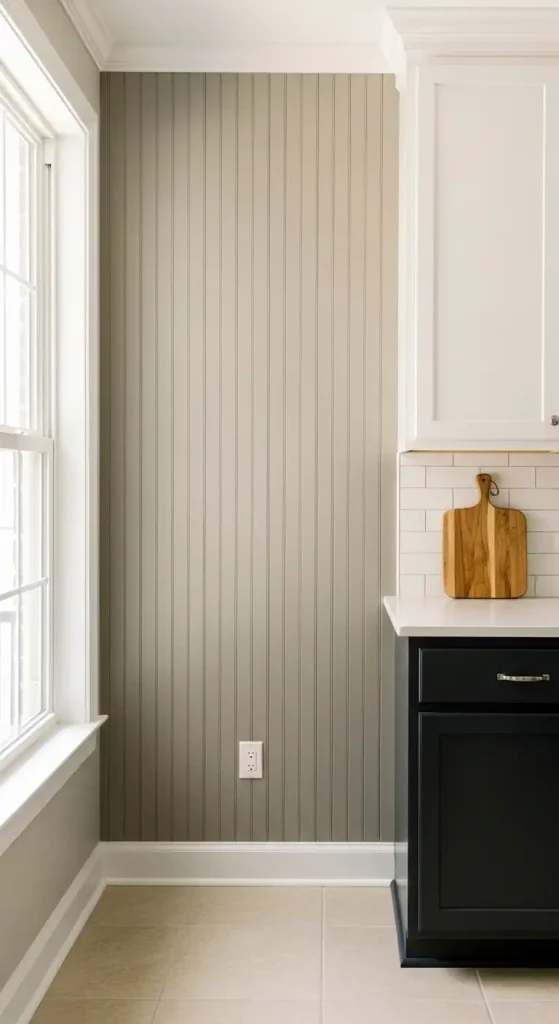
So here’s the thing: if you want warmth without spending a fortune, vertical painted shiplap is genuinely one of the best calls you can make. Use 6 to 8 inch boards in bright white or soft taupe, and suddenly your backsplash feels like a natural extension of the walls. It adds that rustic farmhouse texture people are always after.
And the install? No grout mess, just nails or adhesive. Lots of folks say it works especially well in small kitchens and makes the whole space feel taller. Paint it the same color as your cabinets for a seamless flow, or go two-tone with black lower cabinets. Seriously underrated, and costs way less than tile.
More Ideas:


3. Peel-and-Stick Tiles for Renters
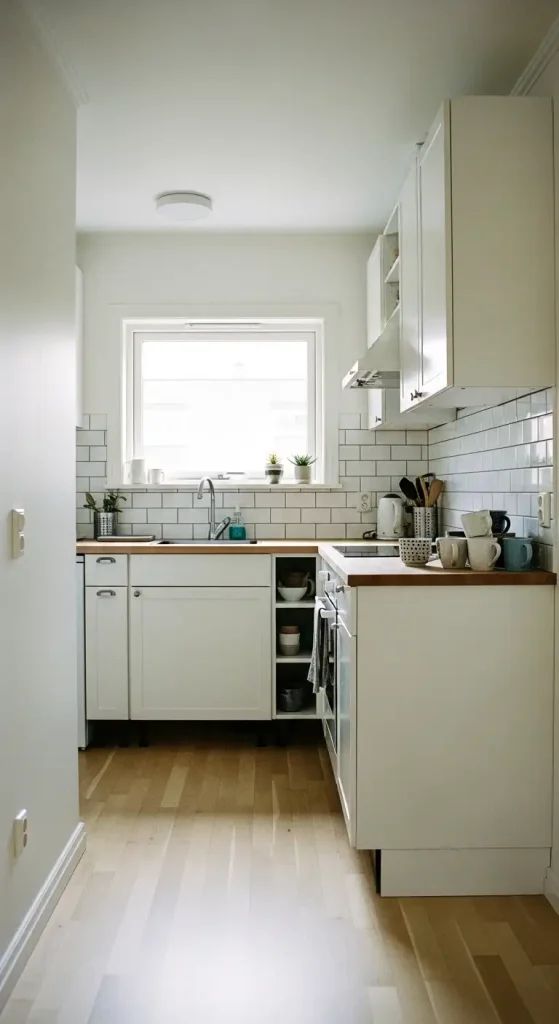
And honestly, this one might be the most practical option on the list. If you’re renting or just not ready to commit, peel-and-stick tiles that mimic brick or classic subway give you the farmhouse feel with zero permanent changes. No grout, no tools, totally removable when you leave. People working with tighter budgets swear by these for quick updates that still look really good. You can find options mimicking aged brick or white subway, and they go right over existing surfaces.
Installation takes an afternoon. Cleanup is nothing since there’s no mess at all. If permanent changes make you nervous, try this first. You might not look back. And if peel-and-stick is just one piece of a bigger update you’re planning, this guide on keeping a kitchen refresh under budget covers the rest of the picture really well.
4. Full-Height Quartz Slab Backsplash
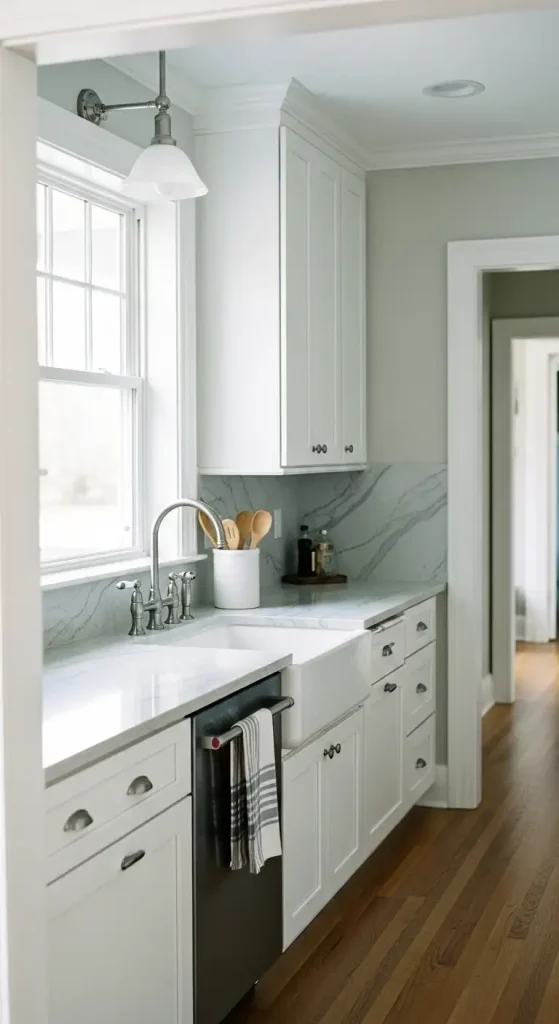
The full-height slab trend is everywhere right now, and I get why. You extend your quartz or marble countertop material straight up the wall, and you get a clean, continuous look with zero grout lines to deal with. Homeowners are genuinely shocked at how low-maintenance it feels in real daily use.
No staining, no scrubbing tiny crevices. It matches your counters perfectly and gives a modern-rustic vibe that’s really having a moment. The only debate is that some purists feel it looks too clean and simple for a traditional farmhouse. But if easy upkeep is your priority, this wins by a lot.
5. Reclaimed Wood Planks or Thin Brick Veneer
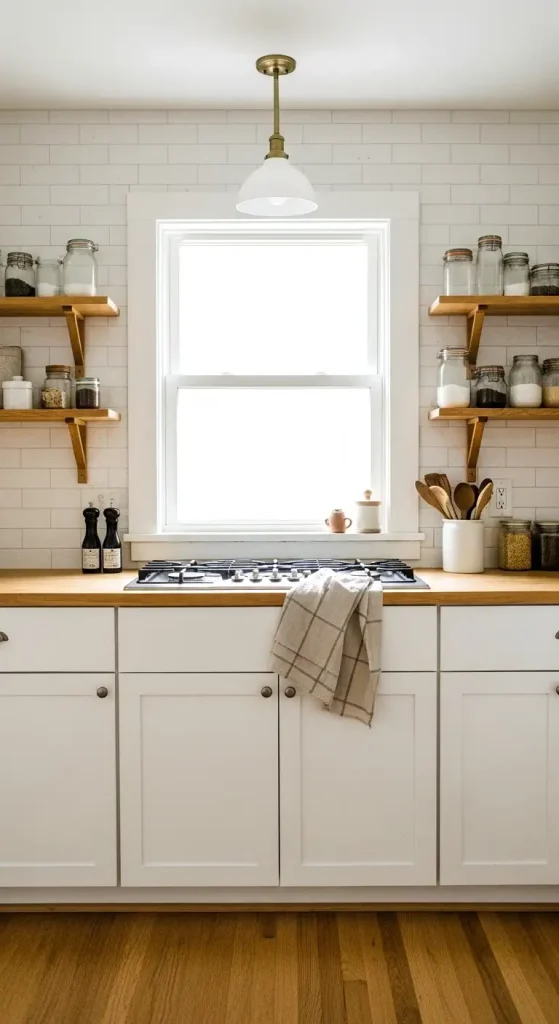
Nothing says authentic farmhouse quite like reclaimed wood planks or thin brick veneer running up the wall. These add real depth and character without making the kitchen feel cluttered or overdone. Go for aged white-painted brick or natural wood tones to keep things light. Real homeowners love how it layers in that warm, collected feel when paired with neutral cabinets. It works great as a full accent wall too. Just make sure the material isn’t too porous.
Sealing it helps a lot with splatters. Plain tile can feel flat sometimes, and this is the kind of option that fixes that. Before you commit to a specific material, these rustic material choices worth exploring first show how wood and brick compare side by side in real kitchens.
6. Handmade Zellige Tiles in Soft Neutrals
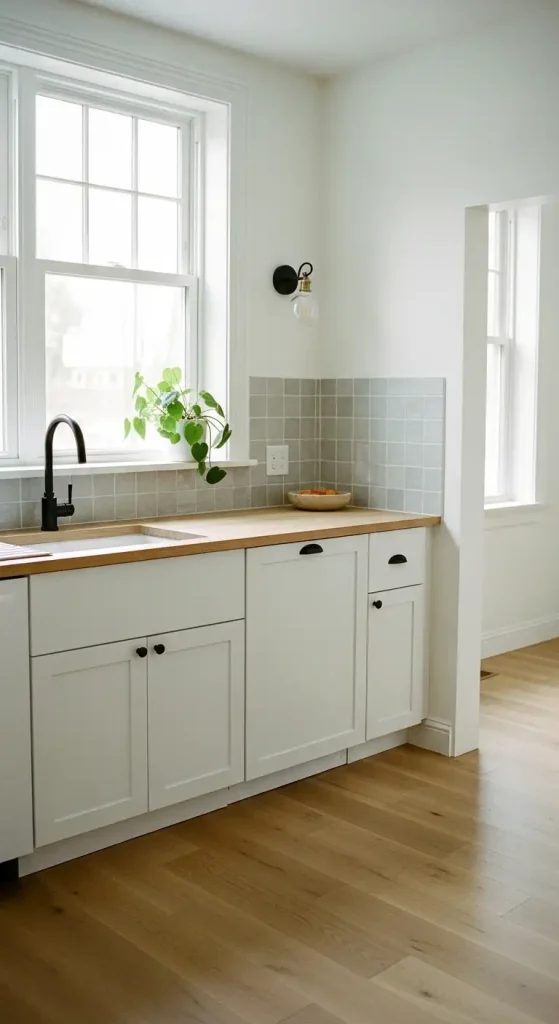
Handmade zellige tiles are stealing the show lately, and honestly, I completely understand it. These textured, slightly irregular glazed squares or hexagons in soft white or gray add a subtle handmade quality that makes basic white cabinets feel a lot more interesting. Homeowners say the gentle bumps and natural variations bring unexpected warmth and make the kitchen feel considered instead of cookie-cutter.
Skip the mass-produced versions. The real ones have a touch you can actually feel. Pair with dark grout for easy cleaning, and keep patterns simple so smaller spaces don’t get overwhelmed. One of the freshest picks out there right now.
More Ideas:
7. Vertical Beadboard Panels
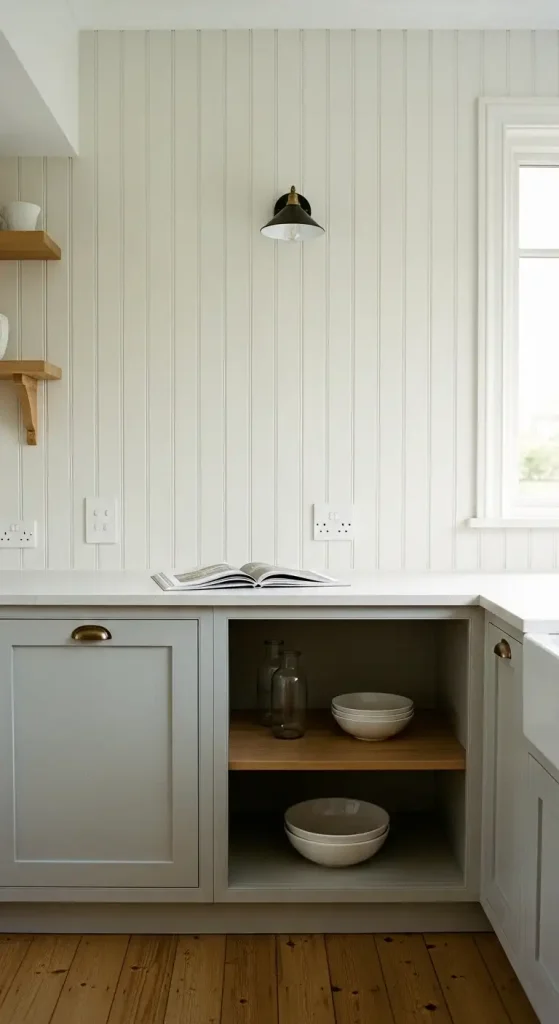
Beadboard is making a real comeback, and I’m here for it. Run vertical panels painted white or soft gray from counter to ceiling, and you create height even in the tiniest kitchens. It gives that warm, cottage-farmhouse texture without any grout hassle at all. Lots of folks mention how it blends well with shiplap but feels a bit more traditional, which I think is actually the appeal. Super DIY-friendly too, and usually comes in under $500 total.
Paint it the same as your walls for a calm, pulled-together look, or add contrast with darker trim. The amount of character you get for that price is genuinely hard to beat. If you want a closer look at the material before you buy, this breakdown on how beadboard holds up as a full backsplash answers most of the questions people have going in.
What I Wish I Knew Before Picking a Farmhouse Kitchen Backsplash
My Early Tile Disaster
Back when I first remodeled our old rental kitchen, I went all in on cheap ceramic subway tiles without testing a sample first. I assumed white would stay bright forever. Three months later the grout looked gray from cooking oil, and one corner started cracking because the wall wasn’t perfectly flat. That small job ended up costing me double in fixes. The lesson hit hard. Looks good in photos doesn’t mean it holds up to real cooking.
The Shift That Changed Everything
I used to chase the “perfect” farmhouse look with every trend I saw online. Then I started asking readers what actually lasted in their kitchens. Turns out most people regretted rushing the choice instead of living with the space first. So I switched to focusing on how a backsplash actually handles daily mess, grease, steam, kids’ hands.
Picking materials based on function over style saved me hundreds and kept the kitchen usable for a lot longer. If white is still where you’re landing after all of this, here are some white backsplash ideas that actually stay clean with daily cooking in a real home. It’s not about the prettiest tile. It’s about the one you won’t hate cleaning every single day.
The Hidden Cost Most Ignore
Here’s what nobody talks about enough: the emotional toll of a backsplash that feels wrong every time you walk in. I’ve heard from hundreds of readers who spent $800 to $1,500 on something trendy only to stare at it and feel off. The deeper issue isn’t really the money. It’s how much mental energy a mismatched choice drains out of you. You end up avoiding the kitchen or resenting the space you use most. And the counterintuitive part? Spending a little more upfront on something simple and durable often costs less in stress and future changes than chasing a look that fades fast.
What You Can Take From This
Don’t let perfect photos push you into a decision you’ll second-guess for years. Walk into your kitchen at different times of day. Notice where the light hits, where splatters land most, how much you actually cook. That quick check beats any mood board. You’re not decorating for strangers. You’re making a space that works for your real routine. Get that right first, and honestly, the rest falls into place a lot easier than you’d think.
8. Herringbone Layout with White Subway
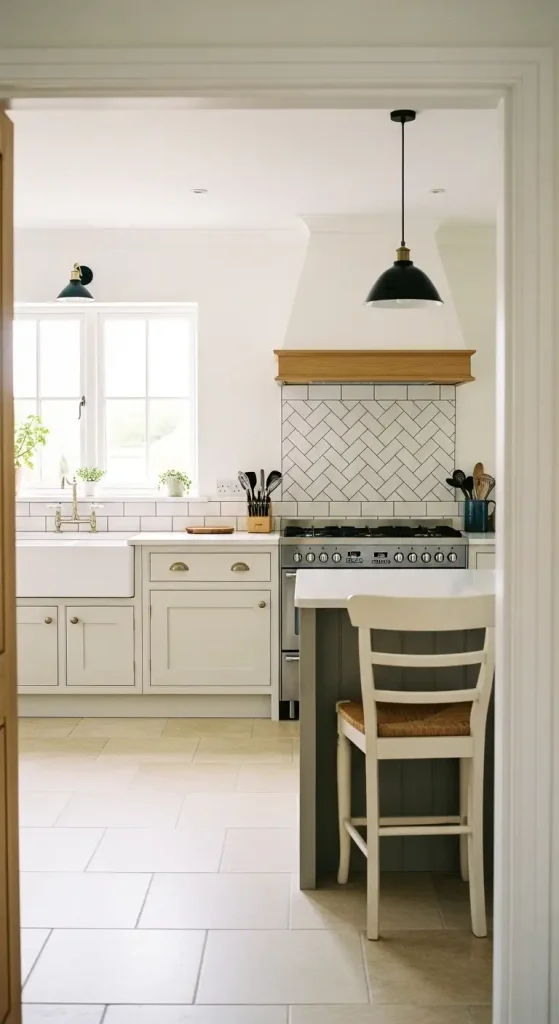
Herringbone pattern on white subway tiles is still the go-to for a reason, and I don’t think that’s changing anytime soon. The angled layout adds movement and visual interest without going overboard, which is exactly what farmhouse style needs. Real homeowner experience shows it hides dirt better when you pair it with dark grout, and the 3×6 size keeps everything classic.
Most people install it 18 inches high, but taking it floor to ceiling looks really good if your ceilings aren’t too tall. If you’re refreshing an older kitchen, this layout wakes the whole space up fast. It just does.
9. Bronze-Tinted Mirror Panels Above the Backsplash
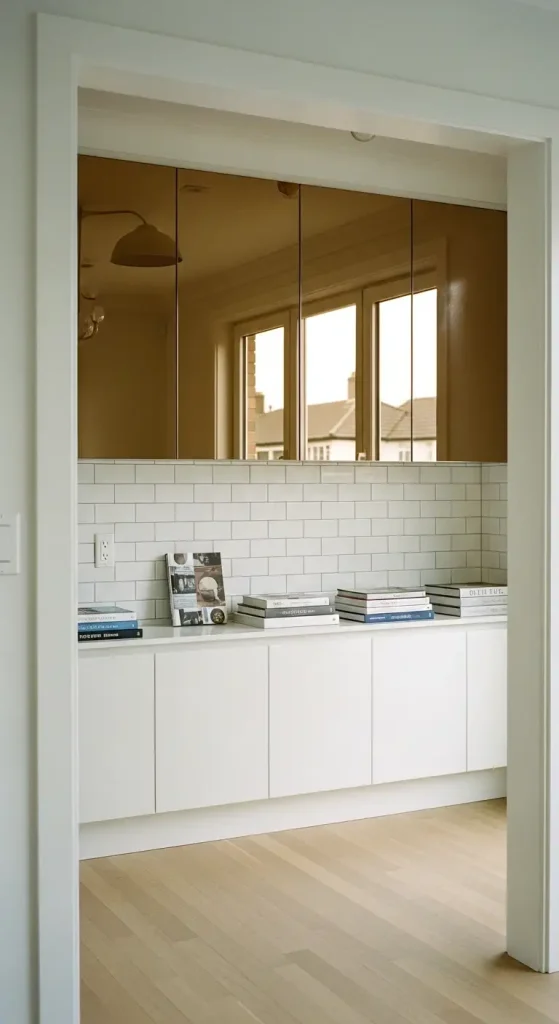
Okay but seriously, bronze-tinted mirror panels above your main backsplash sound like a big commitment, but they work really well in small kitchens. They bounce light around and make even tight spaces feel noticeably bigger and brighter. Pair them with a simple subway or shiplap base and you get that airy, open feel that’s hard to fake any other way.
Homeowners are always caught off guard by how much larger the room looks without adding any clutter. And it works especially well if your kitchen doesn’t get much natural light. Most people skip this one. That’s a mistake.
10. Avoiding Busy Patterns in Small Kitchens
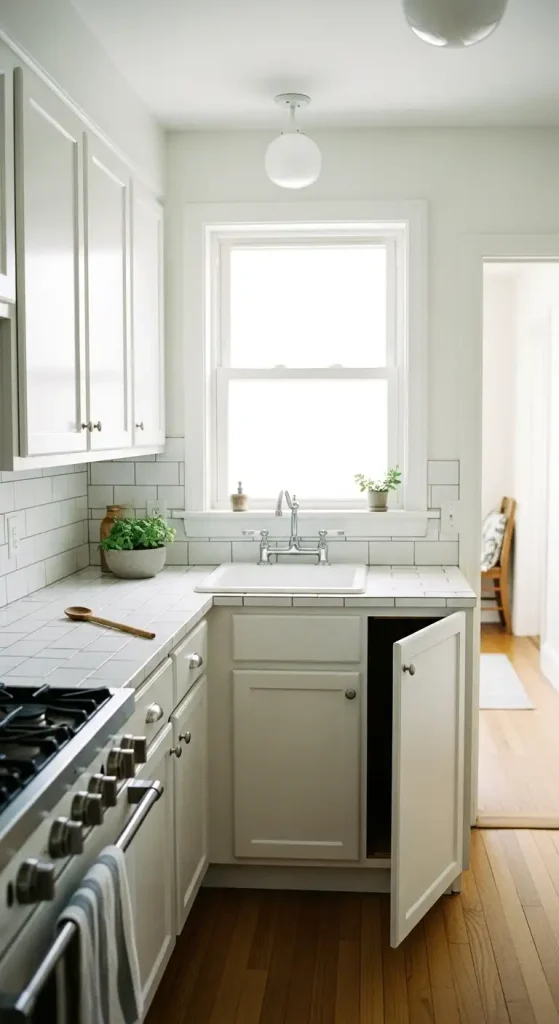
Here’s what nobody tells you when you’re browsing tile samples: busy mosaic or bold patterned tiles can backfire really fast in small kitchens. Real homeowners regret them because they create visual clutter and make the space feel even more cramped than it already is. Stick to simple white subway, zellige, or shiplap instead.
The calmer options let your cabinets and decor do the talking while still keeping that farmhouse feel intact. This mistake comes up constantly in home forums and renovation groups. Go subtle. You won’t look back.
11. My Favorite: Glazed Hex Tiles in Pale Gray
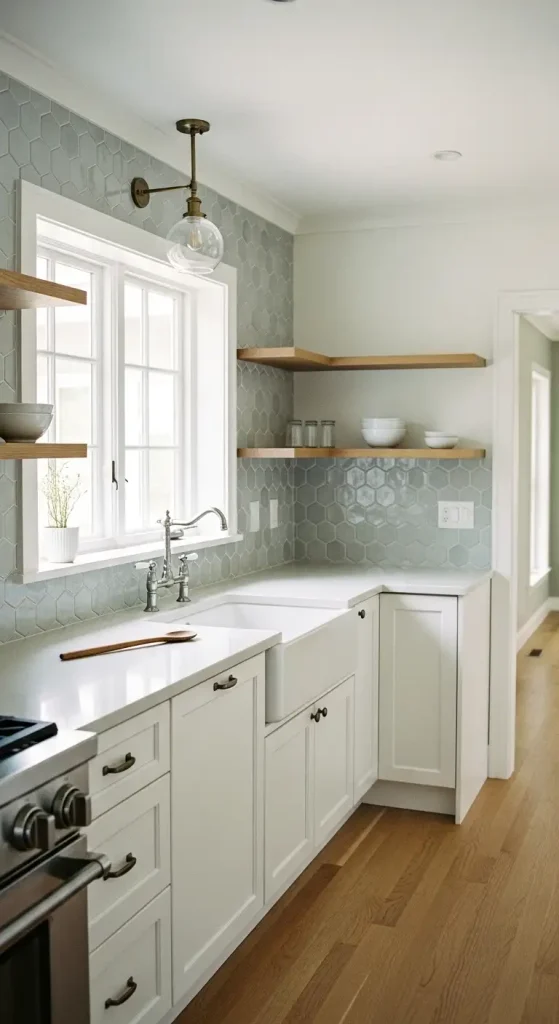
I was skeptical about hex tiles for a long time, but glazed ones in soft gray completely changed my mind. They bring that subtle handmade texture without feeling too busy, and the slight shine makes light bounce around in a really nice way. Real homeowners rave about how these make plain white cabinets feel way more interesting and welcoming.
Stick to pale neutrals or soft white for farmhouse vibes, and use dark grout to keep cleaning easy. The irregular edges add a kind of charm that mass-produced tiles just can’t replicate. If you want something fresh without going overboard, this is genuinely one of the best picks out there. And if that soft, textured quality appeals to you, here are some coastal tile styles with a similar handmade feel that pair just as well with neutral cabinets.
12. Warmer Neutrals Over Stark White
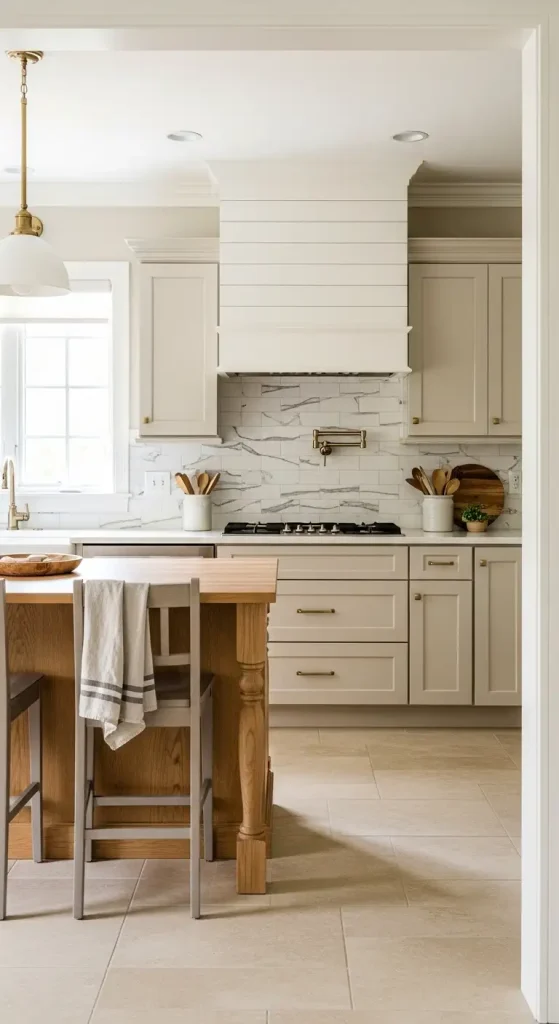
Stark white is safe, but warmer neutrals are really winning right now. Think creamy off-white, soft taupe, or light beige shiplap and tiles paired with gray veining. People say these tones feel more comfortable and lived-in, especially in kitchens with natural wood accents.
If your space gets harsh lighting, skip the cold bright white. Warmer shades make everything feel more welcoming without you having to do much else. Pair with reclaimed brick or wood for that layered farmhouse character that’s so popular right now. It’s a small shift that makes a big difference.
More Ideas:
13. Thin Brick Veneer Painted White
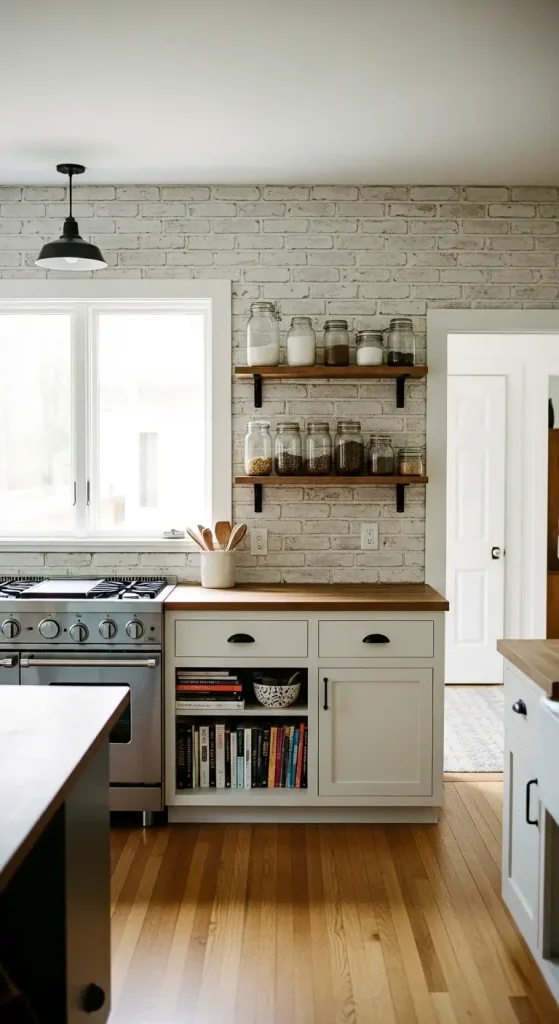
Thin brick veneer painted white gives you instant rustic character without the weight or cost of real brick. It adds texture and depth that flat tile sometimes just doesn’t have, and lots of folks use it for full accent walls behind the stove. The aged, slightly distressed look keeps it feeling authentically farmhouse. Seal it well to avoid grease stains. That’s one of the most common tips from people who’ve actually done it.
Costs stay reasonable since it’s thinner and easier to install than full brick. It surprises people with how much personality it brings for the price. Really does. If your cabinets lean warm and woody, this guide on pairing textured backsplashes with warm wood cabinets shows exactly how the combination plays out in a full kitchen.
14. Full-to-Ceiling Shiplap in Taupe
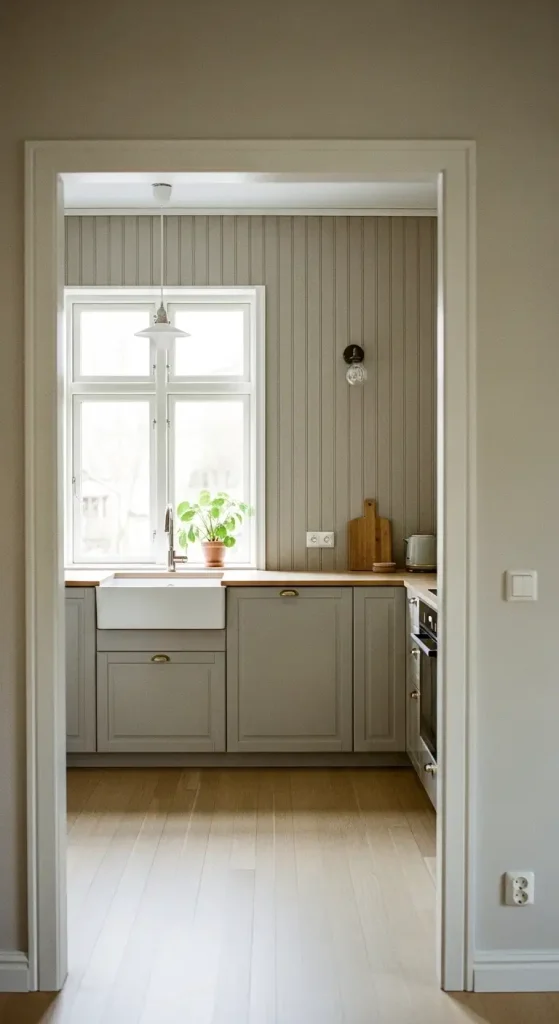
Full-to-ceiling vertical shiplap in taupe or light gray creates a height illusion that makes small kitchens feel taller and more open. You skip that boxed-in feeling you get with shorter backsplashes, which makes a bigger difference than most people expect.
Paint it matte for that soft farmhouse touch, and it blends really well with both white and black cabinets. DIYers love how forgiving it is too. No perfect cuts needed like with tile. It adds that warm, lived-in feel without making the space feel cluttered or overdone. That’s a hard balance to strike, and this one nails it.
15. Avoiding Porous Unsealed Materials
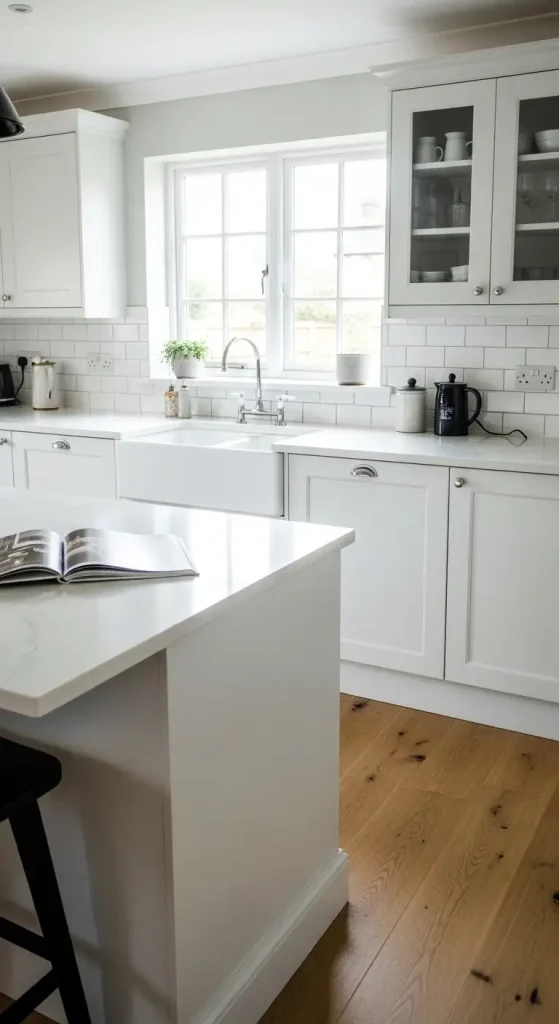
Porous materials like unsealed brick, stone, or handmade tiles can turn into a real problem fast. They soak up grease and splatters, then need constant sealing that most people honestly just forget about. Regret stories pop up all the time around this exact issue. Permanent stains showing up after just a few months is more common than you’d think.
Go with sealed ceramic, quartz, or painted wood instead. If you love the look of natural materials, make sure they’re properly treated or choose glazed versions. Getting this wrong costs way more to fix later than just picking the right material upfront. Learn from other people’s mistakes on this one.
16. Proper DIY Prep and Curing for Subway Tile
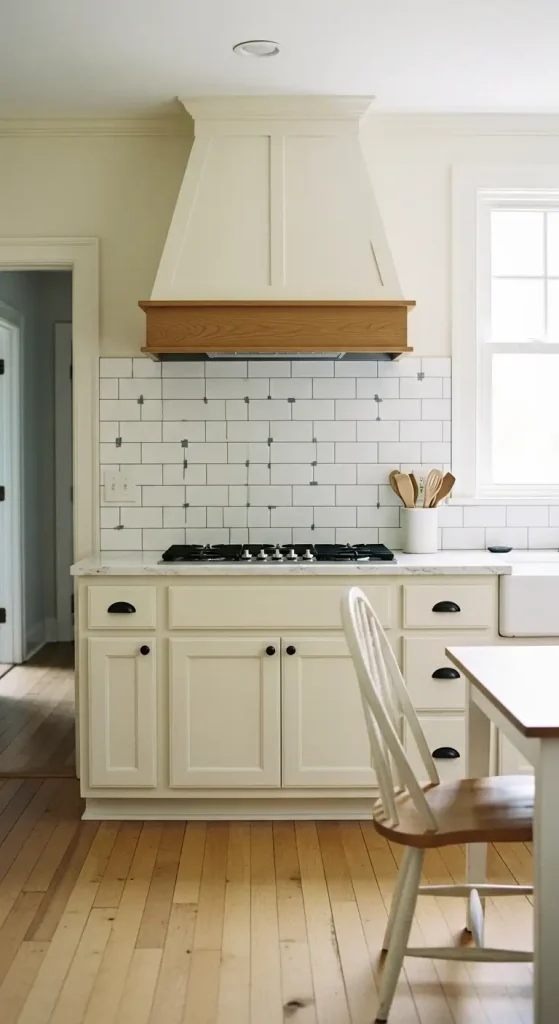
When I tried subway tiles in my own space, the biggest lesson was prep and patience. Clean your walls really well, use good mortar instead of cheap adhesive, and space your tiles evenly. Then mist the grout for three days after installation. It makes the whole thing significantly stronger and longer-lasting than rushed jobs ever turn out.
Beginners skip this step and end up with falling tiles or hazy grout that looks bad fast. Take the extra time. Your white herringbone will look really polished for years if you do it right. Sounds too simple. It’s not though. While you’re planning the install, here are some surfaces that pair well with a fresh subway install so the countertop and backsplash decisions work together from the start.
17. Hand-Painted Patterned Tiles Subtly
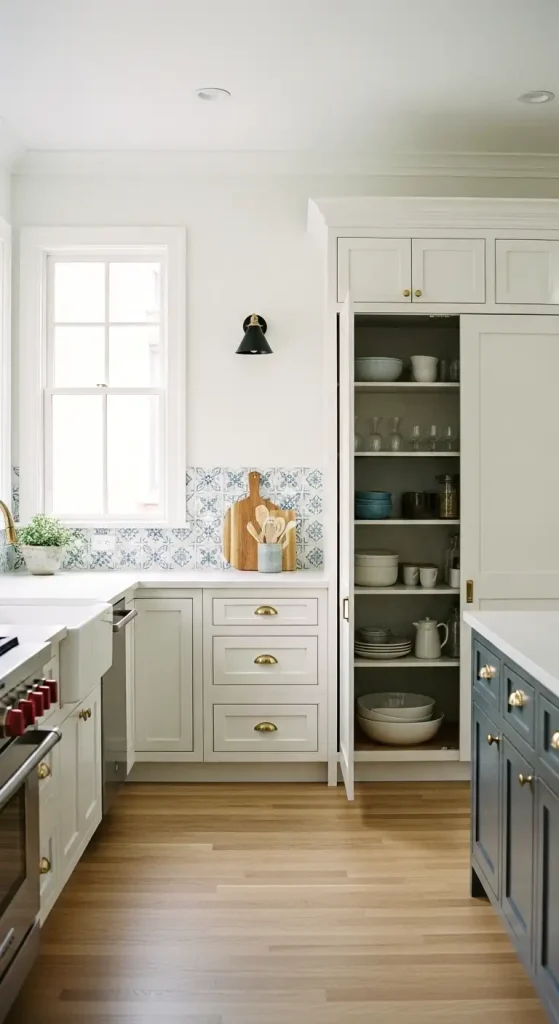
Hand-painted tiles with pale green, pink, or blue accents are quietly making their way into farmhouse kitchens as a soft, personal update. Keep the patterns small and sparse so they don’t overwhelm the space. Think gentle floral hints on white bases, not bold statements.
People love how these add personality without demanding attention, which is exactly the right balance for farmhouse style. Works best in larger kitchens or as a small feature strip rather than a full wall. It’s one of those trends that feels collected and personal rather than designed, and that’s kind of the whole point.
18. Matching Slab to Countertops
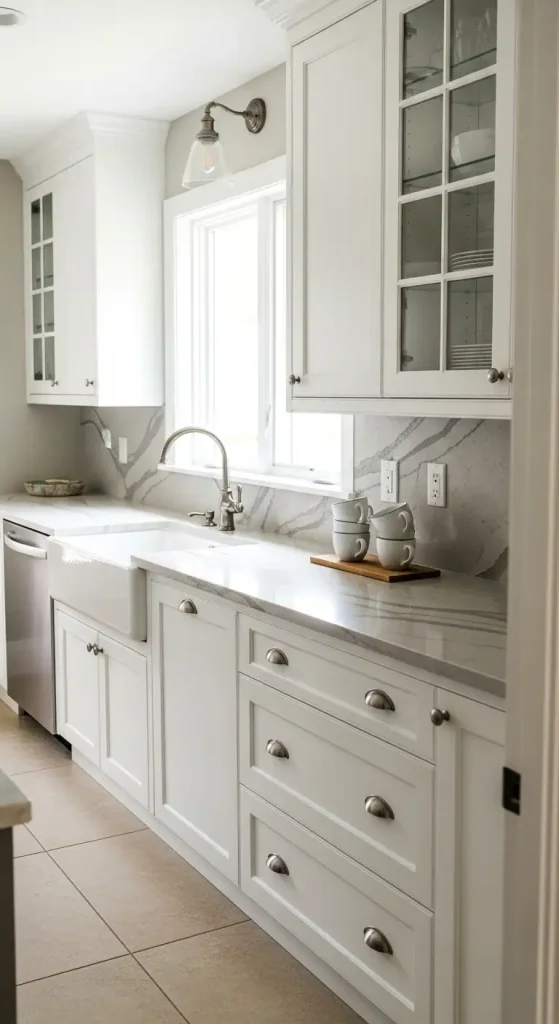
Extending your quartz or marble slab straight up the wall as a full backsplash is one of those decisions that just makes daily life easier. Everything matches perfectly, and you’re completely done with grout cleaning forever. Homeowners are genuinely shocked at how simple the upkeep is. Wipe it down and you’re done. Subtle veining in gray or warm tones keeps it from feeling too cold or modern, which is the concern most people have going in.
If you’re still working out the color direction around your slab, these kitchen color palettes that make slab backsplashes shine give a really clear picture of what works and what doesn’t. And if you’re already getting new counters installed, this upgrade often costs less extra than you’d expect. A really good option for busy families who want something that looks great without a lot of maintenance. Practical wins here.