19 No Kitchen Backsplash Ideas That Actually Look Finished
Your kitchen walls are bare, and every time you cook, you notice the empty gap between the counter and the cabinets. It’s not ugly. It’s just unfinished. That feeling sits in your head.
This list covers 19 no kitchen backsplash ideas, researched across real homeowner forums, Pinterest boards, and rental communities. Each idea was picked because it works in real kitchens, not staged ones. Some cost under $30. Others go up to $300. Every idea is renter-friendly or low-commitment enough that you won’t regret it.
If you’re working with $100 to $300 and want results that look intentional, this is for you. It’s not for anyone expecting a full tile renovation. The ideas here are realistic, and yes, they actually look good.
If you’re also thinking about the bigger picture, there are plenty of ways to refresh your cooking space without gutting the whole room.
By the end, you’ll know exactly what to do with that bare wall behind your stove.
What to Know Before You Start No Kitchen Backsplash Ideas
- Peel-and-stick tiles release in high heat zones; keep them at least 6 inches from open burners.
- Measure your wall space before buying. Most backsplash zones are 15 to 18 inches tall.
- Removable wallpaper costs $1 to $3 per square foot, so a 20-square-foot space runs $20 to $60.
- Grease and steam affect adhesion; wipe walls with a degreaser before applying anything.
- Most people forget to prime raw drywall before painting, causing peeling within months.
- Open shelving above the counter visually fills the space without touching the wall at all.
- Cleaning matters long-term: semi-gloss or satin paint survives splatter and wipes clean easily.
- A thin ledge rail (about 4 inches deep) can hold spice jars and double as visual coverage.
1. Paint the Wall in a Contrasting Color

Painting that strip of wall is the most overlooked option. Most people assume it won’t look finished, but a bold color between white counters and white cabinets actually pops in a really good way. It reads as intentional, not lazy.
Choose a semi-gloss finish so steam and grease wipe off easily. A can of semi-gloss runs $18 to $30, which makes this the cheapest thing on this entire list. I painted mine in a warm terracotta and it changed how the whole kitchen felt. Takes one afternoon.
If you’re not sure which direction to go with color, there are some color combinations that actually work well in most kitchens.
2. Use Peel-and-Stick Subway Tiles

Here’s one people underestimate: peel-and-stick tiles. The quality has jumped a lot in the last few years. The grout lines look real, the texture feels solid, and from two feet away, most people can’t tell the difference from ceramic.
A 10-square-foot kit runs about $30 to $50 on Amazon or at Home Depot. For a standard backsplash zone, you’ll need roughly two kits. Apply to a clean, flat wall and press firmly along every edge. Renters use these all the time and take them off without damage at move-out.
If you like the peel-and-stick idea but want something with more texture, there are a few tile-look options worth considering that go up on the same way.
More Ideas:


3. Hang a Large Cutting Board as Wall Decor

So this one sounds too casual, but it works. A large end-grain cutting board, 18 by 24 inches or bigger, hung flat on the wall behind your prep area looks really nice. It adds warmth and texture without any installation.
You can find oversized boards at TJ Maxx, Home Goods, or online for $40 to $90. Use a picture rail or two heavy-duty adhesive hooks rated for the weight. It protects the wall from grease splatter too, which is a bonus nobody mentions enough.
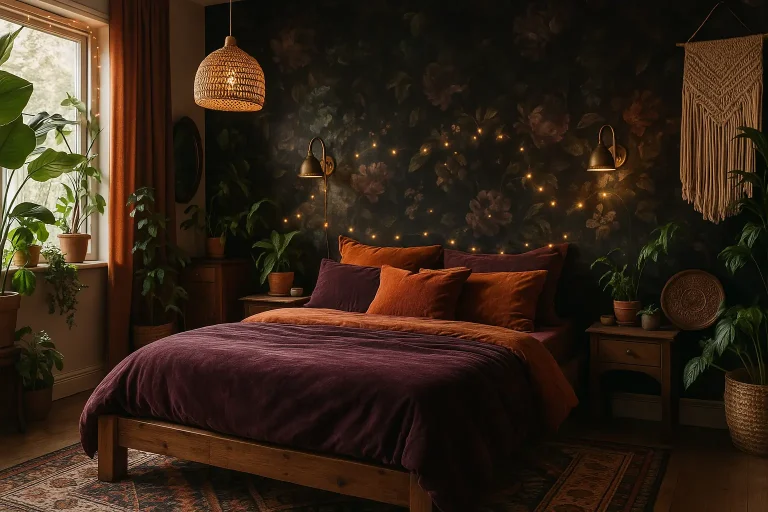
4. Try Removable Wallpaper in a Small Pattern

Removable wallpaper has gotten really good. The small-pattern versions, things like simple geometric prints or a hand-painted tile look, are especially convincing in kitchen spaces. You’re not covering a whole room. You’re covering maybe 18 square feet.
Brands like Tempaper, Chasing Paper, and Spoonflower all have kitchen-safe options. Budget for $40 to $80 for a typical backsplash section. Apply slowly from top to bottom, smooth out air bubbles with a credit card, and you’re done. It peels off cleanly without leaving residue.
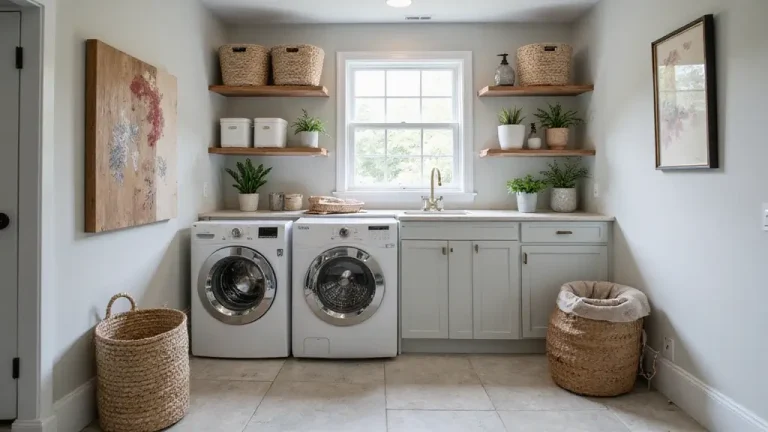
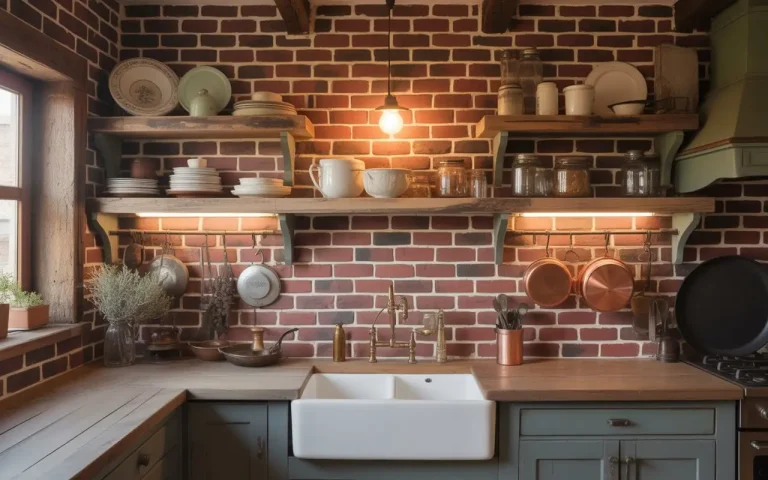
5. Mount Open Wood Shelving Instead

Open shelving covers the wall without touching it as a backsplash. That sounds obvious once you hear it, but most people don’t connect those two ideas. Floating shelves at 12 inches deep, installed at counter height, draw the eye up and fill the visual gap completely.
Pine boards cut to size cost $15 to $25 each at any hardware store. Add a set of floating shelf brackets for $10 to $20 per shelf. Keep the styling minimal: a few plants, olive oil bottles, stacked bowls. The wall behind disappears because the eye focuses on what’s sitting in front of it.
For more shelf styling ideas for small kitchens, it helps to see how others have handled the balance between storage and visual calm.
6. Install a Magnetic Knife Strip

The magnetic knife strip is one of the most functional things you can put on a kitchen wall, and it fills that awkward strip of space behind the counter without looking like a placeholder. It’s practical and it looks clean.
Strips run from $20 (basic) to $80 (solid wood or stainless). Most mount with two screws. You can also use heavy-duty adhesive mounting strips if you don’t want to drill. Mount it at about eye level, which is usually around 54 to 60 inches from the floor. (Took me ages to figure out the right height on this one.)
More Ideas:
7. Apply a Stencil Pattern Directly to the Wall

My friend was skeptical about this one, and then she tried it and couldn’t believe how professional it looked. Stenciling takes patience but the result is a custom painted pattern that fills the wall for under $40 total.
Buy a tile stencil (6-inch Moroccan or simple geometric patterns work well) for about $10 to $15. Use a foam roller and latex paint in a contrasting color or same color with a sheen difference. Work in sections and let each dry before moving to the next. The whole thing takes a Saturday but the finished wall looks like expensive wallpaper.
8. Use a Tension Rod System to Hang Utensils

A tension rod mounted between cabinets or between the wall and a cabinet side, at counter height, becomes a utensil bar with zero drilling. Hang S-hooks and your cooking tools fill the space visually. It’s incredibly practical.
Tension rods thick enough to hold weight cost $12 to $20. Heavy-duty S-hooks are a dollar each. The whole setup runs under $30 and takes 10 minutes. And honestly, having your spatulas, ladles, and tongs visible makes cooking faster because you’re not digging through a drawer.
9. Frame the Wall With Thin Molding

This one is more of an owner situation, but even some renters do it with removable adhesive molding. You create a paneled effect on the backsplash wall using thin wood strips, which gives the wall structure and makes it look custom even without any tile.
Adhesive wood trim pieces at Home Depot or Lowe’s run about $5 to $12 per strip. Use them to create rectangles or a simple grid on the backsplash wall, then paint everything the same color. The texture makes it look intentional. Total cost for a standard backsplash section is $40 to $80.
10. Mount a Metal Sheet for a Prep Station Look

Stainless steel or galvanized metal sheets give a prep kitchen look that actually works in home kitchens. A 24-by-36-inch stainless panel runs $50 to $100 and mounts flat against the wall behind the stove or prep area.
It reflects light, it’s completely heat-resistant near the stove, and it wipes down in seconds. You can mount it with screws or construction adhesive. A few people I know in small apartments use this as their only backsplash alternative and it looks intentional and polished. Bonus: magnets stick to it, so it doubles as a recipe or note board.
More Ideas:
11. Lean a Large Framed Mirror Against the Wall

Leaning a mirror doesn’t sound like a backsplash solution, but in a galley kitchen where there’s a flat wall behind a prep counter, a large leaning mirror completely fills the vertical space. It bounces light around the room too.
A 24-by-36-inch framed mirror costs $50 to $120 at most home stores. Keep it away from the stove area for obvious reasons. This works best behind a coffee station, prep counter, or a section of counter away from heat. The reflection of your kitchen makes the whole room look bigger. It’s one of the smarter things you can do in a small kitchen.
12. Create a Gallery Wall Behind the Counter

A gallery wall works above the counter just as well as anywhere else in a home. The trick is to keep the frames in a tight cluster low enough to fill the backsplash zone, which is roughly between counter height and the bottom of your upper cabinets.
Use command strips to hang frames without drilling. A cluster of 5 to 7 small frames, all in the same black or brass finish, costs $30 to $70 total. Mix art prints with small mirrors and a chalkboard square. It looks really nice and gives you something to look at while you’re doing dishes.
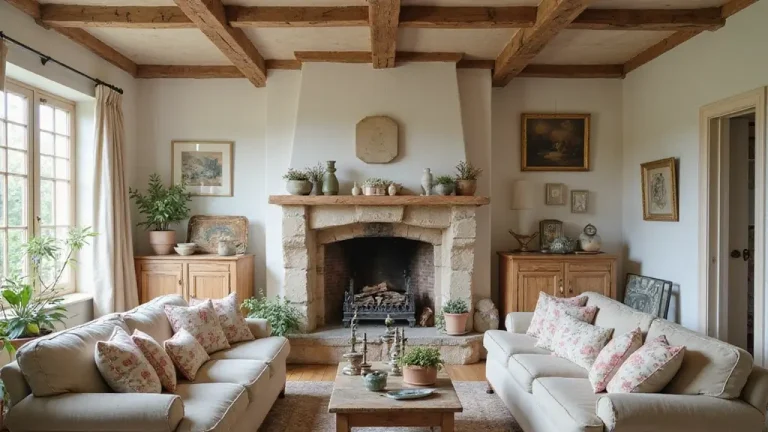
13. Add Beadboard Panel Sections

Beadboard, that classic paneling with thin vertical ridges, looks right at home in a kitchen. You can buy beadboard panels pre-cut at most hardware stores for $20 to $35 for a 4-by-8-foot sheet, which covers a full backsplash section easily.
Cut it to fit your backsplash height, mount it with adhesive or a few finish nails, and paint it in semi-gloss white or a soft sage. When I tried this in my own space, the kitchen instantly felt more pulled together, like something out of a farmhouse renovation photo. It takes a few hours but the visual impact is real.
If the farmhouse direction appeals to you, there are some rustic textures that warm up a kitchen in a similar way without requiring a full renovation.
14. Use Cork Tiles as a Functional Backsplash

Cork tiles aren’t just for office boards. Thick cork tiles mounted on a kitchen wall look warm, textural, and absorb noise in a room that’s usually echo-y. They’re also easy to clean with a damp cloth.
Self-adhesive cork tiles run $20 to $40 for a box that covers 12 square feet. They’re not heat-resistant so stay away from the stove area. Behind a coffee station or prep counter though, they’re great. Tack up recipe cards, shopping lists, or a few dried herbs tied to nails. Practical and really nice looking.
More Ideas:
15. Hang Woven Grass or Seagrass Mats

Woven mats meant for floors actually work well mounted flat on a backsplash wall. They’re lightweight, textural, and add a natural warmth that tile honestly can’t match. You see this trend a lot in kitchen spaces going for a natural or relaxed feel.
Seagrass or jute mats in 18-by-24-inch sizes run $15 to $35. Mount them with picture rail strips or command strips rated for the weight. Wipe-clean versions are available too. Keep them away from the stove zone for fire safety. Behind a sink or prep area, they look really deliberate and warm.
If you like how natural materials read in a kitchen, there are some great examples of natural materials used in kitchen design that lean into texture the same way.
16. Apply Chalkboard Paint to the Entire Section

Chalkboard paint on the backsplash wall is one of the most used-and-loved ideas in small kitchens. It solves two things at once: covers the bare wall and gives you a surface to write shopping lists, menu ideas, or even just draw something.
A quart of chalkboard paint runs $12 to $18. Apply two coats over a primed surface. You’ll need to “season” it first by rubbing the flat side of chalk all over before erasing. After that it works perfectly. It’s durable, matte, and really easy to wipe down. The kitchen feels more alive with something written on it.
For color direction on a painted wall, it helps to look at paint finishes that hold up over time in real kitchen environments.
17. Install Clip Rail or Picture Rail at Counter Height

A clip rail system (also called a picture ledge or display rail) mounted just above counter height lets you lean small framed prints, spice tins, and small plants against the wall at an angle. The wall behind stays untouched.
Ikea’s MOSSLANDA picture ledge is 55 inches wide and costs $12. Mount two side by side for a longer section. Use a level and two screws. The visual effect covers the backsplash zone without anything being permanently attached to the wall surface itself. It’s clean, flexible, and easy to restyle when you want a change.
A coffee or drink station works especially well with this approach — you can find some inspiration in display shelving styled above a counter for that corner of the kitchen.
18. Layer Fabric or a Tapestry Panel

A fabric panel or small tapestry mounted as a backsplash sounds wrong but it actually works in the right kitchen. A flat-woven cotton or linen piece, kept away from the stove, fills the wall warmly and adds pattern with zero permanence.
Wall-hanging tapestries with a simple print run $20 to $50 on Etsy or Amazon. Hang with a thin wooden dowel and two hooks. Keep it behind a prep area or a coffee bar, well away from any open flame. Linen fabric especially looks really good in warm-toned kitchens. Take it down to wash it every few months. No damage to the wall at all.
More Ideas:
19. Paint a Single Bold Vertical Stripe

Instead of painting the whole backsplash section, paint one bold vertical stripe from counter to ceiling on the backsplash wall. It draws the eye up, makes the ceiling feel taller, and looks like a real design decision rather than a workaround.
Use painter’s tape to mark a 6-to-8-inch wide stripe centered on the wall or lined up with a specific element like the faucet or a cabinet gap. Paint in a deep navy, forest green, or warm rust. One sample pot of paint at $4 to $6 is enough. The result looks like something a designer did, not something you improvised on a Tuesday.
Final Thoughts on No Kitchen Backsplash Ideas
You don’t need tile to have a kitchen that looks finished. The ideas here show that paint, shelving, removable panels, and even a few strategic objects can do just as much work as a tiled wall, without the cost or the permanence. Most of these options run between $15 and $100 and take a weekend at most.
Pick one thing and start there. If you’re unsure where to begin, paint is the lowest risk and the fastest payoff. One coat of semi-gloss in a color you actually like, this weekend, and see how different the kitchen feels by Sunday night.
If you want to keep exploring beyond these 19 options, there are more low-effort upgrades with a real impact that fit the same no-commitment approach.
If you want more ideas like this, homelypop.com has a lot more for every room and every budget. Real ideas for real homes.